

Use craft foam and a Cricut machine to make personalized ornaments for your tree or to give as gifts this holiday season.
Making Christmas ornaments is one of my favorite crafts for the holidays. Almost all of the ornaments that go up on our tree each year are handmade and I love each and every one of them!
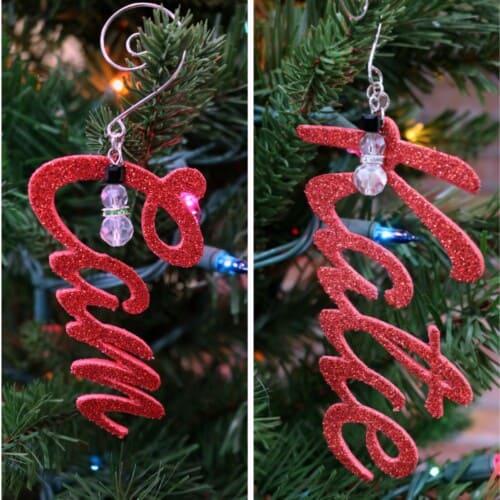
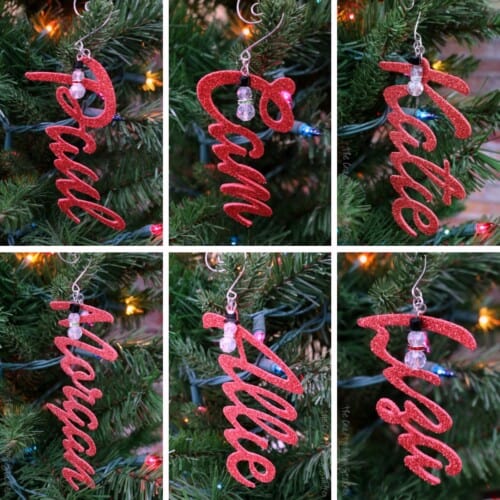
These Cricut Christmas ornaments are extra special because each one belongs to a special person, they are all the people in my family! Each of us now has our very own personalized name ornament!
Craft Tutorial Video
If videos are your thing, you're in luck-I've got a full tutorial ready for you!
Subscribe to my YouTube channel and stay inspired with every new project.
Supplies You'll Need to Create this Project:
Cutting with the Cricut Maker and the Knife Blade:
*The Knife Blade attachment can only be used when connected to a computer, it will not work with a device like a phone or a tablet.
If you have never used the Knife Blade before make sure that you have calibrated it before you begin cutting. To calibrate, Go to the Home menu and Calibration. Follow the prompts on the screen to complete calibration.
I will be cutting the Glitter Craft Foam using my Cricut Maker and the Kraft Blade. This project can be made with either the Maker or Explore using the Fine Point Blade. Although, I think Knife Blade in the Maker is a much nicer cut.
When cutting with the Knife Blade make sure to move all of the white star wheels all the way to the right.
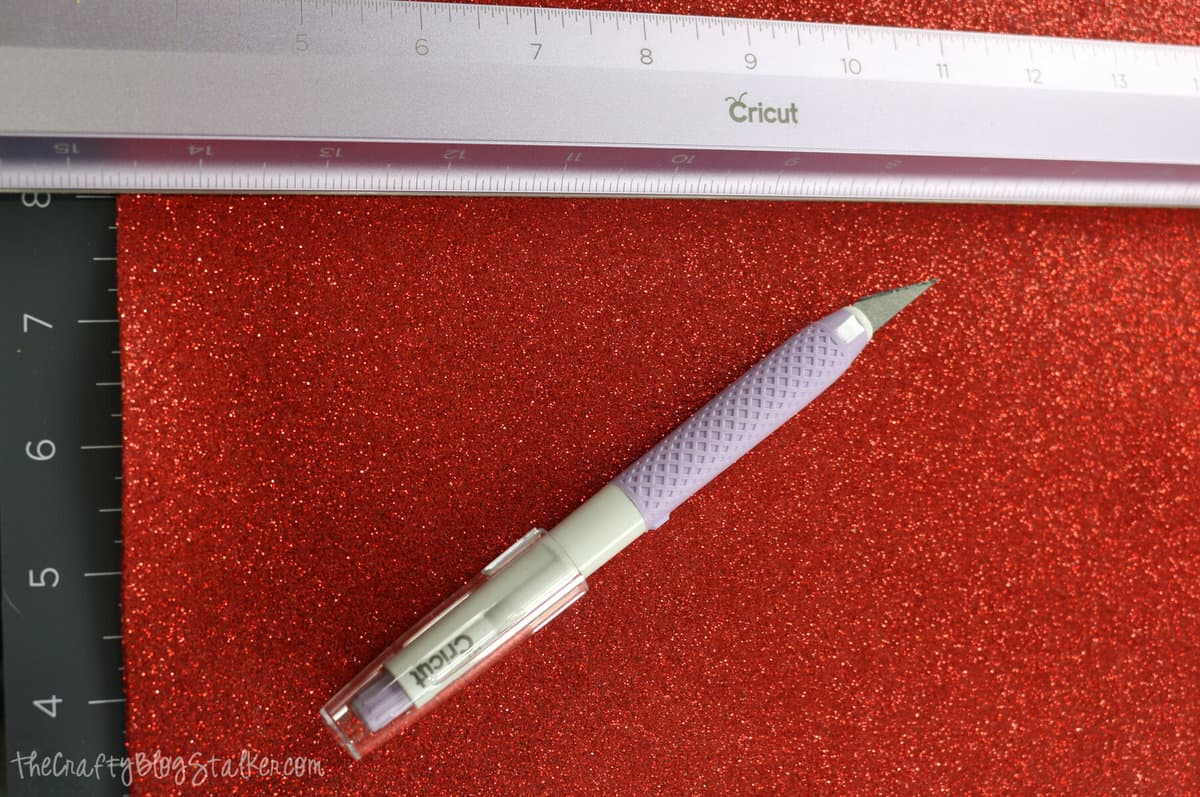
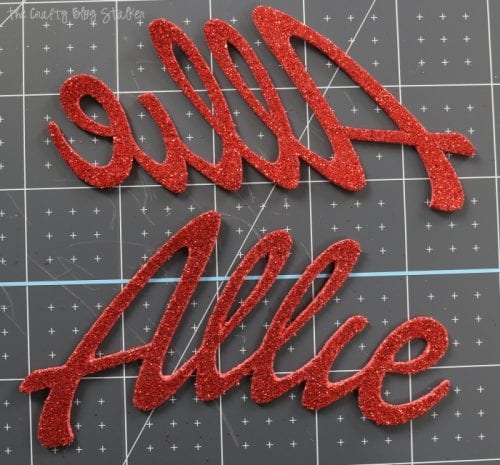
Cut the Glitter Foam down to size using the metal Cutting Ruler and TrueControl Knife. The width can't be any wider than 11 inches. I am cutting all 6 names at once so I cut my craft sheet down to 11 x 8 inches.
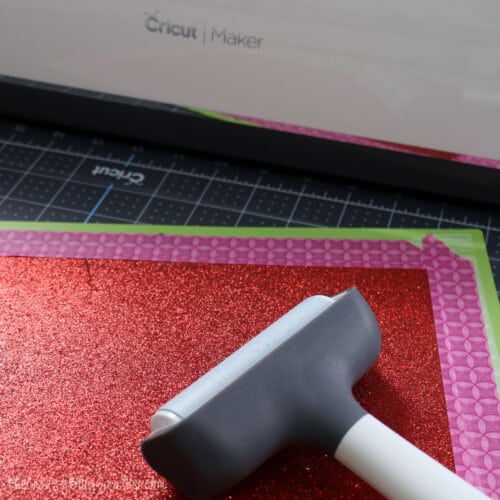
When using the Knife Blade you also need to make sure that your material is securely stuck to the mat so it doesn't wiggle out of place.
Place the Glitter Craft Foam glitter side up on the mat and secure all four edges with masking tape. Using a brayer, press the foam sheet into the stickiness of the Standard Grip Mat.
When the cut is complete, eject the mat and carefully peel back the excess craft foam. Then carefully lift off the cutout. To prolong the life of the mat, try to touch the stickiness of the mat as little as possible.
You want to have two cutouts so you can layer them together. For the second cut, keep the glitter side facing up but select Mirror Image so the two cutouts will be in opposite directions.
The two layers make the ornaments a bit more sturdy.
Assemble the Personalized Name Ornaments:
Now we come to the assembly, this is always my favorite part!
To begin, grab the Tacky Glue and the two mirrored cutouts.
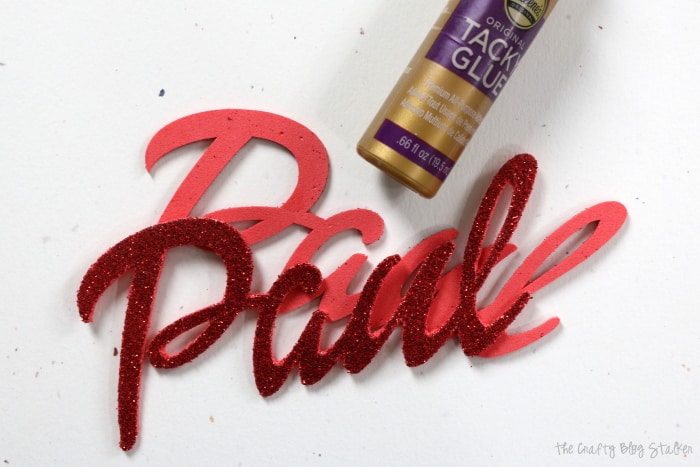
Place one of the cutouts with the glitter facing down and apply a thin line of tacky glue to the backside of the cutout.
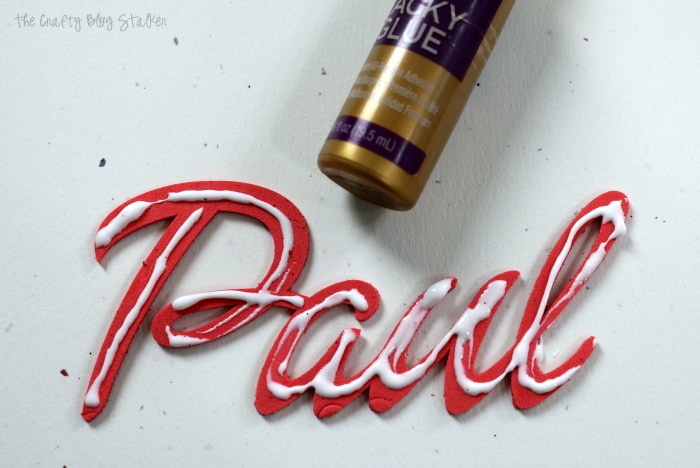
Carefully align the matching cutout over the glue and press it together. Use a cotton swab to wipe any excess glue away from the sides. Let dry.
Tacky Glue dries clear, so if some of the glue is peeking through the edges it is okay.
After the glue is dry we can put all of the pieces together to finish the Personalized Name Ornament.
Place the name cutout verticle on the cutting mat and decide how you want it to hang.
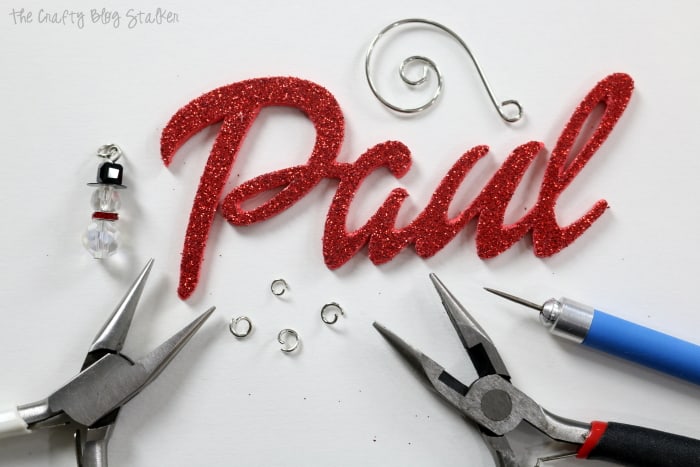
Take the awl and poke into the hanging spot of the name.
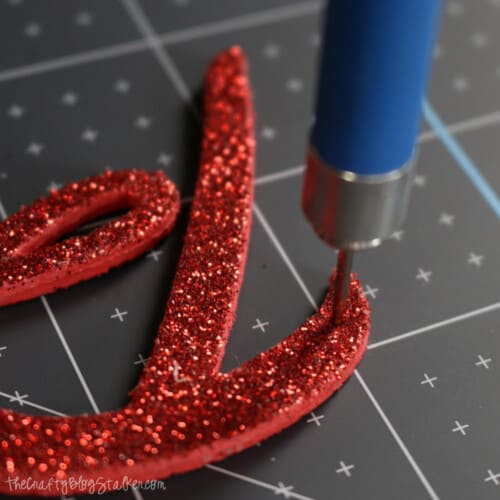
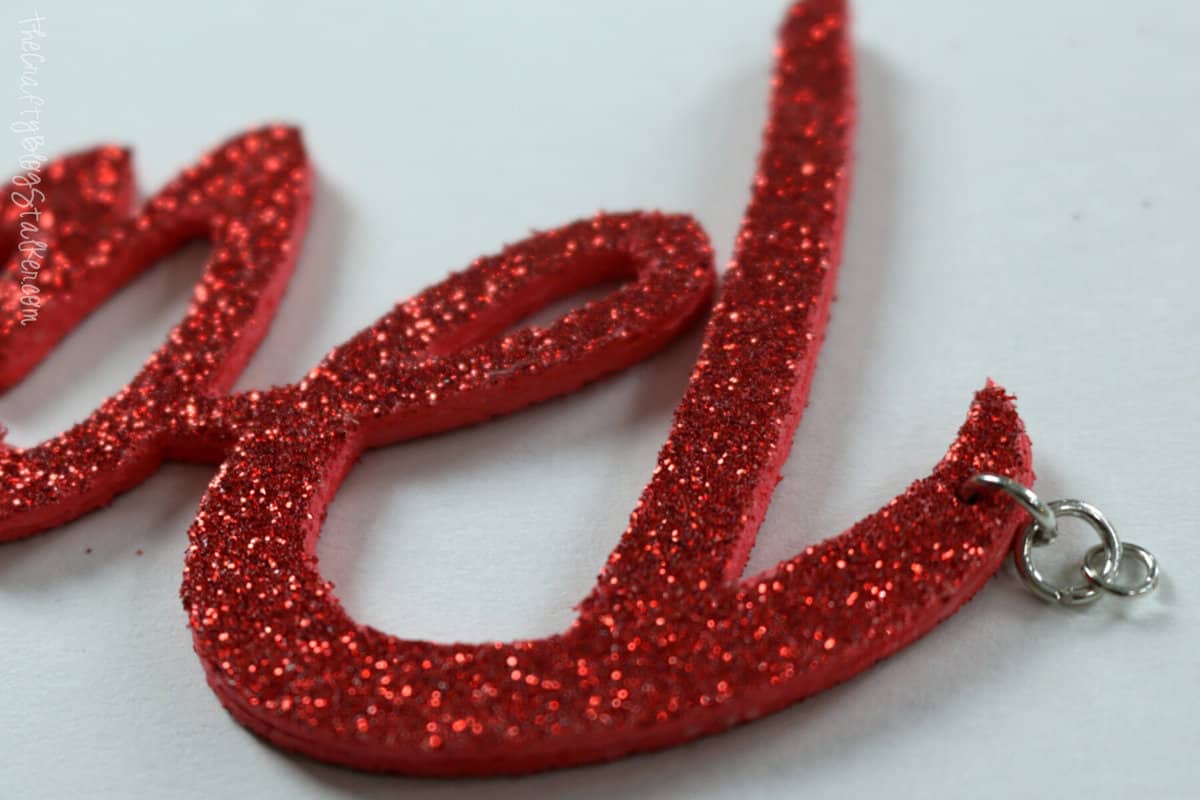
You will be left with a perfect-sized tiny hole. This is where your first jump ring goes.
Connect three jump rings to the hole.
It is best to use two pairs of needle-nose jewelry pliers, one in each hand. Grasp each side of the ring and with a twisting sideways motion, you can open and close the rings. Do not pull straight apart, you want to twist to keep the jump rings nice and round.
Open the ornament hanger with the same twisting motion as the jump rings and slide the Snowman charm and the name cutout into place. Then close the ornament hanger with the same twisting movement.
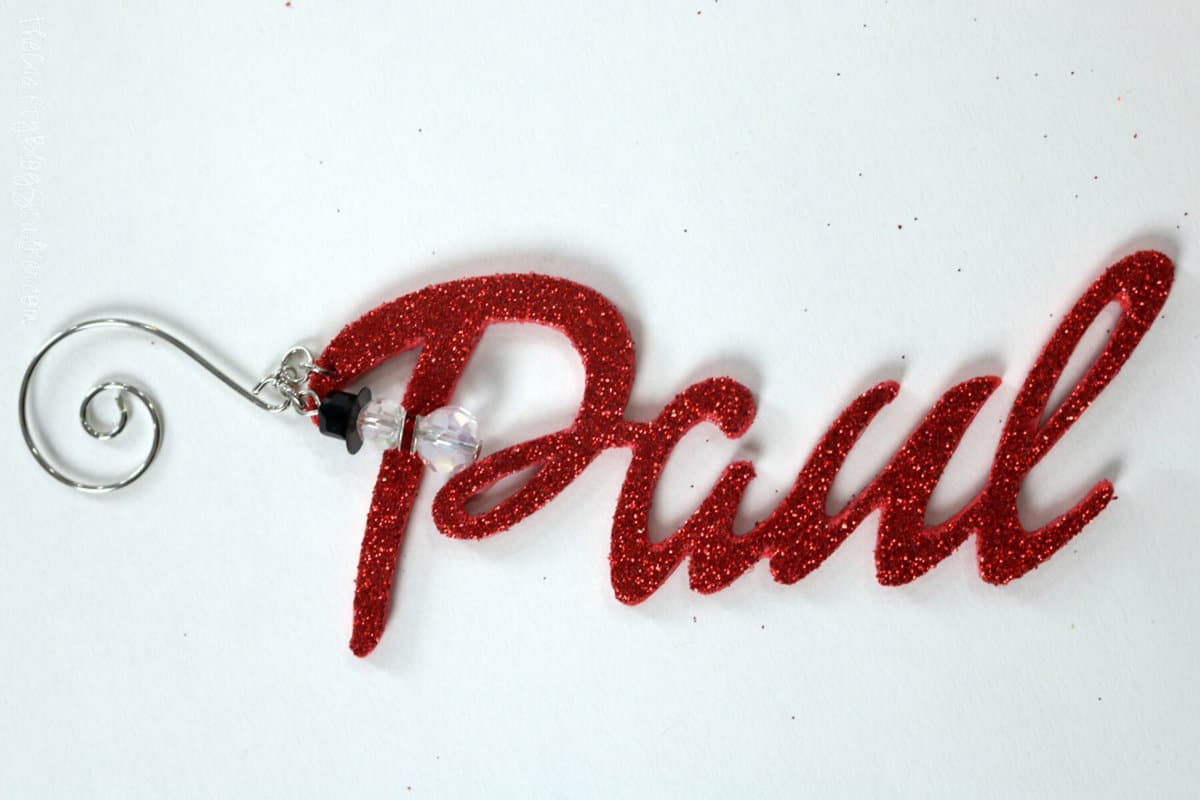
Not too shabby right? I think they are super cute!
Crafting Essentials
- The Cricut Cutting Machine is easily my favorite crafting tool. We use it in so many of our tutorials!
- These MakerX Crafting Tools are perfect for keeping in the craft room and are always ready when needed!
- This Fiskars Paper Trimmer is easy to use and cuts nicely without frayed edges.
- These Scotch Precision Scissors cut like a dream, and you get multiple pairs in a pack!
Cyndi
What is the name of the font you used ?
Katie
I am sorry, but I am not sure. I went through every font and couldn't find one that matched. So it may be a font that was discontinued, at least that is the only thing I can think of.
Kelly Shuffield
I just came to ask the same question. I am having a hard time finding a good font.
Donna Flint
Milkshake is a good, solid font if you can find it online free somewhere.
Leona
What setting do you use to cut with the knife blade on your Maker? I selected the Glitter Craft Foam, but it doesn't recognize the knife blade - it's looking for the fine point blade.
Katie Adams
What machine are using? The knife blade is only compatible with the Maker.
Betsey
Cute Idea! What the font came up with 'Dollie Script' I got it on dafont.com
Helen J Roberts
I believe the font might be called Dollie Script Font.