This post may contain affiliate links. For more information, please see our disclosure policy.
Learn how to use the print then cut feature in Cricut Design Space and create amazing printables. Master the tips and tricks with this step-by-step tutorial.
This is a sponsored conversation written by me on behalf of Cricut. The opinions and text are all mine.
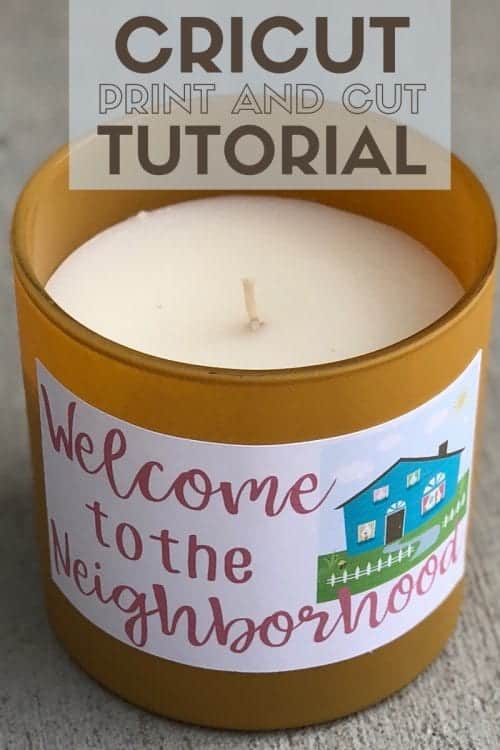
Have you tried the Print then Cut feature in Cricut Design Space?
Oh wait, is it print THEN cut, or print AND cut? I guess either way it means the same thing!
Whatever you call it, there are so many possibilities of what you can create!
I wanted to make a small welcome gift for a new neighbor, so I decided this was the perfect time to share some tips and tricks for Print and Cut! Even if you don't want to make the same design I am making I'll share some great tips on how to design your own print then cut!
How to Print and Cut in Cricut Design Space Video Tutorial
Like videos? I have a video tutorial for you! Please subscribe to my YouTube Channel so you don't miss out on any future video tutorials!
What is Print then Cut?
For starters, let's talk about what the print then cut feature is inside of Cricut Design Space.
Print then cut is when you print your image or design on a printer, hence the "print". Then you run that same printed sheet through your Cricut cutting machine and that image is perfectly cut out. That is where you cut the "cut". So print then cut is a very appropriate title.
You will print directly from Cricut Design Space so any printer connected to your computer or device should work.
I have an older HP Jet printer that is model# 3051A and print then cut works perfectly.
You can also cut your printed design on any Cricut Explore or Maker machine. Today, I will be using my Cricut Maker.
Print Then Cut Files in Cricut Design Space
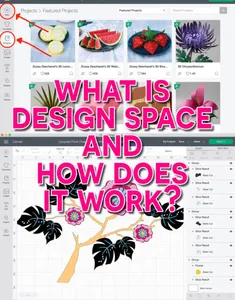
When you are searching for files in Cricut Design Space there are two different ways to identify the type of file you are looking at.
Now all files inside this program are cut files so that is a given, but some are print then cut files. Those can be identified with the little printer icon in the bottom right-hand corner of the image. Can you spot it in the image below?
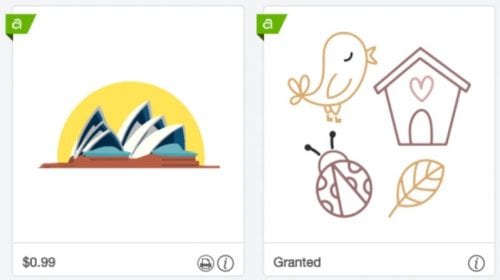
Images with the small printer icon are print and cut ready!
BUT you can change most cut files into print and cut too, it just takes a couple extra steps.
When you are in the canvas creating your design, you will see a small menu bar where you can slice, weld, attach, flatten, and contour your design. When you select Flatten, it takes all of your layers and combines them into one.
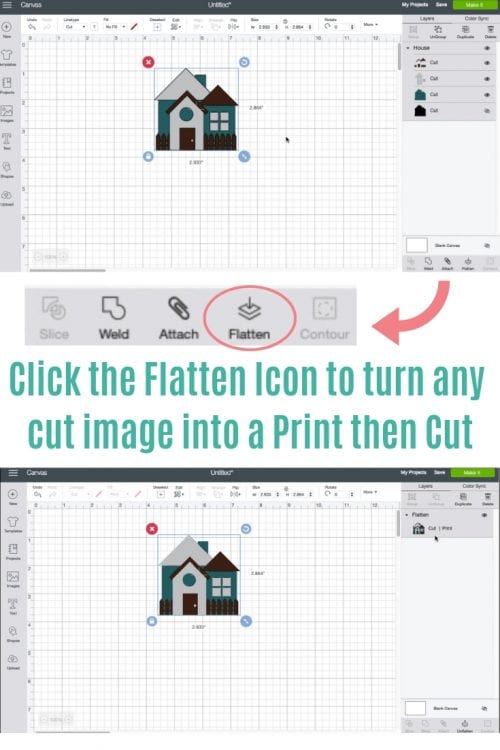
Flatten makes it so you can print your image as a whole instead of cutting each layer out separately and piecing together the different layers to complete your image. It's easy peasy!
Cricut Print and Cut Size
The smallest you can go for a Print then Cut is about ¼" square, and the largest you can go is 9.25" x 6.75". But don't worry, if your printable image is too large you will get a warning message telling you to reduce the size.
Now, let's make something fun with the Print then Cut feature!
Supplies Used to Make a Print and Cut Neighbor Gift Candle
I designed this project so I could give a small personalized gift to our new neighbor. But, I will be sharing tips and tricks that can be applied to any type of design that you want to create.
Items linked below may go to similar items when exact items couldn't be found online. Links are affiliates so when you purchase, I will get a small kickback to help fund the next tutorial!
How to Design a Print then Cut Project - New Neighbor Gift
Select New Project. This will take you to a blank canvas.
Search for the type of image you want to use. I searched for "house". If you want a print and cut ready file you can filter your search result and only search in printables.
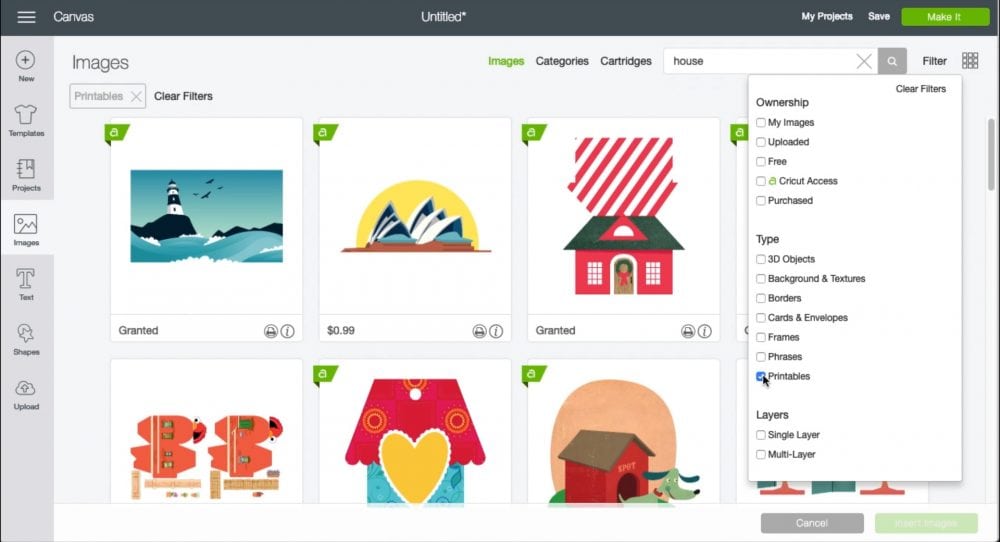
Select and highlight the image(s) that you want to use and select insert images. This will bring those images into your canvas.
Add your text to your design. I used two different fonts. Babbette and CF Jack Story.
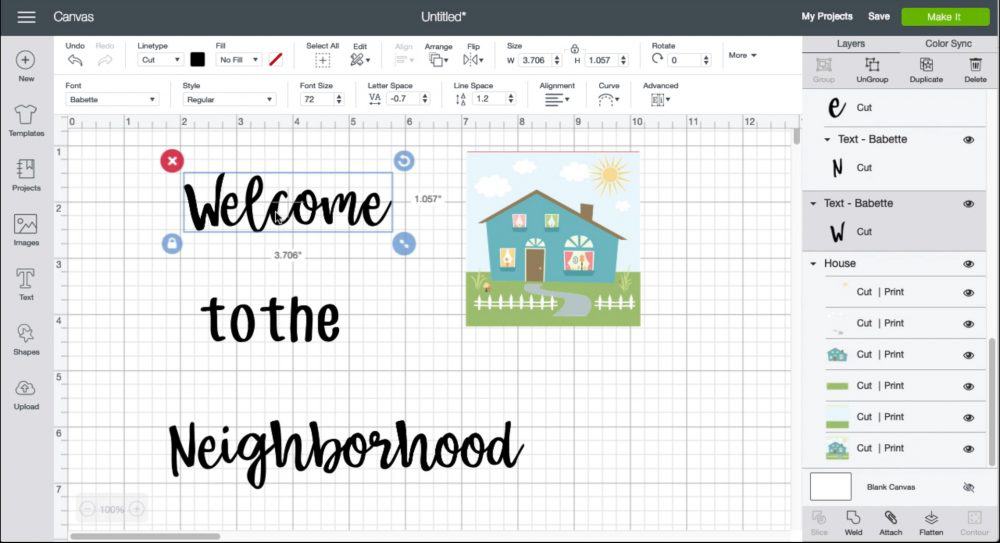
Since you are printing the design, make sure to change any colors of text that you want a specific color. I changed my text to pink so it would match the curtains in my house image.
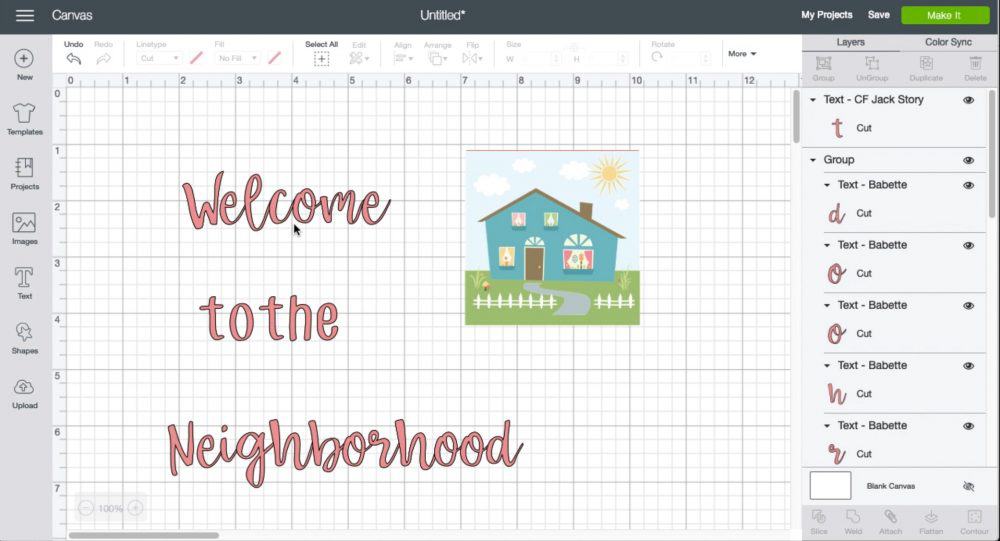
Right now the text is showing as a cut file, and that is ok. We will flatten everything when we are done arranging and that converts all of the files into one layer making it a print then cut.
Aligning the Image and Text
Cricut Design Space has an awesome feature for aligning so you don't have to eyeball and guess for perfect placement!
For this design, I started at the bottom and worked my way up.
Space the text "neighborhood" beneath the image with the spacing that you want. Then select the neighborhood text and image and select "Align" then "Align Right". This will align the end of the text exactly with the edge of the image.
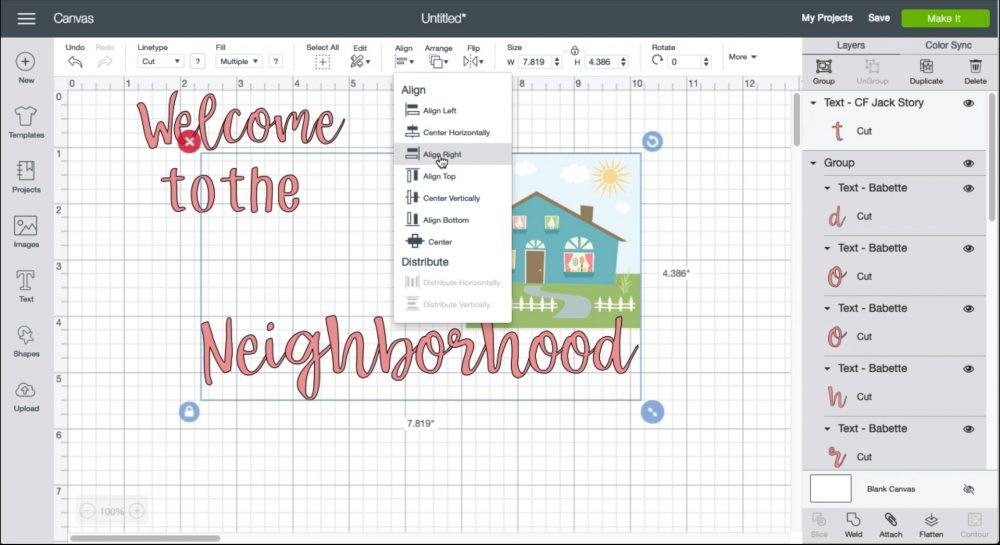
Once aligned, select the group to group these two sections together. That way you can move them around but they will stay perfectly spaced.
Next, we are going to align the welcome text. Highlight "welcome" and the grouped image and select "Align" then "Align Left" and then "Align Top". This will align the text to the beginning of the neighborhood text and the top of the image. Once aligned, make sure to the group again.
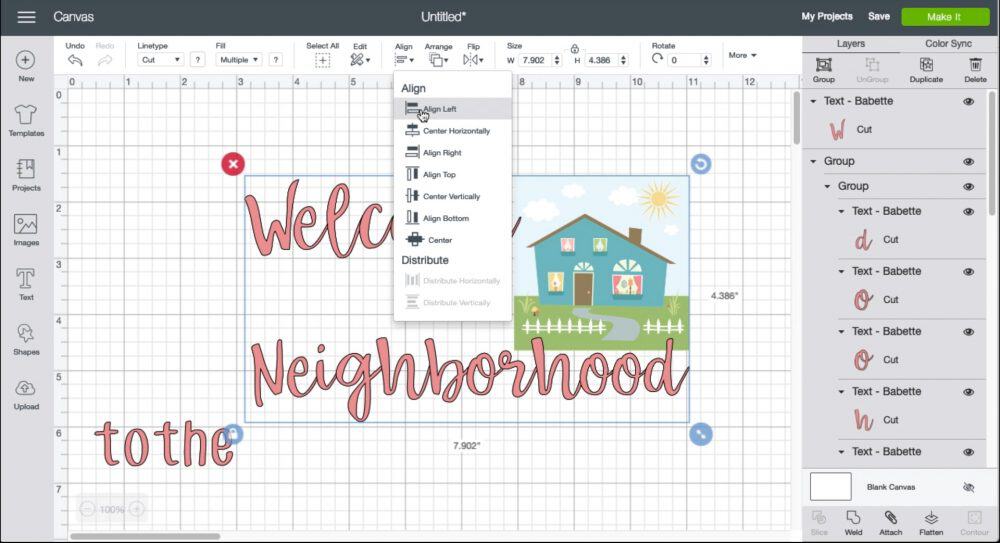
Since the "to the" text isn't perfectly centered in the middle of the design, we will need to eyeball the placement between "welcome" and "neighborhood". Again, make sure to group all of the pieces together.
Now that we have all of the pieces aligned, select the Flatten icon to convert everything to one layer.
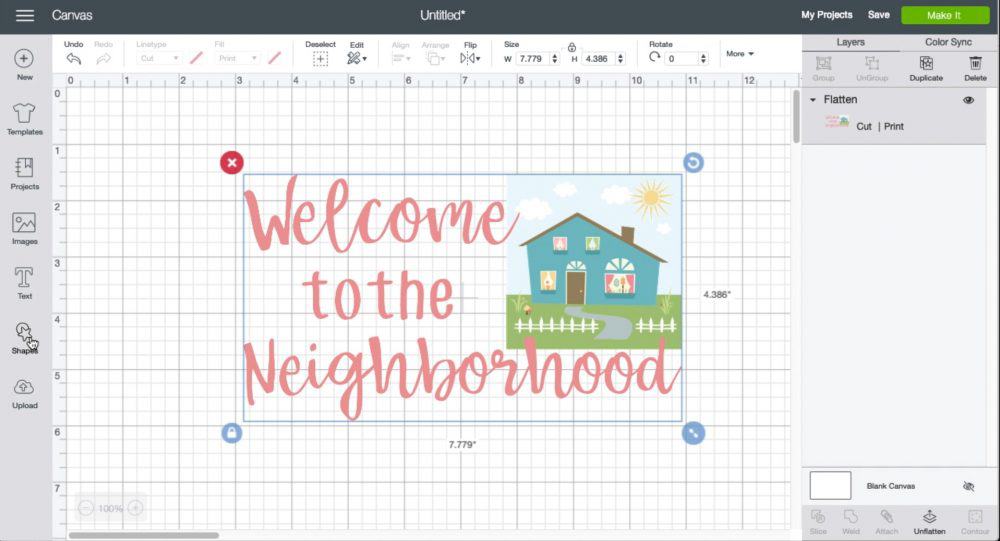
We are close to done, but not quite there. We need to give the image a backing, otherwise, when we cut the image the Cricut is going to cut around each letter making it so all of the pieces are no longer connected.
Add a square from the Shapes menu and size around the designed image, and change the color to white.
Then use the Align tool again. Highlight the white square and the grouped image and select "Align" then "Align Center". This will align the image to the center of the square.
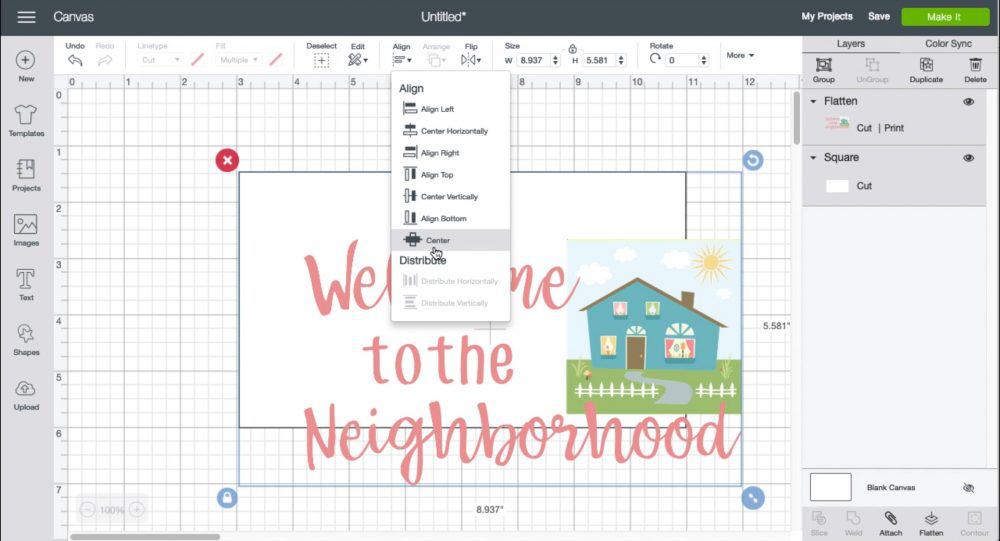
Group and then Flatten.
Now that the design is complete check your measurements and adjust as needed.
Select "Make It". This will take you to the next step of printing out your project on your home printer.
We are taken to a preview of what the printable should look like once it is printed and laid on a cutting mat.
Select "Continue", then "Send to Printer".
A Print Setup window opens and you can select how you want to print. I like to choose "Advanced Options" which takes me to my printer's window so I can check my options there.
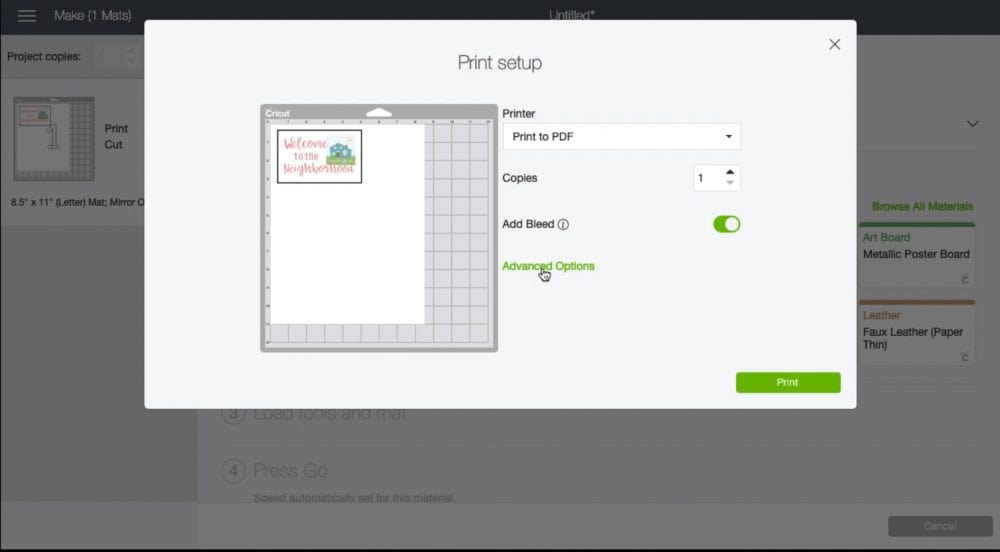
I make sure the best printer quality is set and select print.
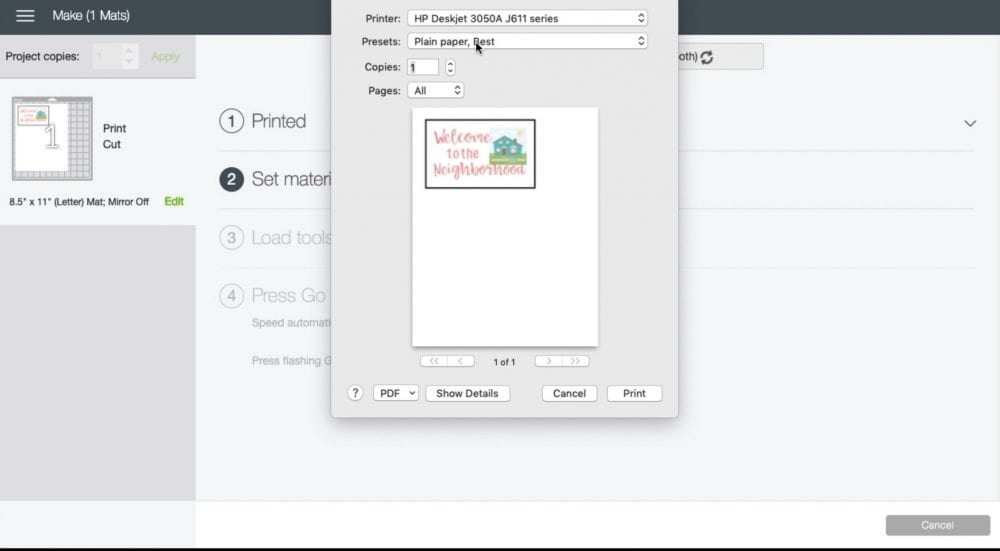
My printer is an HP DeskJet #3050A. It is really old (doesn't even have Bluetooth) but it still works perfectly!
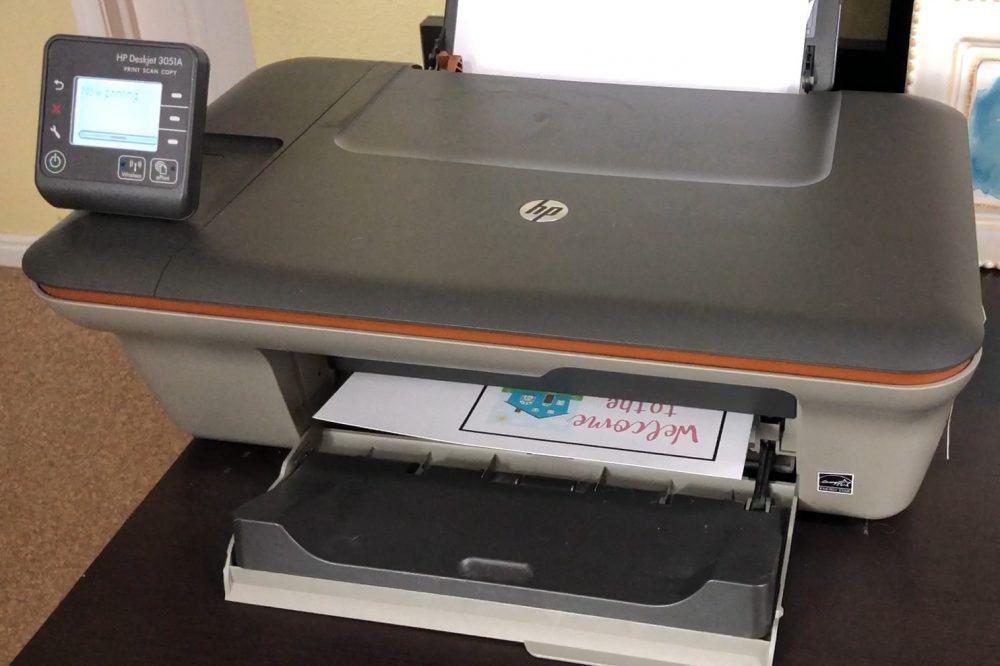
Cut
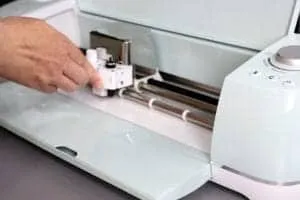
Now that the design is printed, all that is left is letting the Cricut Maker work its magic and perfectly cut out the design!
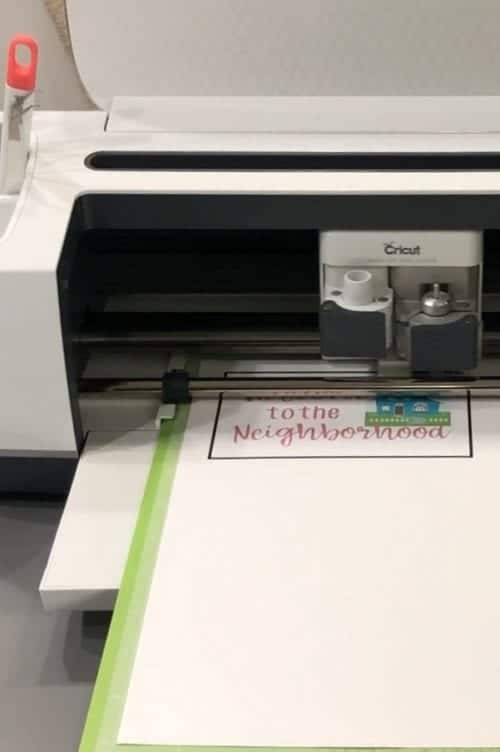
After that, select the type of material you are cutting. I am using Cricut Printable Sticker paper. Align the printed sticker sheet onto the green Standard Cutting Mat and follow the prompts.
Once loaded, you will see a little light come on near the blade. This is the Cricut looking for the black frame that printed around your design. That frame tells the Cricut machine exactly where to cut.
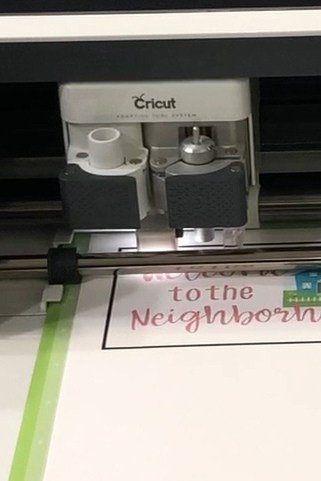
Once the machine knows exactly what to do, the blade moves to the right of the machine calibration and then begins cutting.
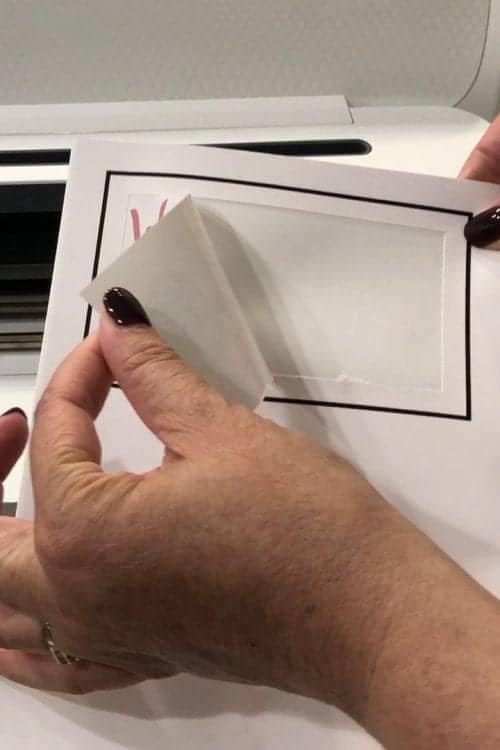
The new sticker peels easily away from the backing sheet.
Place the sticker on the candle.
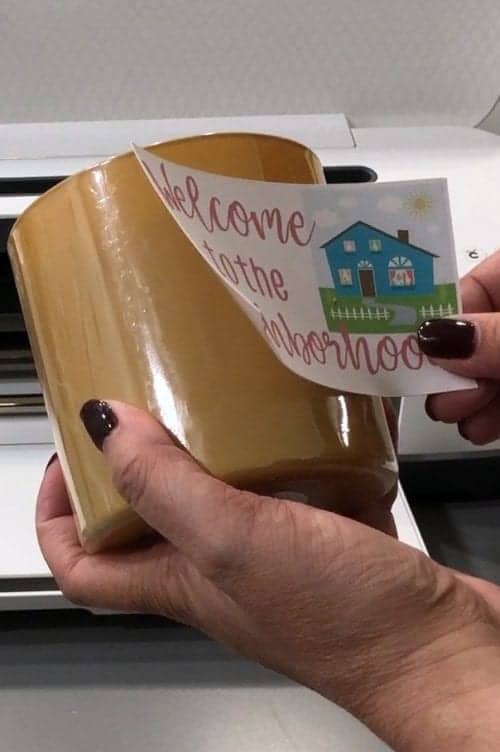
And we are done!
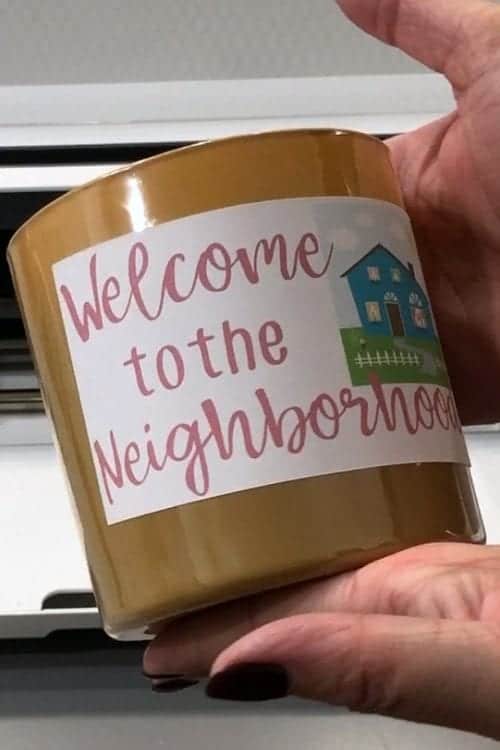
Now I know this may seem like a lot of steps. But I wanted to make sure you know exactly what you need to do. If you feel like I missed a step or have a question about something, I suggest watching the video above. Sometimes it is easier to talk about something naturally than to break it down step by step.
But if you have any questions, don't hesitate to ask in the comment section below. You can also use this cut file if you would like.
Overall, this project from start to finish took me about 20 minutes to complete. So this really is a quick and easy project!

What design would you create for Print and Cut?
Our Crafting Essentials:
- The Cricut Cutting Machine is easily our favorite crafting tool. We use it in so many of our tutorials!
- These MakerX Crafting Tools are perfect for keeping in the craft room and are always ready when needed!
- This Fiskars Paper Trimmer is easy to use and cuts nicely without frayed edges.
- These Scotch Precision Scissors cut like a dream, and you get multiple pairs in a pack!






Bekah Gasper
When I created a print then cut with a white background, it wouldn't cut. It printed beautifully scanned and then spit it out. What did I miss?
Katie
Hi Bekah, It's hard to say exactly without seeing your canvas. Look at your layers. Does it say each image is a "Cut|Print| or does it only say "Print"?
phillip
when i go to print, advanced print options isnt there to change the print quality. please help
Katie
Hi Phillip! The print quality would be within your printer's settings. You should be able to change that but each printer is different so you may have to check your user's manual.
CraftyB
Hi Katie, Thanks so much for sharing this tutorial. To follow up on Phillip's comment. I also cannot see the Advanced Options link when I'm in the Print Setup window within the Cricut Design Space. I have seen the same option show in many tutorials and for some reason that option doesn't show up on my end. The green link that says "Advanced Options" in the photo under this "A Print Setup window opens and you can select how you want to print. I like to choose “Advanced Options” which takes me to my printer’s window so I can check my options there.".
Any idea why or how can that be fixed? I don't think is the printer settings since I cannot even get to that window/option.
Katie
Hi CraftyB,
I am sorry but I am not sure how to help you. I can't see what you see. But Cricut has a customer support team that is fantastic and they may be able to help you better. You can reach out here: https://help.cricut.com/hc/en-us
Sue
When I click on this link, "You can also use this cut file if you would like", it only takes me to the Cricut.com website not the cut file of the Welcome to the Neighborhood.
Katie Adams
Hi Sue,
This file is only available on Cricut Design Space, which is the link opens up Cricut Design Space.