

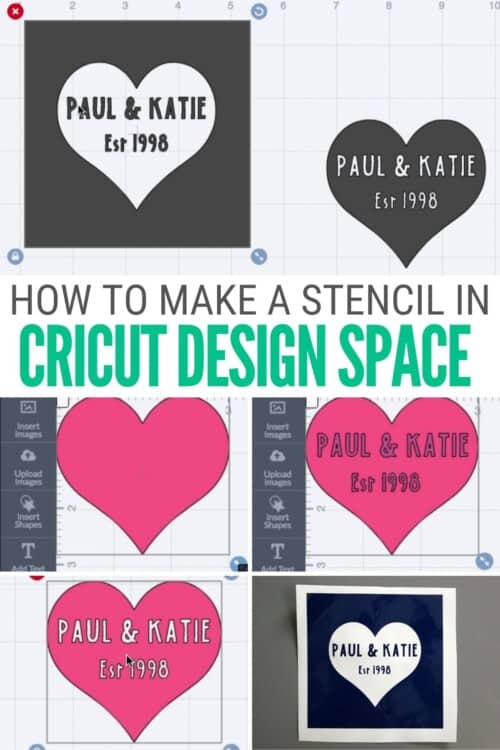
This is a beginner's guide to creating a stencil using Cricut Design Space. It includes a walkthrough on how to make the stencil from start to finish.
Do you have a Cricut? I absolutely love mine and I am constantly finding new things that I can make with it!
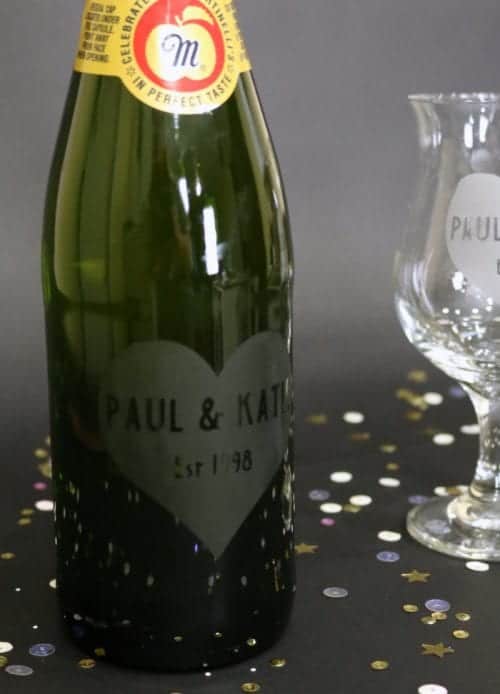
Recently, I wanted to make something special to help celebrate my 19th wedding anniversary. How about permanently etching our names and wedding year into a glass wine bottle? It is going to make a great gift for my husband and is something we can keep afterward as a keepsake.
Vinyl makes a great stencil, so I turned to my Cricut to help me make the craft. I have had many ask me about how to create the stencil so will do that in this tutorial. You can find the tutorial for the Etched Glass Bottle here.
Cricut Design Space is a designing app that you can use with all Cricut Machines. You can access the program from any computer or device that has an internet connection.
What material do you use to make a stencil with Cricut?
There are different materials that you can choose from, it depends on what project you are creating.
Vinyl works great for stencil design when you want to have the stencil "stuck" to the surface while painting. Once you are finished with the stencil you can peel and throw away. Using vinyl creates a one-time use stencil.
To create a reusable stencil, use a thin Plastic Sheet to cut the design. It will not be adhesive like vinyl, but you can use masking tape to secure the stencil in place.
Craft Tutorial Video:
Like videos? I have a video tutorial for you! Please subscribe to my YouTube Channel so you don't miss out on any future video tutorials!
How to Make a Stencil with Cricut Design Space
The look of Cricut Design Space has been updated since this tutorial was created, but the steps are the same.
Begin by tapping on File and then on New. This will take you to a new design grid.
The focus of this stencil is a heart. Select Insert Images and type "heart" into the search field. This will bring up all of the heart images within the program. Highlight the image you like best and tap on Insert Image.
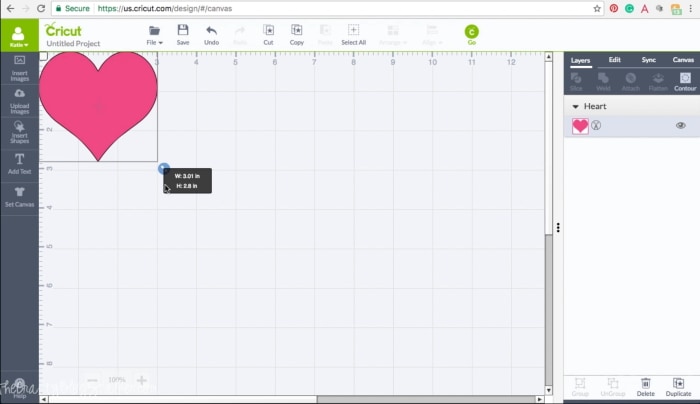
Drag the heart to the size needed.
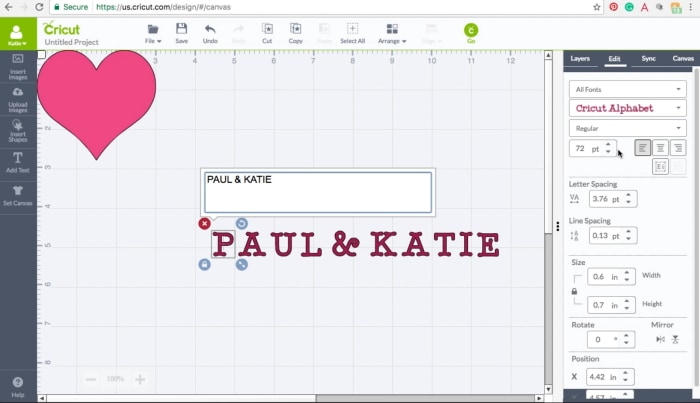
To add text, select Add Text from the left menu and type. To change the font tap on Edit on the right menu, all fonts, and then select the desired font.
Resize the text to fit inside the heart.
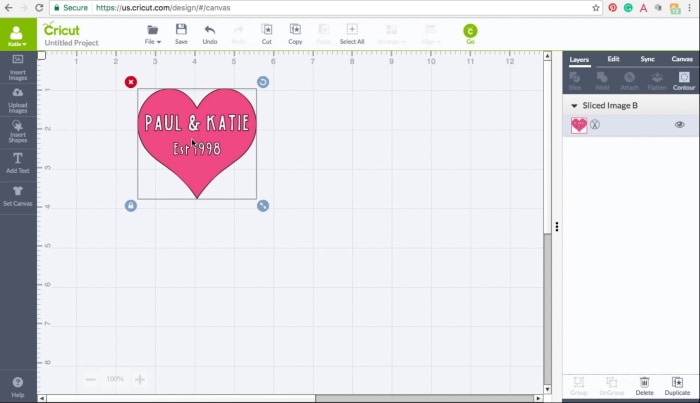
Next, we want to combine the image and text but have an empty space where the text is. To do that, go to the layers on the right menu. Highlight the heart and a line of text and select slice. Since my heart has 2 lines of text, I repeat selecting the heart again and the second line of text and again tapping slice.
When finished, I can move the heart and see that the text now holds empty space in the heart image. Delete the text boxes, those are no longer needed.
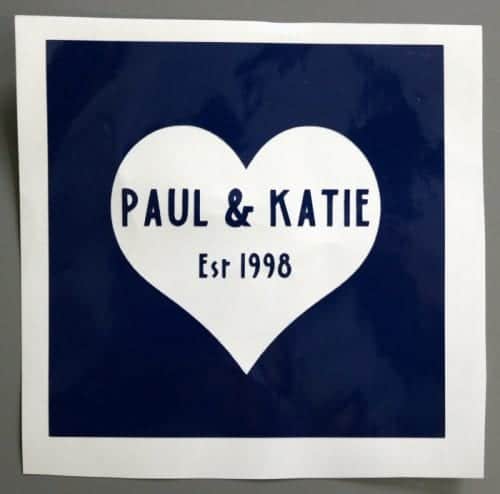
We are close, but we aren't done yet. This is what I want my finished image to look like after I have used my stencil, so we need to create a negative of this.
Select Shape from the left menu and then select Square. You want the square larger than your image so drag it to the size you need.
Then drag the image over the square. If the image tries to hide behind the square tap on Arrange from the top menu and select Move Forward.
Repeat the Slice step from above. From the Layers menu on the right side, select the two images and tap on Slice. When you drag the square away you will see that you are left with a positive and a negative of your design. The negative is the stencil.

To cut the stencil, tap on the round green button that says go in the top menu and follow the steps to cut out your stencil!
This stencil was cut using my Cricut Explore Air 2 and a scrap piece of Cricut Vinyl.
And here is the finished project that my stencil helped me make! It's the Glass Etched Wine Bottle I created using the stencil we just made.
Crafting Essentials
- The Cricut Cutting Machine is easily my favorite crafting tool. We use it in so many of our tutorials!
- These MakerX Crafting Tools are perfect for keeping in the craft room and are always ready when needed!
- This Fiskars Paper Trimmer is easy to use and cuts nicely without frayed edges.
- These Scotch Precision Scissors cut like a dream, and you get multiple pairs in a pack!
Debra
I have a Cricket and I just love it. It's so fun for crafty ideas. Thanks for sharing this with us at Funtastic Friday!
Katie
I'm so glad I was able to help!
DAPHNE HARNUM
HI I watched your video on glass etching and found it to be very informative. Just wondering if you know if I can do this on my expressions machine?
Katie
Do you mean cut a stencil with vinyl? I don't have any experience with the Expressions machine so I couldn't tell you how. But you should be able too. Thanks Daphne!
Teri Ziegler
Can these stencils be used over and over again? Is there a way to make a permanent stencil of something you would make often? If so, what would you make it out of? Vinyl or something harder and studier?
Would vinyl stick over and over to a sign made out of wood so that I could make many signs with the same stencil?
Katie
Hi Teri, I wouldn't recommend using a vinyl stencil more than once. When you peel it off the surface the vinyl will stretch and won't be exactly the same when reapplied to the next surface. You can buy sheets of blanks stencil plastic (http://amzn.to/2vPUWFD affilaite) that you can your stencil out of but they are not sticky backed so you would have to apply with tape, and depending on what you are using, the paint may leak under the stencil.
Faye
I have tried and tried you way to make a stencil. I am printing out the word "Laundry". I tried cutting the positive and negative letters after I drag them apart. I still am getting the middle of the "a" and "d". is there a way to keep them intact?
Thanks
Faye
Katie
Hi Faye, I am sorry you are having troubles. So do you not want the middle of the d and a cutout? I'm don't quite understand what you are trying to do. I am happy to help but I need a little bit more information.
BRYAN LEACHMAN
Are u ableto makr custom stencils with the cricut create? Or is it just preloaded images for that cutter. Do i need to buy the cricut air 2?
Katie
Hi Bryan, yes you can create custom stencils in Cricut Design Space, or you can create them elsewhere and upload them as well. You do not need the Cricut Air 2 to design, you jsut need Cricut Design Space and any Cricut cutting machine.
Caryl
I am trying to make a stencil using my zip code. I can't figure out how to keep the center of the zero intact. The zero is a big round circle, so when i paint it, it will be just a blob of paint. Do you know how to cut a vinyl stencil keeping the inner circle?
thank you for any help you can give me
Katie
To keep the center of the O connected, you either need to use a font where the center circle isn't it's own piece, or you can use transfer tape when moving the stencil and that will keep the center of the O in place.
Marianne
So the Cricut does to have a knife tool like Silhouette? I make stencils all the time to paint words into my painted art, like Welcome for instance. I do not have to keep track of the center of the "e", "o"'s and "a" by using a knife feature where I can cut a little slice into it, thus not having to keep track of those little pieces. I can then use the stencil multiple times, or cut several so that each student has one. I stuck with Silhouette and gave my Circuit Explore to my niece for this sole reason. I was hoping that the Circuit Maker has a knife capability? There is no sense in my spending another $400 if I cannot make professional stencils with craft plastic on the Cricut Maker. Advice?
Katie
Hi Marianne, great question! I have never cut stencil plastic on my machine to make stencils so I have never thought about this. When I do make stencils they are one-time use and made from vinyl.
I did find this article that will help you with stencils and lettering. https://repurposingjunkie.com/2017/12/06/how-to-keep-letters-intact-when-making-stencils-in-cricut-design-space/
Thanks for the great a question and let me know if I can help you with anything else.
Sarah
Hi my name Sarah
And I am new to this and your video made it a little easier
Katie
Oh, I am so glad Sarah! Thank you!
Carlie
That video was super easy to follow and very helpful. I am wondering if you know how to make text connect as part of an image. For example I have a svg file of an outline of new york state. I wanted to add text to the image and make it all one. I would love some help!
Katie
Carlie, are you using Cricut Design Space? Are you wanting the word to be cut out of the middle of the state or just keep the spacing for when you cut? To keep the spacing you want to highlight everything and then click on attach. if you want to layer the words in the state, you would highlight all layers and click slice, then you can remove the letters from inside the image. Let me know if that works for you!
cathleen McCown
Thanks for this post! how do you make or where do you buy the stencil? I have a Cricut. Thanks, Cathleen
Katie
Hi Cathleen. This post is all about how to create a stencil. You can follow the links in the post to purchase the vinyl if you would like.
Betsey
I make stencils with my Cricut to decorate cookies. I use Iron on Vinyl (HTV) and iron it to Silk Screen Mesh that I get from Amazon. They can be washed as required. I don't know if that would work with wood and paint, but I think I will try it. Thanks!