

Celebrate patriotic holidays with a stunning DIY red, white, and blue bandana wreath for your front door. Easy and budget-friendly!
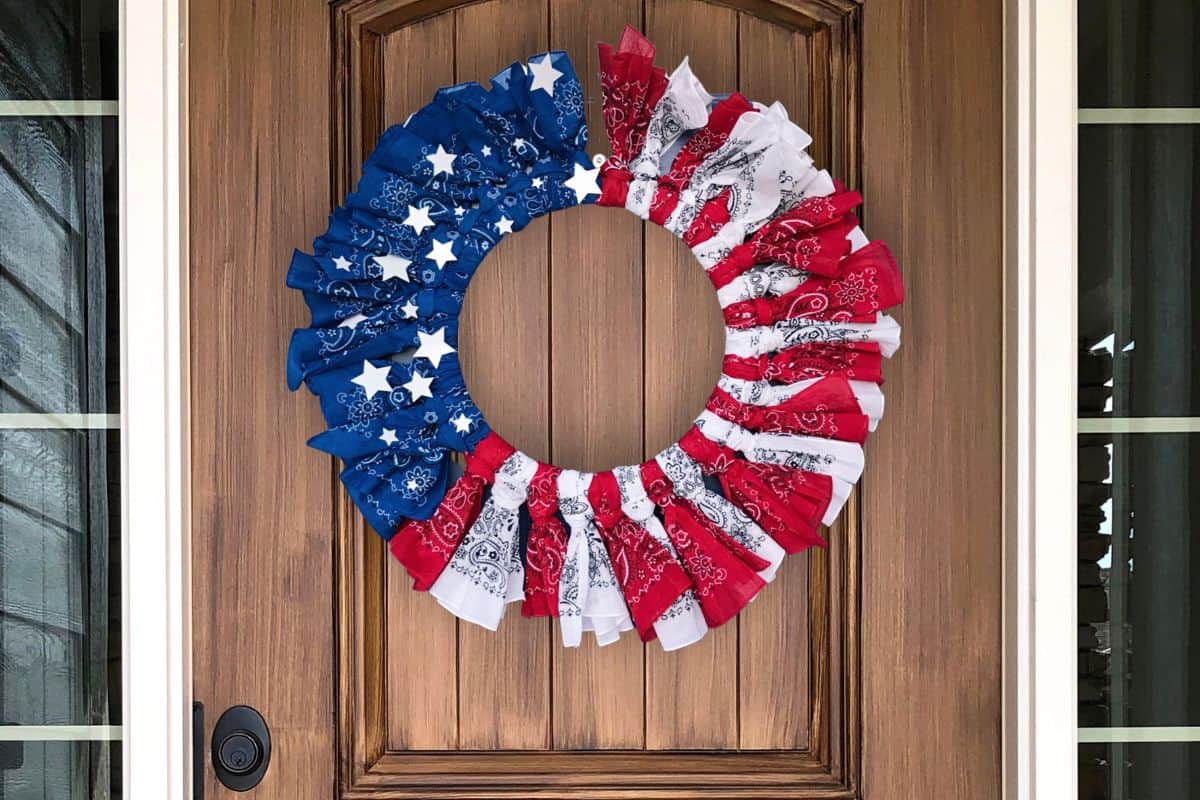
Whether you're gearing up for July 4th, Memorial Day, Veterans Day, Flag Day, or simply want to show your love for your country, this DIY project is perfect for adding a touch of red, white, and blue to your home decor.
In this step-by-step tutorial, we'll guide you through the process of making a stunning wreath using bandanas, a wreath form, and a few simple crafting supplies.
Get ready to unleash your creativity and create a wreath that represents the American flag and will make a bold and patriotic statement on your front door.
Let's dive in and learn how to make a patriotic bandana wreath that will be the envy of the neighborhood!
Craft Tutorial Video:
Like videos? I have a video tutorial for you! Please subscribe to my YouTube Channel so you don't miss out on any future video tutorials!
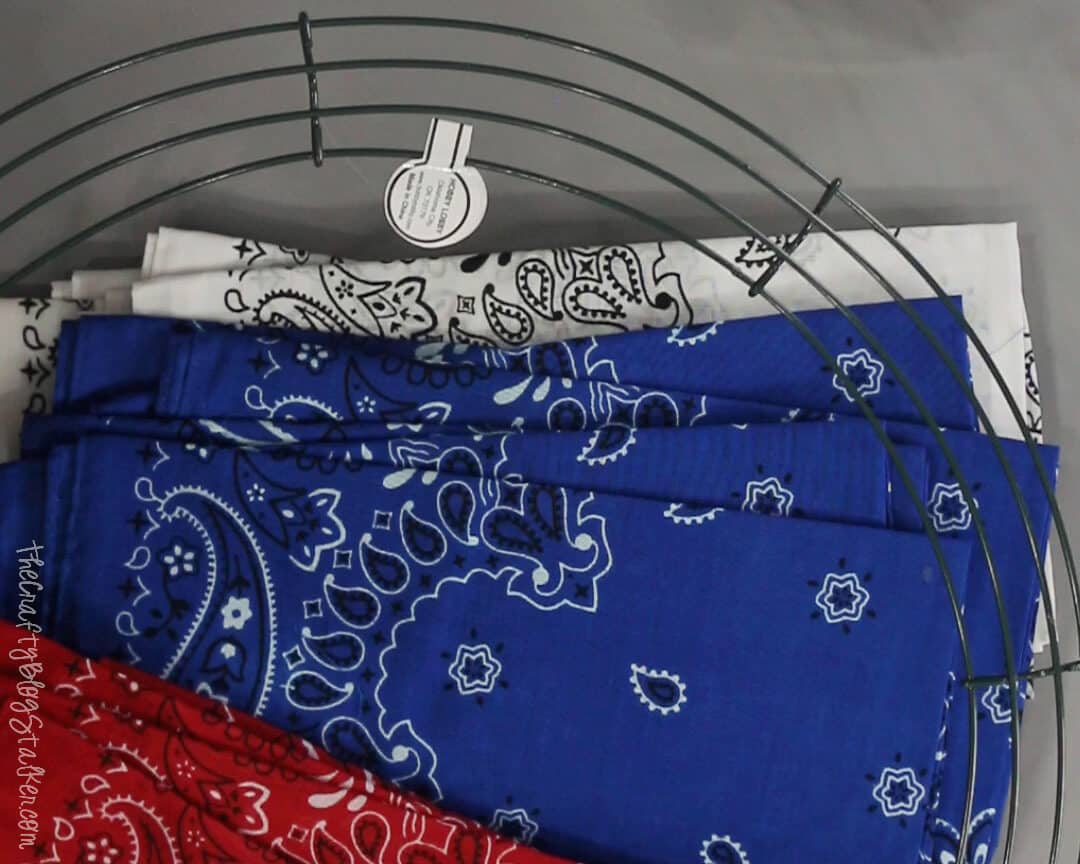
Supplies You'll Need to Make This Craft:
Some links may lead to similar items when the exact item is unavailable.
- 16-inch Wire Wreath Form
- 6 Red Bandanas
- 6 Blue Bandanas
- 6 White Bandanas
- Scissors
- Cricut Cutting Machine
- Stars - Cricut Design Space
- White Glitter Paper
- Hot Glue Gun
Bandana Prep:
To begin, cut all of the bandanas in half.
If your bandanas came folded then there should be a fold right through the center, you can use that as a guide.
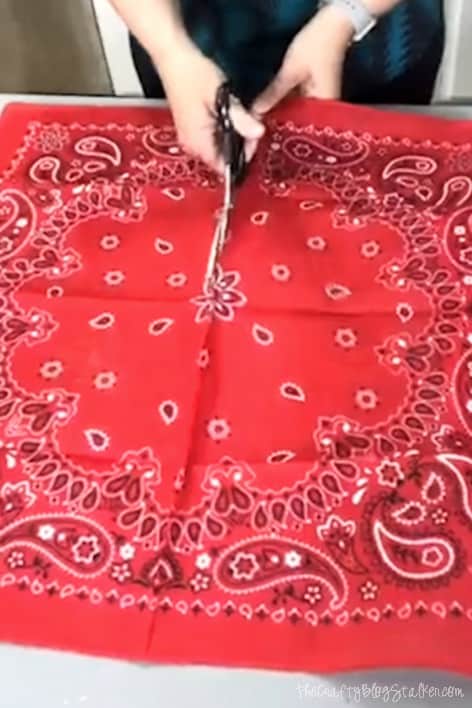
There is no need to iron out the creases before assembly, you can leave them as is.
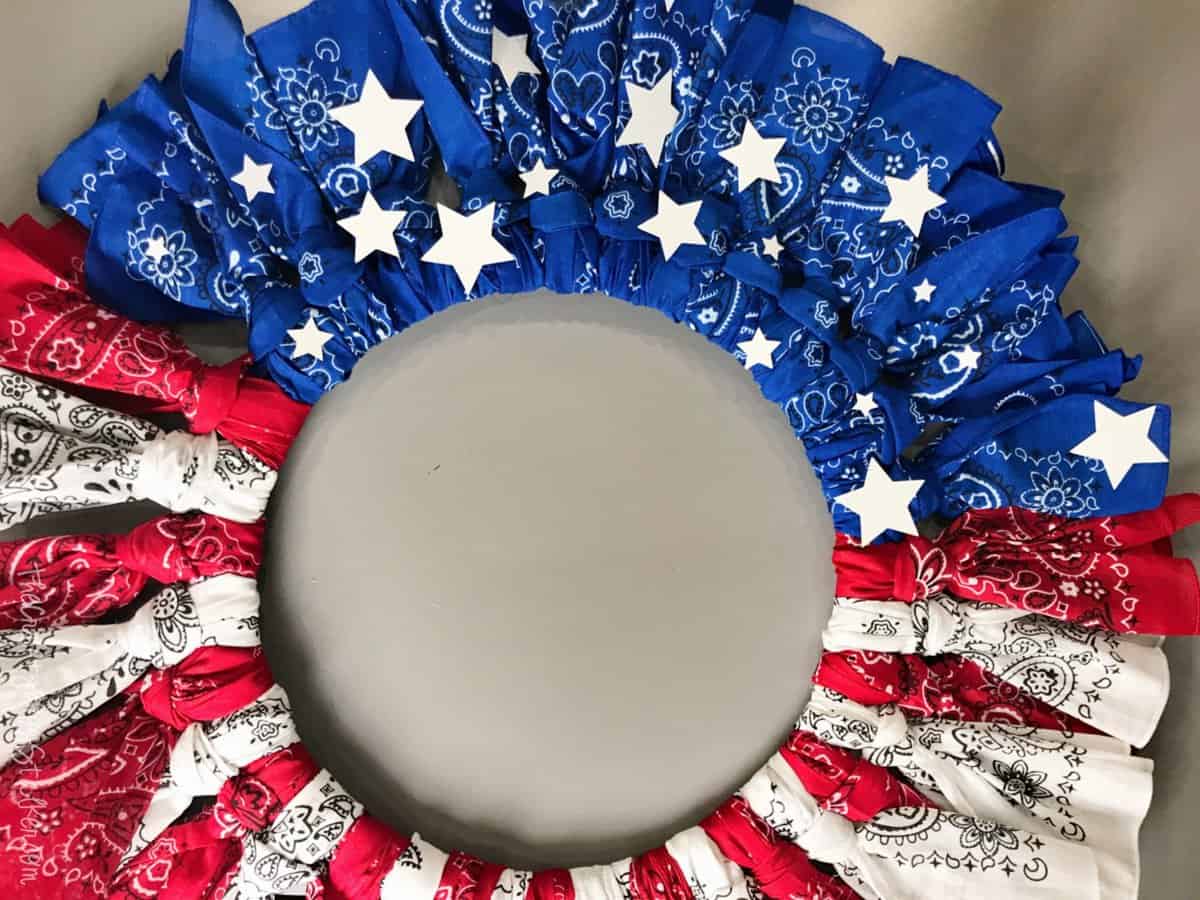
Tie On the Bandanas:
Next, tie them around the wreath.
To tie the pieces on, fold a strip in half lengthwise.
Place the strip under the wire wreath with the loop on the outside of the and the tails in the middle of the wreath.
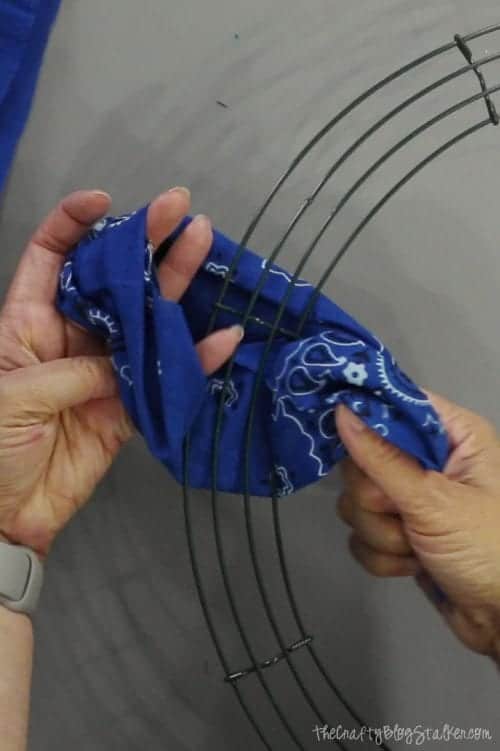
Pull the tails over the top of the wreath and tuck them into the loop end. Pull tight and open the ends of the bandana at the same time.
Continue around the wreath adding more strips of the bandana. Pushing the pieces close together as you go.
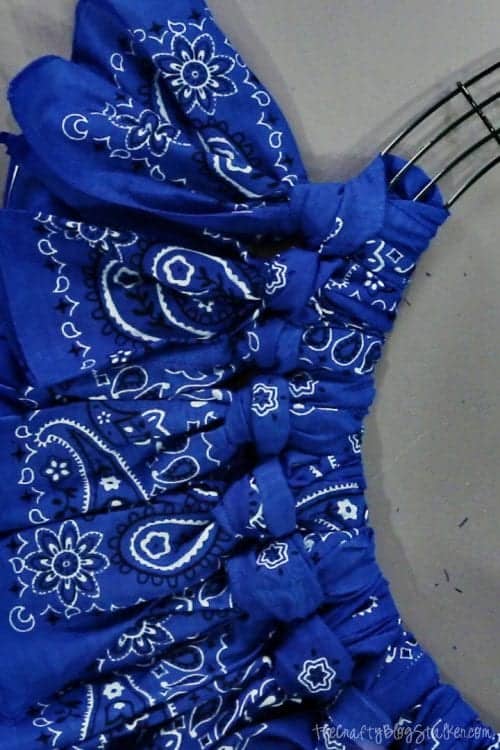
I did all of the blues in one section and then alternated the red and the white, but you can put them in whatever order you want.
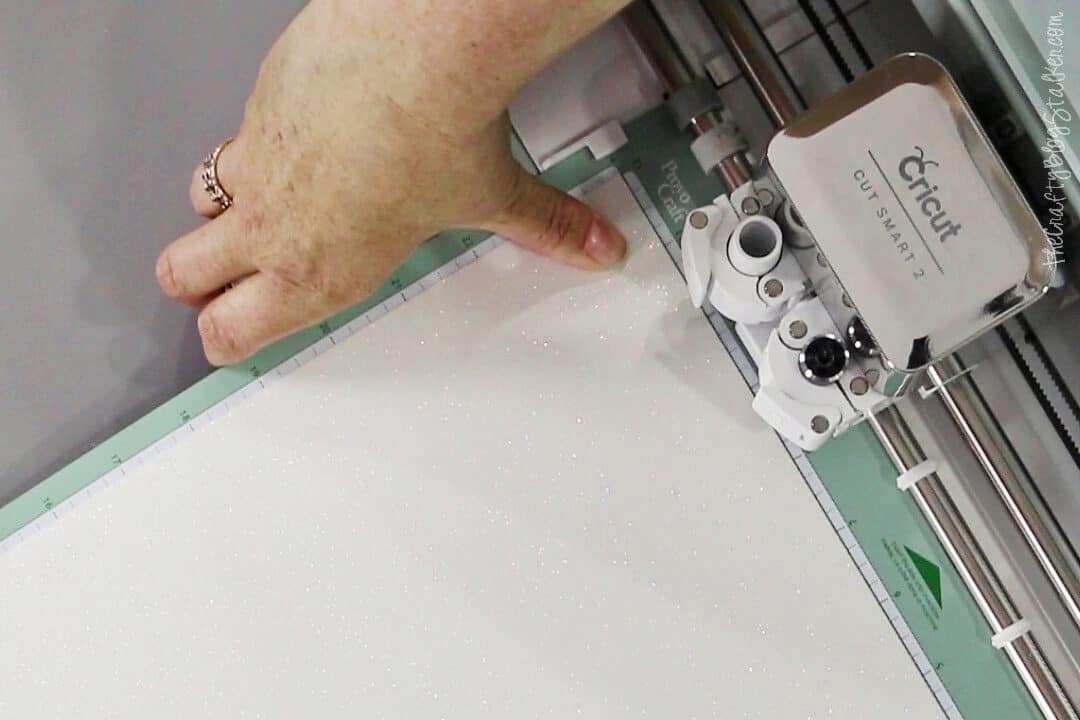
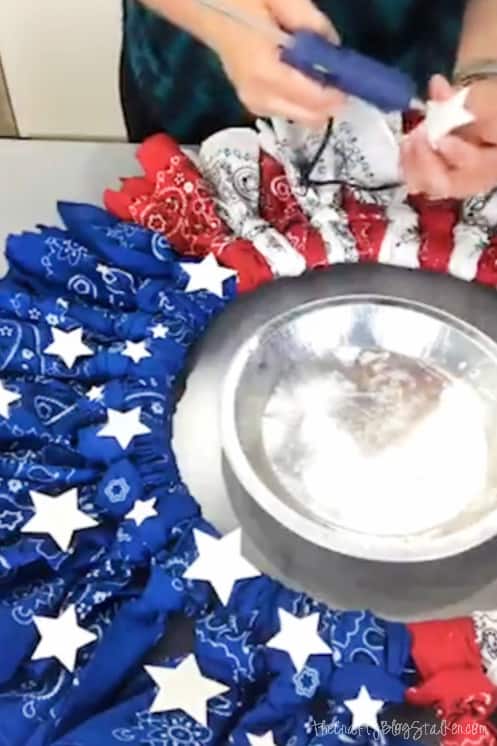
Cut Paper Stars with Cricut:
The cut file for these glitter stars is all ready to go on Cricut Design Space!
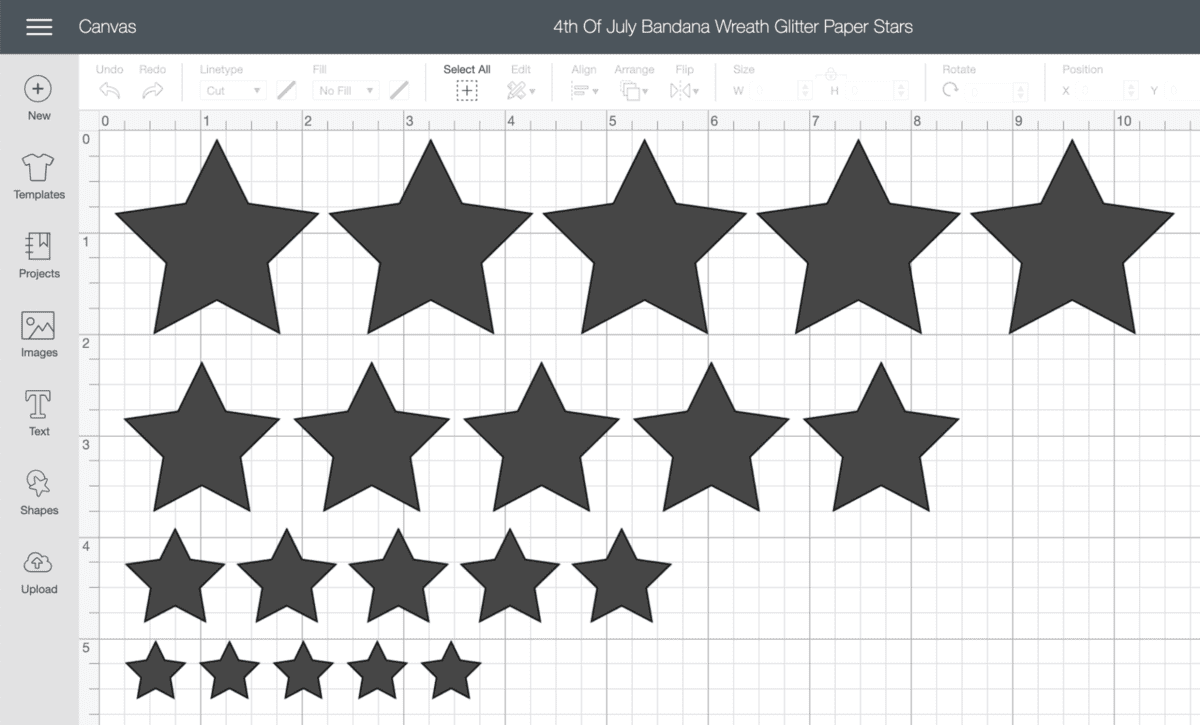
Follow the prompts within Cricut Design Space and cut out your stars using glitter paper.
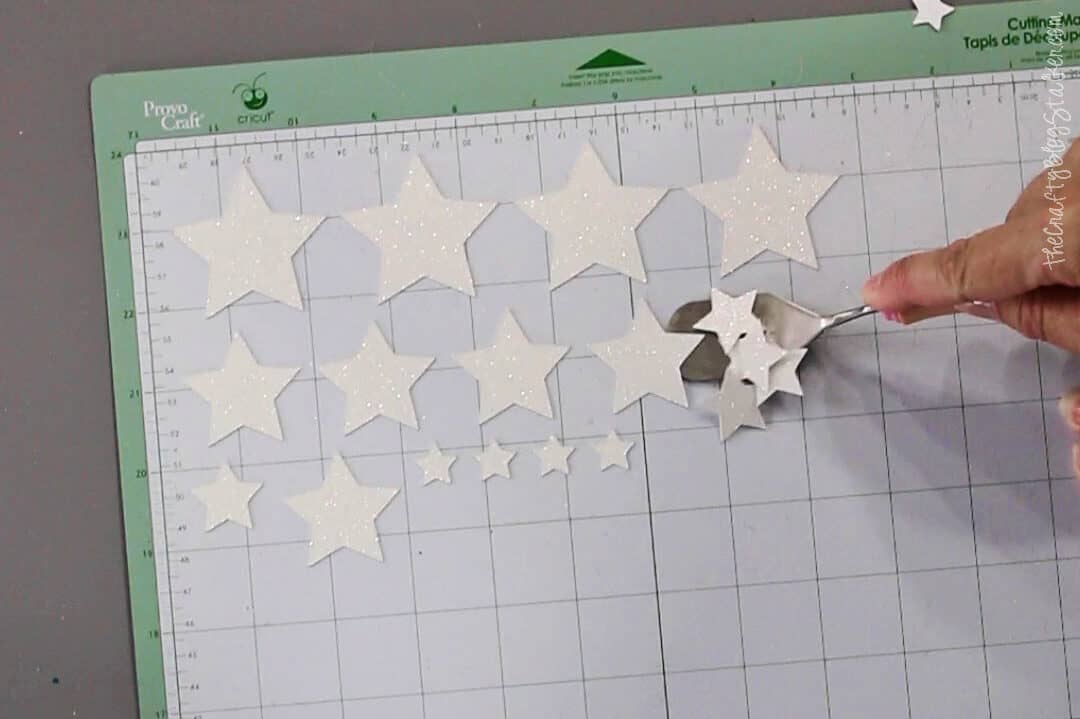
If you have this nifty spatula tool, it makes removing the stars from the mat so easy!
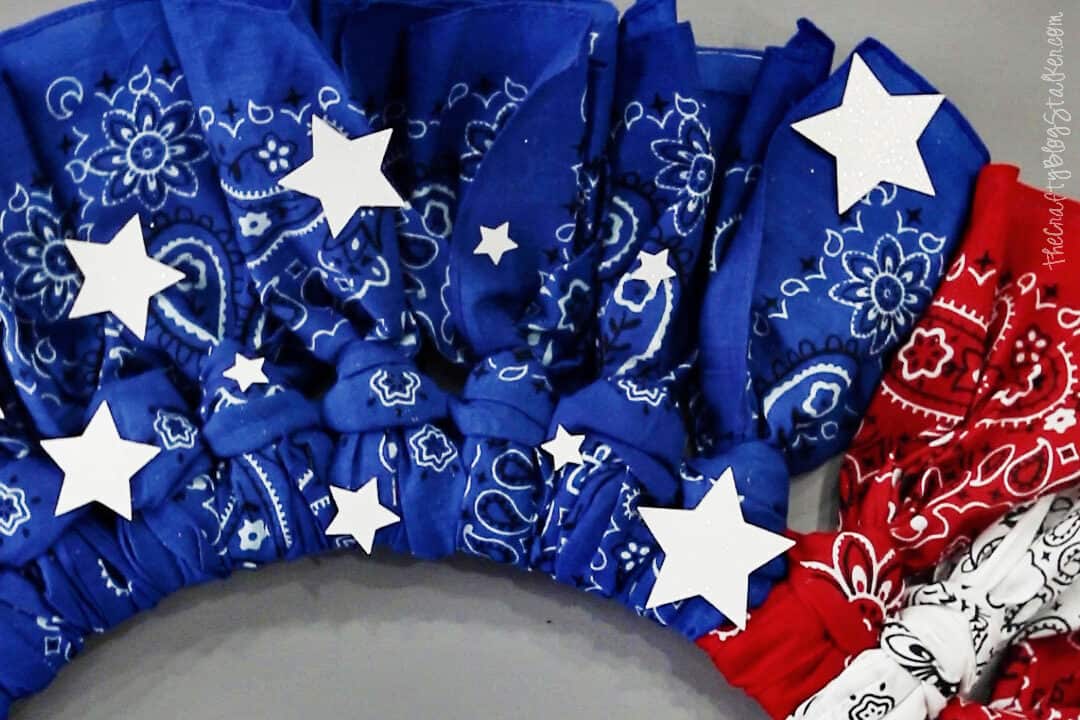
Glue the Stars on the Wreath:
Lay the stars out about where you want them on the wreath and then glue them in place by adding a bit of hot glue to the back of each glitter star.
Be aware that since the stars are made of paper, they can be ruined by harsh weather.
You can use wood stars although those are heavier and can make the bandana ends flop over.
If you have a covered porch a screen door, or an overhang over your door it should last just fine. You just don't want the wreath directly under a water spout. 🙂
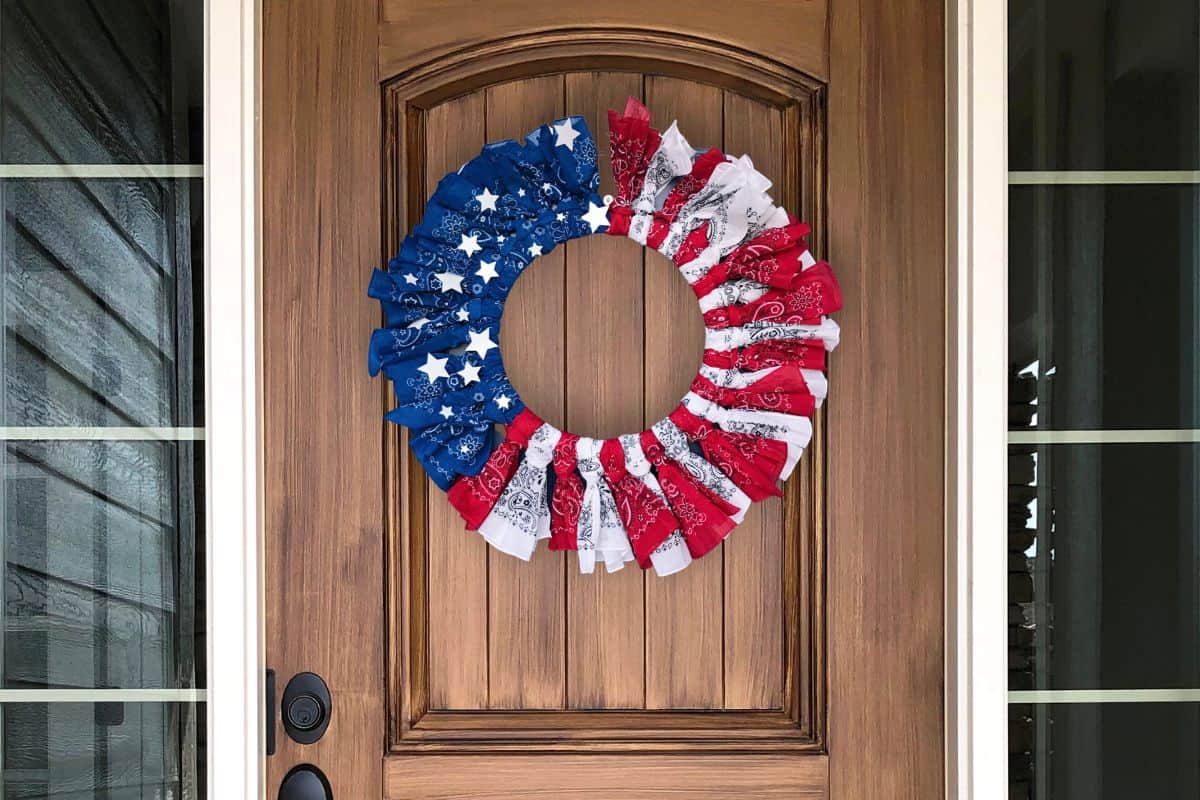
I really love how the stars add to the finished look of the wreath.
And it looks amazing hanging on the front door!
When you make this Bandana Wreath please share a photo and tag me @thecraftyblogstalker! I'd love to see what you've made.
Frequently Asked Questions:
The number of bandanas can vary depending on the size of the wreath. For my 16-inch wire wreath form, I used 18 bandanas.
Yes, you can use fabric by the yard, although it won't be as stiff. So I would recommend stiffening it up with some spray starch to make the top pieces still stand straight up.
Crafting Essentials
- The Cricut Cutting Machine is easily my favorite crafting tool. We use it in so many of our tutorials!
- These MakerX Crafting Tools are perfect for keeping in the craft room and are always ready when needed!
- This Fiskars Paper Trimmer is easy to use and cuts nicely without frayed edges.
- These Scotch Precision Scissors cut like a dream, and you get multiple pairs in a pack!
Jennifer Hovermale
I would like to subscribe to your blog but I can't find where & how to do that. Can you please help?
By the way, I love this bandana wreath! I hope I have time to make it before July 4th!
Debbie Lawrence
Jennifer, I’m sure you have long since made this wreath. I don’t have a Cricut either but a two inch star hole punch works great!
LisA SToker
What is do not have a Cricket machine to make the stars.
Katie
Great question Lisa! If you don't have a Cricut you cut the stars out by hand, purchase premade cut stars from a craft store, or you could just leave them off!
Lupe
Do you have a video on how to make and cut the Wreath Lupe
Katie
You can view the complete tutorial on YouTube: https://youtu.be/FLqLkBR42jQ
Penny
What are the (approximate) dimensions of the wreath after all the bandanas are tied onto the wire wreath? It looks pretty big. I really love this & would like to make one of these but with a smaller wire wreath. I would like to make it with a 12” wire wreath instead of the 16”. I absolutely love how this turned out!
Katie
Thank you so much Penny. ❤️ The finished size of my wreath is about 24 inches.
Penny
Thank you so much for responding. I finally found a 14” wire wreath form at a dollar tree by me. I finished putting the bandanas on & all I have to do yet is die cut some glitter stars & attach them. I have some star dies from Stampin Up that I’ll use. I’ll definitely have it finished in time to hang on my door for the holidays coming up. Until then, I can’t wait! Thank you again for sharing your beautiful wreath & inspiring me!!
Paulet
What is the secret to keeping the top bandannas from “wilting”. ☺️Thanks.
Katie
You could use spray starch.
Leona
How can you keep them from flopping over
Katie Adams
Hi Leona, Others in the comments have said they have starched the bandanas. I have not tried that but it is worth a shot!
Lisa
What do you use to to hang it? Or do you just use the frame itself?
Katie Adams
I hung it from the frame but you could easily add some ribbon on the back to hang from as well.
Lisa
I ended up adding ribbon mine turned out real cute and I added a few things. I was going to add a picture of my completed wreath but pinterest took that option away I guess.