

Learn how to create stunning cutaway cards in Cricut Design Space. Follow our step-by-step guide for designing and cutting!
Tired of searching through endless rows of cards in the store, only to find nothing that quite captures what you want to say?
Say goodbye to the card aisle dilemma!
With our guide, you'll learn how to create your own card design using Cricut Design Space and the Cricut Joy.
Say it your way with a touch of handmade charm!
Craft Tutorial Video
If videos are your thing, you're in luck-I've got a full tutorial ready for you!
Subscribe to my YouTube channel and stay inspired with every new project.
This tutorial talks about the Joy App which is no longer available. The instructions below walk through the process in Cricut Design Space.
Supplies You'll Need to Create this Project:
Some supplies were gifted at no cost. When exact item are unavailable online, links may point to comparable products.
- Cricut Joy
- Cricut Design Space
- Cricut Joy Card Mat
- Cutaway Cards
- Weeding Tools

This card template can be cut on a Ventuire, Maker, Explore, and Joy. All machines have a threshold for size so you will need to cut within your machine's capabilities.
Cricut Design Space:
Open a new project in Cricut Design Space.
Click on Projects, and type 'cutaway card setup'.
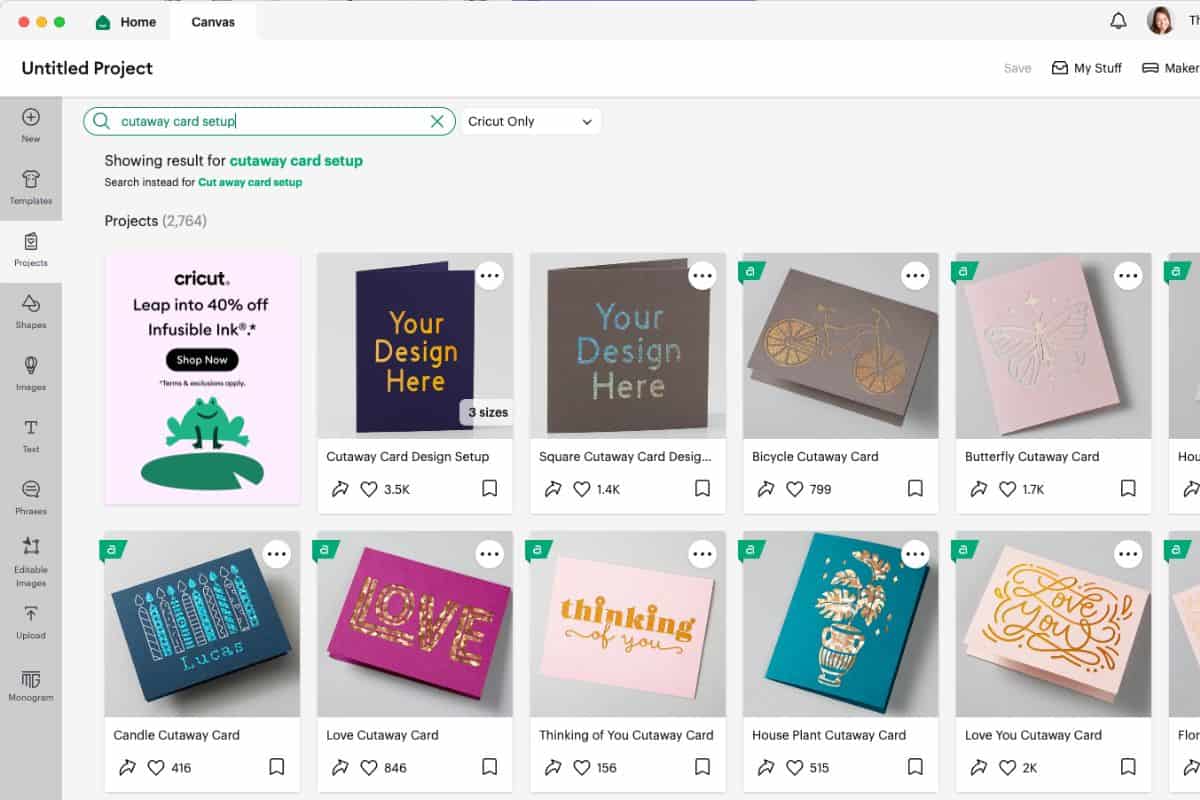
Select the option that includes 3 sizes.
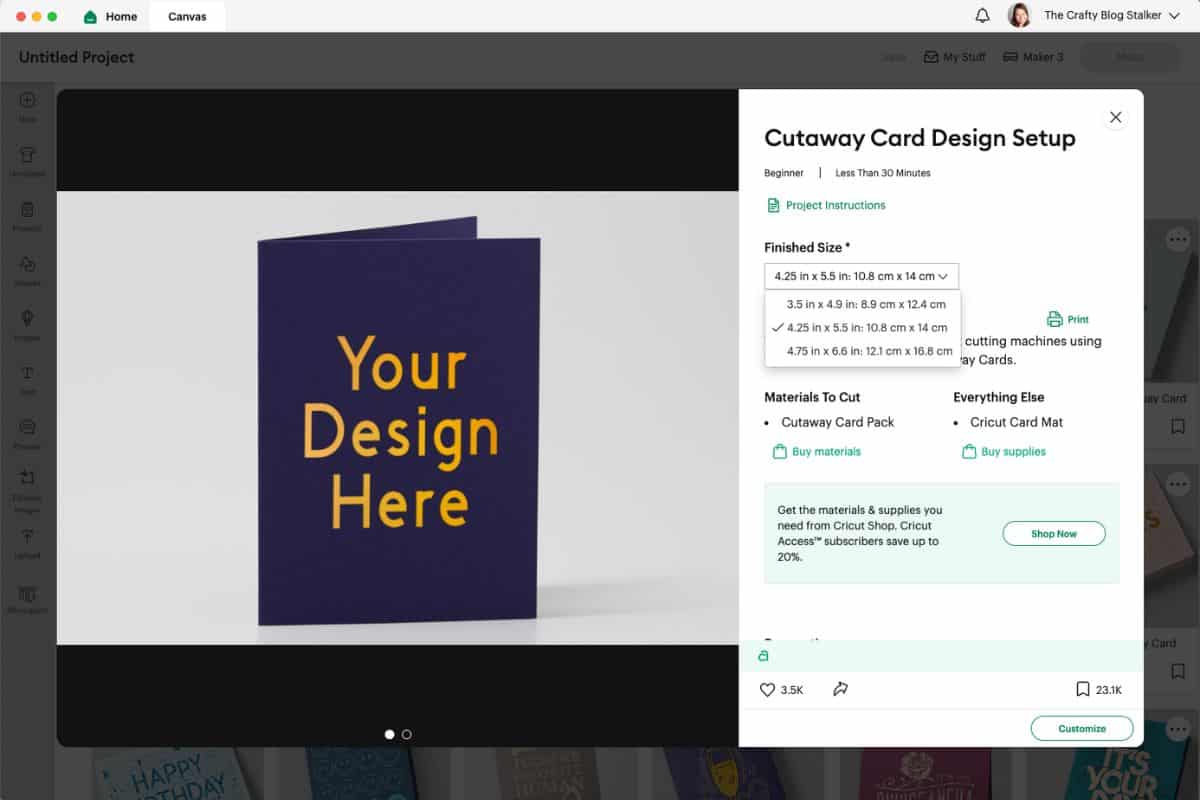
In the dropdown menu, you can select the size of the card you are working with. Mine are the 4.25 x 5.5 cards.
Then click Customize.
The Design Guide is then transferred to your canvas.
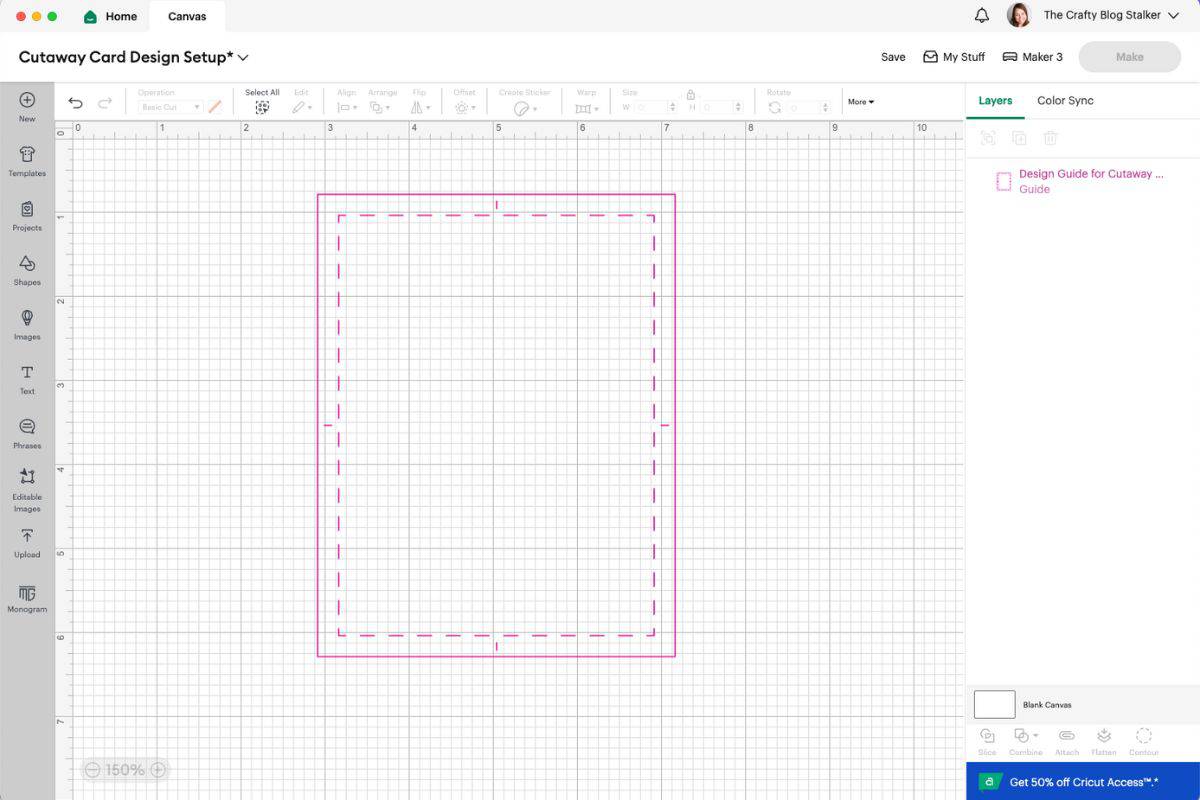
This guide should not be resized, if you do resize your design will not fit on your card correctly.
The guide is exactly what it sounds like, a guide. These lines will not be transferred to your card, they are there as a size reference only.
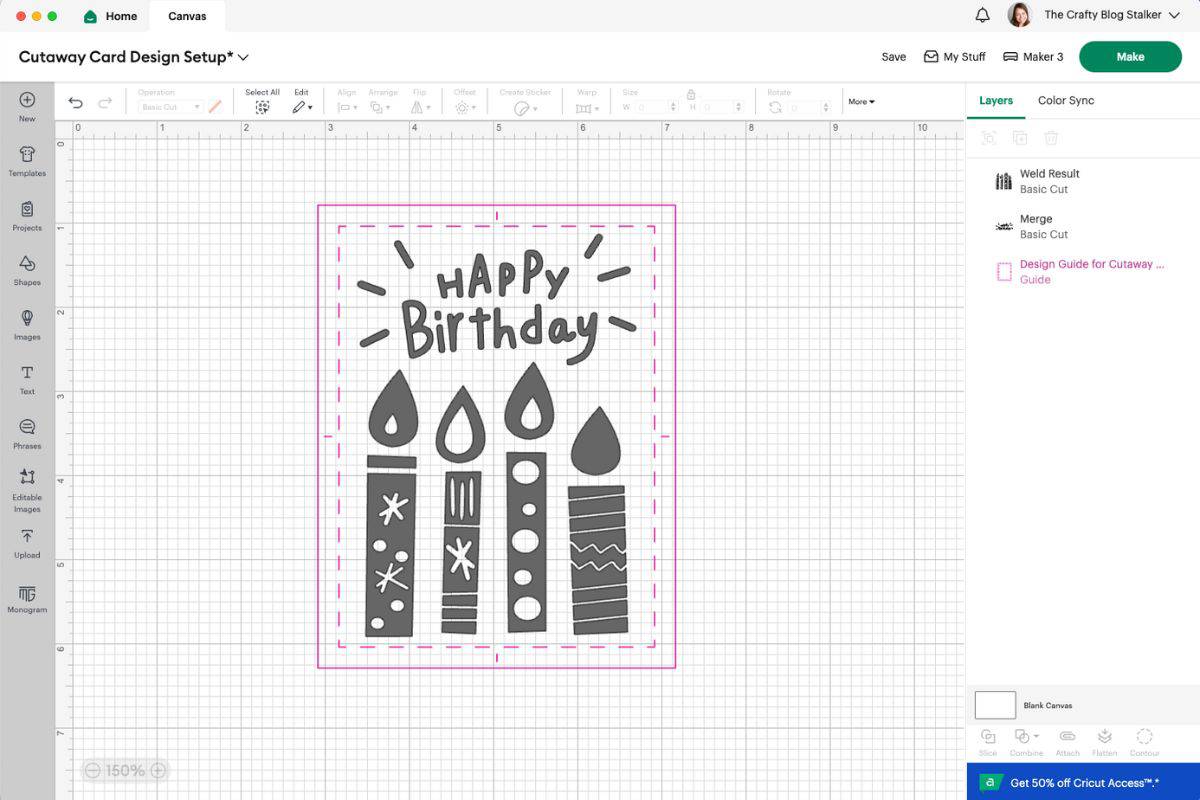
Now you can design your card within those guidelines.
Press the image of the hot air balloon to search Cricut Design Space Images and add them to the canvas.
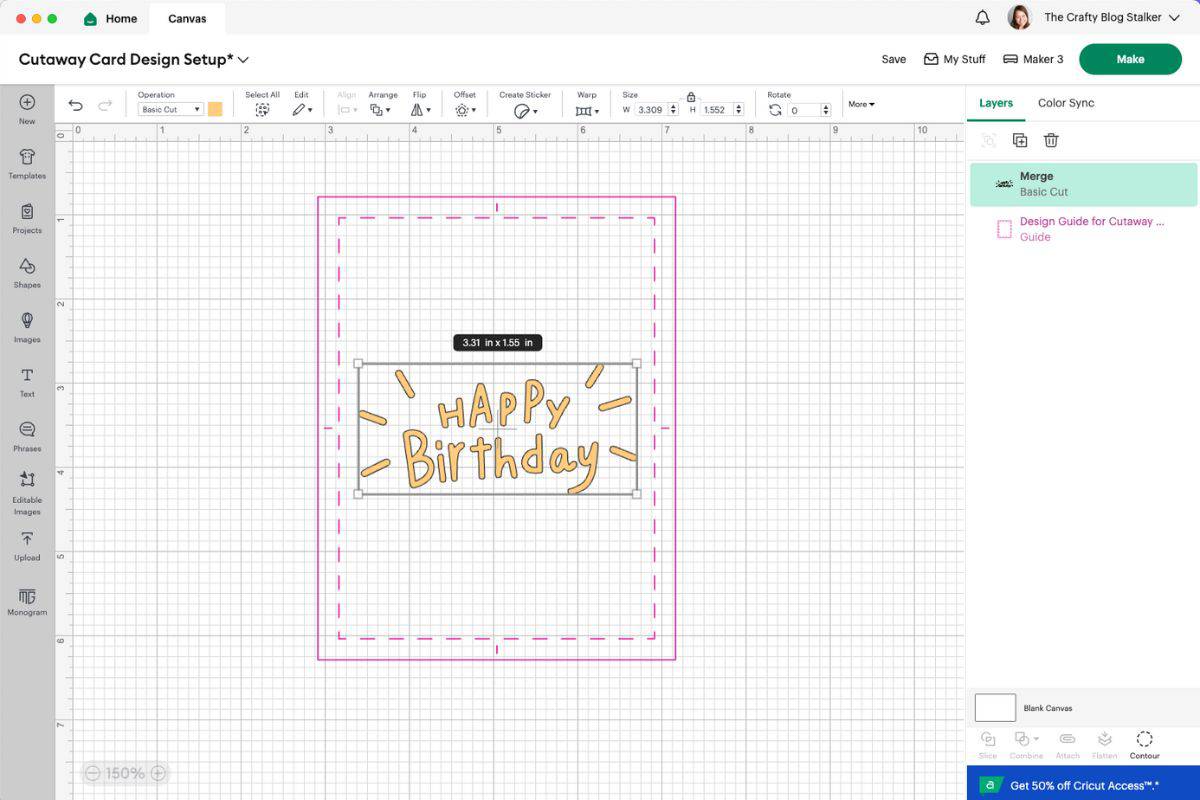
Move the design where you want it on the card. You can also resize it by selecting the corner of the image and dragging it.
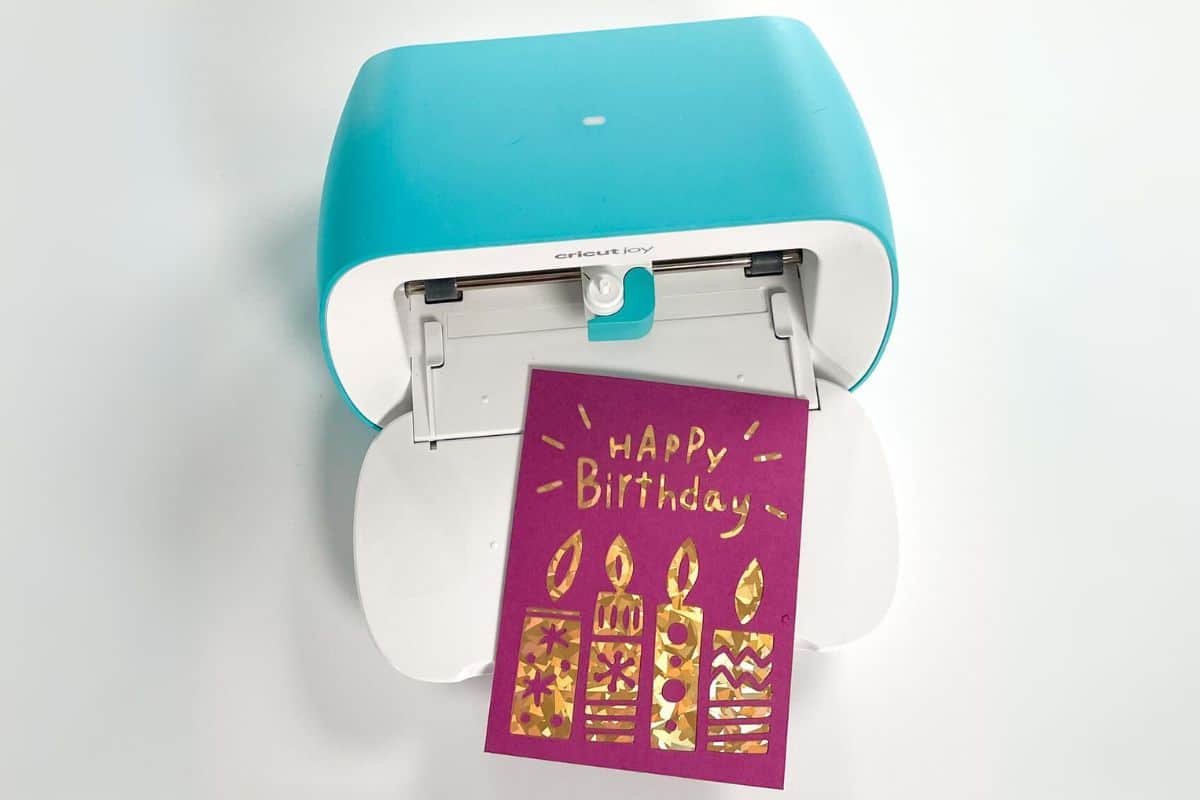
I couldn't find the exact candles I used on the original card, so created my own that were similar.
When you are happy with how your card looks, select Make It and follow the prompts in Cricut Design Space.
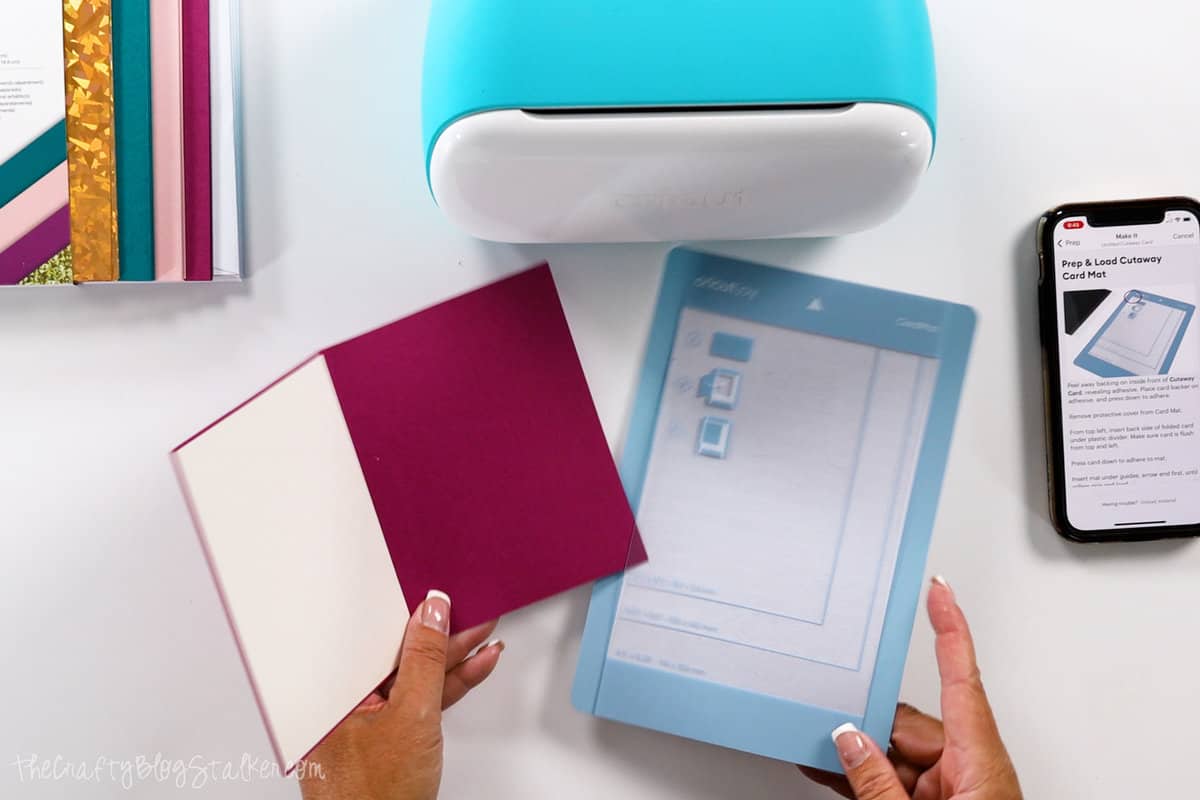
Prepping the Card:
Open the card blank and peel back the adhesive backing sheet.

The insert card will lay onto that adhesive with the design facing the adhesive and the white side out.
I find it easiest to lay the Cricut insert card on its side next to the crease in the card. Then roll it down onto the adhesive.
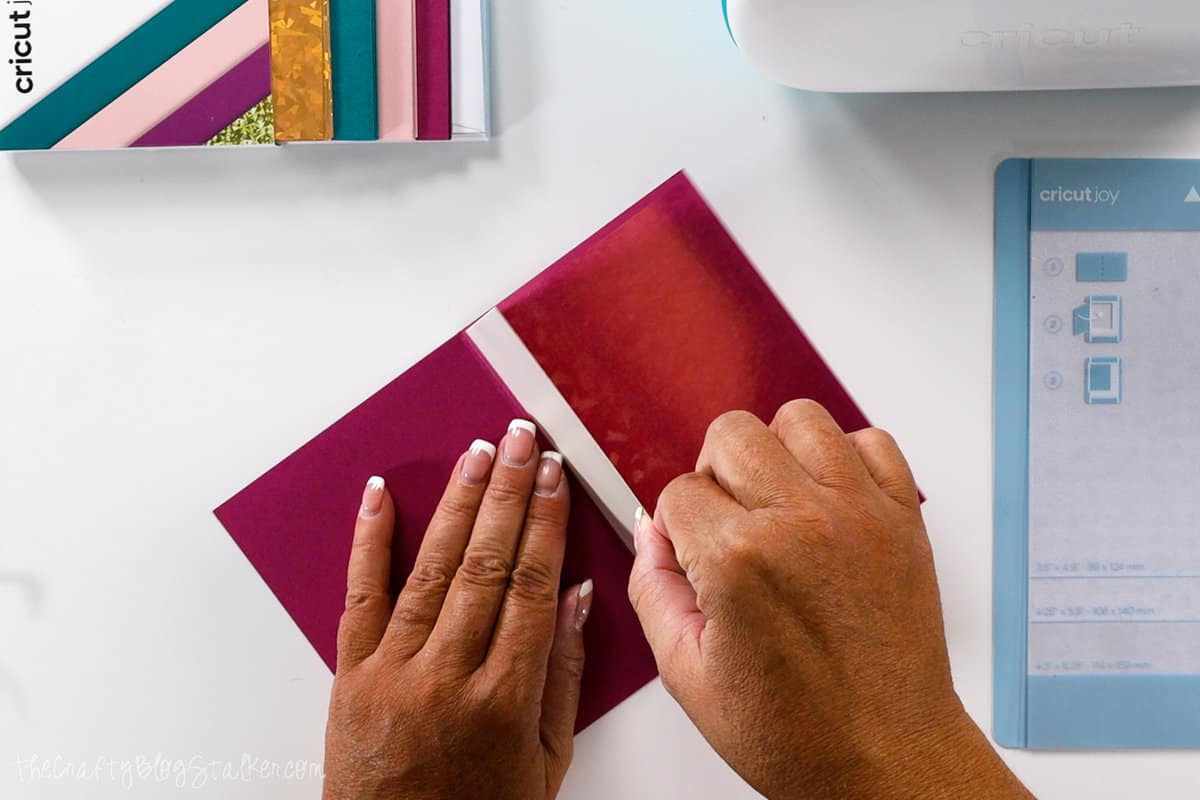
Rub over the insert with your fingers to make sure it is secure in the adhesive.
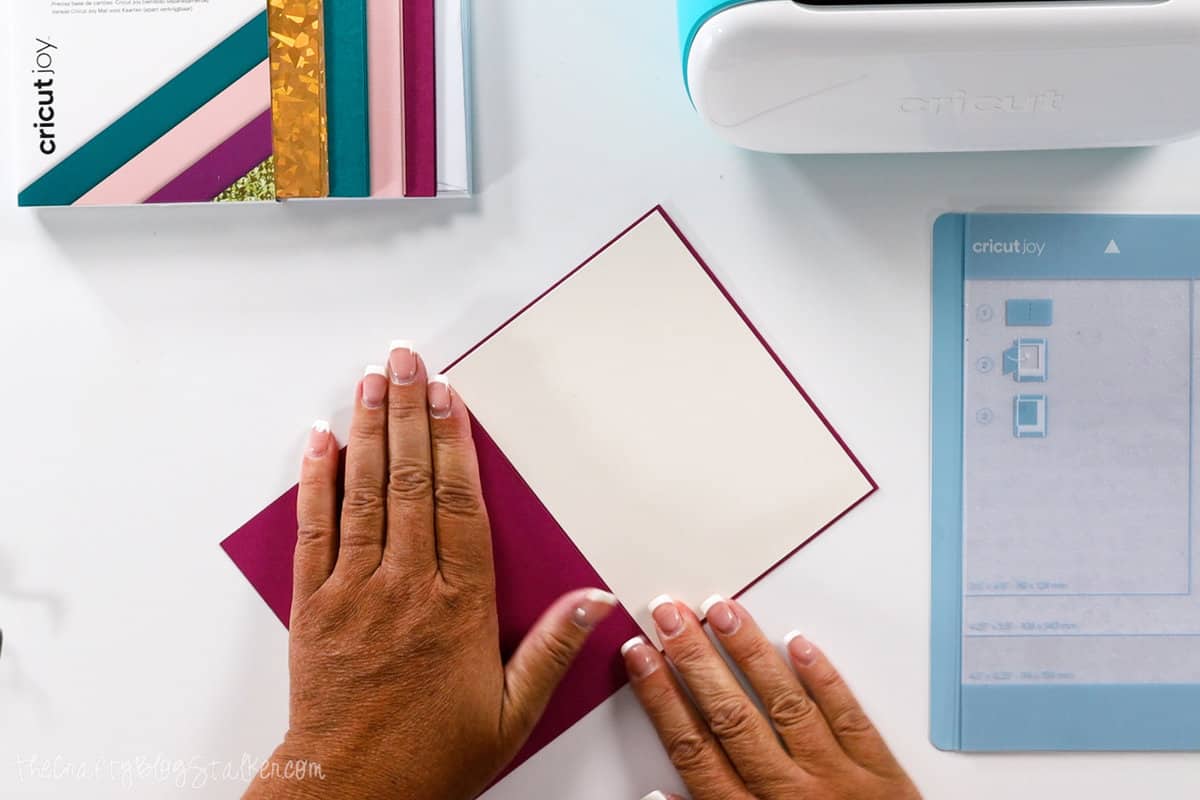
With the card open, slide the bottom right of the card into the card mat up to the fold in the card. Then shut the card on top of the mat.
Cut the Card:
Load the mat into the Cricut Joy.
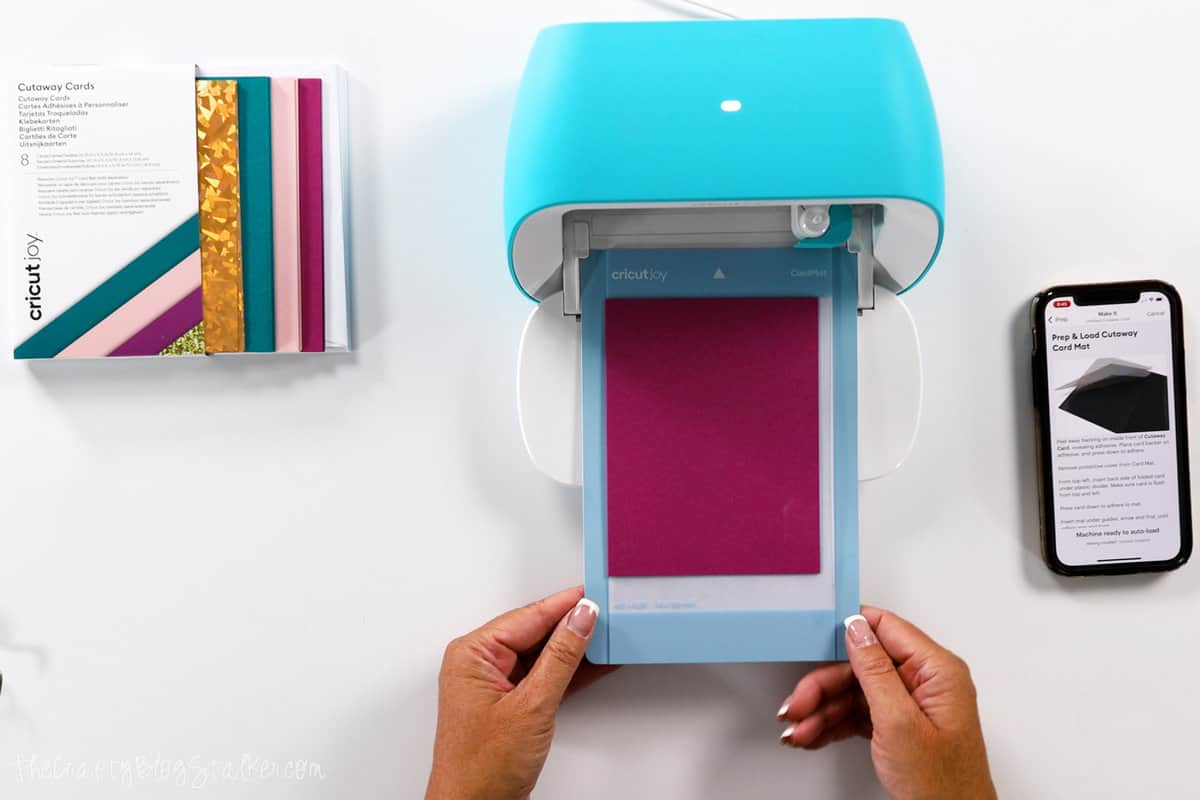
Tap Go in Cricut Design Space to begin cutting.
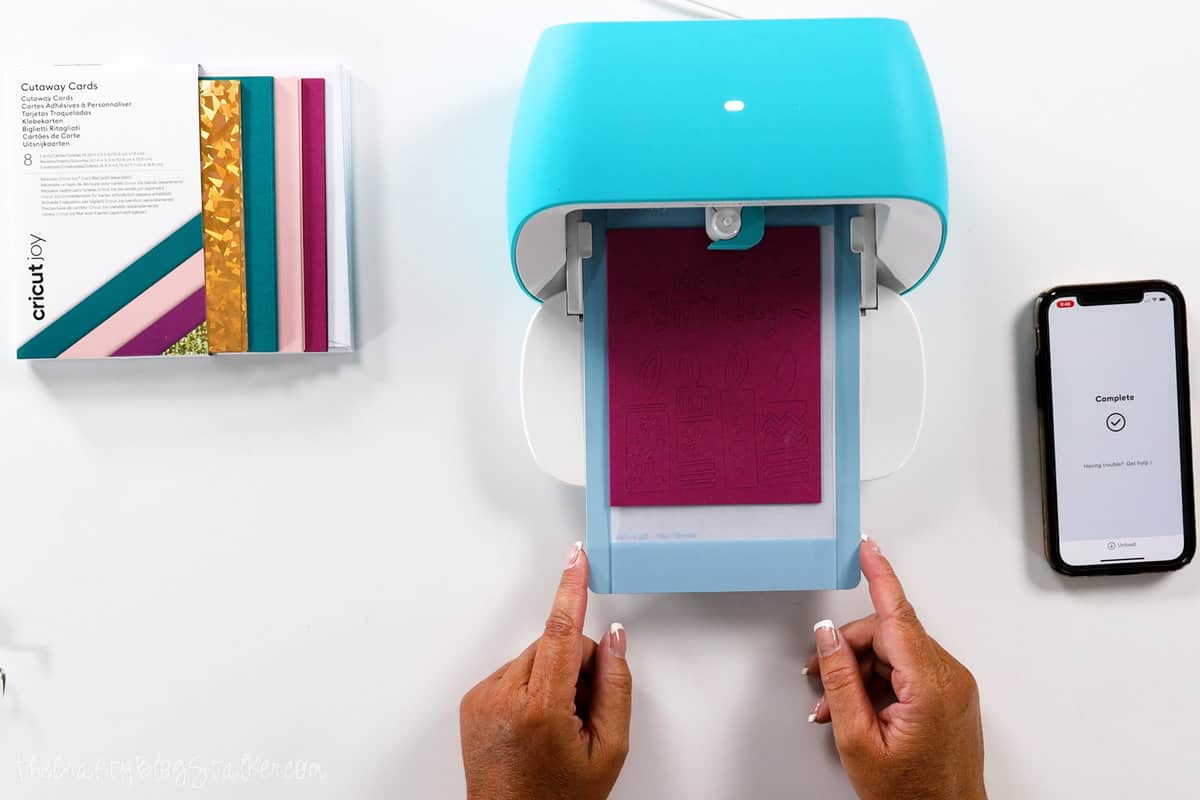
When finished, select "Unload" on the app to remove the mat from the machine.
Carefully remove the card from the mat.
Weed:
Using a weeding tool carefully remove the cut cardstock pieces from the card. As you do, you will reveal the insert card underneath.
Be careful with the weeding tool as you can scratch the insert card, so weed with a light hand.
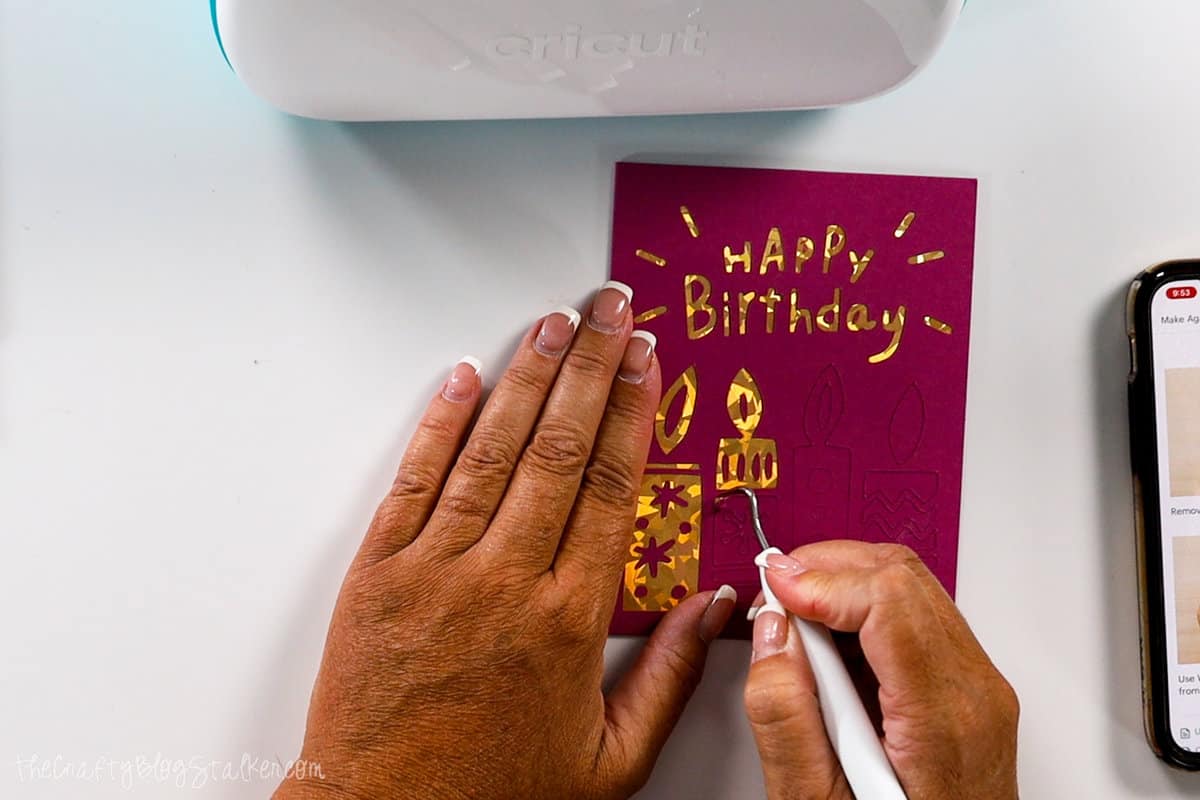
When you are done, you have a one-of-a-kind Happy Birthday card that you designed! Perfect for anyone that you love.

Crafting Essentials
- The Cricut Cutting Machine is easily my favorite crafting tool. We use it in so many of our tutorials!
- These MakerX Crafting Tools are perfect for keeping in the craft room and are always ready when needed!
- This Fiskars Paper Trimmer is easy to use and cuts nicely without frayed edges.
- These Scotch Precision Scissors cut like a dream, and you get multiple pairs in a pack!
Madeline Griggs
Can these cards be done on Cricut Maker machine? Thank you, I really like the cards.
Katie Adams
Yes you can! Although you will need the larger card mat. https://cricut.pxf.io/GKkoNB