This post may contain affiliate links. For more information, please see our disclosure policy.
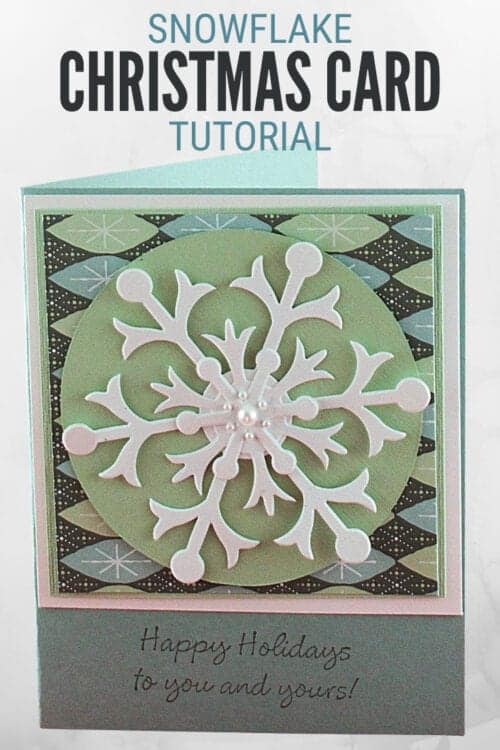
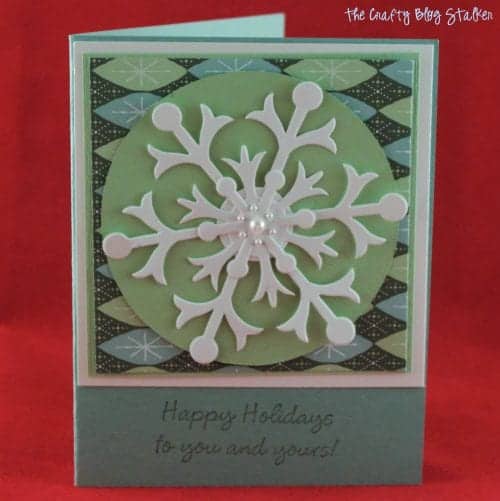
A simple handmade Christmas card idea to give to friends and family this holiday season. The step by step Snowflake Christmas Card Tutorial is below!
Do you like to make handmade Christmas cards to send to friends and family? I usually end up making about 40 cards. It takes a bit of time but is totally worth it.
My snowflake cards look fancy with all of the layers and pearls, but it is actually very easy to do.
Handmade Christmas Card Ideas:
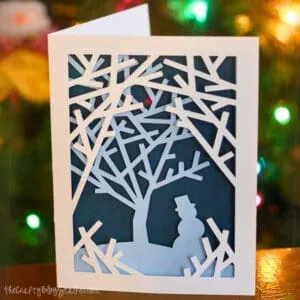
Since we have been blogging for nearly 10 years, we have shared a lot of Christmas Card tutorials. Like this Into the Woods Christmas Card, this Merry Christmas Card, and another Handmade Snowflake Card.
Supplies You'll Need to Create this Project:
This post contains affiliate links.
- Big Shot
- Snowflake Sizzix Die
- Cardstock
- Pattern Paper
- Pearl Embellishments
- Adhesive
- Christmas Sentiment Stamp
How to Make a Layered Snowflake Christmas Card:
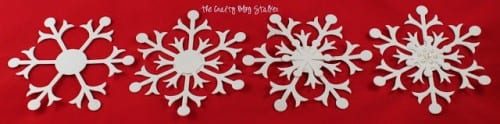
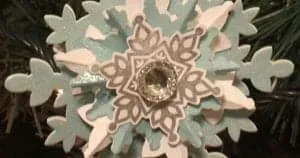
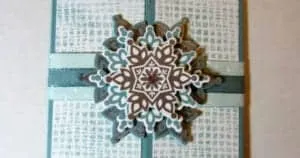
Start with the Sizzix Snowflake Die. This die cuts different sizes of snowflakes. Layer 3 of the snowflakes and add self-adhesive pearls to the center.
For the card, cut the following layers.
- 5" x 8.5" card base in a coordinating color to the pattern paper
- 4 ⅛" square out of white
- 3 5/16" square in a different coordinating color to the pattern paper
- 3 ¾" square out of the pattern paper
- 3 ½" circle out of coordinating solid color cardstock.
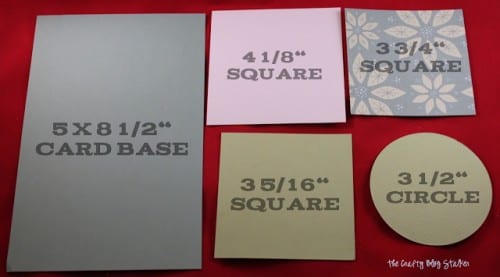
Layer all of the pieces together.

Place the layered snowflake square at the top of the card base and stamp a Christmas sentiment stamp centered at the bottom of the card.
When you make these Snowflake Christmas Cards please share a photo! I'd love to see them.
Our Crafting Essentials:
- The Cricut Cutting Machine is easily our favorite crafting tool. We use it in so many of our tutorials!
- These MakerX Crafting Tools are perfect for keeping in the craft room and are always ready when needed!
- This Fiskars Paper Trimmer is easy to use and cuts nicely without frayed edges.
- These Scotch Precision Scissors cut like a dream, and you get multiple pairs in a pack!
Recommended Posts


Katie Adams
Creator at The Crafty Blog Stalker
- DIY Watercolor Thank You Cards
- Make Cutaway Cards in Cricut Design Space
- 29 Step-by-Step Paper Envelope Tutorials
- 19 Christmas Printable Activities
- How to Make and Play the Christmas Saran Wrap Ball Game
- Printable Christmas Dice Gift Swap Game
- 28 Fun Christmas Party Games for Work or Family Gatherings
- Easy Ham Glaze Recipe with Brown Sugar, Mustard, and Pineapple Juice
- 20 Easy to Make DIY Birthday Cards
- Return Address Labels with Cricut
- How to Make a DIY Gift Card Box
- Handmade Thank You Card with Washi Tape
Carol, The Answer Is Chocolate
I love your cards ( and know exactly how you feel...I need to finish mine up). Talking tags?! Shut the front door!
allisamazing
I love this!
Julie Moore
Gorgeous! Thank you for sharing this with The 12 Days of Christmas {Goodies} link-up! 🙂