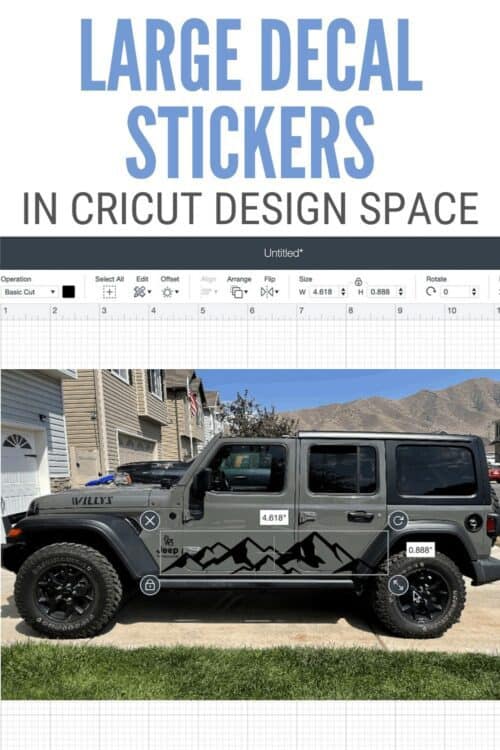
Give your car some personality and style with a large decal sticker! Below is the step-by-step tutorial using Cricut Design Space.
Do you name your vehicles? I never did before, but my latest vehicle does have a name.
Her name is Ava which is short for Avalanche, and this is where you have to get the deep, raspy movie announcer voice, "because she brings the rocks down around her!"
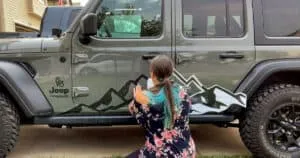
Because she is a rough and tough jeep I wanted to give her a fun decal that would match her name, and what could be better than a rocky mountain's edge.
Craft Tutorial Video:
Like videos? I have a video tutorial for you! Please subscribe to my YouTube Channel so you don't miss out on any future video tutorials!
In this tutorial, we are going to go over designing and cutting the large decal. The application tutorial can be found here, How to Apply Large Vehicle Decals.
There is also a video tutorial below if that is more of your learning style.
More Cricut Tutorials:
I love my Cricut cutting machines, and that means I have lots of Cricut tutorials that I want to share with you. Like this Funny Music Tote Bag, these Cricut Font Combinations, and this Napping Blanket.
Be sure to look around the blog for more fun craft tutorials!
Supplies You'll Need to Create this Project:
This post contains affiliate links.
- Cricut Cutting Machine
- Cricut Design Space
- Balck Smart Permantent Vinyl
- Weeding Tool
- Scraper Tool
- Transfer Tape
- Cricut Roll Holder (optional)
Cricut Design Space:
The first thing to do is find the perfect image.
I knew I wanted a mountain range, but feel free to select a design that fits your personality better.
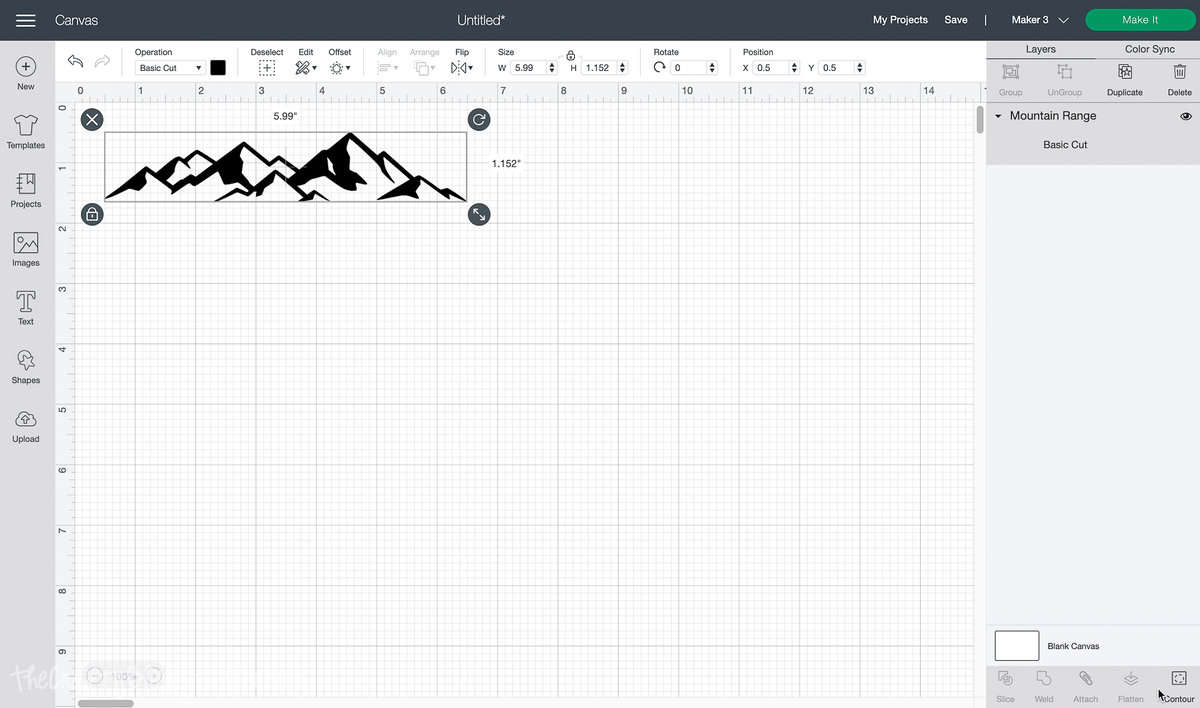
The easiest way to get a preview of what your vehicle will look like is to have an image in Cricut Design Space of your vehicle.
Open a square, and unlock the dimension. Stretch the square so you have more of a rectangle or photo shape.
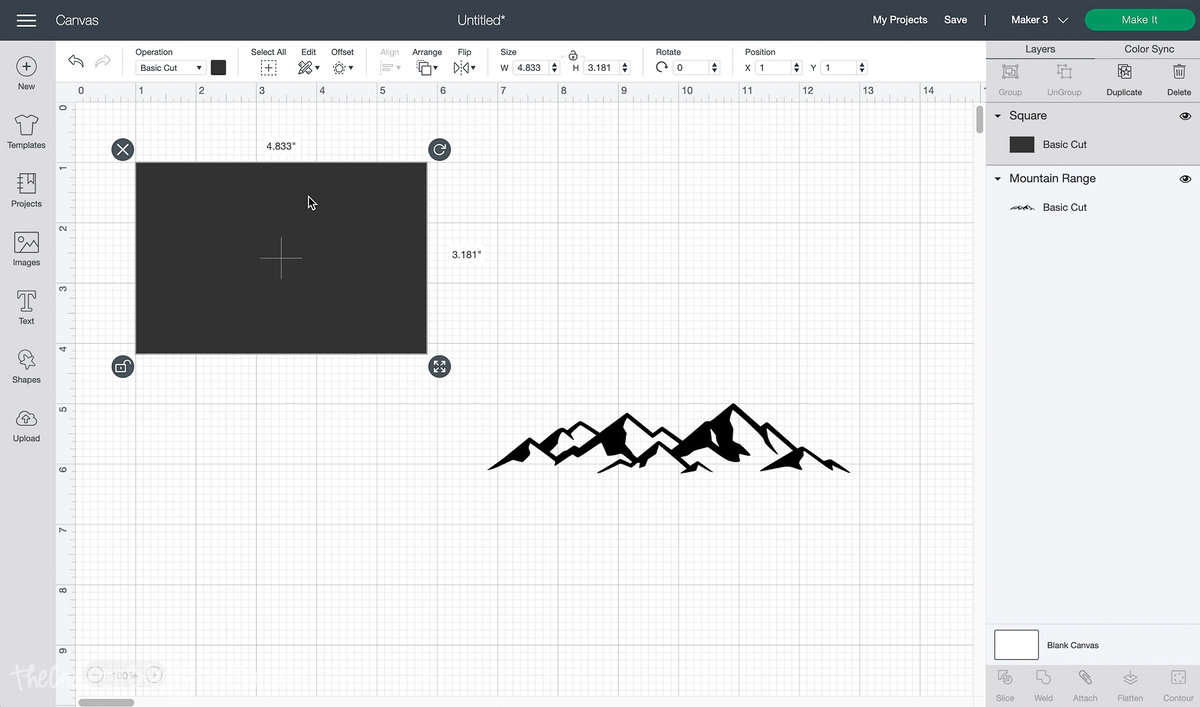
Select upload, and then upload pattern. Drag the photo of your car into the pattern box.
Highlight the rectangle, and go to the Operation drop-down menu, and select Print Then Cut.
Then select the color choice for the box and change the print type to a pattern.
Scroll down a bit and you will see the image of your vehicle.
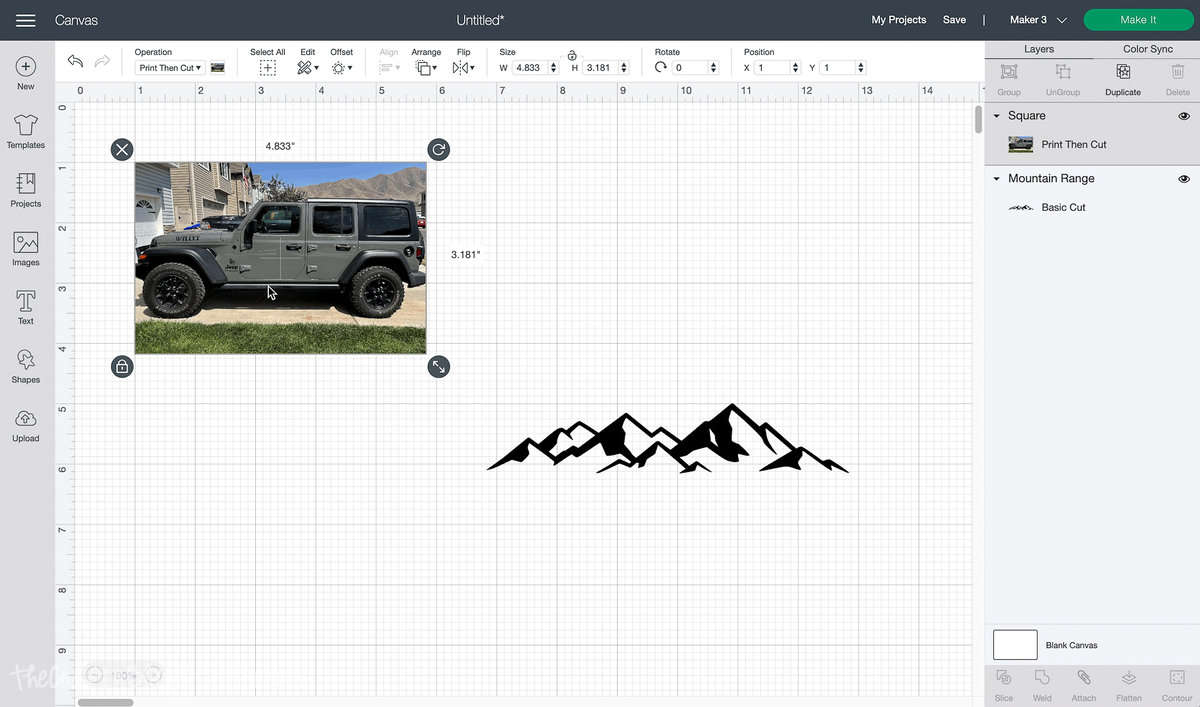
If you need, you can edit the pattern to make the image fill the rectangle better.
Now you can play around with the design on the vehicle and get the perfect placement.
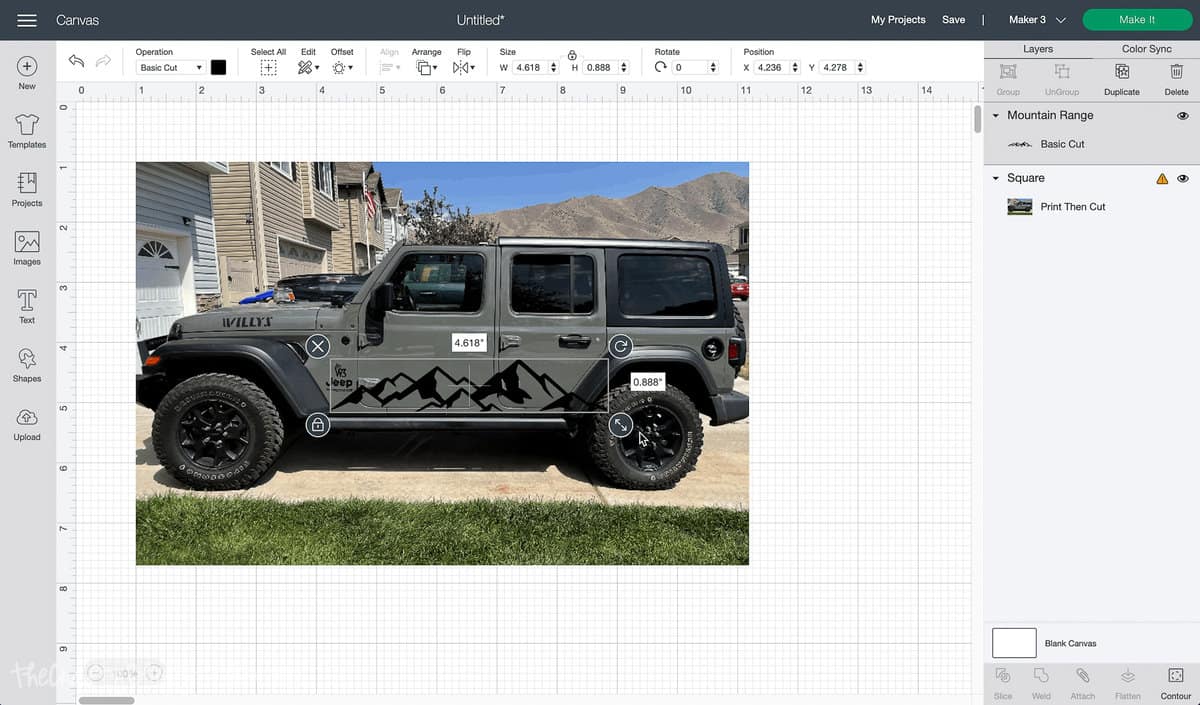
My Jeep has large hinges where the doors hand, and I don't want to have to deal with wrapping vinyl around those decals. For me, I need the image to go around those hinges.
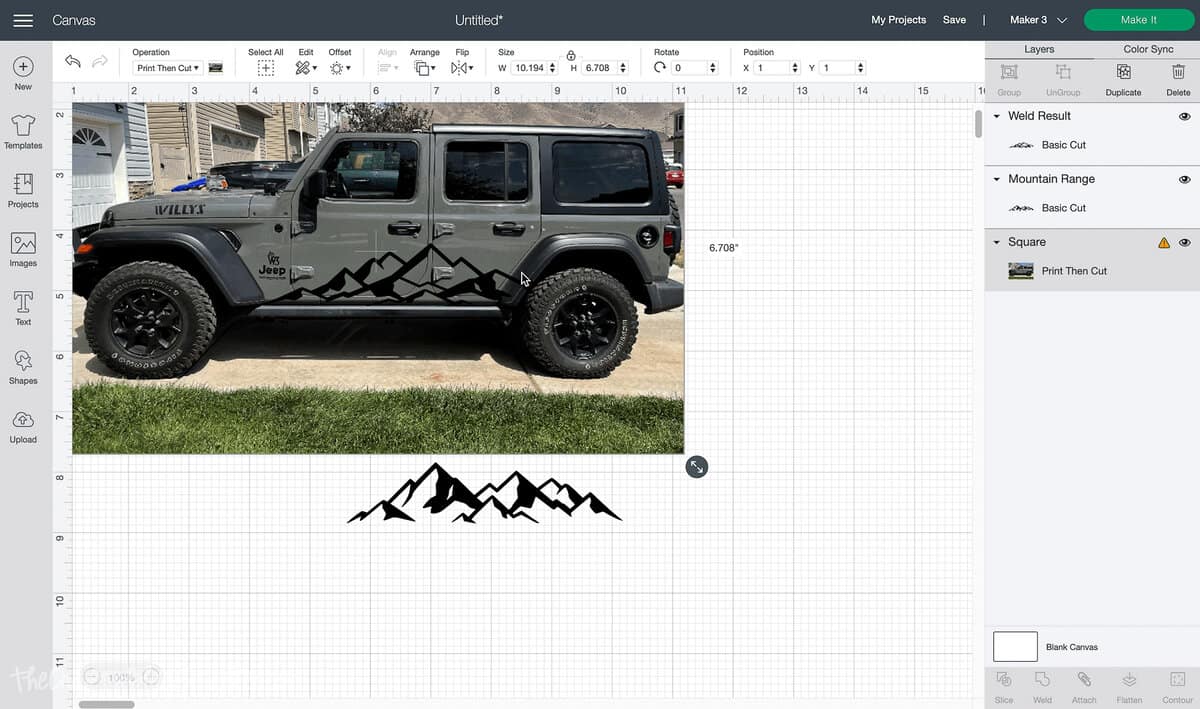
Using the slice and weld feature I was able to create more of a custom mountain range that worked great.
If you want more info on how I did that, watch the tutorial below.
Measure Your Vehicle:
Once you have a good placement, go to your vehicle and measure where that decal will be placed.
Mine was 72 inches.
Then I went back to Cricut Design Space and sized my image to 72 inches long.
Split the Cut:
Making my design 72 inches long, also makes it about 16 ½ inches wide. BUT the max the Cricut Maker 3 can cut with Smart Materials is 11.75.
That means we need to split the design so we can cut the design into two strips.
Create a rectangle that is 72 inches by 11.75 inches and a second rectangle that is 72 inches by 6 inches.
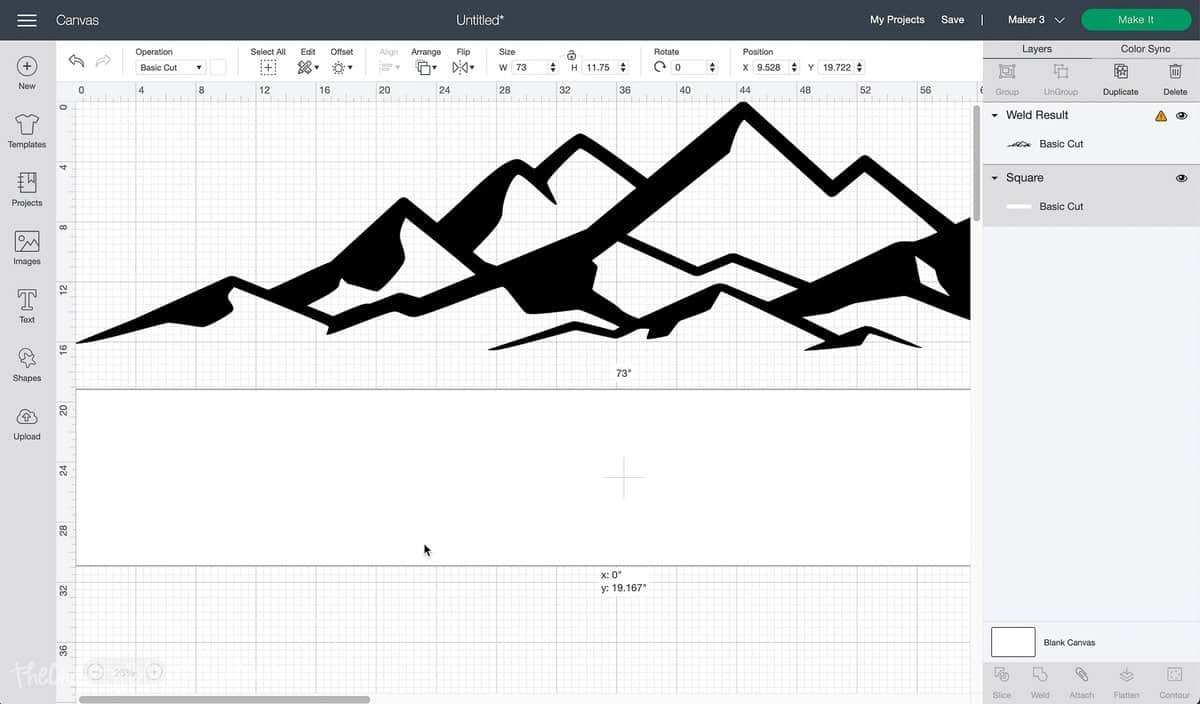
Align the largest rectangle with the bottom of the mountain range, and the thinner rectangle aligns with the top.
This will overlap the rectangles about an inch and that is what we want.
Add the shape of a star to the design and size it to about .75 inches. Place one on each side of the mountain in the section that overlaps.
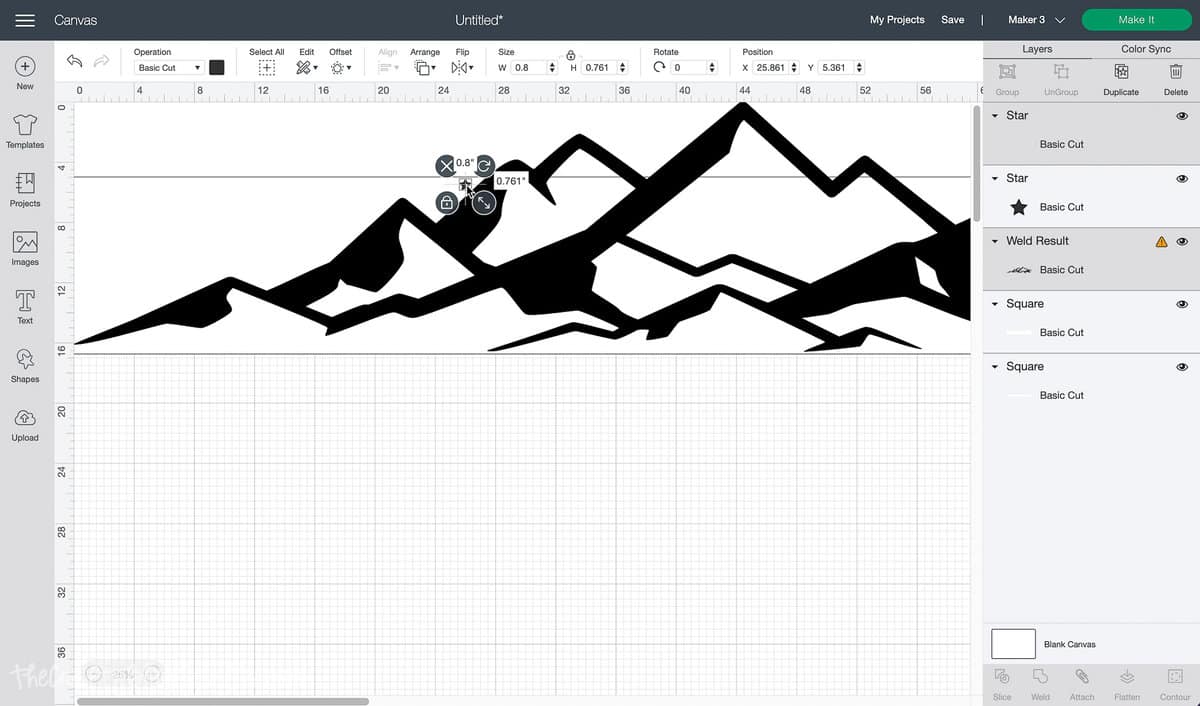
Hide the two rectangles, highlight the mountain and the two stars, and select weld. This will make the stars part of the design.
Next, copy the design so there are now two. Select both designs and center align to get them perfectly stacked.
Unhide, the two rectangles and make sure the mountain designs are centered over the top.
Highlight one layer of mountains and one rectangle and select Slice. This will gill you 3 cutouts, only keep the cutout with the stars. You can delete the other two.
Repeat, and highlight the other mountain and rectangle. Select Slice, and gain remove the pieces that don't have stars.
Now to you have two cuttable strips of the design that we can line up after cutting.
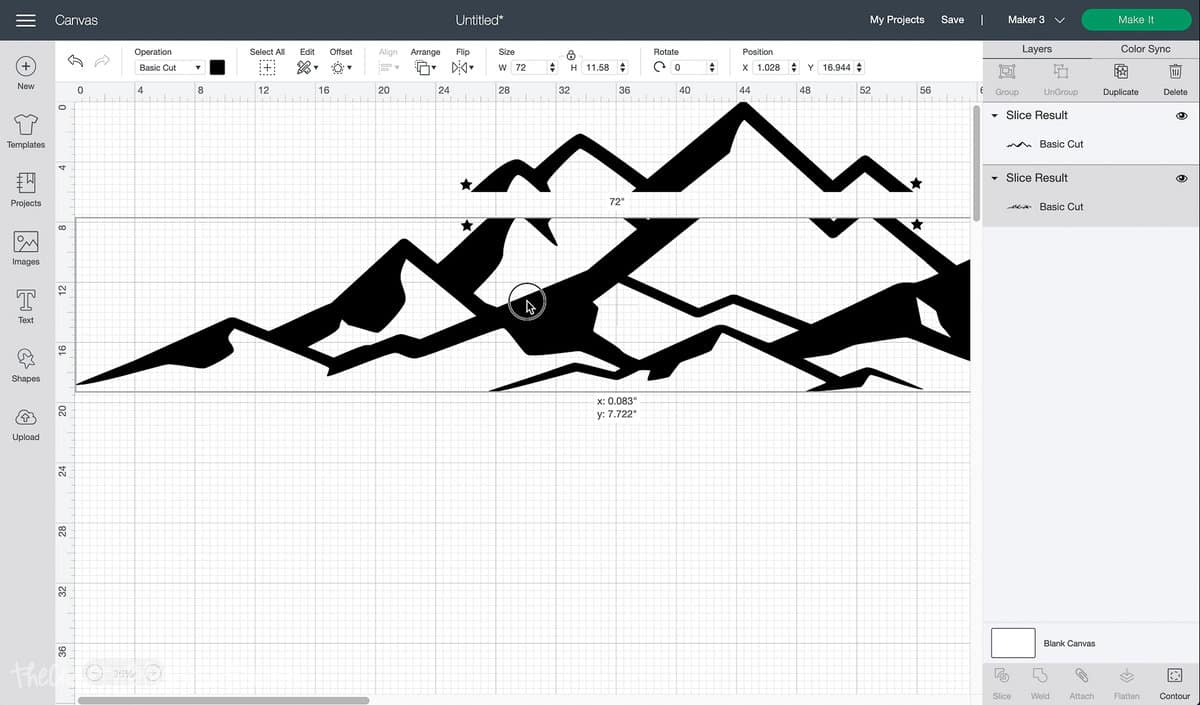
Don't forget the other side of your vehicle too. If you want them to have matching sides, just copy and paste the design and mirror flip one of the sets.
Now we'll I have a mountain range on each side of my Jeep.
Cutting the Large Decal:
Select Make It and cut your design using permanent vinyl.
The Roll holder is helpful since we are working with long strips of vinyl but is totally optional.
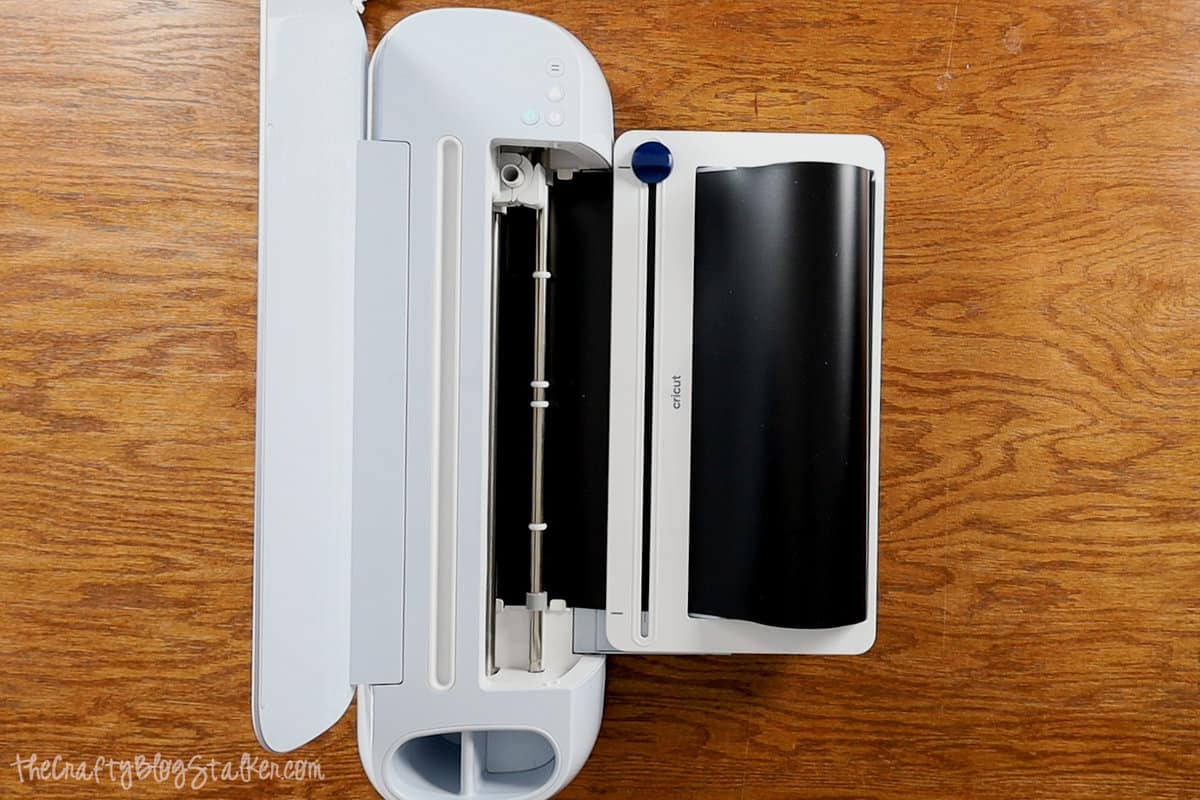
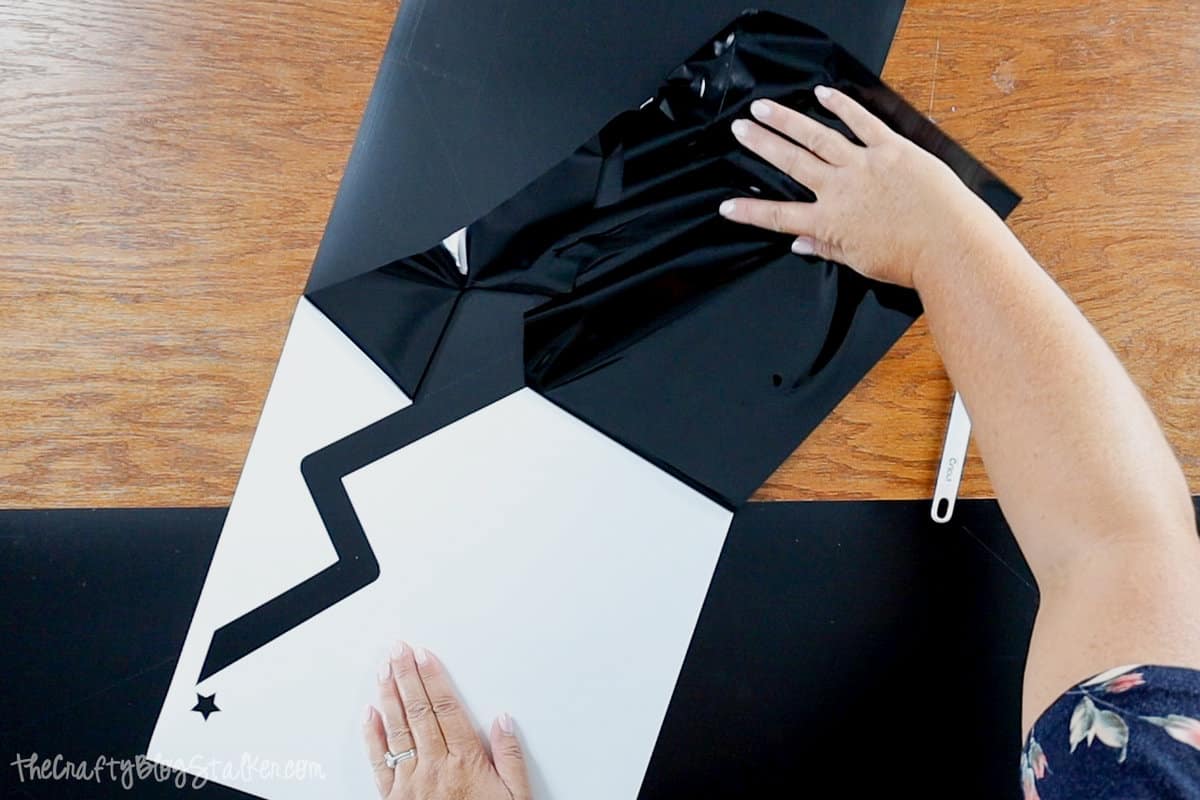
Once cut, weed the vinyl.
Applying Transfer Tape:
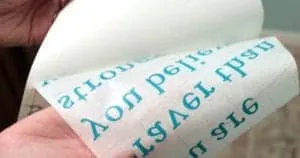
We are also going to apply the transfer tape in strips.
Start with the top of the mountain range because it is smaller. It is good practice before we do the same method on the larger piece.
Apply the transfer tape using the hinge method:
- Align the tops of the weeded design and transfer tape on top.
- Place tape down the center of the design on top of the transfer tape.
- Peel the transfer tape from the backing sheet to the center hinge.
- Cut off the paper backing to the hinge.
- Lay the transfer tape down from the hinge out, pressing along the way.
- Remove the tape that was creating the hinge.
- Remove backing tape from the rest of the transfer tape
- Lay the transfer tape down from the inside out, pressing along the way.
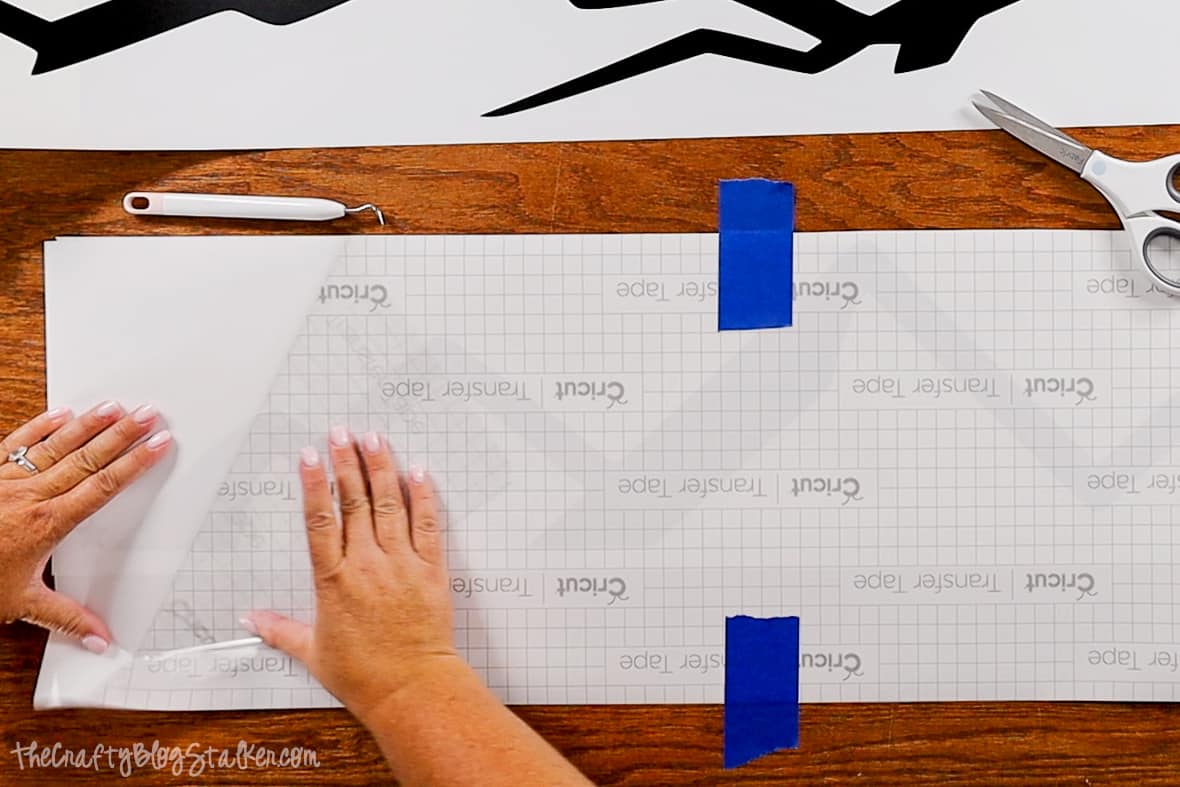
Make sure to leave the backing paper from the vinyl, we are only removing the backing paper from the transfer tape.
Align the Strips:
On the shorter strip, fold the backing paper up about 1 ½ inches and then trim off.
Layer the stars on top of each other making sure to line them up perfectly. This will line up the rest of the design.
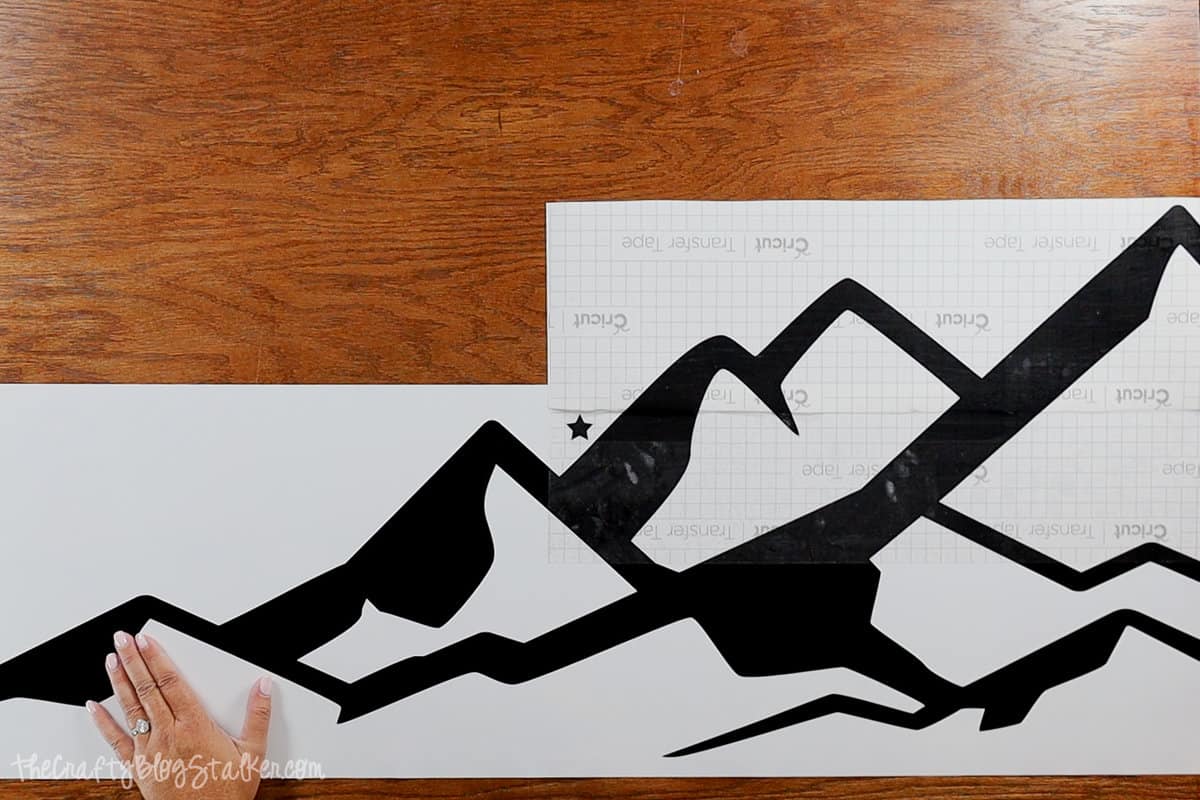
Next, apply transfer tape to the rest of the decal. Use the hinge method again as stated above.
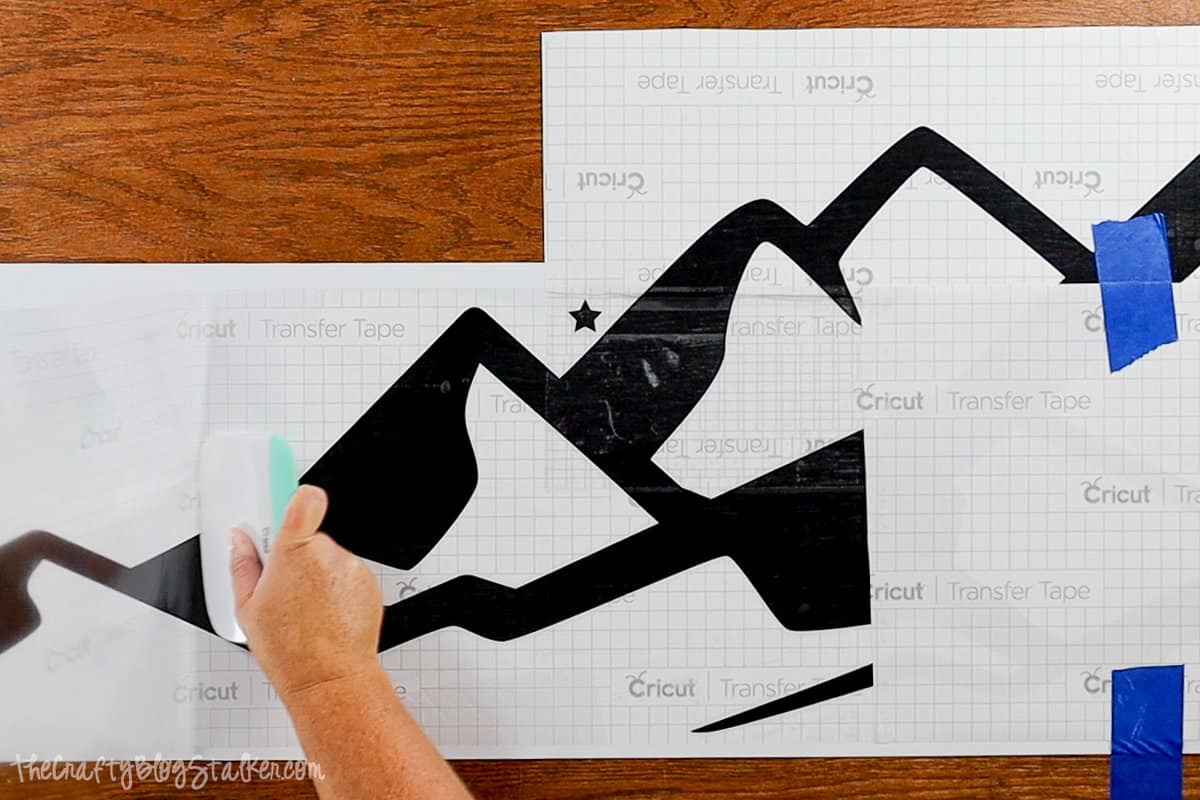
Trim around the mountain decal. At this point, we no longer need the stars so you can cut those off.
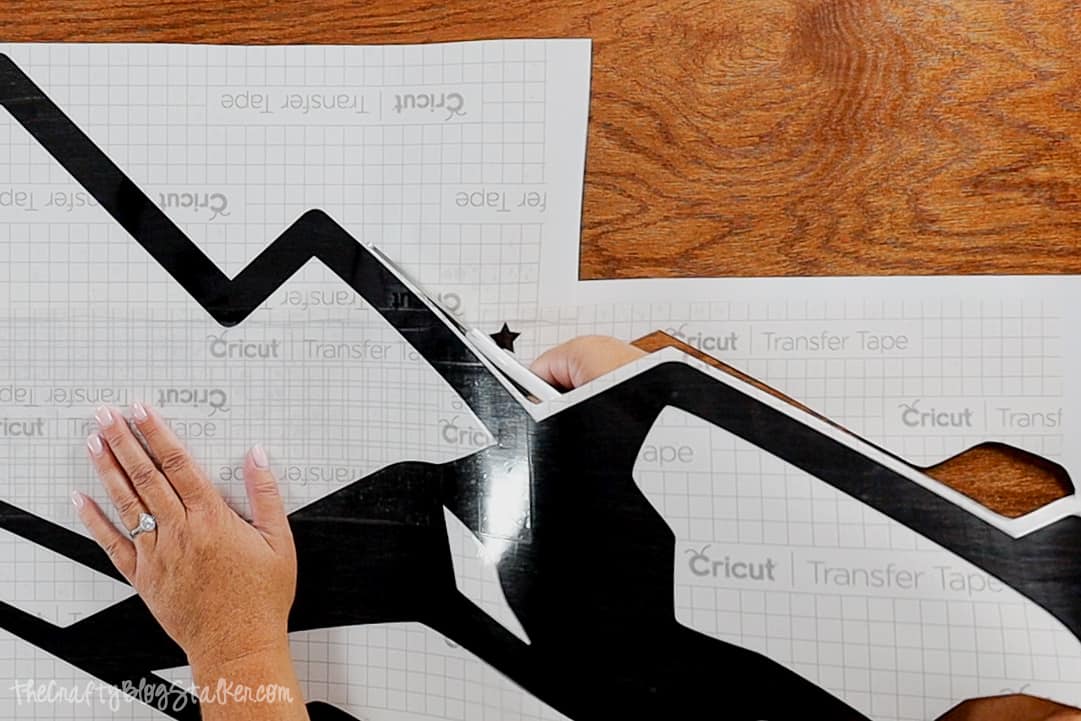
For my Jeep, I needed to trim the inside of one of the mountains to make room for the hinge. But when applying I noticed it made this section a bit more difficult to install.
If you don't need to trim inside the design, leave it as is.
Now our decal is ready to be applied to our vehicle, but that tutorial is in a different post. So if you are ready, move on to How to Apply Large Vehicle Decals.
Our Crafting Essentials:
- The Cricut Cutting Machine is easily our favorite crafting tool. We use it in so many of our tutorials!
- These MakerX Crafting Tools are perfect for keeping in the craft room and are always ready when needed!
- This Fiskars Paper Trimmer is easy to use and cuts nicely without frayed edges.
- These Scotch Precision Scissors cut like a dream, and you get multiple pairs in a pack!





Leave a Reply