

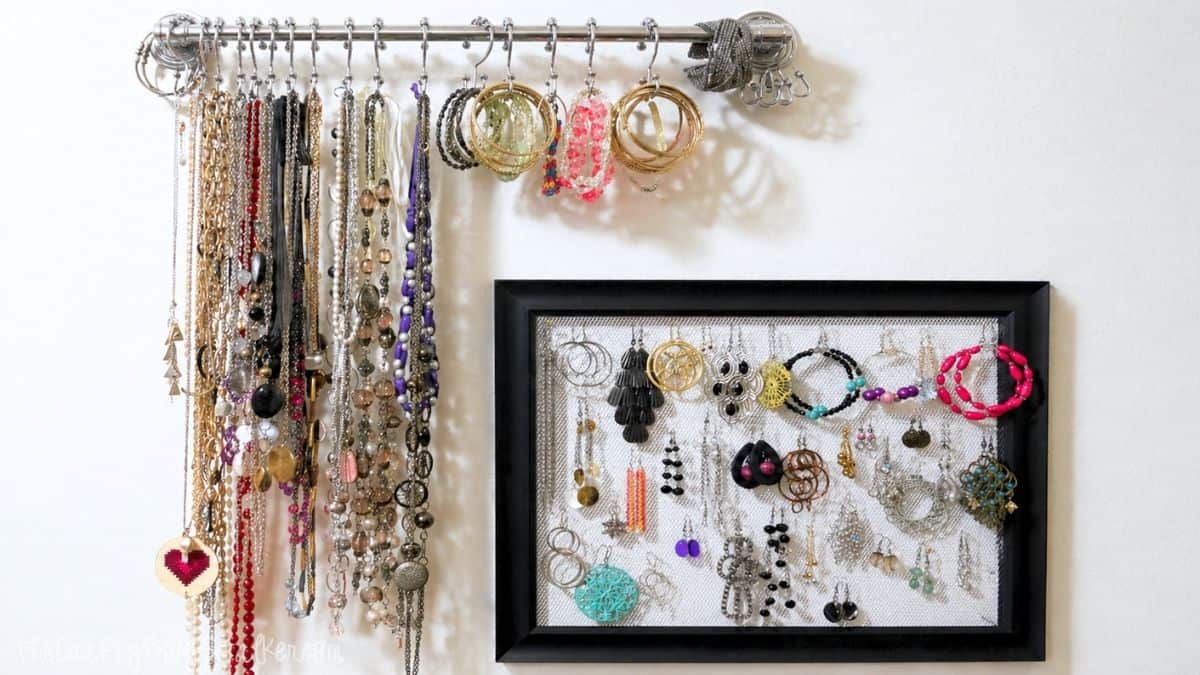
Make a picture frame earring holder to organize your jewelry. This easy DIY turns a simple frame into a pretty, functional way to store earrings.
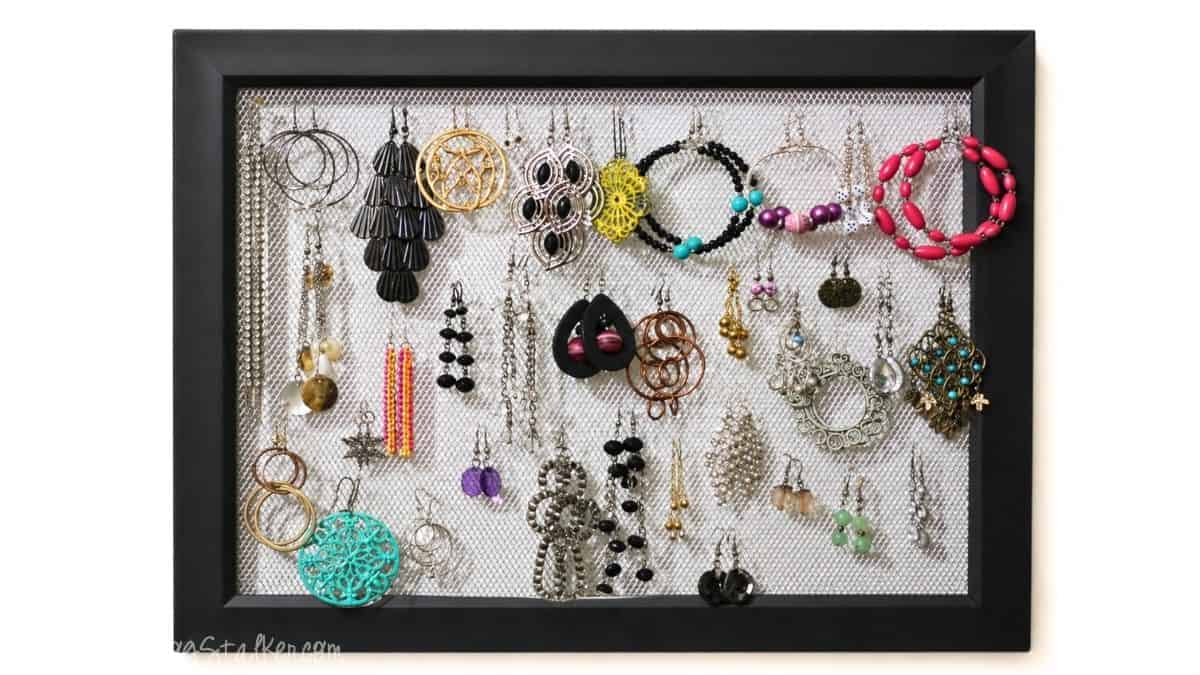
If your earrings are always getting lost in a pile like mine used to, this picture frame earring holder DIY is going to be a game-changer.
I finally made one after getting tired of digging through a pile just to find a matching pair.
Now everything is visible, easy to grab, and actually gets worn with different outfits.
Skill Level: Beginner
Total Time: 30 minutes
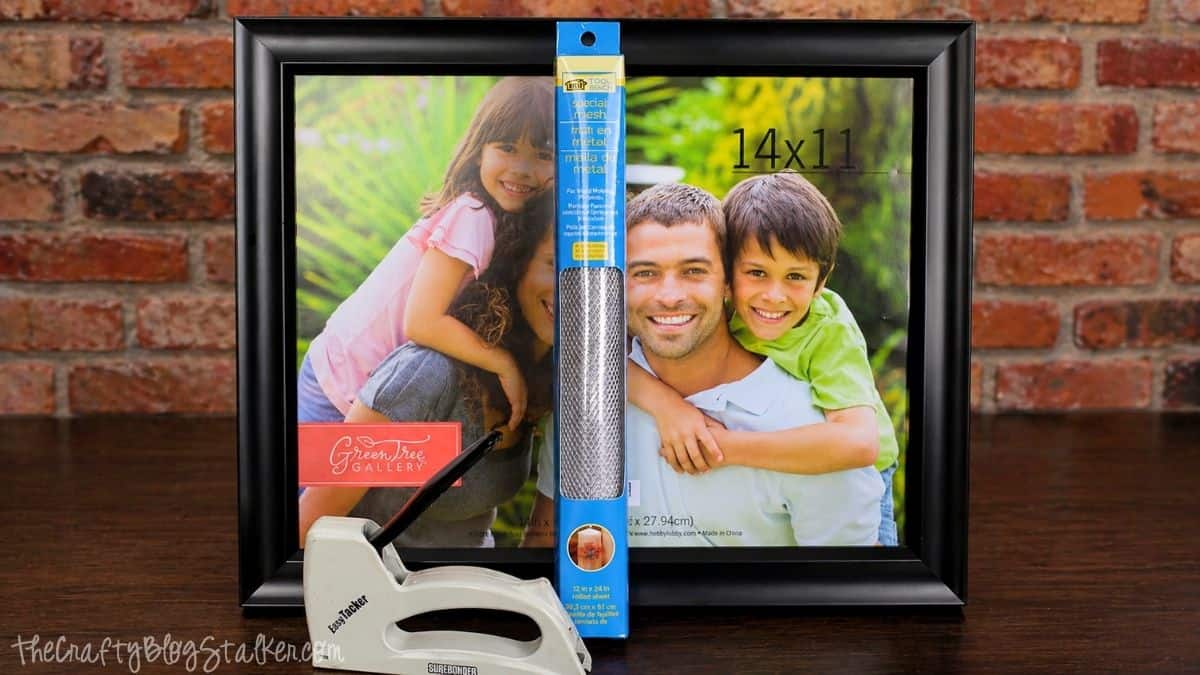
Supply List
The mesh can be sharp, so it's a good idea to wear gloves while working to protect your hands.
Instructions
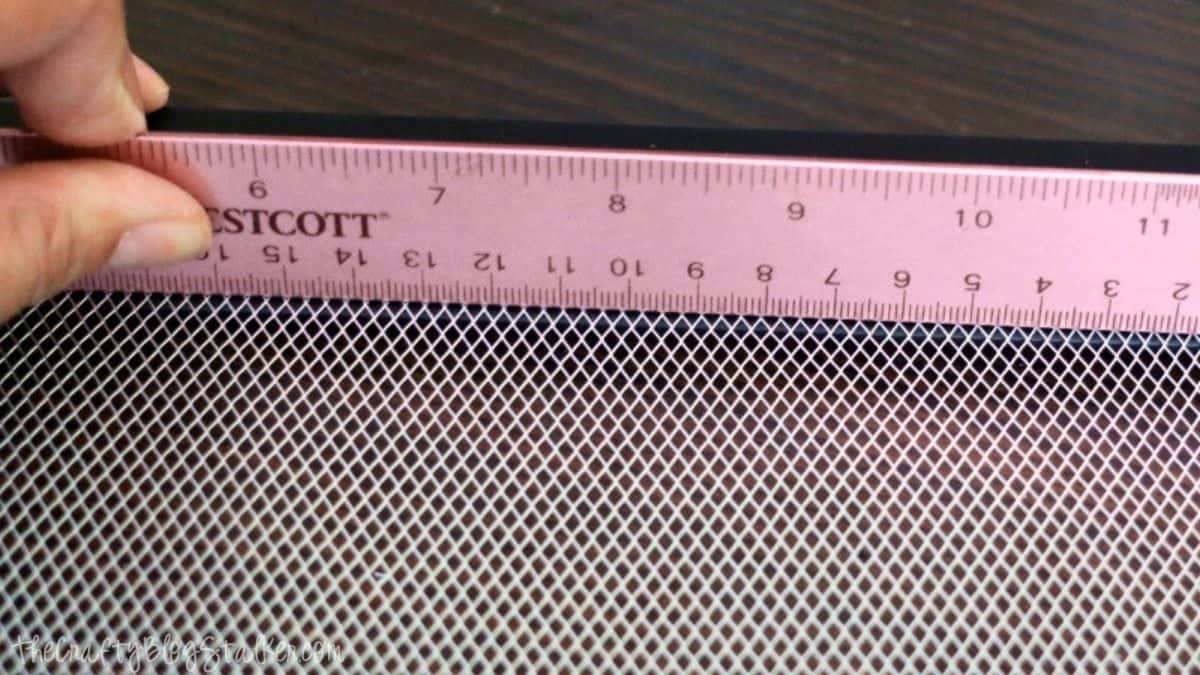
Start by removing the backing and glass from the picture frame so you are only working with the frame itself. Set the insert aside because you will use it as a guide.
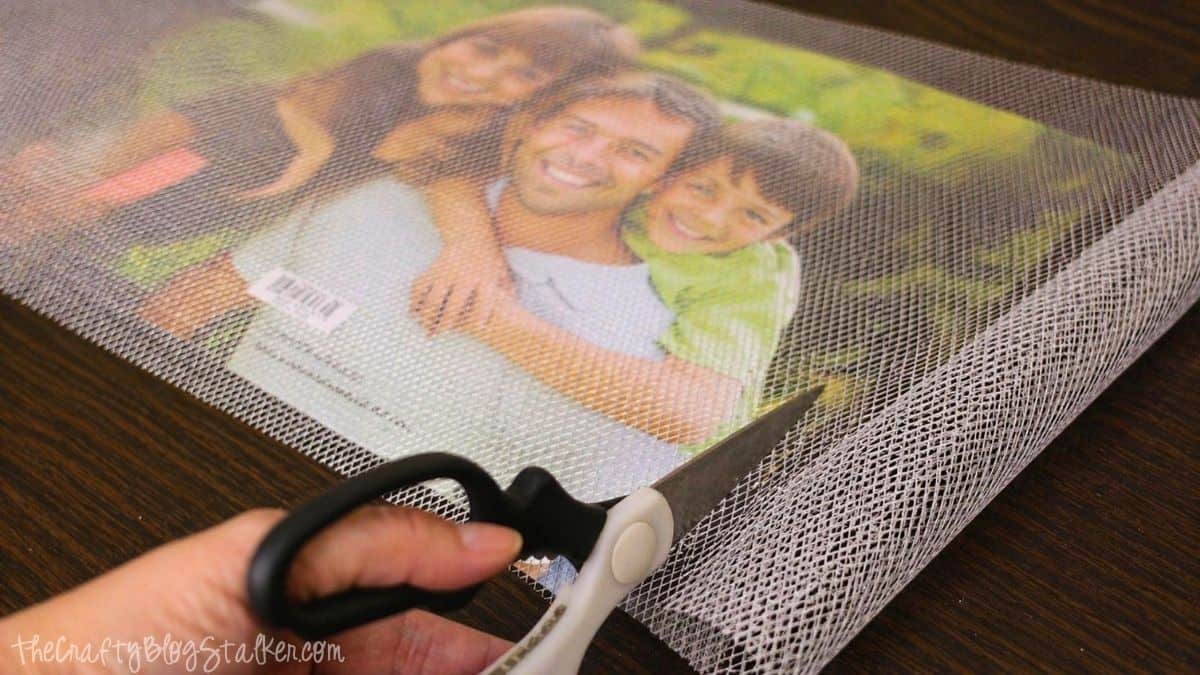
Lay your metal mesh or chicken wire flat and place the paper insert from the frame on top.
Use it to measure the size you need, then cut the mesh slightly larger so it fits snugly inside the frame opening.
The mesh cuts fairly easily, but since it is metal, it is best not to use your favorite scissors.
Once the mesh is cut, place it over the back of the frame.
Begin by folding the top edge slightly so it will sit neatly inside the groove on the back of the frame.
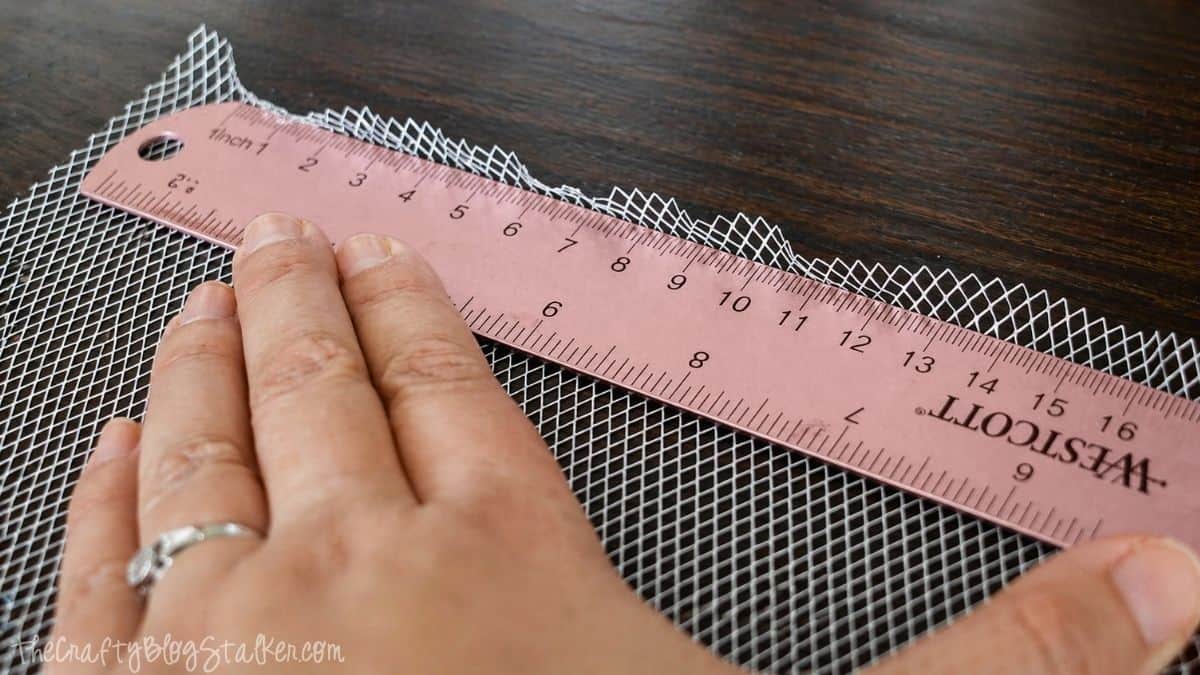
Press it into place using a ruler.
Hold the mesh tight and begin stapling along the top edge on the back of the frame.
Make sure the staples go into the inside edge of the frame and not through to the front. This is important so they don't show when the project is finished.
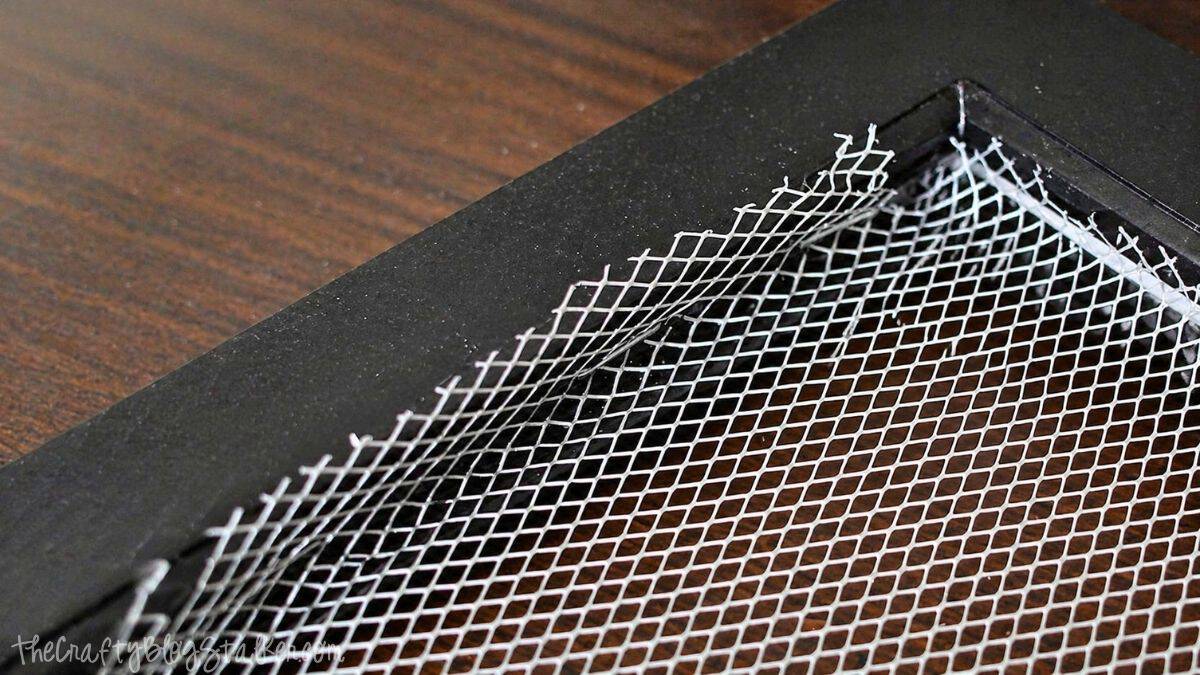
As you move toward the corners, you may notice the mesh bunching.
Trim a small square from each corner so the mesh folds cleanly and lies flat without pulling or puckering.
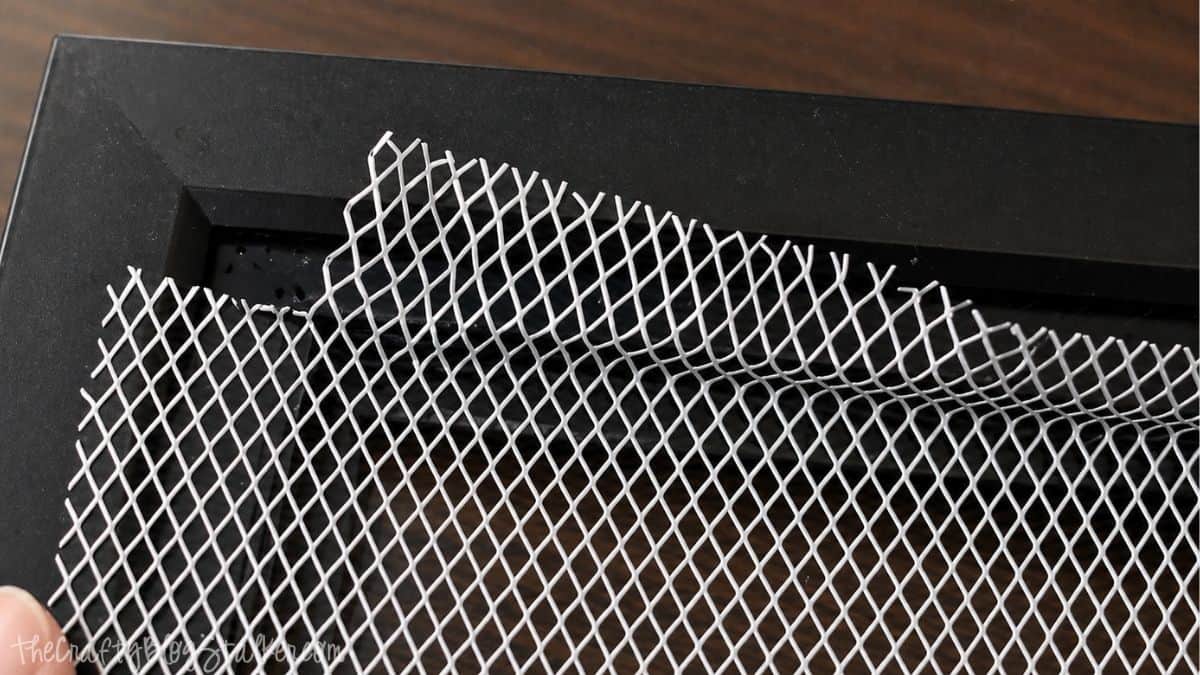
Continue stapling the remaining sides, working your way around the frame.
Keep the mesh pulled tight as you go so it doesn't sag.
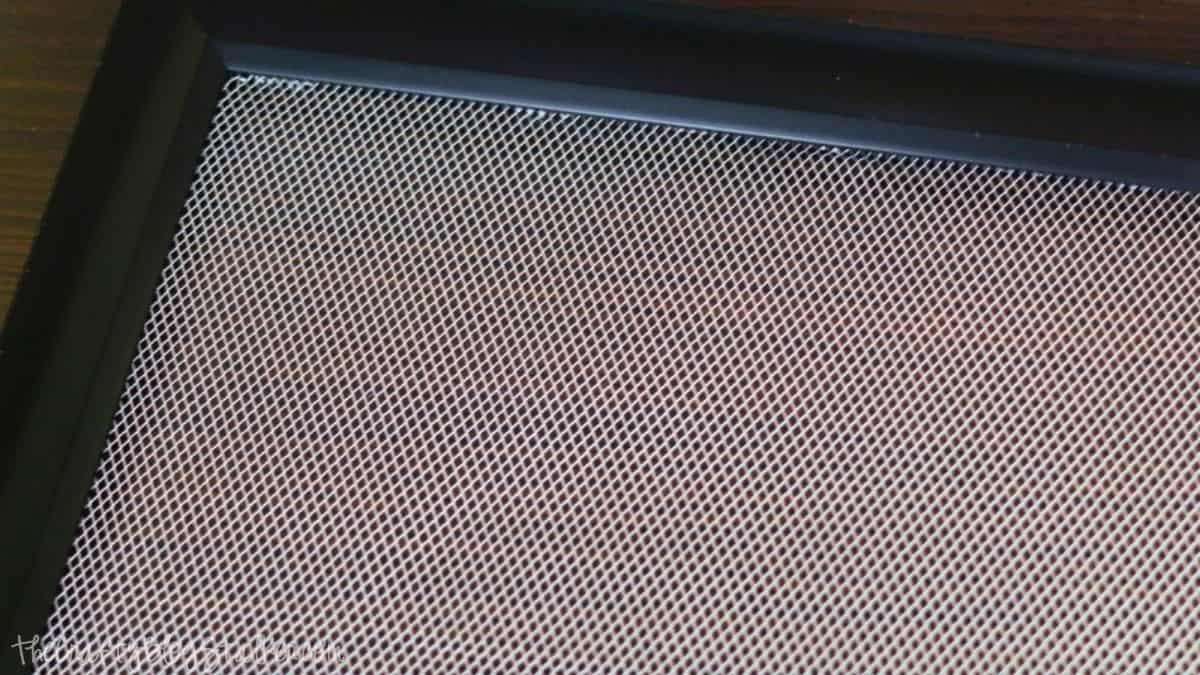
Once all sides are secured, trim any excess mesh so nothing extends past the back of the frame. Be careful here, as the edges can still be sharp.
How to Use Your Earring Holder
Once finished, hang or place your frame where you get ready each day.
This earring holder works best with hook-style earrings because they slide easily into the mesh openings.
Post earrings will still work, but you will need to reach around the back of the frame to secure them.
Final Thoughts
This DIY project is one of those simple crafts that makes a big difference.
It keeps your jewelry organized and easy to see while adding a little personality to your space.
I hung mine just below my DIY Jewelry Rod, and now everything is in one place. Getting ready is quicker, and I actually remember what I have to wear.
More Organization Ideas
Looking for more simple ways to organize your space? Here are a few ideas to try next.

Hi, I'm Katie!
I'm so glad you're here. Want to make something fabulous? I'm here to help!
Pam@over50feeling40
Such a great idea! I will share this idea with others! Thanks for sharing with the Thursday Blog Hop!
creativejewishmom/sara
So wonderful to be so organized! Thanks for sharing on craft schooling Sunday!
Heather @ Simply Save
This is so pretty! My friend made me a similar one with lace instead of mesh and it's propped up on my dresser. It's such a fun way to display and store jewelry! Thanks for sharing on the Small Victories Sunday Linkup!
Christine
That is is wonderful idea, what a great use of an old frame to help deal with the clutter of tiny earrings that always get lost so easily. You did a great job!
XO,
CHristine
Sandra
My jewelry storage is a wee bit out of control and I think this will work for me. Thank you for sharing this at Celebrate Your Story link party.
Pixie
I made one in a hurry and used a sheet of plastic canvas. and hot glued it in place. Yours is much more stylish and can use a larger frame.
Katie
Thank you Pixie. I had never thought to sue plastic canvas.
Cristina
It looks so nice. And also so helpful!
Katie
Thank you, Cristina! Happy to help!
Jackie
I have clipped on earrings. How could that work?
Katie Adams
You could still use the chicken wire, just cut it into strips. Nail the strips into the frame horizontally and clip the earrings onto each strip. You could use strips of a thicker ribbon as well.