

This mercury glass spray paint method makes it easy to achieve that classic look. Perfect for decorating glass pieces or creating handmade gifts.
Mercury glass spray paint sounds like a real product, but it isn't.
That's what makes this method so fun. With a little patience and a few layers, you can create the same faux mercury glass look at home.
I first tried this while helping a friend make glass vases for centerpieces, and we kept stopping to admire each one as it turned out.
No two pieces looked exactly the same, which made it even better.
Skill Level: Beginner
Total Time: 15 minutes
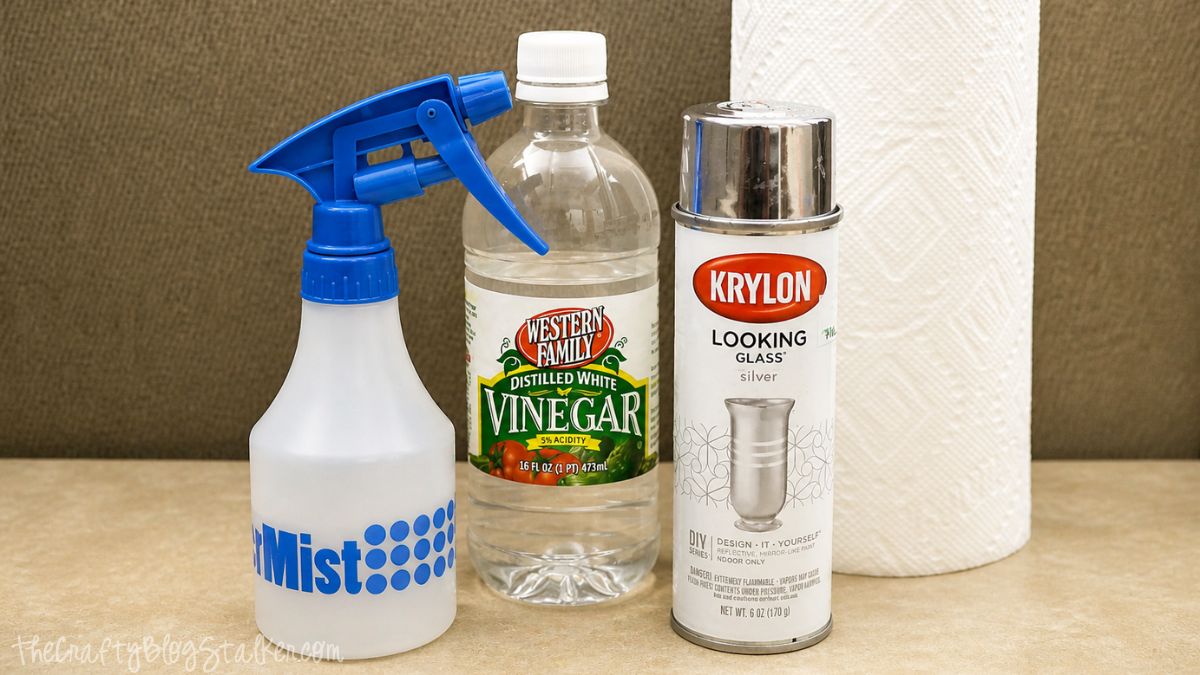
Supply List
- Glass Vase (will work on anything glass)
- Krylon Looking Glass Silver Spray Paint
- Spray Bottle with Water
- Vinegar
- Paper Towels
Instructions
Start by cleaning your glass really well. Any oils, fingerprints, or residue will affect how the paint sticks.
You can use a glass cleaner, but I usually reach for isopropyl alcohol because it dries quickly and leaves the surface spotless.
Next, mix equal parts water and vinegar in a spray bottle. This water mixture creates a mottled, aged look rather than a solid mirror finish.
Lightly mist the outside of your glass with the mixture. You don't want it dripping, just a light, even layer.

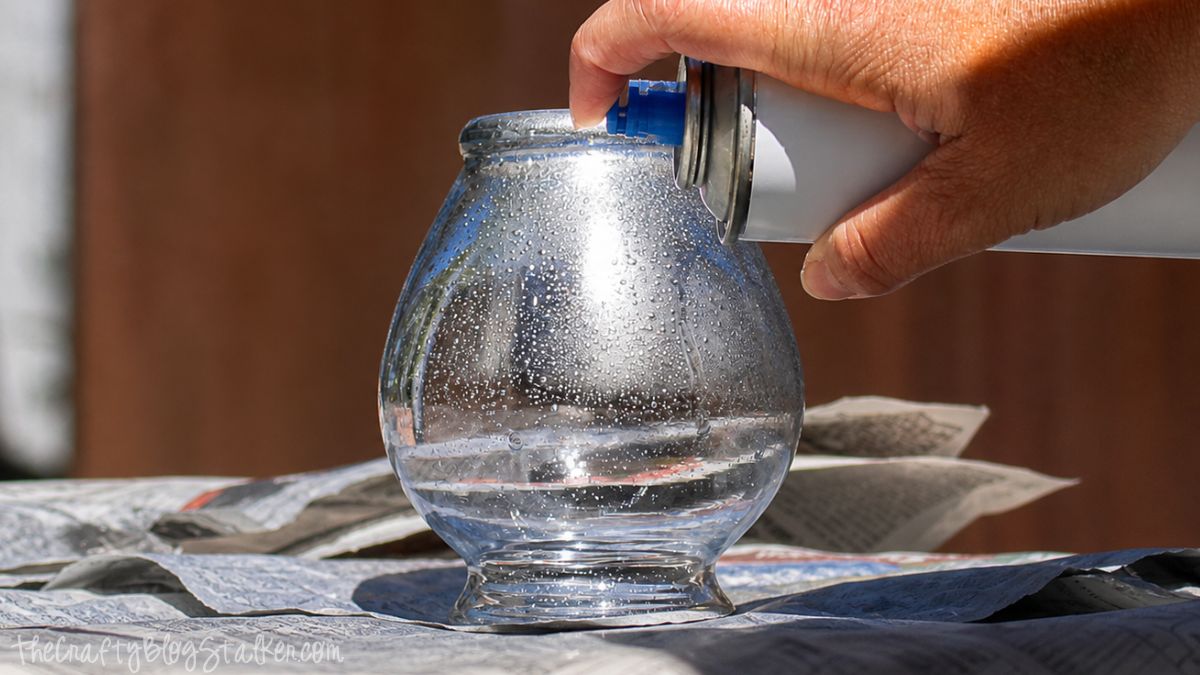
Now apply a light coat of the Krylon Looking Glass spray paint.
Hold the can a few inches away and spray in short bursts to keep the layer thin. Let it sit for about a minute.
Once the paint has started to set, lightly mist the glass again with the water mixture.
You'll start to see small spots forming, which is exactly what gives faux mercury glass its texture.
Apply another light coat of spray paint over the top.
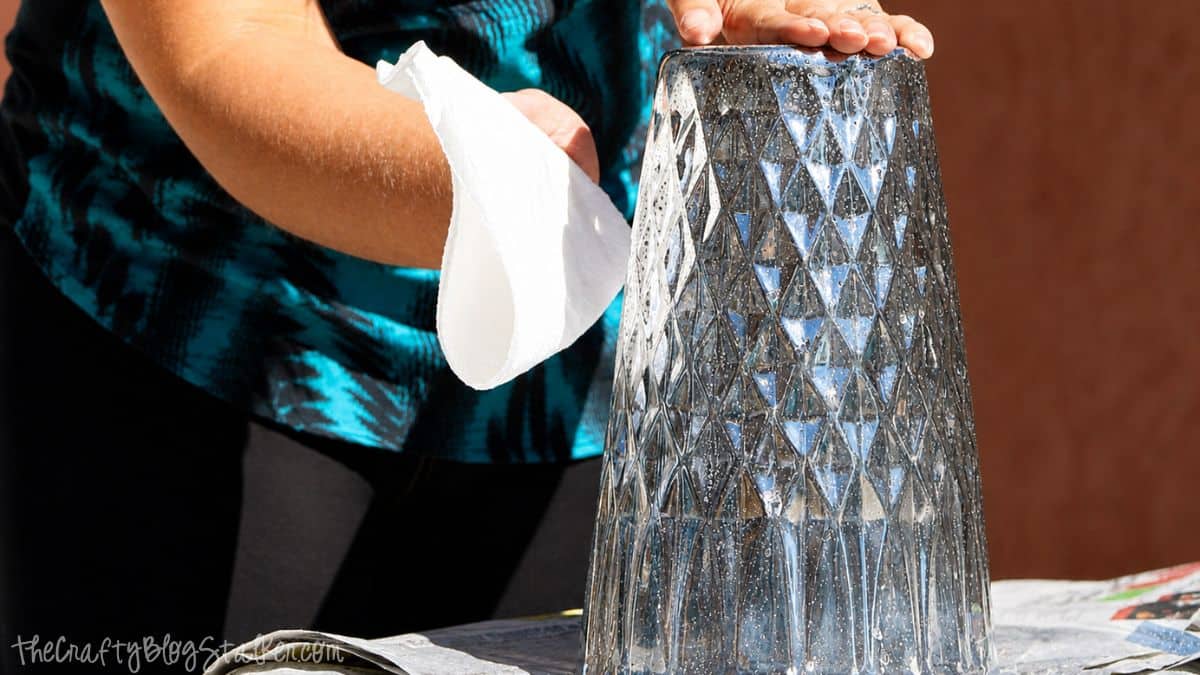
Let it dry for a couple of minutes, then gently dab the surface with paper towels.
This step removes a bit of the paint and softens the finish, making it look more like real mercury glass.
Repeat this process a few times until you like the look.
Most of my pieces took about three to four rounds, but you can stop earlier for a lighter finish or keep going for a more aged effect.
What to Expect
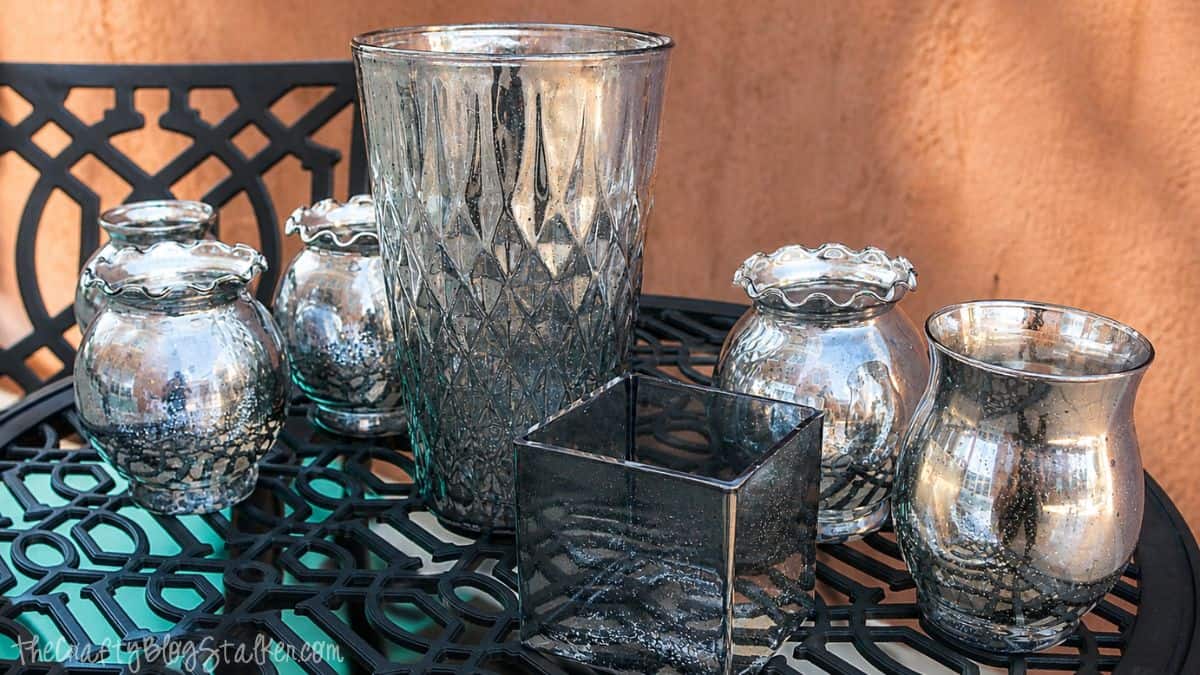
Each piece will turn out a little different, and that's part of the charm. Some areas will look more reflective, while others will have a softer, spotted finish.
On larger vases, the effect really stands out, giving the glass more depth. It's one of those crafts where the results look much more complicated than the process actually is.
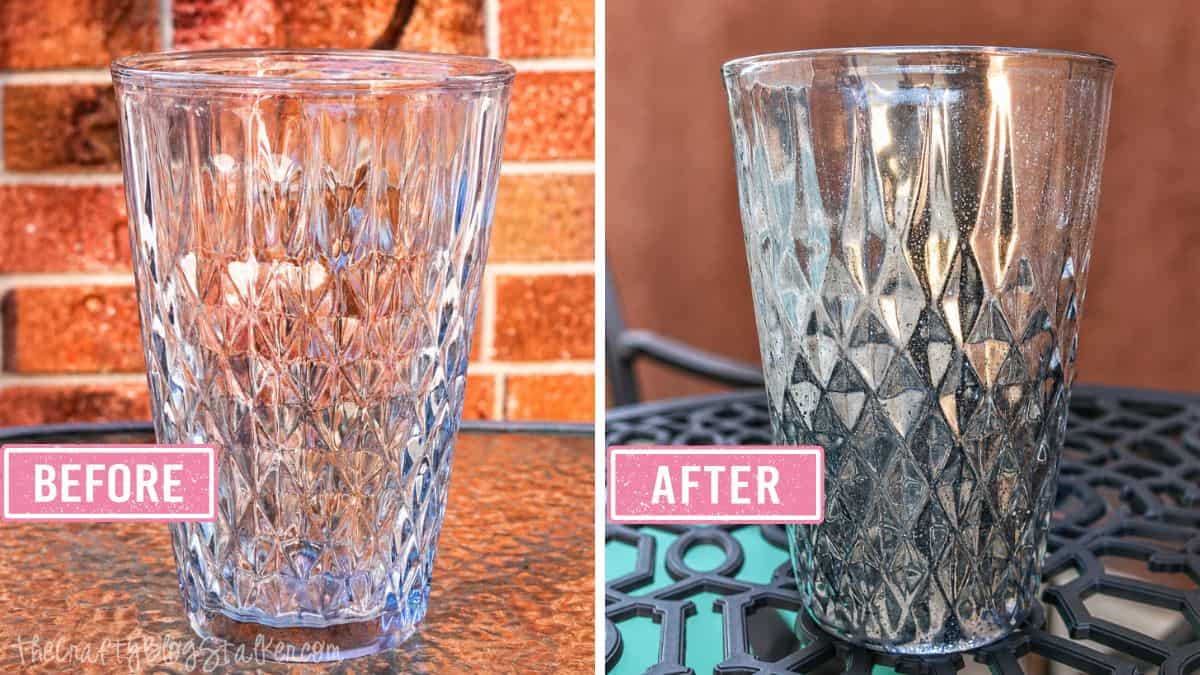
Here is a before-and-after of my favorite piece, a large glass vase. I love how the silver really brings out the glass's cut. It is beautiful!
Final Thoughts
This is an easy craft that makes a big impact. It's perfect for updating old glass dishes, creating custom decor, or adding a little shine to a shelf or mantel.
If you try this technique, I'd love to see how your pieces turn out. It's always fun to see how different each project looks.
More DIY Decor
Looking for more simple decor ideas? Here are a few more projects to try next.


Hi, I'm Katie!
I'm so glad you're here. Want to make something fabulous? I'm here to help!