

The perfect gift for any special occasion is a wine bottle etching. Below is the Personalized Glass Etched Wine Bottle tutorial.
Special occasions are a great reason to go a little beyond the norm, maybe you could even say it's a great time to do something a little special.
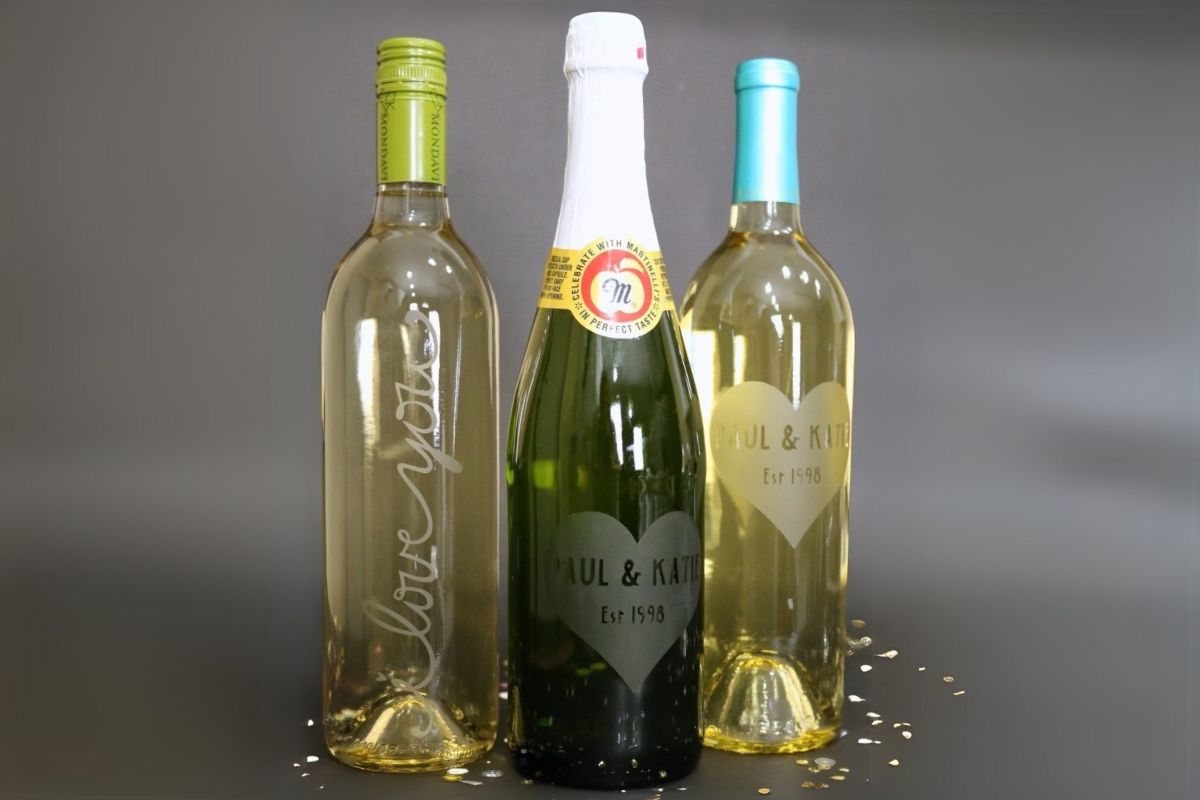
The end of February marks my 23rd wedding anniversary, and I definitely think that is a special occasion. To mark the occasion I decided to make a personalized gift of an etched glass bottle.
This is such a fun idea because even after we have toasted the occasion, the bottle becomes a keepsake.
Craft Tutorial Video:
Like videos? I have a video tutorial for you! Please subscribe to my YouTube Channel so you don't miss out on any future video tutorials!
Supplies You'll Need to Create this Project:
This post contains affiliate links.
- Glass Bottle
- Goo Gone
- Cricut Cutting Machine
- StandardGrip Mat
- Vinyl
- Transfer Tape
- Rubbing Alcohol
- Lint Free Cloth
- Etchall Etching Creme
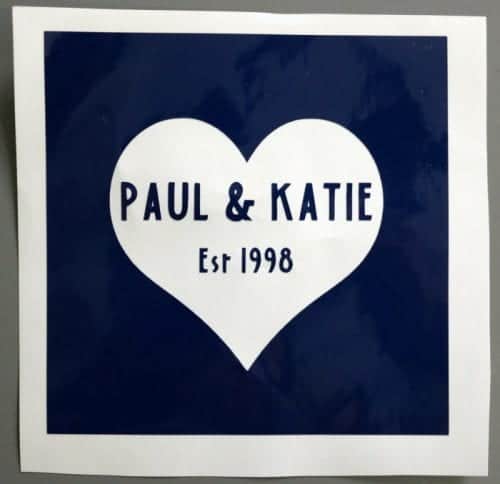
Make and Cut a Personalized Stencil:
The first thing you will need to do is create a stencil. I created my stencil in Cricut Design Space and I have a tutorial for you to learn How to Make a Stencil in Cricut Design Space.
Cut the stencil out of vinyl using your Cricut Explore machine. Cricut Design Space will walk you through the cutting process.
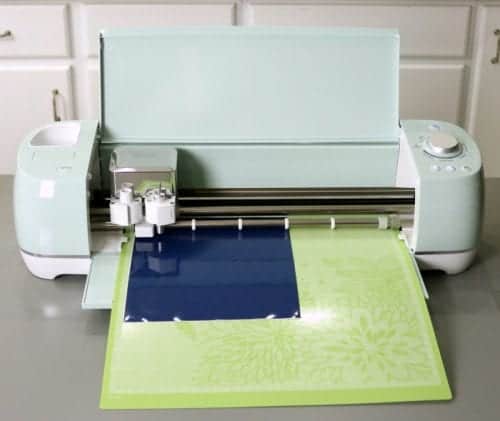
If you don't have a Cricut, you can hand-cut the stencil out of vinyl using a craft night. However, the Cricut seriously makes it so easy and you are sure to get perfectly straight and curved lines.
After the image is cut, weed out the vinyl spaces that you want the etch cream to fill on the bottle.
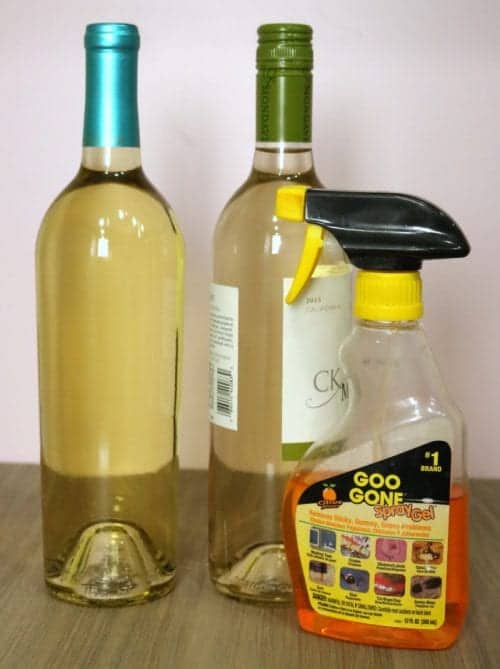
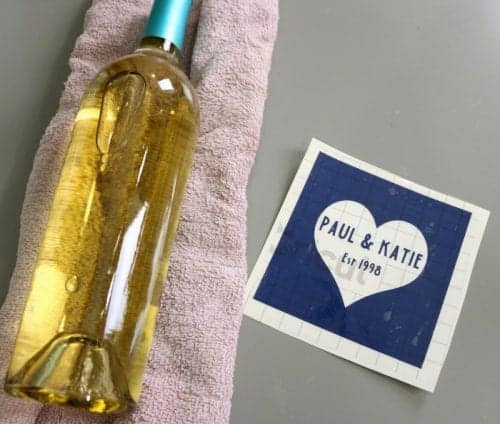
Removing the Label:
Wine bottle labels are a @$#! to get off. Use Goo Gone to assist you in removing the label from the glass bottle.
The technique that worked the best for me was to get the label wet under some running water. Then I sprayed a good amount of Goo Gone onto the bottle, rubbed it into the paper with my finger, and let it sit for 5 to 10 minutes.
Using a kitchen scrubber run the bottle under water and scrub the label off making sure to get any glue residue that is stuck to the bottle.
Do not use a wire scrubber because that will scratch the glass. I used a kitchen sponge scrubber that had a good scrubby side but was still gentle enough to not scratch.
You may need to repeat spraying on Goo Gone and let it sit a couple of times before you get all of the residues off.
After the glue is all removed, wash the outside of the bottle with some dish soap to remove any greasy residue of the Goo Gone.
Apply the Vinyl Stencil:
Cut a square of transfer tape that is just slightly larger than the stencil. Rub the top of the transfer tape with a spatula tool to get the vinyl stuck to the transfer tape.
Carefully peel back the transfer tape and this should peel up the vinyl from its backing sheet like a sticker.
Make sure all pieces are stuck to the transfer tape. If a portion doesn't pull up, lay the transfer tape back down and go back over the spot with a finger or the spatula tool. Repeat until the complete stencil easily peels away.
Next, apply the stencil to the glass bottle and press all over the stencil because now you want the stencil to stick to the glass. Slowly peel off the transfer tape. If an area of the stencil sticks to the transfer tape lay it back down and rub until it sticks.
Make sure the vinyl is really stuck to the glass and there is a good seal, otherwise the etching cream will sneak under the vinyl and you won't get nice crisp lines.
Remove any excess grease from fingers with a lint-free cloth and some rubbing alcohol.

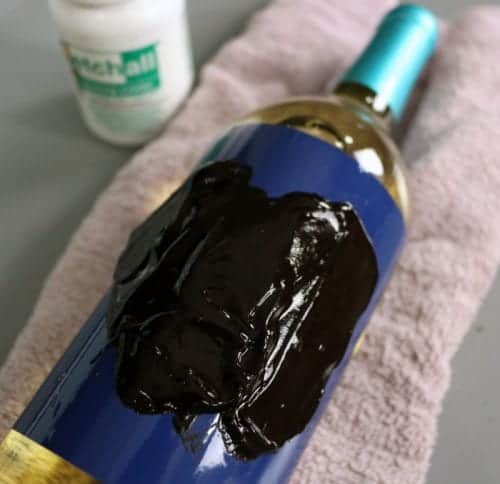
Applying the Glass Etch Cream:
First, let me say, Etch All is usually white. I don't know why mine is black. So if your cream has turned black, don't worry. It still works. The black cream does not add a tint to the glass that it etches, it still works normally, just as if it were white.
Using a wood popsicle stick, apply the Etch All cream in big blobs. It is a thick cream that doesn't really drip so it should stay in the place that you put it. Cover the entire stencil with a thick coat and let it sit for 15 minutes.
After the 15 minutes is up, take that same popsicle stick and carefully scrape the Etch All cream off of the bottle, and put it back into the bottle.
Did you know you can reuse the cream? I have had this same bottle for about 10 years and I have done so many fun projects with it!
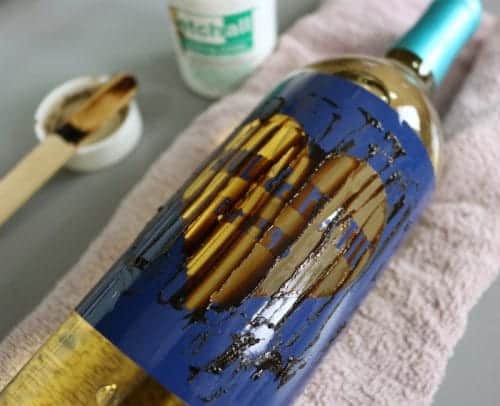
Take the bottle to the sink and carefully wash away what is left because any area the cream touches, it will etch.
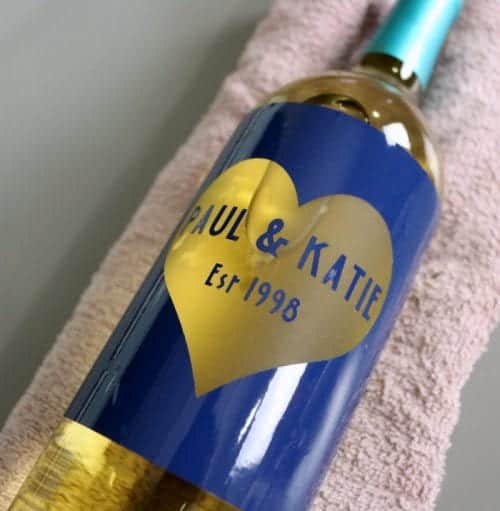
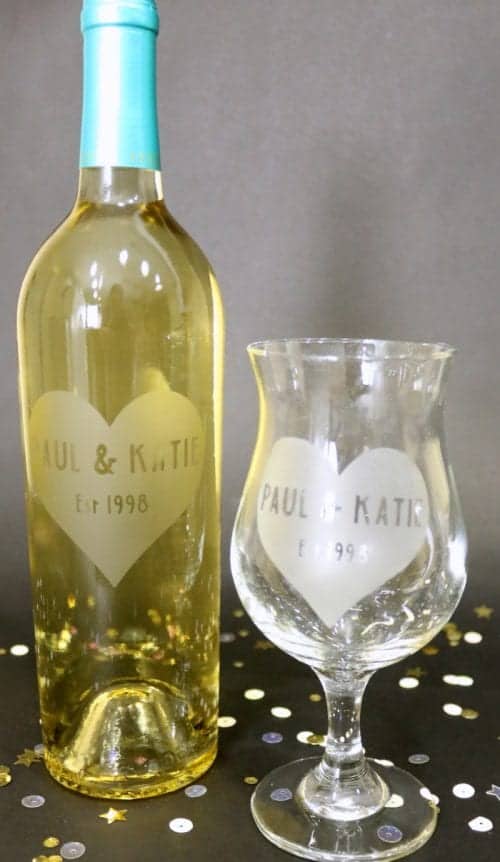
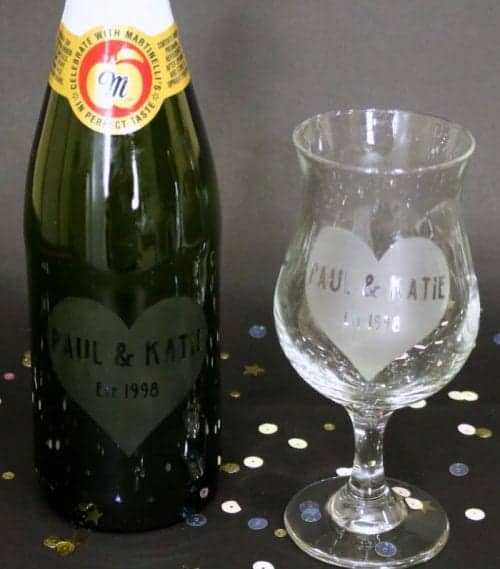
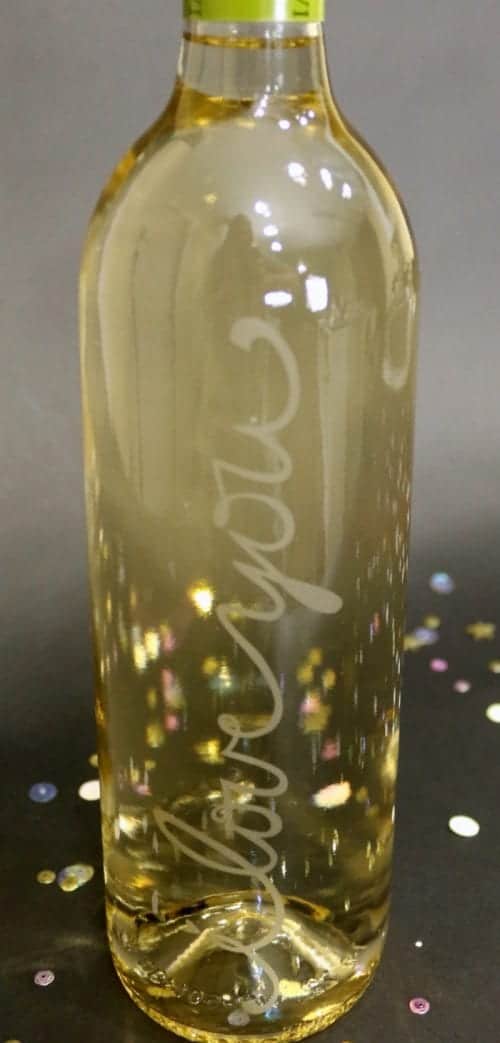
Peel back the vinyl stencil and there you have your wine bottle etching!
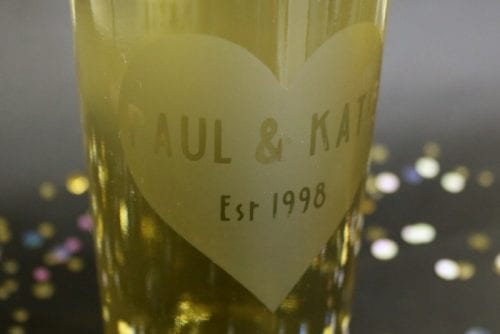
I also made matching wine glasses!
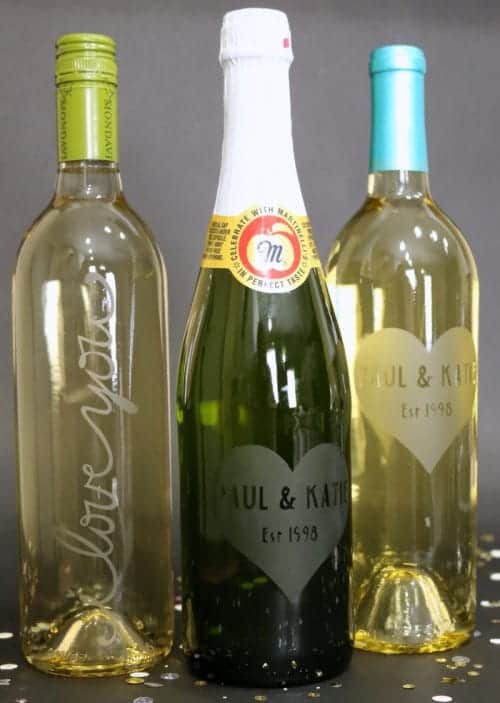
Etching glass is really so easy and once you've done it, you will want to etch EVERYTHING, I was having so much fun that I etched a couple more glass bottles.
I really wanted to see what the difference would be between the darker-colored glass and the clear glass.
The green bottle matched the wine glasses as well.
Then I went rogue and created a different stencil using an image in Cricut Design Space that took no personalization, but I still love it.
These personalized wine bottle etchings are such a fun gift idea for weddings, anniversaries, Valentine's Day, and really so much more!
If you love this tutorial, please give it a five-star review and help me share it on Facebook and Pinterest!
Crafting Essentials
- The Cricut Cutting Machine is easily my favorite crafting tool. We use it in so many of our tutorials!
- These MakerX Crafting Tools are perfect for keeping in the craft room and are always ready when needed!
- This Fiskars Paper Trimmer is easy to use and cuts nicely without frayed edges.
- These Scotch Precision Scissors cut like a dream, and you get multiple pairs in a pack!
Roseann Hampton
Great tutorial! Thanks for sharing!
Katie
Thank you Roseann! Glass etching is so much fun! Have you tried it?
Texmom
Mine had blotchy, uneven areas. Any idea why? I put it on thick and even applied it a second time.
Katie
I'm sorry Texmom. Did you leave the etching cream on for at least 20 minutes? When you spread it on you can also spread it around in several different directions to make sure that it gets everywhere you want it too.
Crysta Waston
Wow fantastic idea, Thanks for giving these tips.
Katie
You are welcome, Crysta! I'm so glad you found this tutorial useful.
Manahil jahan
Hello! I was wondering how u attached the vinyl to the cutting mat? I’m thinking of buying a circuit exactly like yours to help me make stencils for so wood signs so I’m totally new to this! Does the mat comeback with the circuit and how did you coonct ur computer to the circuit so it can print out the design?
Manahil jahan
* does the come with the cricut
* how do you connect your computer with the cricut
Katie
Hello Manahil!
The mat is sticky so the sticky holds the vinyl in place while it cuts but then can still easily be peeled from the mat when finished cutting. You can connect the Cricut Maker two ways to your computer. Either Bluetooth or the there is a USB printer cord that is included and you can connect that way.
Alena
If using Armor Etch, does one need to be concerned with the etch cream going through the glass and contaminating the wine if left on too long?
Katie
I don't think so, Alena. The etching cream isn't powerful enough to penetrate all the way through the glass.
Amber Smith
Hi what kind of vinyl did u use I just got a Cricut I'm looking into stenciling but not sure wat kind of vinyl to use
Katie
Hi Amber, I used Cricut vinyl and it worked great!