

Learn to make Paper Strip Hearts with easy instructions! These charming decorations are perfect for Valentine's Day or as a lovely surprise anytime.
In this post, we'll guide you through making beautiful Paper Strip Hearts, a simple yet stunning craft that's perfect for Valentine's Day crafts or to brighten up any day of the year.
These easy-to-follow instructions make crafting these hearts a breeze, whether you're a seasoned DIYer or a beginner.
Not only are cut hearts a lot of fun to make, but they also serve as a fun surprise for someone special.
Let's start crafting and spread love with these adorable paper hearts!
Supply List:
Directions:
To begin, choose your paper. There are so many fun papers out there to choose from.
I chose a double-sided paper that also has touches of glitter in it, and some red, white and pink cardstock.
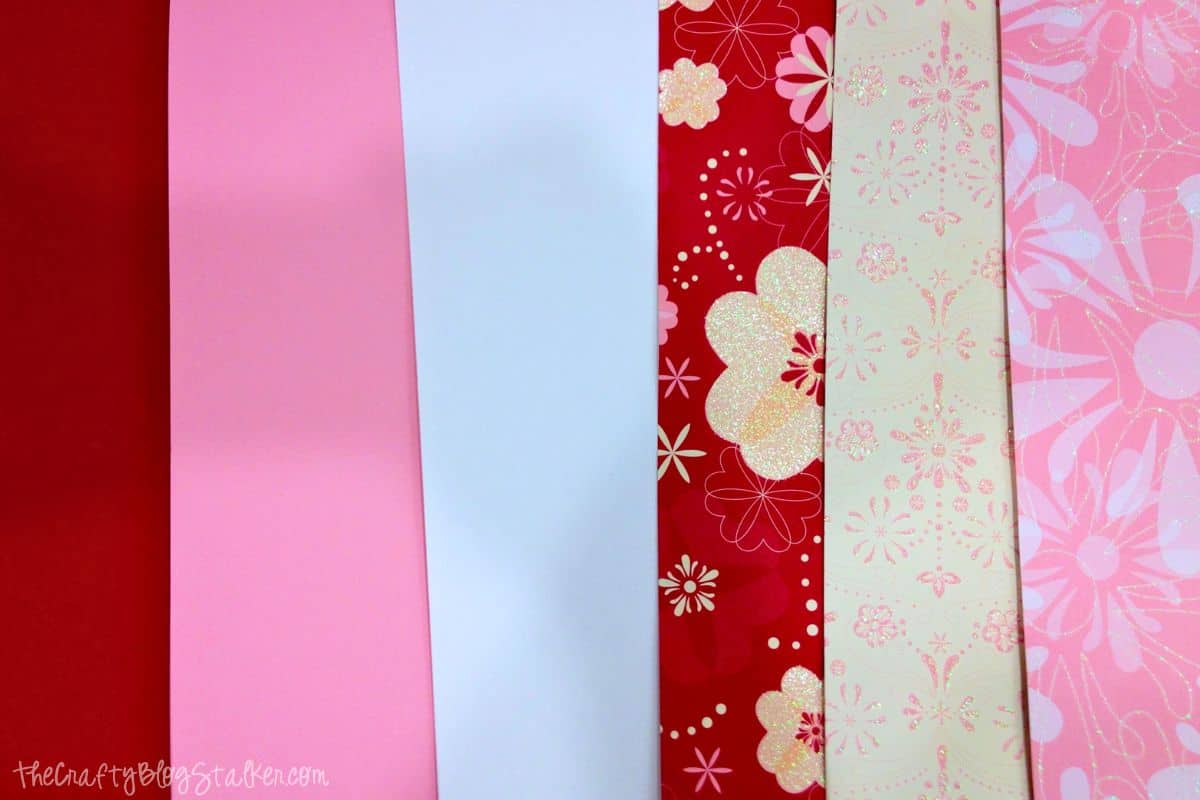
You could also use construction paper in many different colors, or standard printer paper.
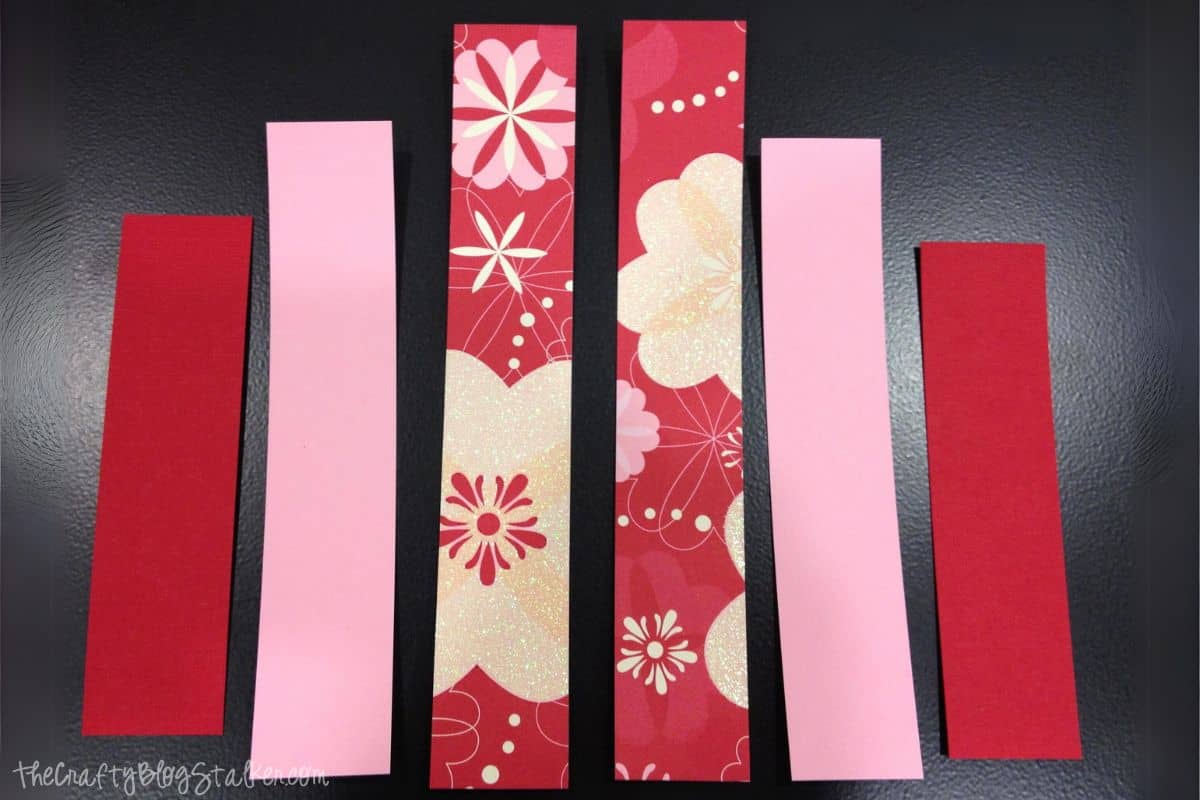
Using a paper trimmer, cut the paper into strips with a 1 inch width.
For each heart, you will need 6 strips; two 5 inch strips, two 6 ½ inch strips, and two 8 inch strips.
To make larger sized hearts, cut the strips into wider and longer lengths.
Stack the pieces of paper in the order shown above, from left to right, and bring the ends of the strips together and staple.
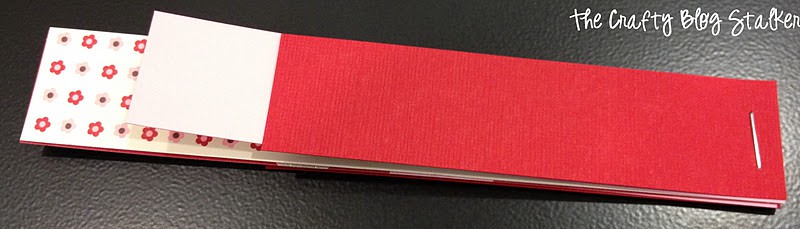
Take 3 strips of paper and bring the ends together until they are even. Do the same with the other three strips pulling them in the opposite direction.
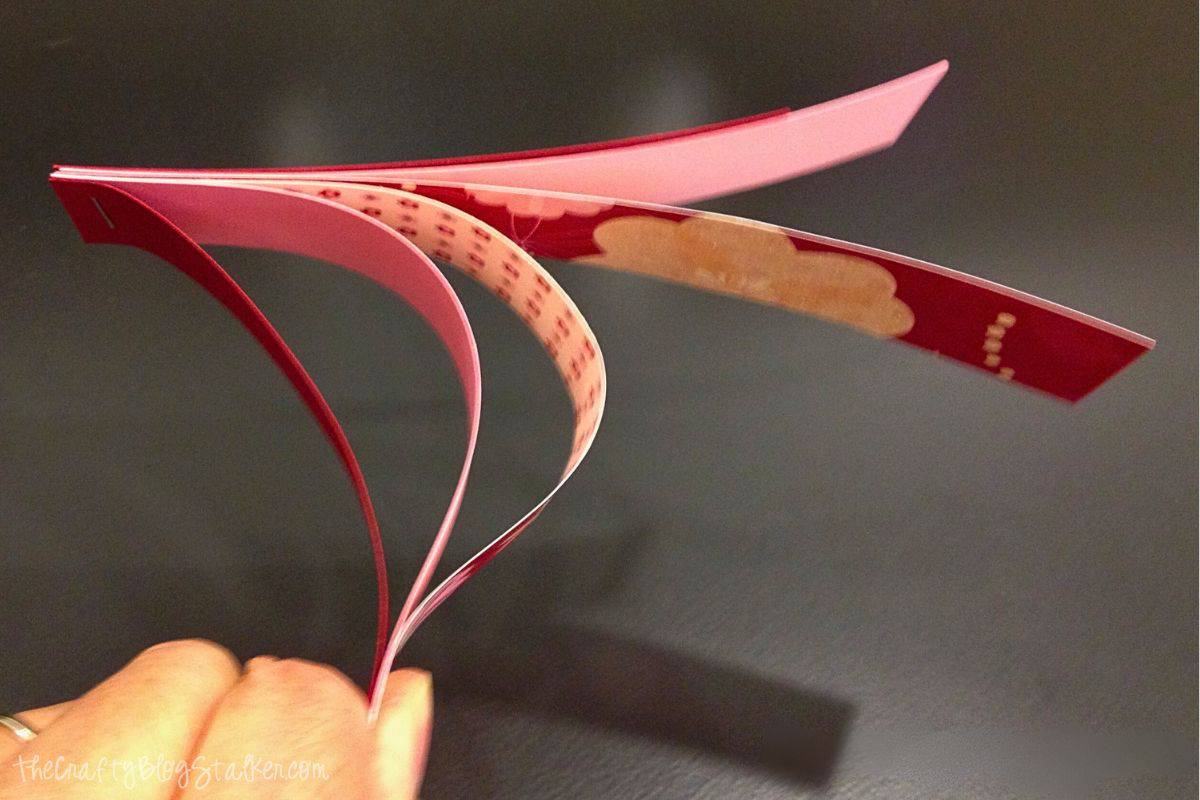
Then bring all 6 ends together, keeping them even, and staple the ends together.
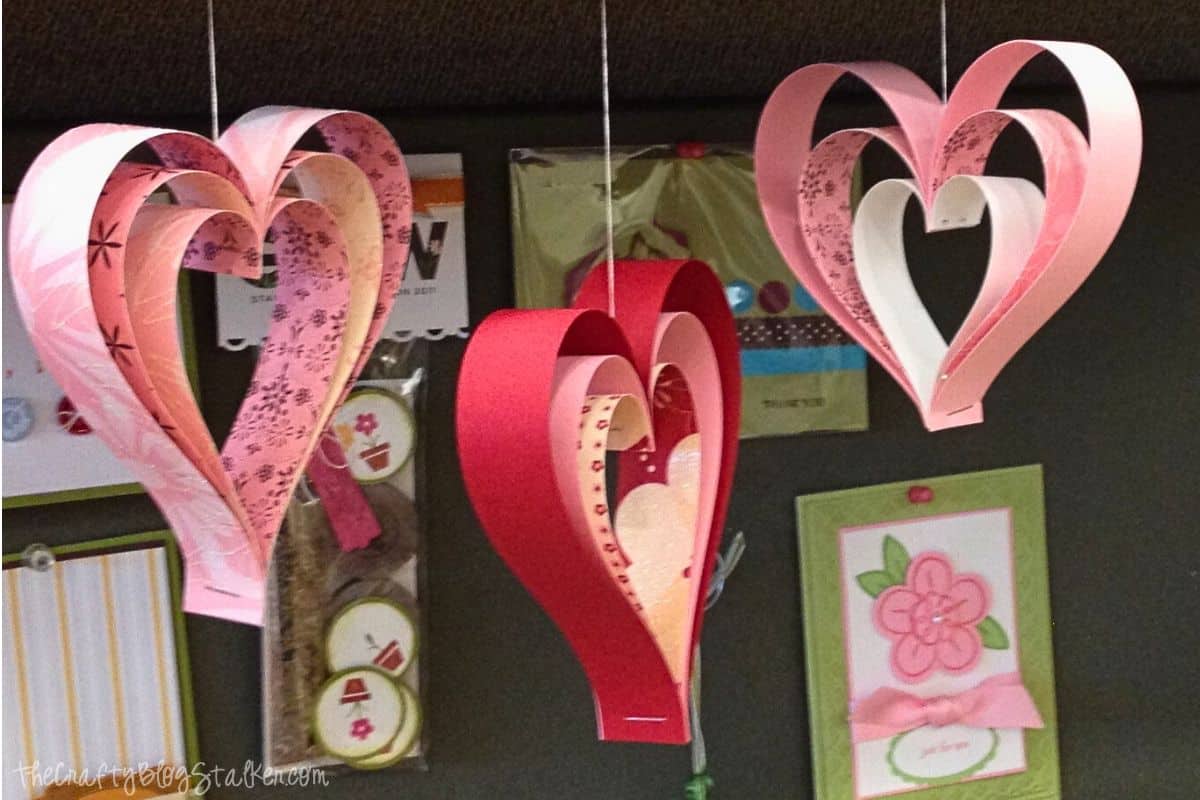
And there is your heart shape!
To attach a hanger, place a glue dot between the center of the heart. Then put the end of the string in the glue dot and pinch the heart together.
The glue dot will hold the string, it won't be super strong, but will hold the heart to hang it.
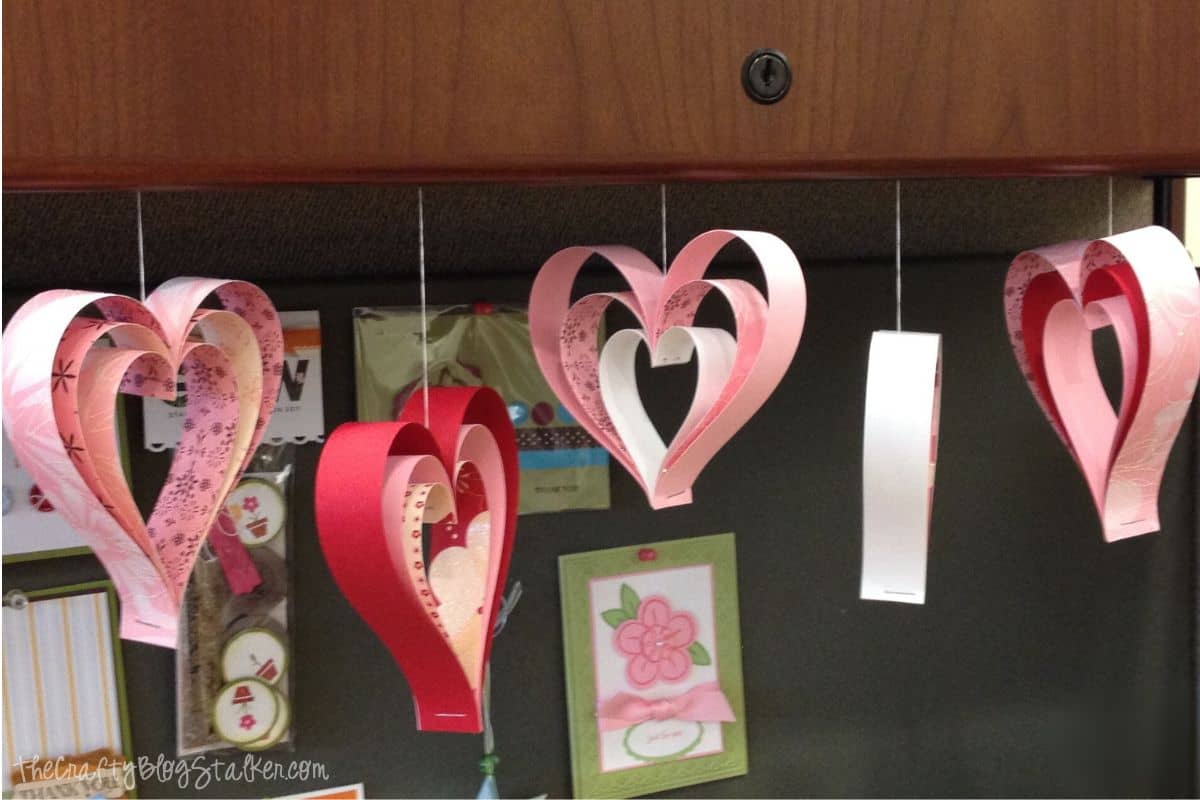
I love to watch the hearts as they hang because they slowly spin so they are always moving.
Crafting Essentials
- The Cricut Cutting Machine is easily my favorite crafting tool. We use it in so many of our tutorials!
- These MakerX Crafting Tools are perfect for keeping in the craft room and are always ready when needed!
- This Fiskars Paper Trimmer is easy to use and cuts nicely without frayed edges.
- These Scotch Precision Scissors cut like a dream, and you get multiple pairs in a pack!
Tonii
Oh how cute are these?! Thank you so much for sharing, I can't wait to try these with my girls next week!!
Coxo
Hi so cute ❤️✨❤️❤️❤️❤️❤️❤️
Katie Adams
Thank you so much!
Ann Porteous
these are too cute!! I am your newest fan! visiting from craftomanic blog link!
Rachael
So cute, what a fun idea.
Kelly @ Here Comes the Sun
I know what I will be making this week with my daughter! Thanks for the great idea.
Lesley @ early play
These are wonderful and look so professional and so simple. I think we will make these at playgroup for valentines. Cheers.
Kate
Lovely!!! Creativity A+
Katie Adams
Thank you so much Kate, will you be making any?
Amanda
I LOVE the paper choices!! Awesome job!
Marriage from Scratch
Those are adorable! I will definitely be making these :)Thanks for sharing!
Mandy @ Sugar Bee Crafts
I love where you hung them - great job!!
april@gingerbread
I really LOVE those hearts! Swoon
Barb
So so pretty!
The Answer Is Chocolate
Love these. Saw them over at A Glimpse Inside and now following you 🙂
Allison {A Glimpse Inside}
They turned out fabulously! Love the paper you used!
Thanks so much for sharing and linking up to this week's Catch a Glimpse party! I'll be featuring this tomorrow!
Gale
So cute! Pinned this!
Vonda
I love these. Just found a fun craft to do this weekend! Thanks!
Terry
These are really sweet. I was actually checking them out while I was searching another party, lol. Really cute. Thanks for sharing them at our Link It Up Thursday party.
Anonymous
They are lovely and easy to do, I just tried one and they look adorable, and I just used plain white paper..for trial, and they are cute.
Cheryl
These are cute! Gonna try making some.
Heather @ Raising Memories Blog
I love how this turned out- such a cool effect! Just wanted to invite you to share this at Sharing Time! Would love to have you over there! 🙂
~Heather
Molly
So lovely!! I might have to give these a try, thanks for sharing the tutorial and for linking up to our Valentines Countdown Party!
AmieAnn
These are sooo sweet! Love how cute they look hanging from the chandelier! Thanks so much for sharing with the Pink Hippo party.. can't wait to see what you share next!
Rhinestone Beagle
These are fantastic and so easy! Thanks so much for linking this up at Doggone Dirty Craftin last week. Can't wait to see what you have for this thursday!
Molly
Hey! Thanks for linking up to my Countdown to Valentines party, I've featured these today as one of my favorites!
{Adventuresindinner}
Congratulations! You are one our features this week at our Pin'Inspiration party. Pop by and grab a button when you have a mo :0)
Terry
Just wanted to let you know that we featured your pretty hearts at our Link It Up Thursday party.
Lisa @ Flour Me With Love
Thanks so much for sharing at Mix it up Monday 🙂 I hope you'll stop back often!
Ruby
This art work is really simple but very creative. This is good decoration for a valentine party at home. You have explained it very clearly. Thanks for sharing your talent with others.
Diana - FreeStyleMama
So pretty! I love these!!
Bridgit's Bell
Cool, I shared on Google +.
Natalie B.
Very cute!
Thanks for sharing on Tutorial Thursdays.
I have chosen to feature your post tomorrow, so do come past and get your button 🙂
x
Natalie
Angie
These are beautiful. I listed them in "best of the web" in Valentine's crafts. I hope that is OK.
Sheri
I love the look of your hearts and used your image on my Facebook Page (Hang-Mate Products). We invented a retracting ceiling hanger that's keeping teachers and librarians safe when they hang all of these delightful ideas of yours. Thanks for a lovely blog!