

Delight your friends and neighbors with glass-etched Christmas cookie plates! A charming handmade gift that will be treasured for years. Get crafting today!

Do you gift your friends and neighbors cookie plates for the holidays too? I love gifting my favorite treats, but this year they will be going out on the cutest cookie plates!
These glass plates are etched on the back. They are dishwasher and food-safe, and they look amazing! Since the glass plates come from the dollar store they have a small price tag but deliver a big wow!
Craft Tutorial Video
If videos are your thing, you're in luck-I've got a full tutorial ready for you!
Subscribe to my YouTube channel and stay inspired with every new project.
Supplies Used:
Some links may point to similar items when the exact item couldn't be found online.
- Cricut Cutting Machine
- Christmas Cookie Plate - Cricut Design Space
- StandardGrip Mat
- Vinyl
- Weeding Tools
- BrightPad
- Transfer Tape
- Glass Etching Cream
- Painters Tape
- Glass Plates
Cricut Design Space:
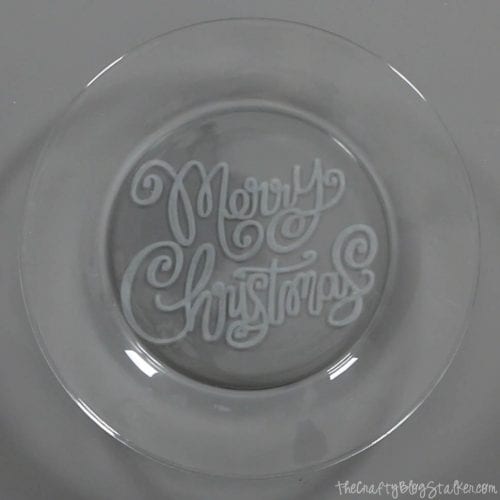
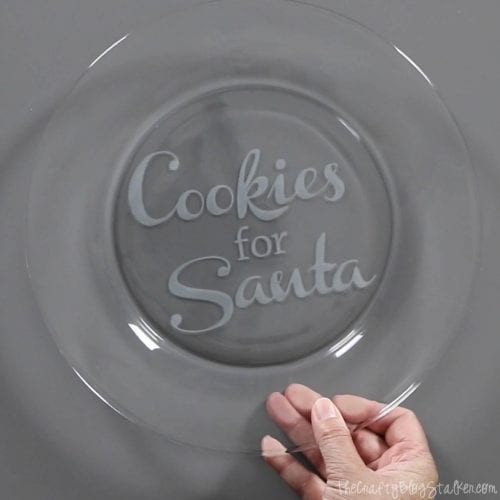
There are 3 different designs to choose from in the Christmas Cookie Plate Canvas. Simply delete the design(s) you don't want to use.
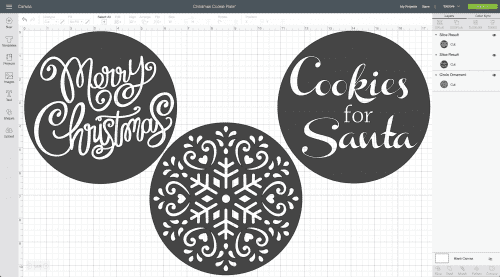
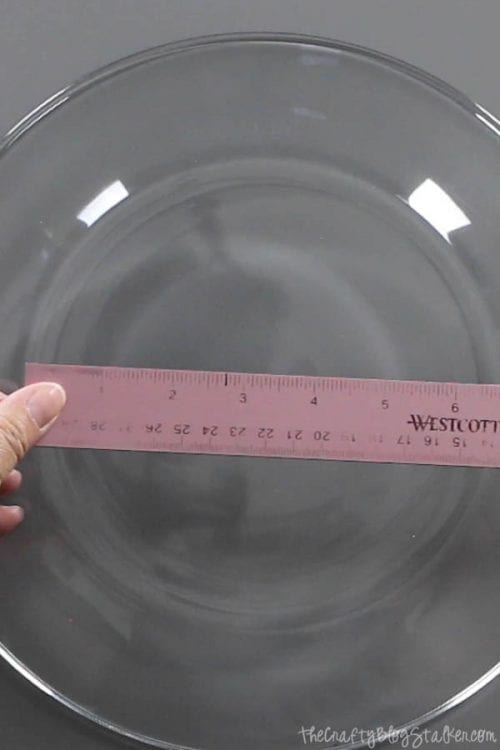
Before you cut your chosen design make sure to size it to fit the base of your plate. The base of my glass plates had a diameter of 6 ⅝ inches, so I cut the vinyl stencil with a diameter of 6 ½ inches, just a tad smaller than the actual size. If you are using a different-sized plate, adjust the size before cutting.
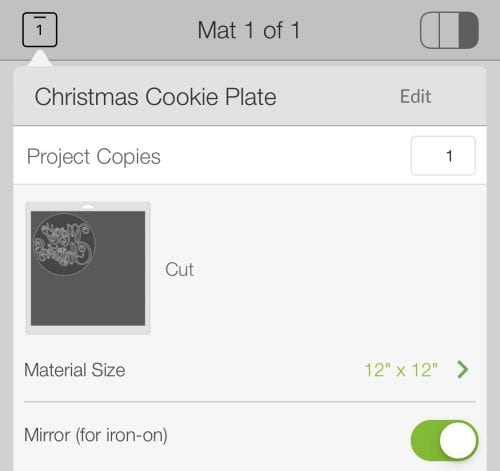
While on mat preview, make sure to mirror the design. Since we are putting the vinyl stencil on the back of the plate, it needs to be mirrored so you can read it from the front.
Follow the prompts from Cricut Design Space and when the arrow button blinks on the machine, load the mat and vinyl.
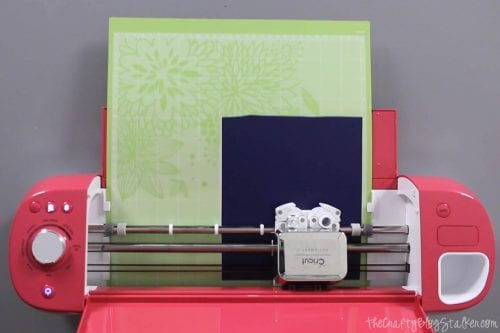
When the Cricut Logo light blinks it is ready to cut, so simply press the blinking button to begin.
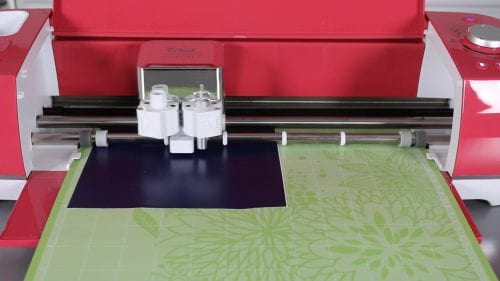
When the design is finished cutting, the logo light will blink again. Press the blinking light and your mat will unload from the machine.
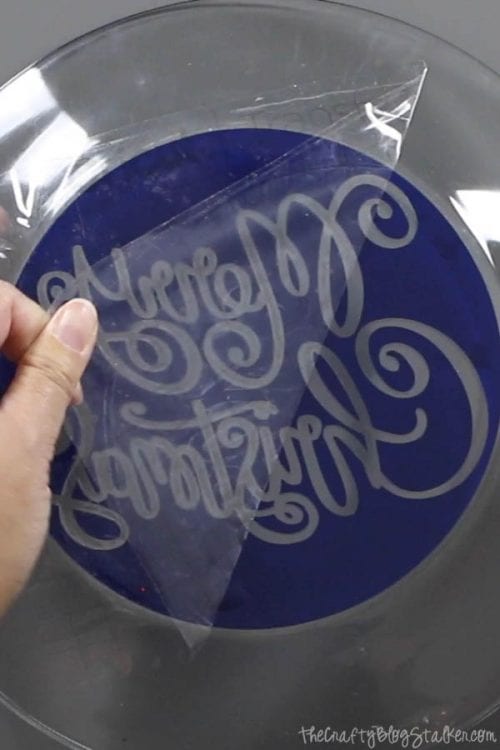
Carefully peel the vinyl from the cutting mat.
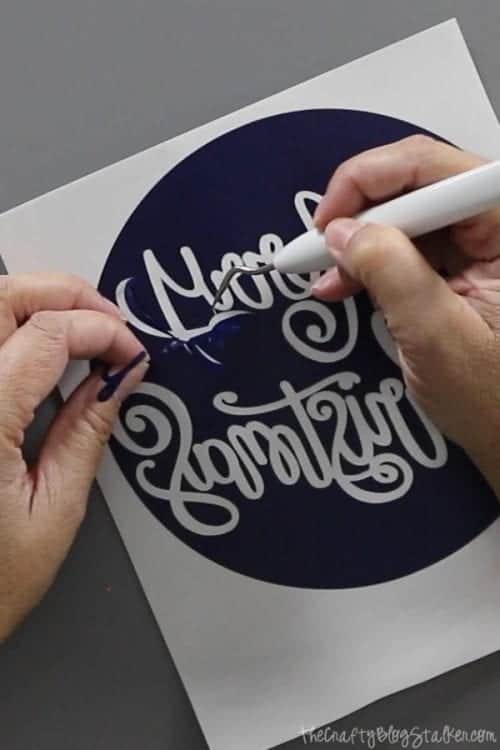
Weed the Glass Etched Christmas Cookie Plate Design
Weeding means removing the excess material you don't want from your design. In this case, we are keeping the negative of the design since the vinyl will only be a stencil.
The weeding tools and Cricut BrightPad are super helpful when it comes to weeding.
Applying Vinyl Stencil:
Cut a piece of Transfer Tape a bit larger than the design. The transfer tape will help move the vinyl design without stretching any parts of the design.
Peel back the clear layer and lay it over the vinyl design. Rub over the top with a scraper.
Peel back the clear layer once again and this time the vinyl design should be stuck to it. If part of the vinyl doesn't stick, lay the transfer tape back down and rub over it again with the scraper.
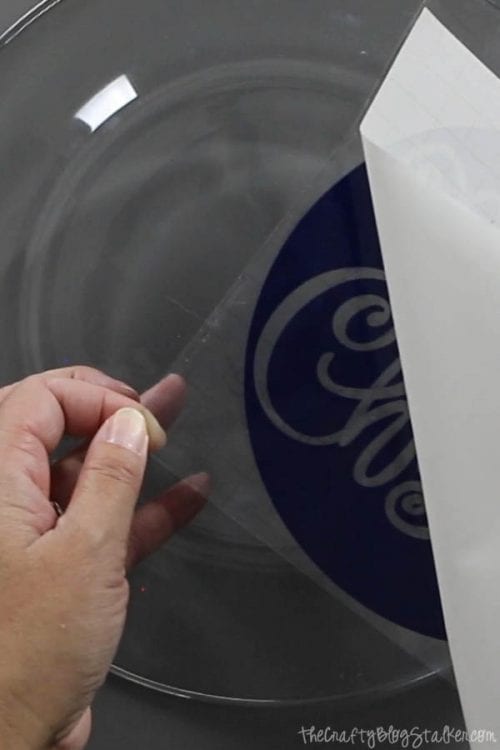
Center the vinyl design onto the back of the glass plate.
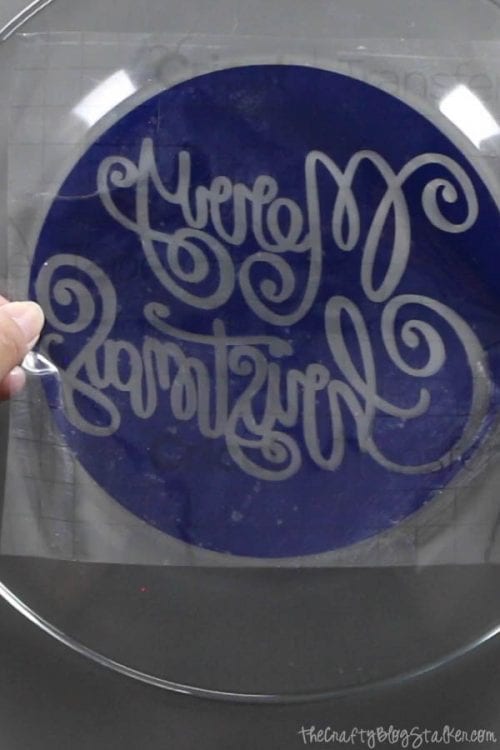
Once in place, rub again with the scraper tool. Slowly peel the transfer tape from the back of the plate. This time the vinyl should stick to the glass plate. If it doesn't, lay the transfer tape back down and rub it over again with the scraper.
Applying Glass Etch Cream:
Some parts of the design are very close to the edge of the vinyl stencil, so to make sure we only apply the etch cream where we want it, go around the design with strips of painter's tape. Etch cream will etch glass as soon as it touches the glass, so this is a bit of extra protection against the messy application.
Scoop a good amount of etching cream out of the bottle with a popsicle stick. You want to make sure you apply a thick layer.
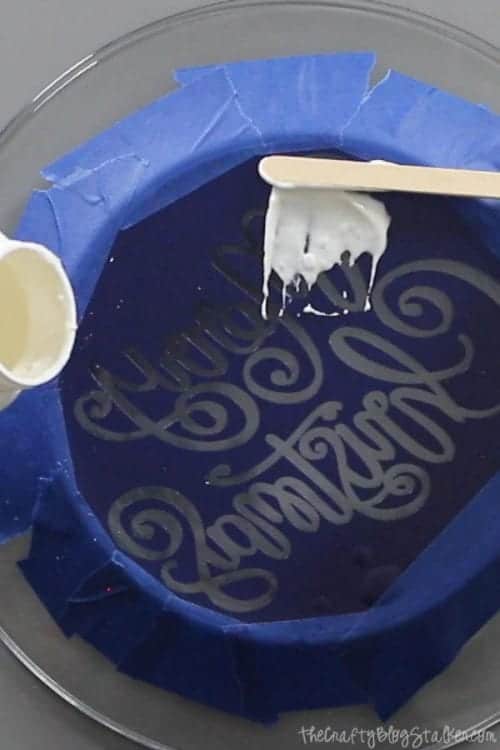
Cover the entire stencil (being careful to keep it off the edges of the plate).
Look at the right side of the plate to see if there are any spots that you missed, and respread if necessary.
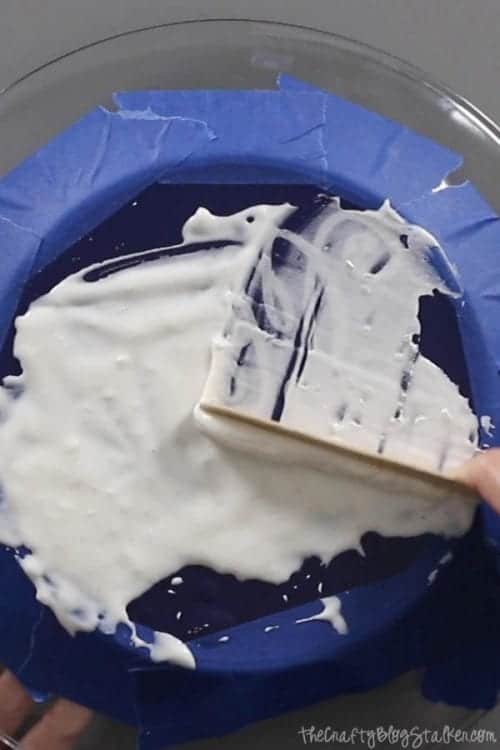
Let the etching cream sit for 15 to 20 minutes.
Using another popsicle stick, scrape off the etching cream and place it back in the bottle. Etching cream can actually be used over and over again!
Once you've scraped off all that you can, take the plate to a sink and run it under running water. Using your fingers, scrub the remaining etching cream off the plate.
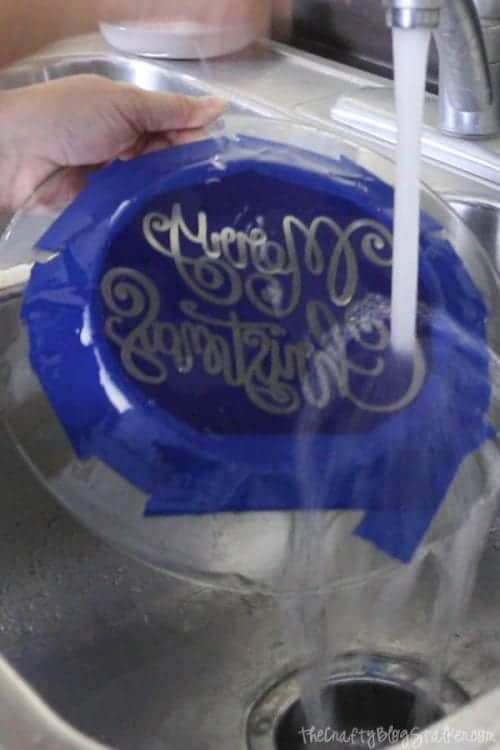
Remove the painter's tape and vinyl stencil and you have a glass-etched cookie plate!
Want to see the other designs too?

All that is left is to fill the plate with some yummy cookies. They don't even have to be homemade! Hey, you made the plate!
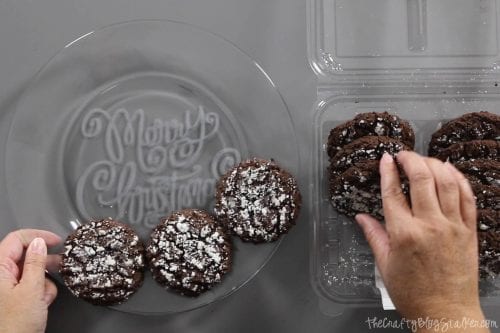
And everyone will be so glad that they are your friends!

Which cookie plate design is your favorite?
Crafting Essentials
- The Cricut Cutting Machine is easily my favorite crafting tool. We use it in so many of our tutorials!
- These MakerX Crafting Tools are perfect for keeping in the craft room and are always ready when needed!
- This Fiskars Paper Trimmer is easy to use and cuts nicely without frayed edges.
- These Scotch Precision Scissors cut like a dream, and you get multiple pairs in a pack!
Regina
How do I find your designs in Cricut Designs?
Katie
You can find them here https://design.cricut.com/#/profile/57fd93fad8a1ae3509cd31c3
Cindy
Can you reuse the stencil over to make more then one plate ?
Katie
You cannot reuse the vinyl. It is a one time stencil. There is harder stencil material that is reusable but would not work with the glass etching cream.