

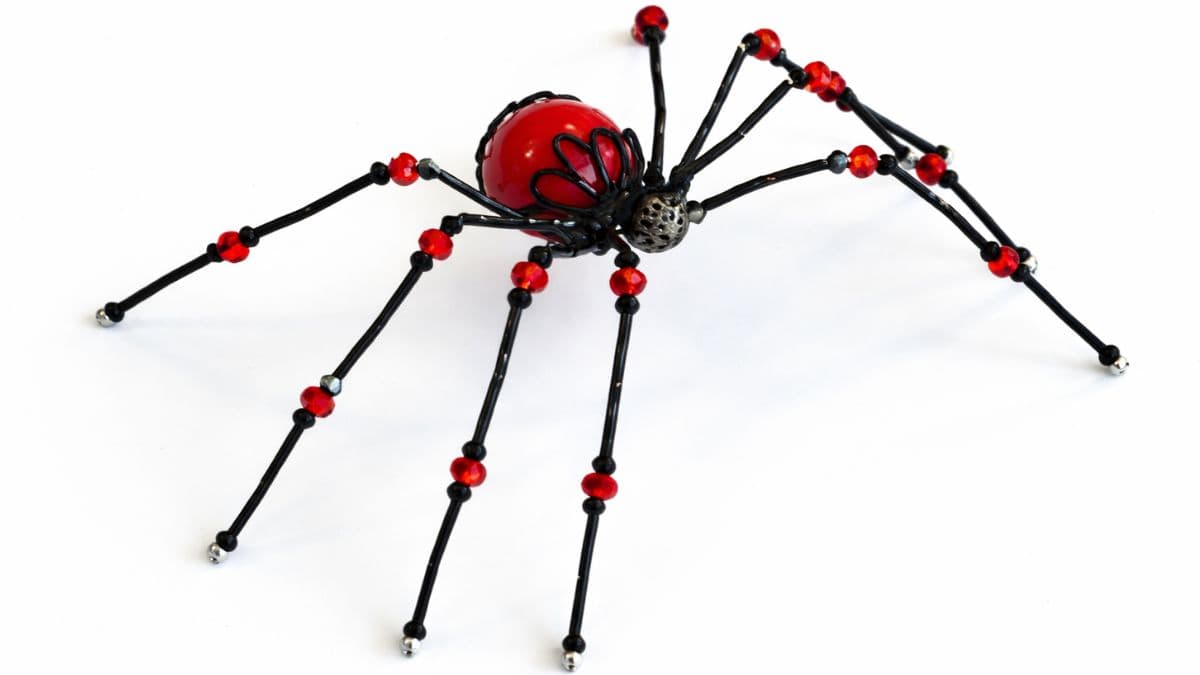
Learn how to create a charming spider with this beaded spider tutorial using easy steps that beginners can follow.
I am a little surprised with myself for sharing this craft with you today because I do not like spiders! They scare me to death.
In fact, I am training my kids to catch and release spiders so I don't have to. 😂
But these spiders are pretty cute, and I like that they won't sneak up and attack me.
Skill Level: Beginner
Total Time: 45 minutes
Supply List
Some links may lead to similar items when the exact item is unavailable.
- Round-nose Pliers
- 20-gauge Wire
- 56 - 4 mm Black Beads
- 48 - #5 Black Bugle Beads
- 16 - 6 mm Red Beads
- 1 - 25mm Red Bead
- 1 - 12mm Black Bead
- 2 - Small Metal Bead Caps
- 2 - Large Black Bead Caps
- 1 - 3-inch Headpin

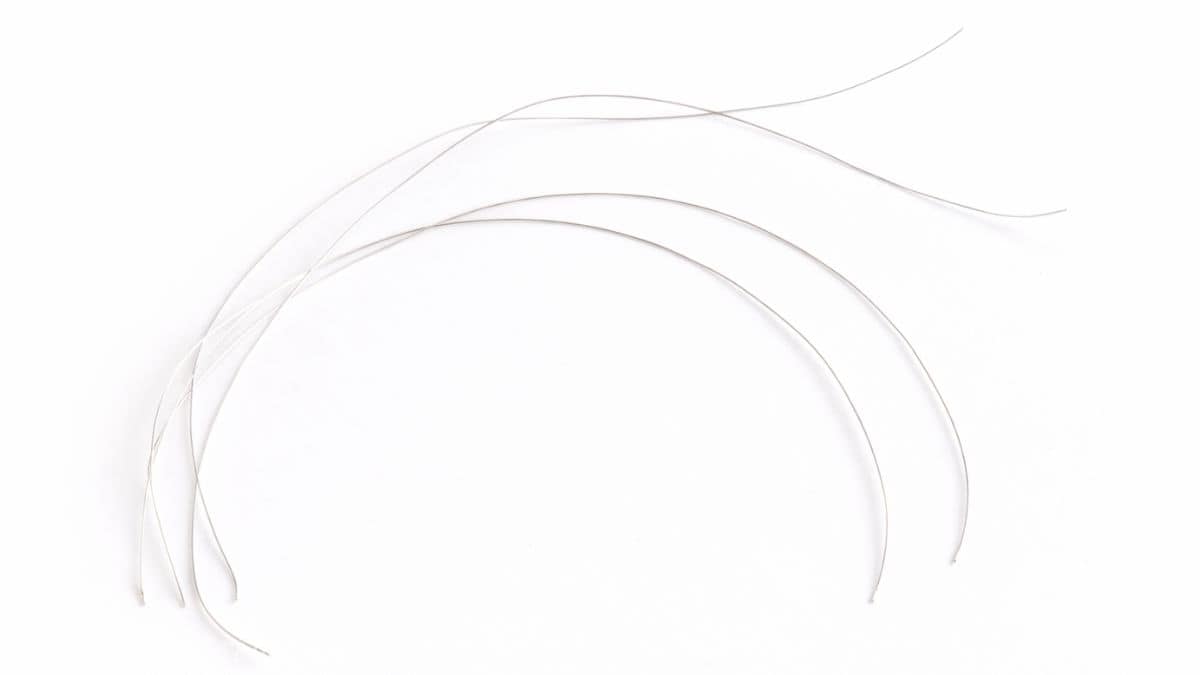
Prepare Wire
I am using 20-gauge wire, but you can use other gauges. You'll just need to make sure that the wire fits through all of the beads.
Cut 4 pieces of wire to about 10-12 inches each.
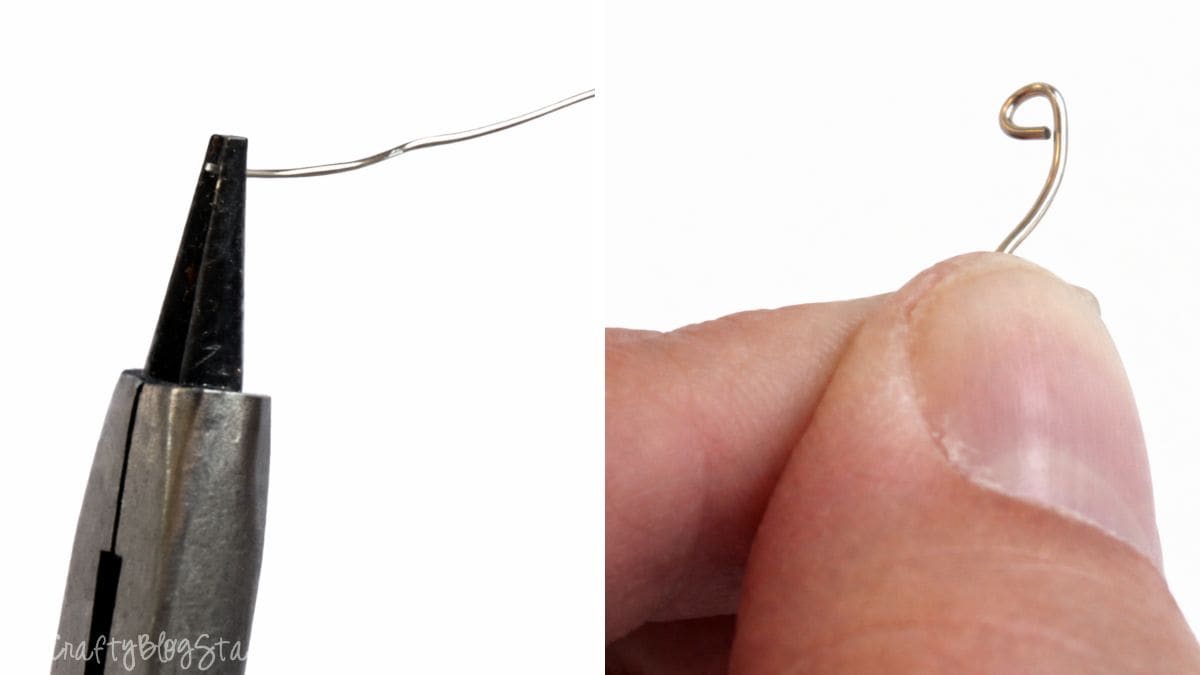
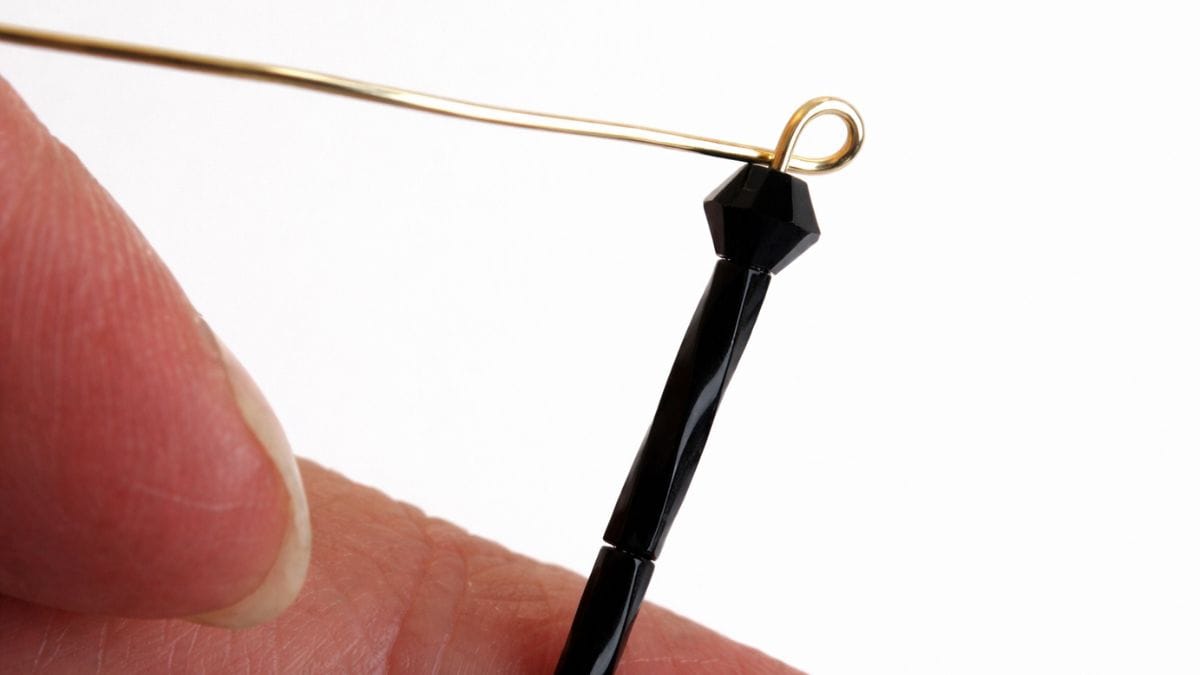
At the 1 end of each wire, bend a small loop. This will prevent the beads from sliding off the end of the wire.
To do this, pinch the very end of the wire with round-nose pliers and wrap it around to form a small circle.
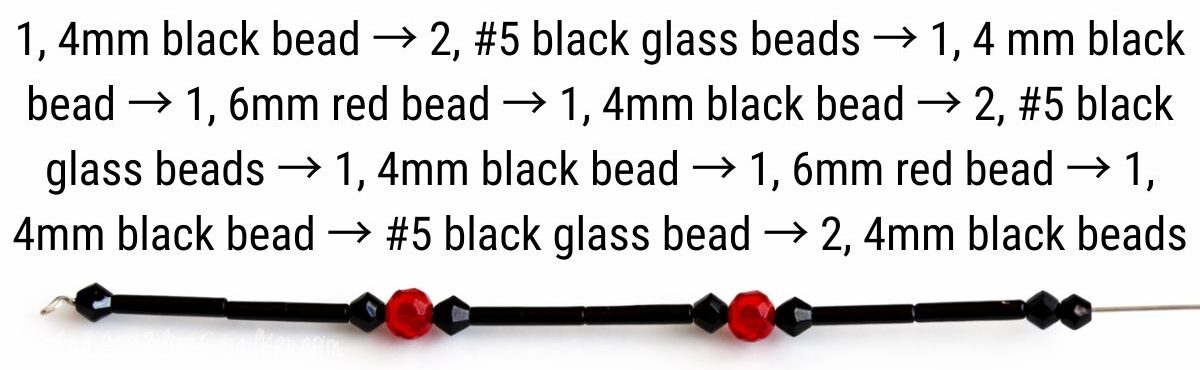
Spider Legs
With each wire strand, you'll want to repeat this pattern. These will be the spider's legs.
String the beads all the way so they are tight against the end loop you made in the wire.
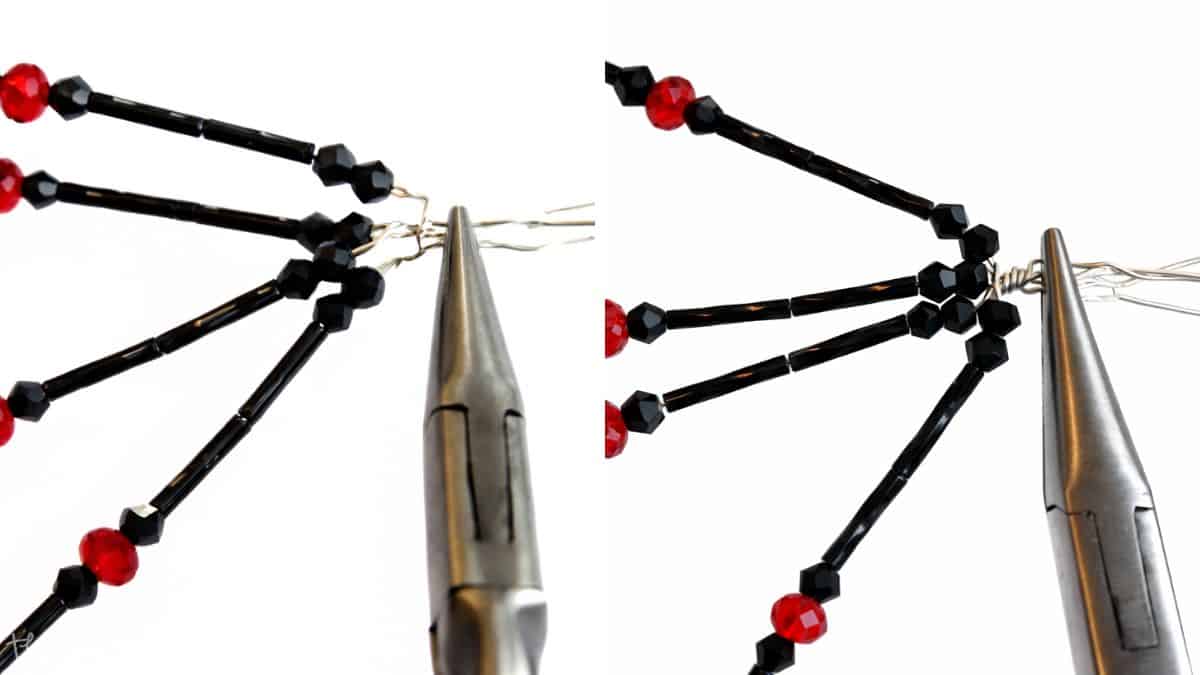
After all four wires are strung with the same bead pattern, make sure the legs are even and clasped tightly with round-nose pliers.
This part is a little tricky. As you can see in the kinky ends of the wires, I had to do this a couple of times before I was happy with the results.
Hold the pliers tightly and twist the legs. You'll want a nice, tight twist like shown in the second picture.
Spider Body
Create the head of the spider by putting the headpin through 1 small bead cap -> 1 12mm black bead -> 1 small bead cap.
Poke the headpin between the wires already twisted for the legs, and continue to twist the wires to secure the headpin.
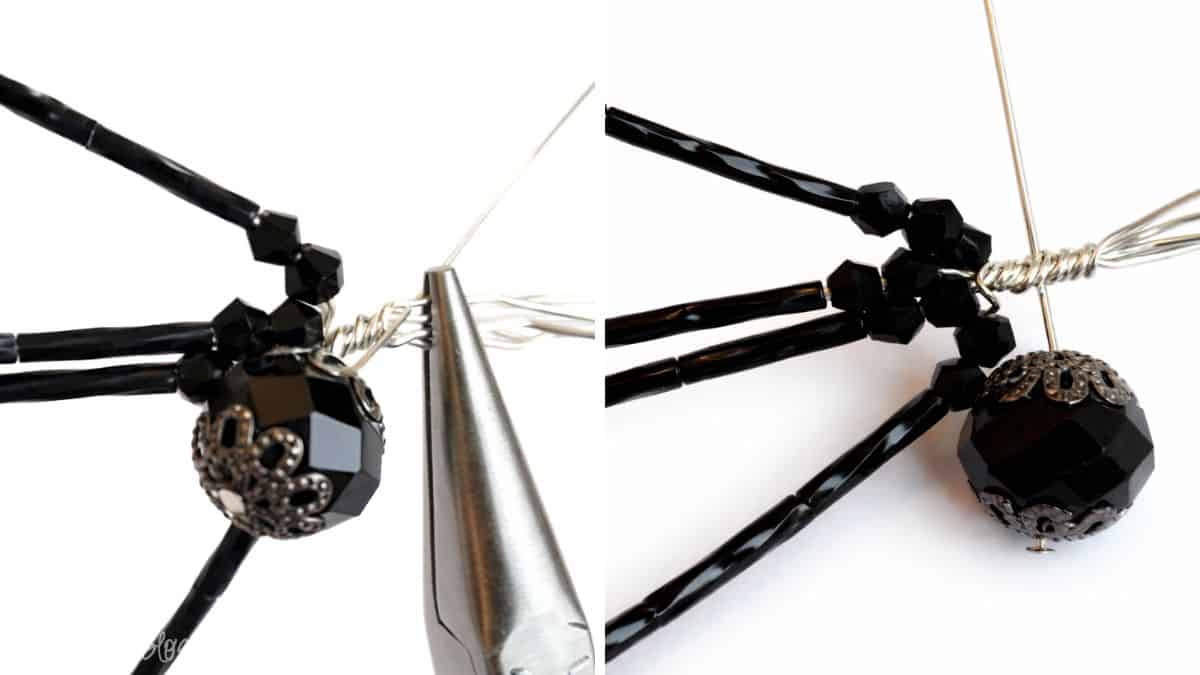
This step is a little tricky, and 3 hands would be helpful because you don't want the headpin to fall out of the twist while you twist.
I held the 4 wires a little farther down the strands and twisted them more.
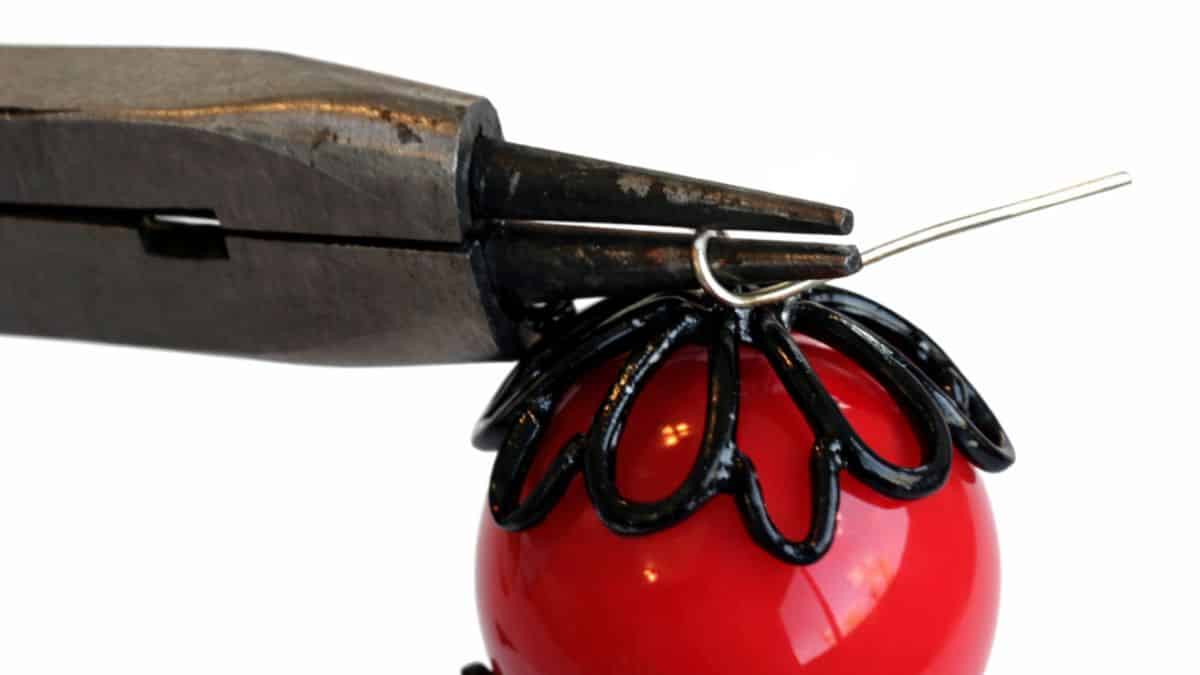
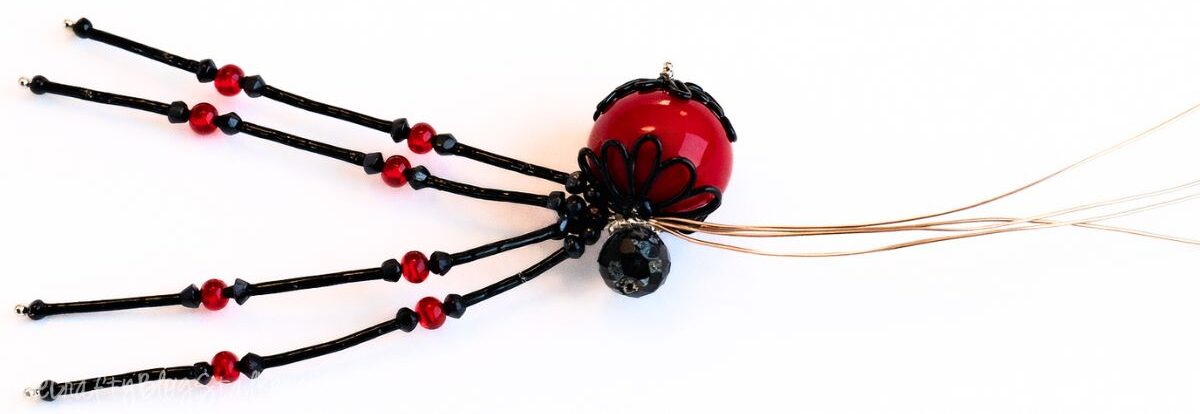
To the headpin, add the large bead cap -> 25mm red bead -> large bead cap -> 1, 4mm black bead to the end of the headpin for the abdomen of the spider.
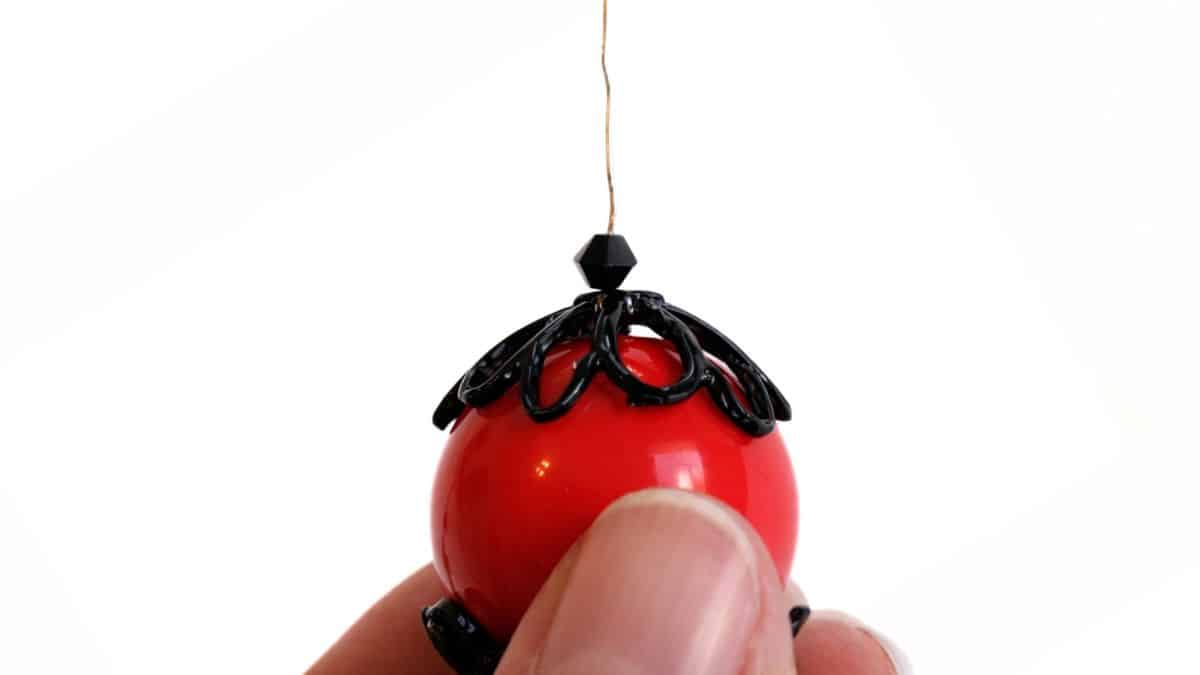
At the end of the headpin, I made a wire-wrapping loop to keep everything secure and together.
My cute little spider is coming along, but he isn't quite finished yet. He needs 4 more legs!
Continue Spider Legs
Using the same pattern as before, string the beads onto the wire for the other 4 legs.
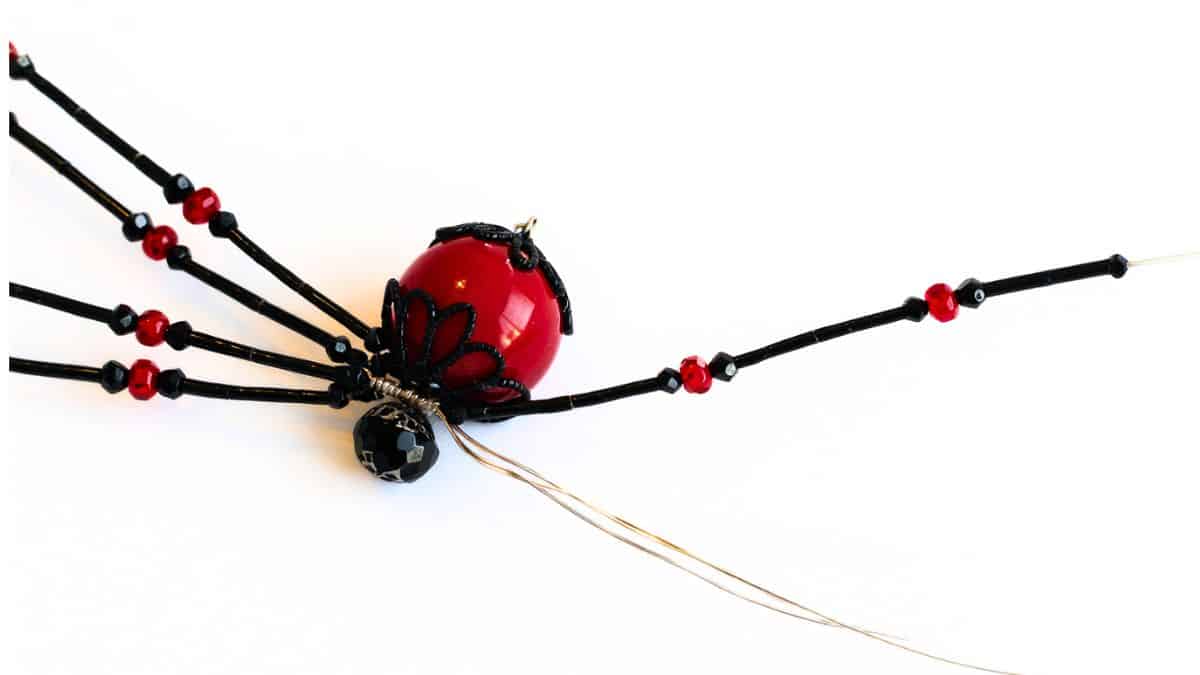
When all beads are on, push them as tightly against the spider's body as you can, then make another wire loop and trim off the excess wire.
When all legs were finished, he looked like this. Like a spider, but a sad and flat spider.
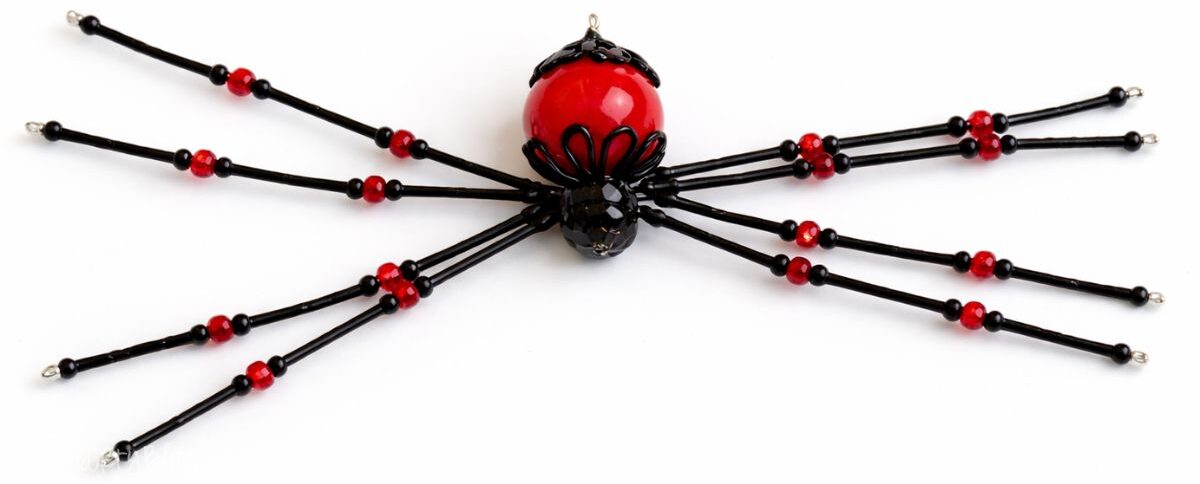
Gently bend the wires at the first joint nearest the body to make it appear as if he is standing.
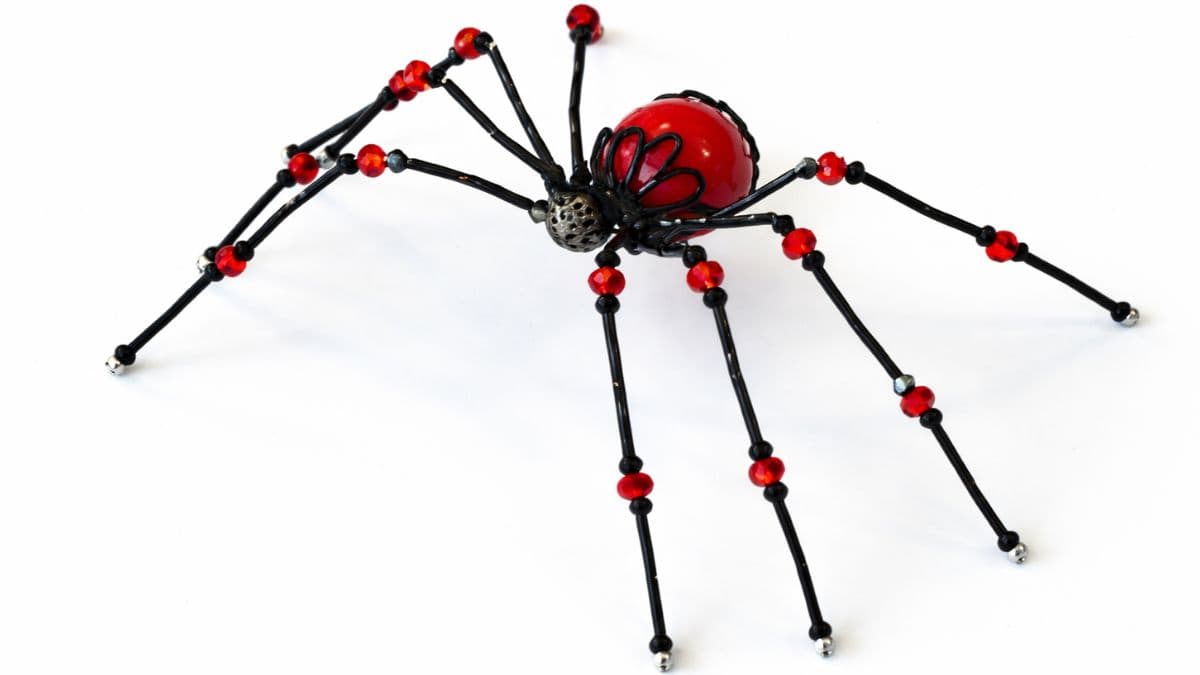
See, isn't he cute? I know you want one now, too!
Did you know there is a Legend of the Christmas Spider? It's why we put tinsel on our Christmas Trees.
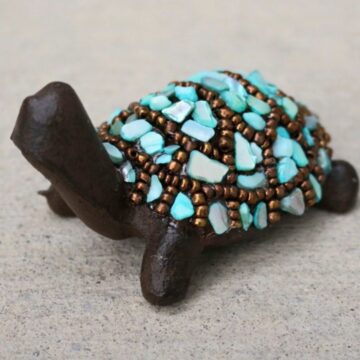
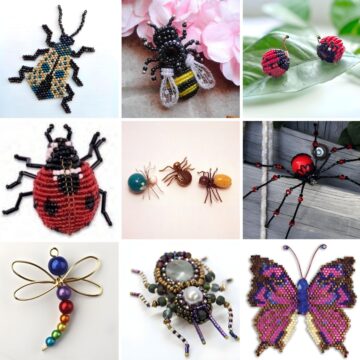
More Bead Crafts
Beads aren't just for jewelry making! Here are a few more fun ideas.


Hi, I'm Katie!
I'm so glad you're here. Want to make something fabulous? I'm here to help!
Allison Miller
This is such a fun tutorial! I love all the helpful pictures. Thanks so much for being part of the Halloween series! It was so fun having you!
Lisa
I hate spiders too and even thought this is abosoulty adorable. Its still creeps me out. But hey thats what Halloween is all about. Tooo cute!!!
Annie
I have never seen a pretty spider like this!
Nicole@Show Off Friday
That spider is too cute!
Heather
I'm with you! I can't stand real spiders, I'm too creeped out to even kill them. This is beautiful! I need to make one for my Christmas tree (according to German folklore a spider in your tree is a very good thing)!
Karen Traversy
I like spiders! I am going to try this project.
Rein
Fab spider,
thanks for sharing!
kitblu
I love spiders and think of them as 'she'. I currently have a large spider in a massive web on my front verandah. I have a smaller spider in a web on the passenger mirror of my car.I have quite a few 'art' spiders around my house all year 'round, a spider and web watch, a necklace and a bracelet. I may have some earrings, I can't remember for sure.
Julie redheadcandecorate.com
Hey Katie! I love your spider! We will be featuring her this weekend at our "Inspiration Monday Party". So nice to meet you` Julie redheadcandecorate.com
Melanie G
Such a cool idea, thank you for sharing!
Melanie
violetsbuds.blogspot.com
Tammy N
Love this spider. You could almost call her pretty. A great Halloween decoration!
Leah S
Very creative! I am with you on training the kids to kill them! If I see a spider I tell my 4 year old it is a spider emergency and he comes running prepared to kill it! I love this spider and the tutorial is very explanatory so even though I know nothing about beads, I think I could do this! Thanks for linking up to the Friday Follow Along and I hope you stop by this week because you are featured 🙂
Michelle Day
Katie, this spider is so cute! And I don't usually like spiders, lol Thanks so much for sharing at the Spooktacular Halloween link party. Have a great week.
Michelle
Darlene Nemeth
My granddaughters love your spider. Fantastic tutorial.
Heather May
That is an amazing project! The kids will love them! Thank you for linking up to the Friday Follow Along! your post was featured this week..I hope you will swing by and link up again!
Talya Tate Boerner
adorable!!! I've never done any type of bead project. You may have inspired me. Thanks!
Missy
Interesting! I'm not a big fan of spiders myself, but anything we can make with beads is fun! My girls love beading, but this is a bead project that my son would probably enjoy too 🙂 Thank you for sharing!
I found your post at the Bewitch Me & Titi Link-up.
Sheena @ Hot Eats and Cool Reads
This is so cute!! Thanks for linking up at the Spooktacular Halloween Round Up!
Randi@SowderingAbout
As much as I hate spiders, this is cute, I really love how original it is!
Jessica Blacknall
This is great! I despise birds myself, but my whole house is decorated in them. Funny how we can do that to ourselves. 🙂
Camila Rojas
This is awesome! I looove it LOL I would enjoy a lot making it. love it love it!
XOXO
Kathy Moody
I love your adorable spider, Katie! Just pinned. Thank you so much for sharing at A Bouquet of Talent this week. I featured it today at Pick of the Bunch!
Have a wonderful weekend.
Hugs
Kathy
Sherry
What a cute idea for Halloween. I love it. And Yes I am also afraid of spiders... I shared this so my sister could see how it is made and make her and her grandkids one.. Thanks for sharing..
Kristina and Millie
spooky, creepy and yet kind of cool 🙂
Alexis @ Persia Lou
This is awesome! I love Halloween decorations that are pretty. 🙂 Thanks so much for sharing with us at The Maker! Off to pin!
Kimberly
This is super cute! Pinned. Lou Lou Girls
Adrian
Spiders don't scare me so bad but snakes? Terrified! I love how this turned out:) Thanks for sharing this with us at the Teach Me Tuesday Linky Party!
Jerry and Lisa COmbs
My wife and I really love the spider and the tutorial. Thanks for the fun. And, Happy Halloween!
Vince
Thanks so much for posting!
Katie
Thank you for sharing Brad! The Spider Grandmother is very interesting.
Cathy
I love this idea. I have made spiders and used the Christmas spider story and spiders using bells and pipe cleaners. I just love the bead spiders as they are so very intricate looking. I will be making the beaded version for sure. Thank you for the tutorial.
(I do not have a website. I am told I should but I just love to make crafts)
Katie
Thanks for stopping by Cathy. I hate real spiders but LOVE the beaded version.
Kathy Hall
Beautiful. Can't see how to post my spider.
Katie Adams
You can't post it here but I would love for you to post it on Facebook or Instagram and tag me with @thecraftyblogstalker
Korey Ertley
HAAHAAAHAA!
Chris Petrozz
I have made Christmas spiders in the past but wired the legs separately ( 2 at a time one on each side of the body). The legs are too wobbly so I'm anxious to try your technique. I also used a finer gauge wire which made it harder to position them as nicely as yours.. At first I was confused about the #5 black beads but realized they are bugle beads. Thanks for these tips. And I like spiders do to the other bugs they eat & love their intricate webs!
Linda Shapiro
I love spiders but my husband is terrified of them. I think I’ll make him one 😂 - because it’s so adorable!
Katie Adams
Too funny Linda! I don't like spiders easy, but I like beaded spiders. They can't eat me. 🤣
TD (rather not post full nm)
OMGSH! I made the spider... and it's ADORABLE!!! I put a length of chain on it, since I made it holdable size, and i'm going to make a spider familiar bracelet! (Def. gonna use it for cosplay) TYSM for making this tutorial!
Katie Adams
Thank you TD! I am so glad you made your own and that you love it!