

With this easy craft tutorial, you can create an adorable beaded turtle. It's perfect as a paperweight or charming garden decor. Start crafting today!

How can you not fall in love with this little turtle?
This adorable little guy is so charming that I had to name him-say hello to Gus!
In this tutorial, you'll learn how to create your own beaded turtle, perfect for a cute paperweight or garden decor.
Follow along and make your very own Gus today!
Jump to:
Craft Tutorial Video
If videos are your thing, you're in luck-I've got a full tutorial ready for you!
Subscribe to my YouTube channel and stay inspired with every new project.
Supply List
Some links may lead to similar items when the exact item is unavailable.
- Small Cast Iron Turtle
- Bronze Seed Beads
- Crushed Shell Pieces
- Invisible Nylon Thread
- E6000 Glue
- Craft Tweezers
- Wood Sticks (optional)

String Beads
Begin by stringing bronze beads onto a length of the fishing line.
To keep the beads from sliding off, string a bead close to the end of the line and tie a knot around the bead.
Then, string the rest of the beads.

The string of beads will make gluing the beads onto the turtle much easier than gluing them on one at a time.
Glue Seed Beads
Apply E6000 glue to the turtle shell in small sections at a time, following the grooves of the shell.
After applying a small glue line, lay the strung beads into the glue line and press the beads into the glue.

Hold the beads in place for a moment while the glue begins to take hold, then slowly and carefully remove the fishing line from that section of beads.
The beads should stay in place.

Carefully move around the shell. Since the glue takes a bit to dry, the beads can be knocked out of place.
I found it easiest to start with the large ring around the shell.

Then, the little pieces out to the end of the turtle shell.

The inside grooves I did last.

Glue Crushed Shell Pieces
Fill a section with E6000 glue, then add the crushed pieces with tweezers.
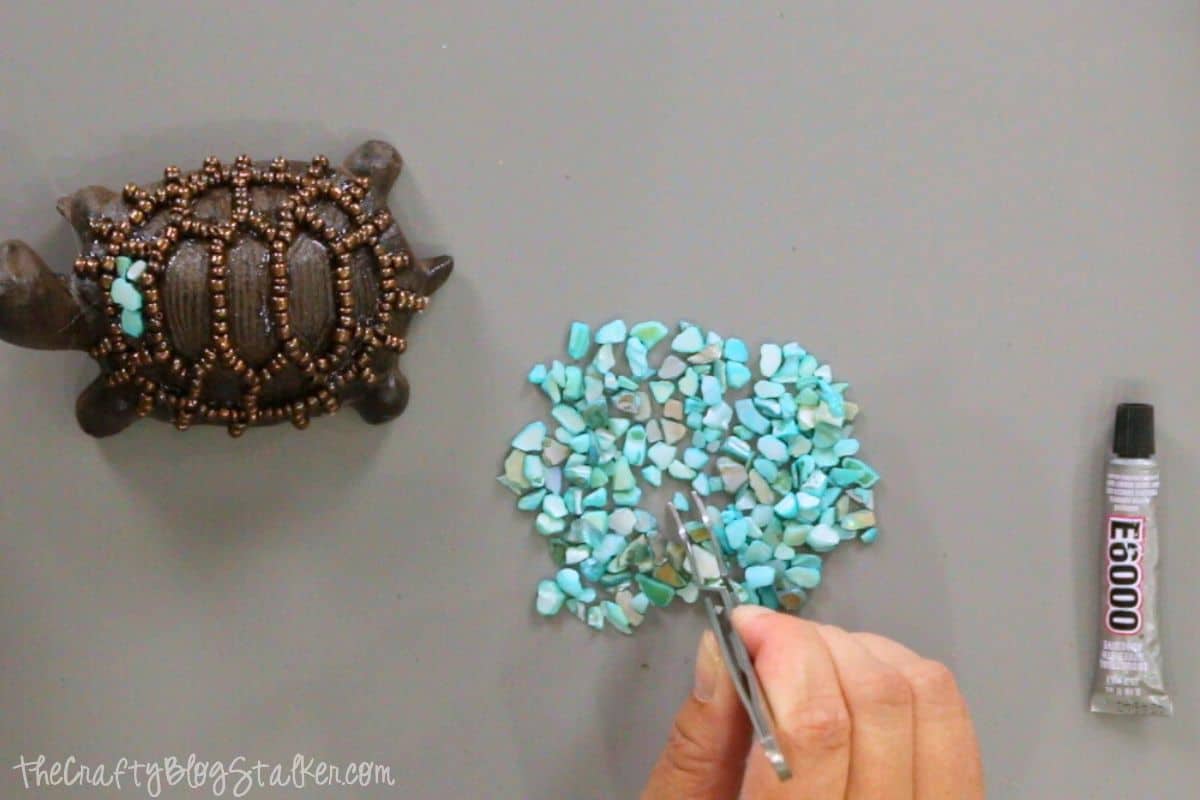
Make sure to cover the entire shell.

That's it! Your little slowpoke is done in 3 easy steps!
Final Thoughts
This beaded turtle is so cute, and I absolutely love him!

I love him so much that I made a second turtle and made her look completely different.

As you can see, the turtle can be customized to fit any style.
This project is perfect for anyone who loves sea turtles. Makes a great handmade gift or home decor item.
Crafting Essentials
- The Cricut Cutting Machine is easily my favorite crafting tool. We use it in so many of our tutorials!
- These MakerX Crafting Tools are perfect for keeping in the craft room and are always ready when needed!
- This Fiskars Paper Trimmer is easy to use and cuts nicely without frayed edges.
- These Scotch Precision Scissors cut like a dream, and you get multiple pairs in a pack!