

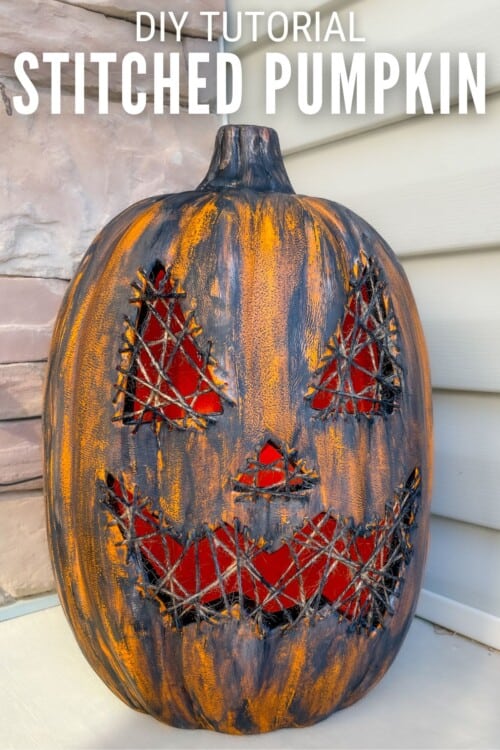
Get ready for Halloween by stitching your own jack-o-lantern! Check out these easy instructions for a stitched pumpkin to put on your porch this fall.
Halloween is one of my favorite holidays to craft for. I just love the variation from cute to creepy and everything in between.
This project has been on my mind for a couple of years, it just took me a while to get it done, and I am so excited to share the results with you!
Craft Tutorial Video
If videos are your thing, you're in luck-I've got a full tutorial ready for you!
Subscribe to my YouTube channel and stay inspired with every new project.
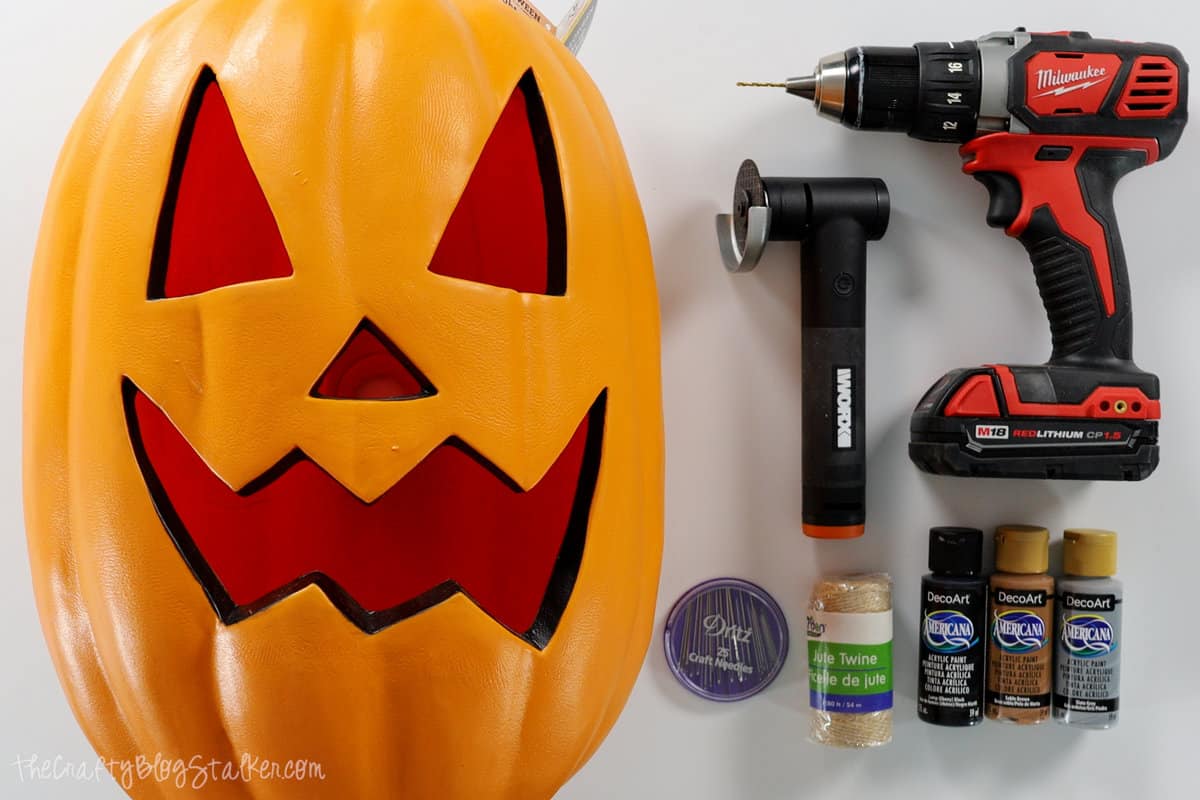
Supplies You'll Need to Create this Project:
- Light Up Pumpkin
- Angle Grinder with Cutting Wheel
- Drill with 3/32 Drill Bit
- Large Eye Craft Needle
- Twine
- Gray Acrylic Paint
- Black Acrylic Paint
- Brown Acrylic Paint
- Foam Brush
- Rag
Remove the Light Bulb:
In the back of the pumpkin are the lightbulb and cord.
To remove, squeeze the plastic casing around the light bulb and pull.
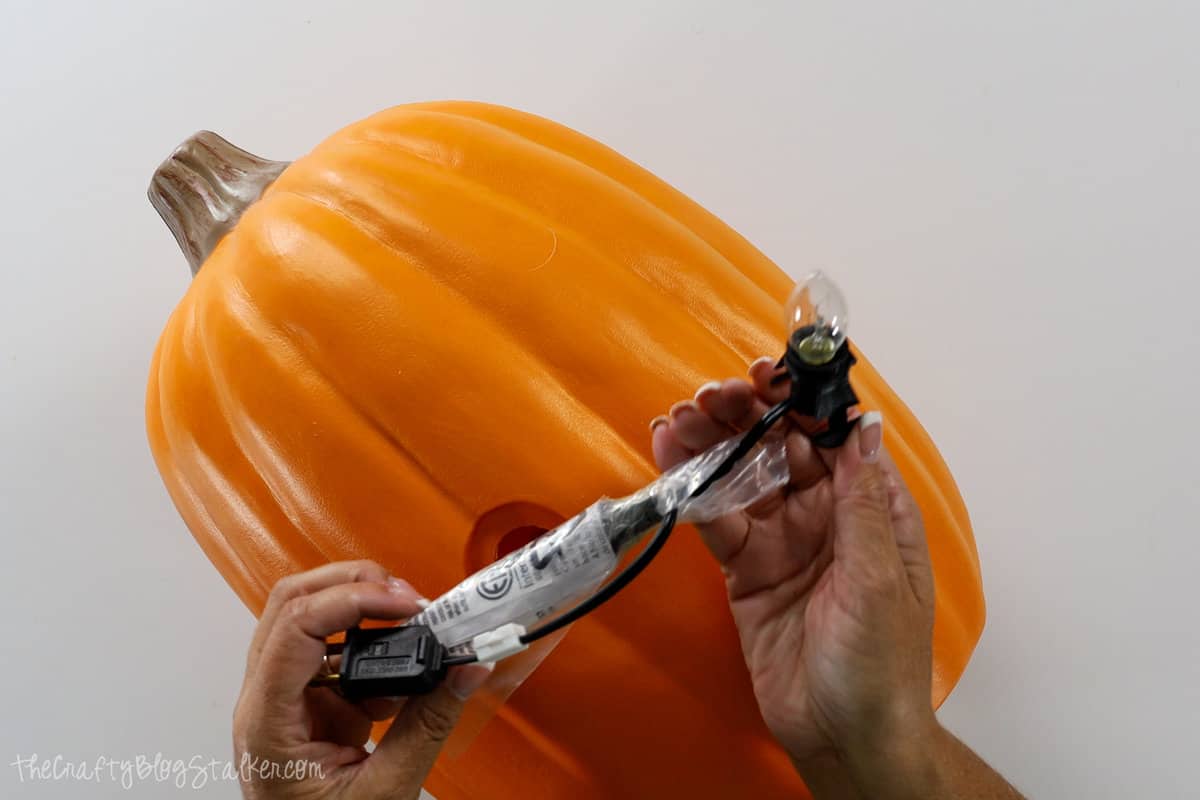
We will be putting this back in once the pumpkin is finished, so don't misplace it.
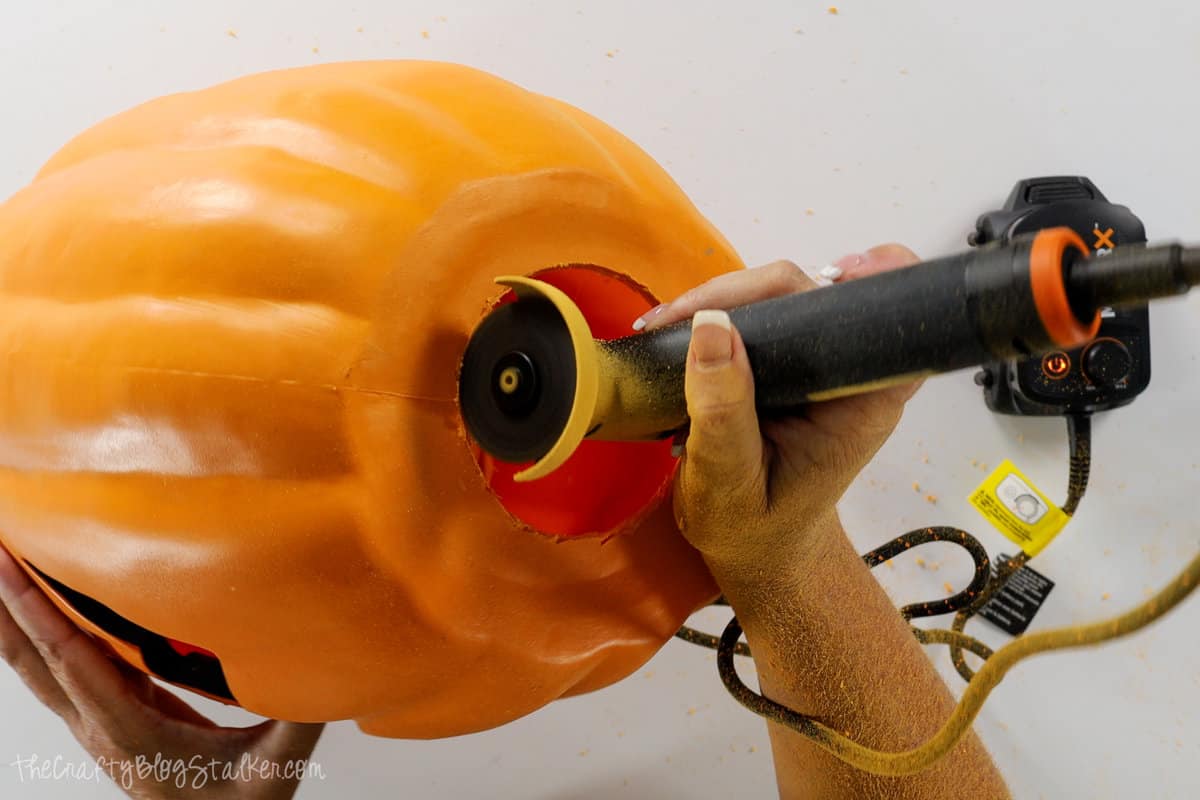
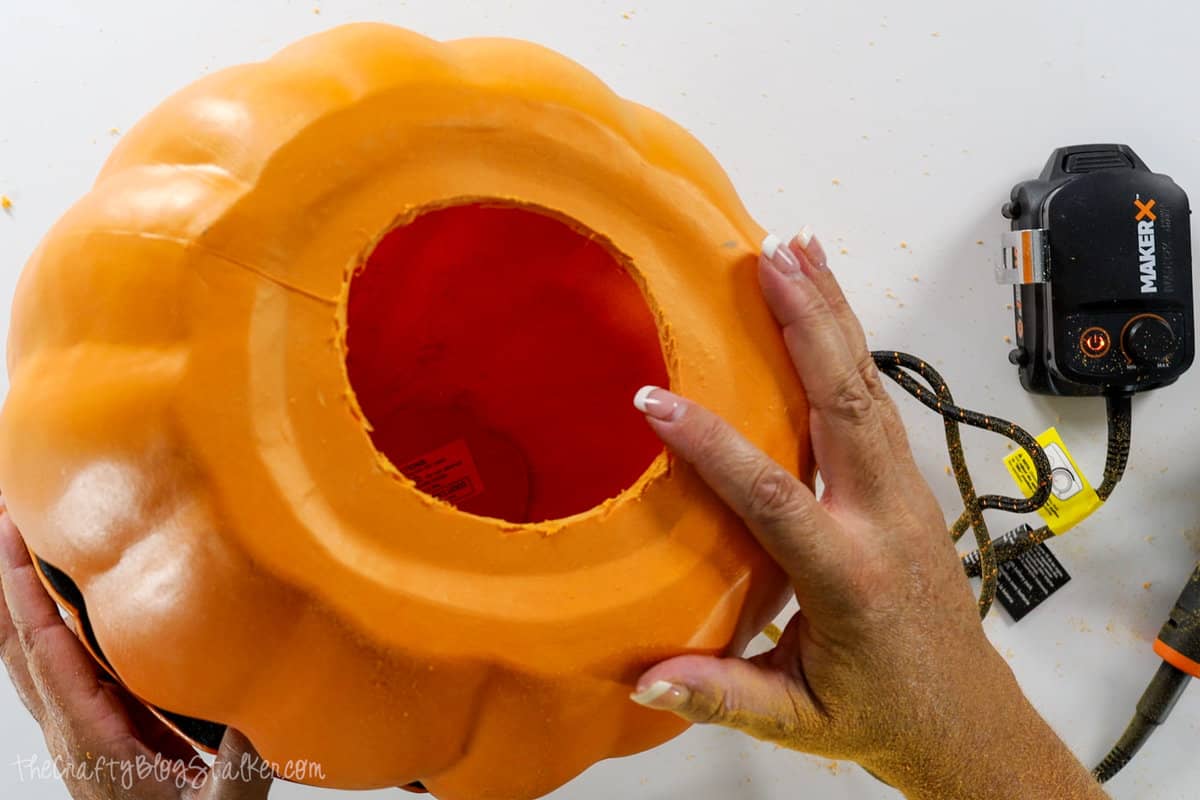
Cut a Hole in the Bottom:
To start, we want to cut a hole in the bottom of the pumpkin.
This hole will make it so you can put your hand inside while stitching with the twine.
I used my Worx Angle Grinder with a cutting wheel that is rated for plastic and metal.
Make sure to wear protective eyewear!
Drill Holes for Stitching:
Use a drill with a 3/32 drill bit and drill holes around the eye, nose, and mouth openings.
I did not measure. Perfect isn't creepy, chaos is. 🤣
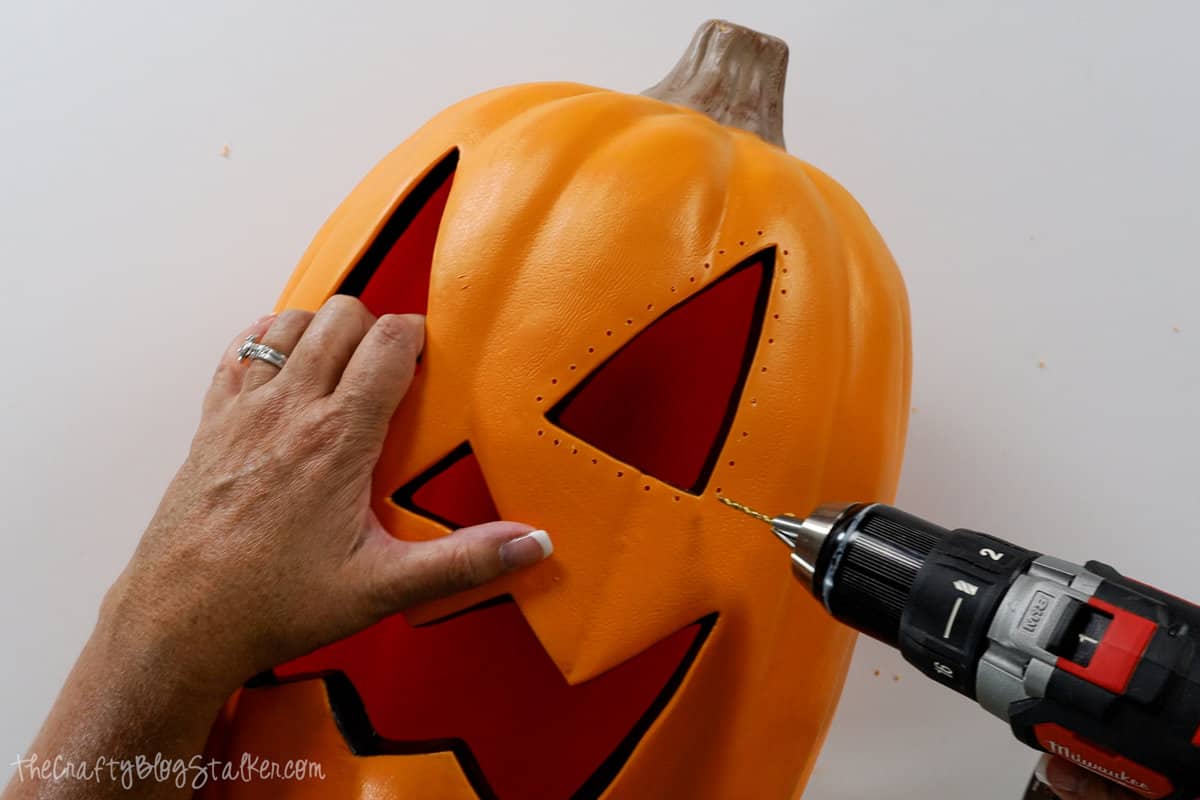
The size of your holes depends on the twine you are using. If you are using a thicker twine you will want to drill bigger holes.

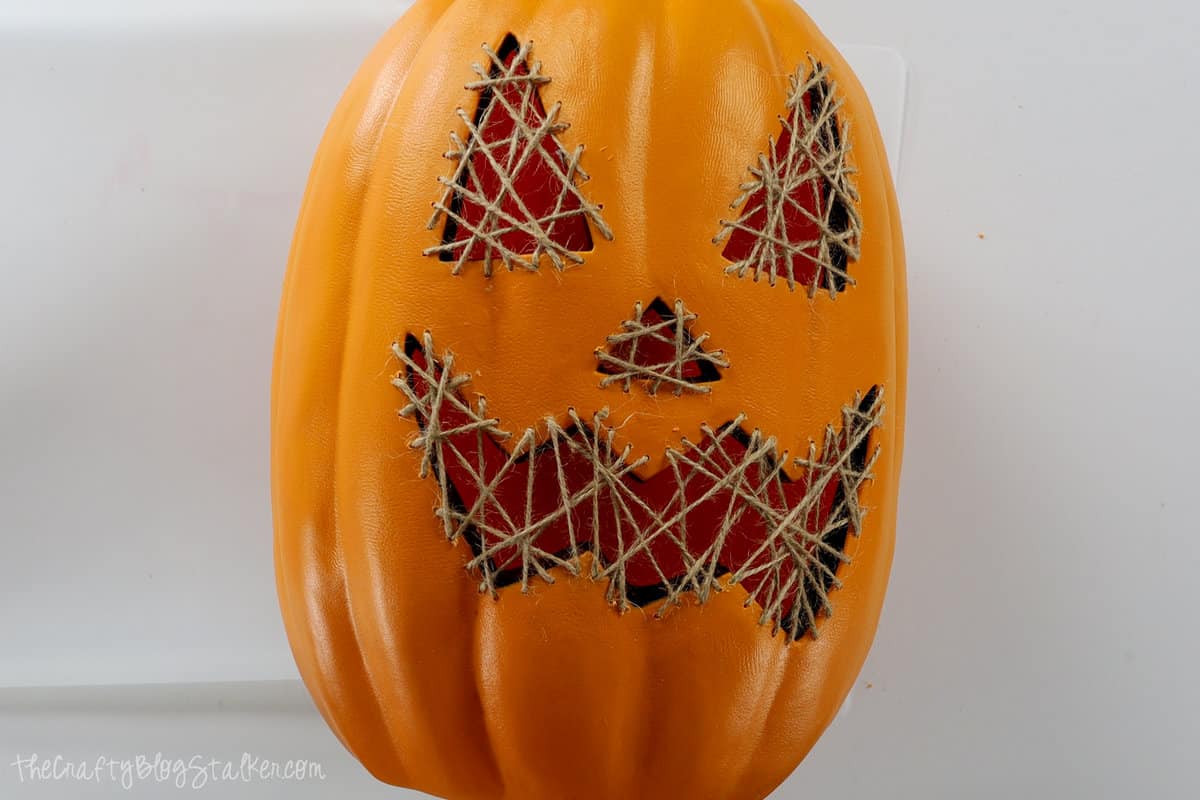
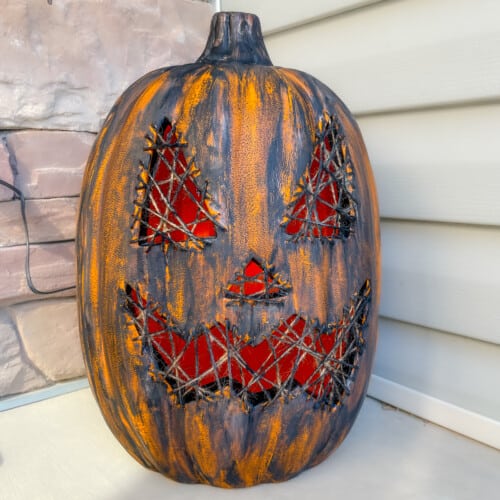
Stitch with Twine:
Thread the twine through the eye of the craft needle and begin stitching.
Again, I did not go in any specific criss-cross pattern. My stitches go in every direction.
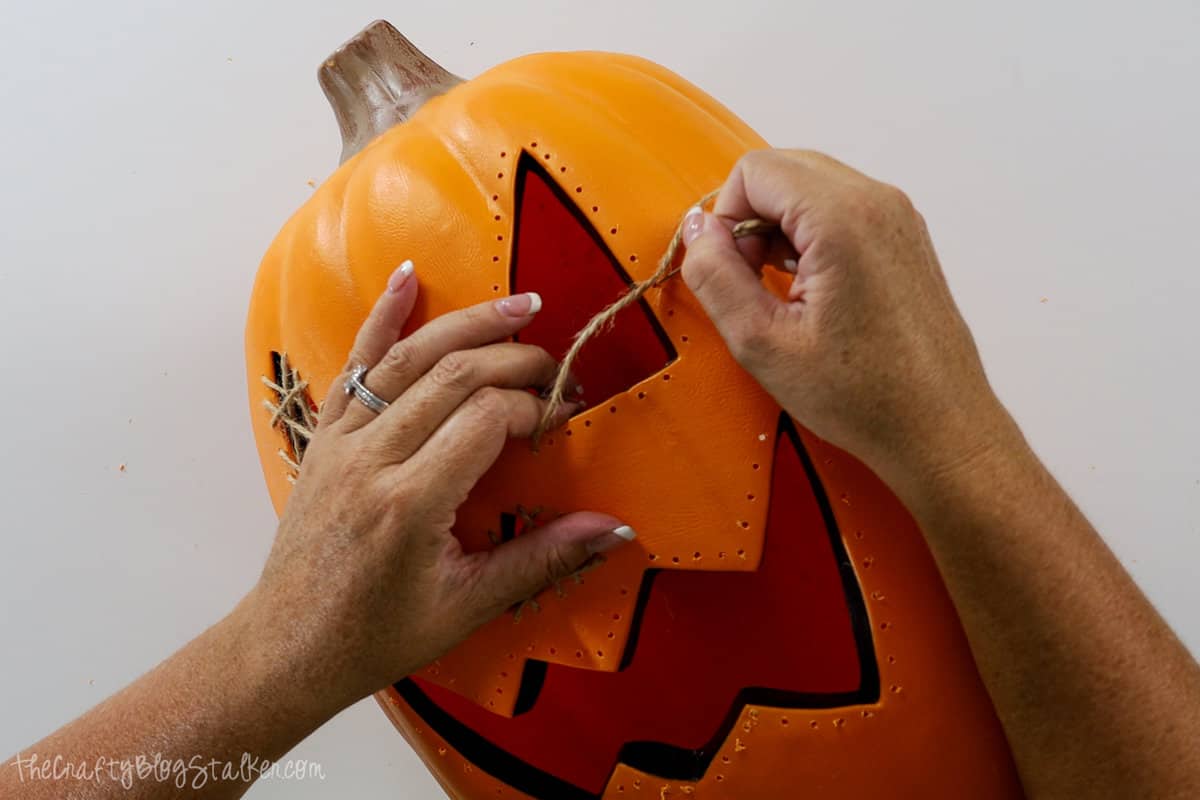
I started with the left eye and moved clockwise to stitch the different openings.
When I came to the end of a length of twine, I tried my best to tie it off on the inside of the pumpkin and started with another length where I left off.
Paint the Pumpkin:
To paint my pumpkin I used three different colors of acrylic paint.
I started pretty light adding streaks of grey around the whole pumpkin, even painting parts of the stitched twine.
Next, I applied black paint and went pretty heavy with it.
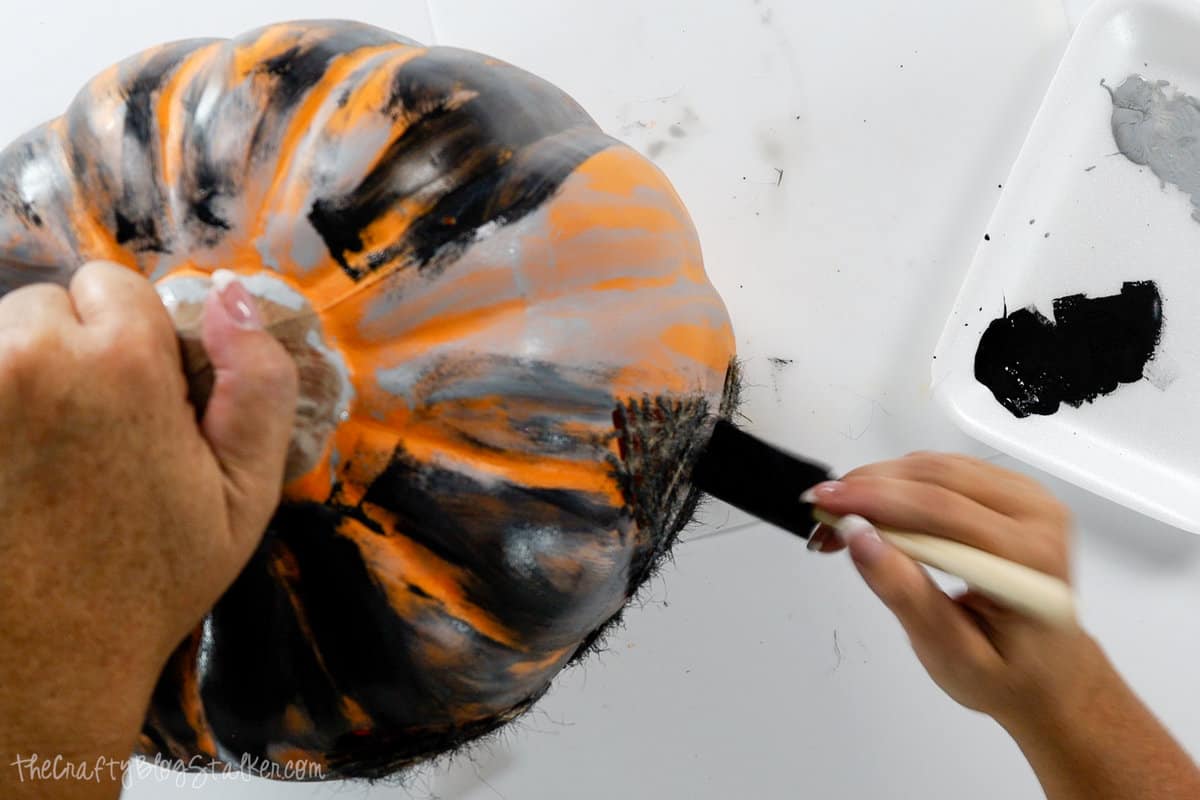
Last, I went around the pumpkin with the brown paint and really tried to cover up most of the orange from showing through.
Before the paint dried, I wiped the pumpkin with a rag. Now I wanted the orange to peek through.

You can decide how much you want to wipe off and how much you want to leave on. I ended up wiping quite a bit off, more than I thought I would.
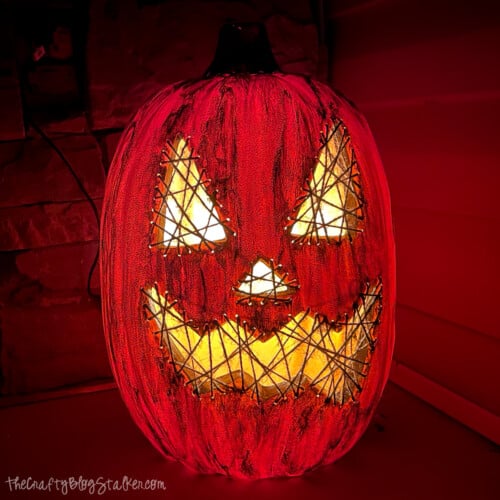
Insert the Light Bulb:
Once your creepy pumpkin is completely dry, place the light bulb back in place.
Doesn't he look creepy and fantastic?
he looks even creepier at night, all lit up!
Crafting Essentials
- The Cricut Cutting Machine is easily my favorite crafting tool. We use it in so many of our tutorials!
- These MakerX Crafting Tools are perfect for keeping in the craft room and are always ready when needed!
- This Fiskars Paper Trimmer is easy to use and cuts nicely without frayed edges.
- These Scotch Precision Scissors cut like a dream, and you get multiple pairs in a pack!
Beth
Katie, we love this Jack-O-Lantern SO MUCH!
Lisa
That pumpkin looks so creepy. You're a genius. Might try this next year.
Katie Adams
😆 Thanks Lisa!