

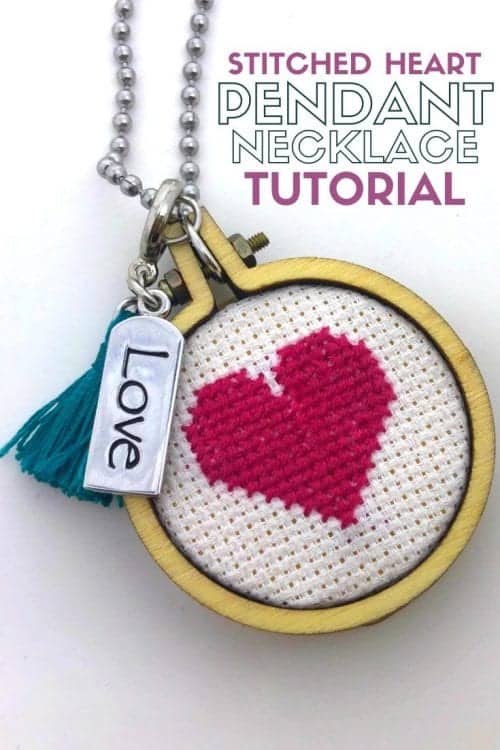
Make a beautiful stitched heart pendant necklace with a step-by-step tutorial. A DIY heart necklace is a great addition to your handmade jewelry collection.
A heart is so much more than a cute symbol, a heart defines love and unity.
While February is the season of hearts, you can show off hearts all year long! That is why I love this stitched heart necklace so much.
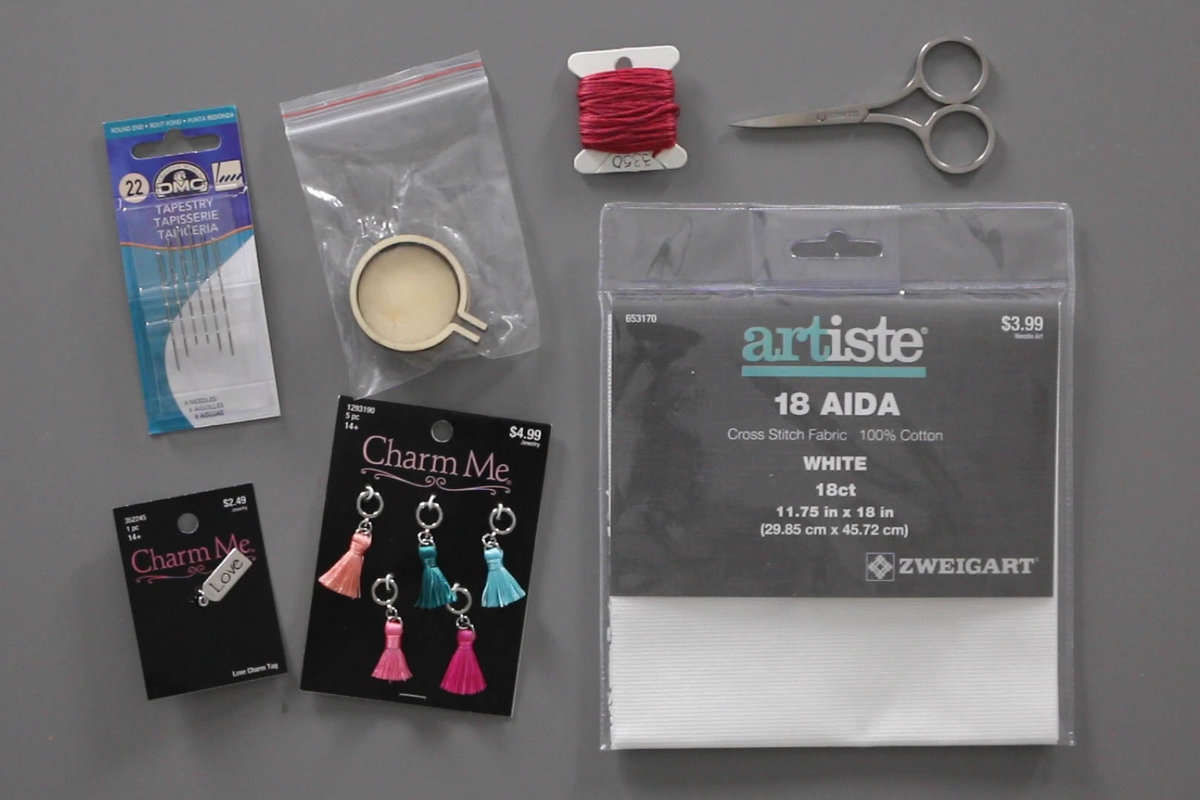
Supplies Used to Make a Love Heart Pendant Necklace
Some links may lead to similar items when the exact item is unavailable.
- Mini Embroidery Hoop Pendants
- 18 Aida Cloth
- Needle
- DMC Floss (I used 3350)
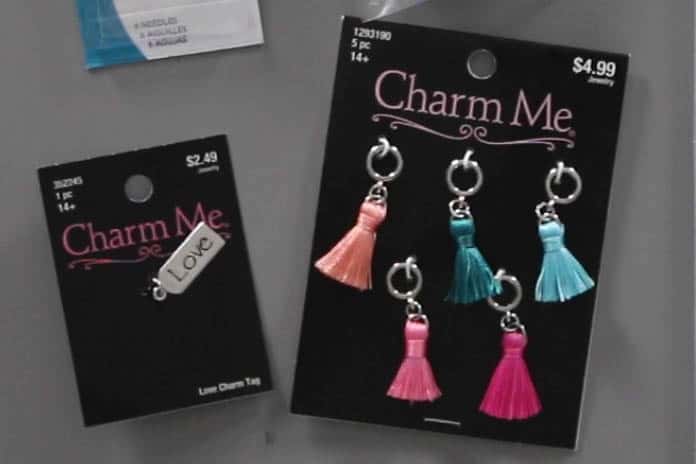
- Charms
- Embroidery Scissors
- Jump Rings
- 2 Pairs Jewelry Needle Nose Pliers
- Hot Glue Gun
- Small Screw Driver Set
Love Heart Pendant Necklace Video Tutorial
Like videos? I have a video tutorial for you! Please subscribe to my YouTube Channel so you don't miss out on any future video tutorials!
Making the Cross Stitch Heart
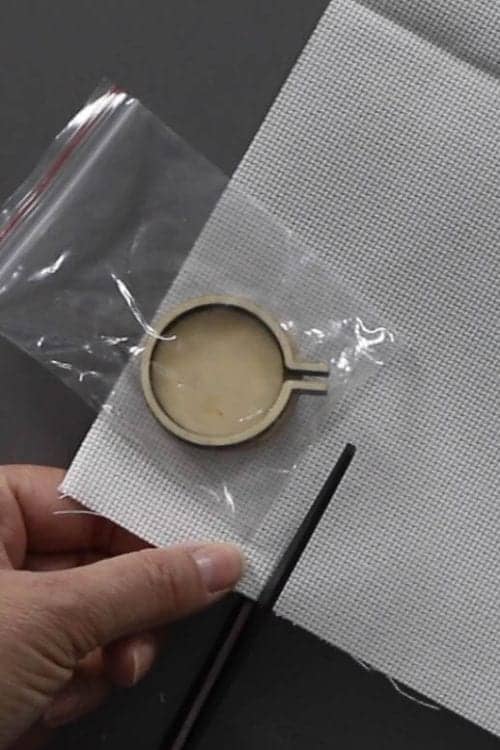
To begin cut a square out of the Aida Cloth. You want the piece larger than the mini hoop pendant.
Cut a piece of DMC Floss. The floss is made up of 6 strands, and for this project, you will want to separate the piece so it contains 2 strands. Thread the floss through the needle and tie a stopper knot at the end of the strand.
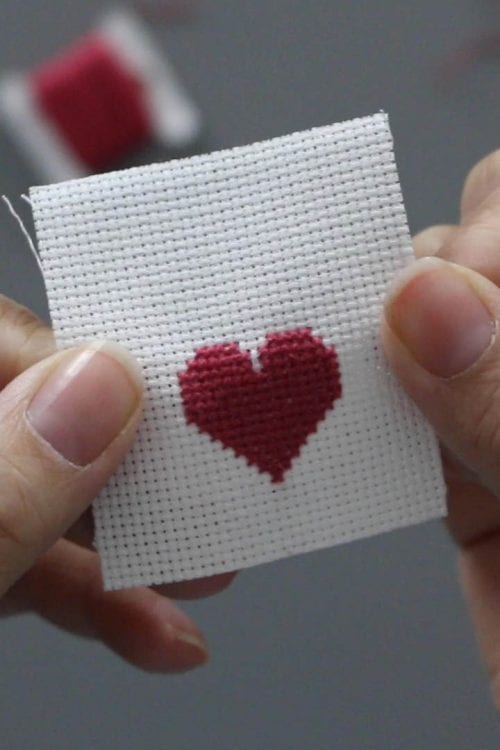
This is the pattern I used for the heart, but you could use any small cross stitch pattern as long as the finished design fits inside the mini hoop pendant.
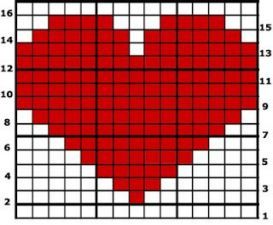
For this project, I did not count over to make sure the design is perfectly centered because I will be trimming away the excess anyways. So I guestimated the center near the bottom and began stitching.
Work from the bottom of the pattern and up.
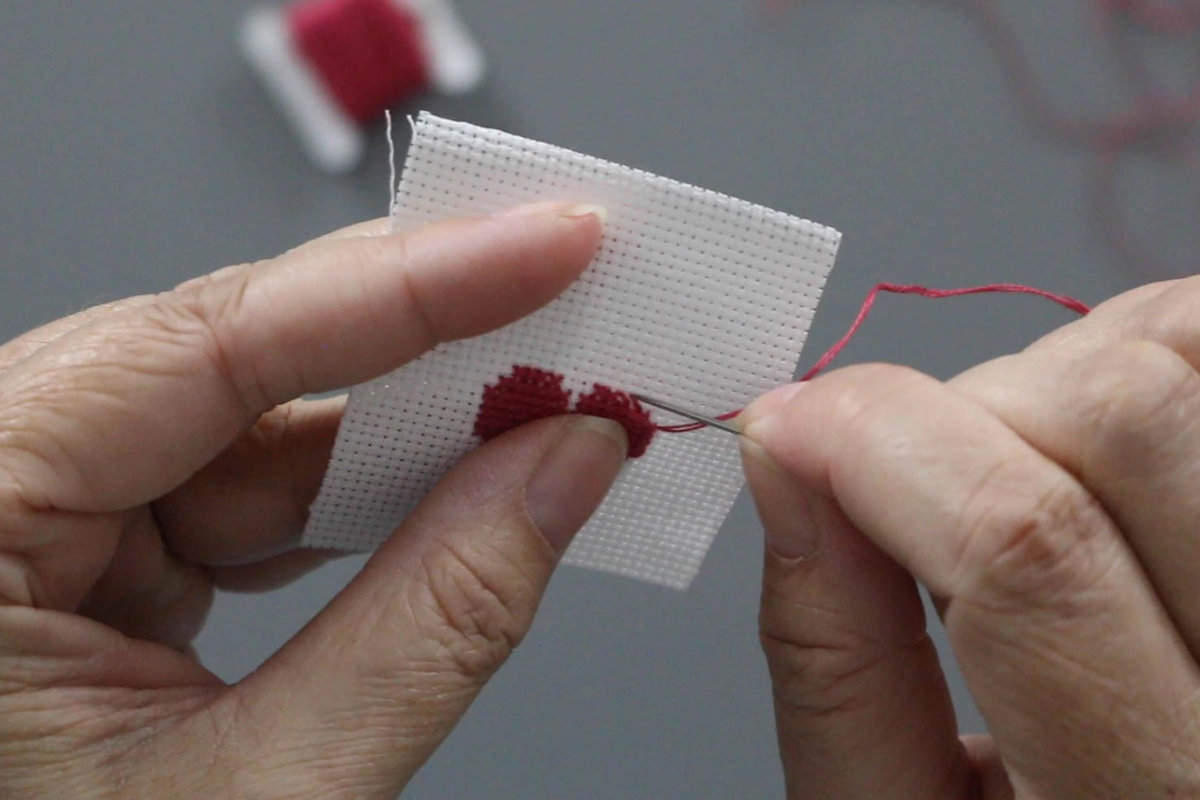
Hint: to give the design a nice smooth look, have all the base stitches go from right to left corners and the top stitches to go from left to right corners.
Placing the Design in the Mini Hoop
The mini embroidery hoop comes in three pieces. The hoop, the insert, and the back cover.
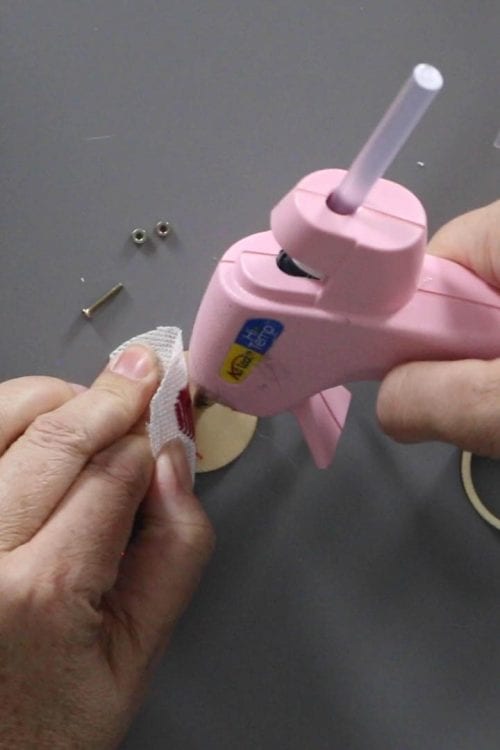
Center the stitched design over the insert and trim away the excess but give plenty of room to wrap the Aida cloth to the back of the insert.
Put a small dab of hot glue behind the center of the design to secure it in place. Then wrap the edges securing with the hot glue as well.
Place the hoop over the top of the insert and use the screw and bolts to tighten into place.
Before twisting the screw all the way through, place a jump ring over the screw, as shown below.
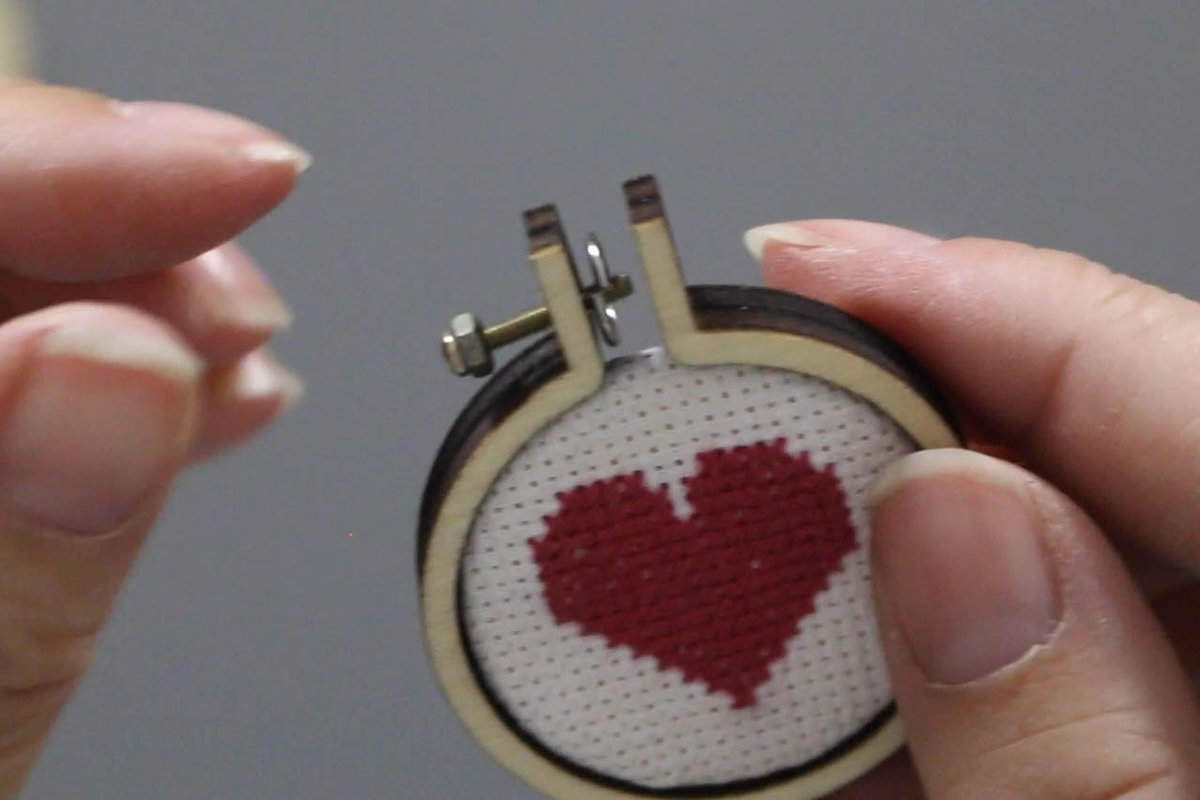
The Screw and bolts are super tiny. Having a small screwdriver is very helpful.
Making the Love Charm
Adding a charm to the necklace is completely optional, but I really like how it adds to the finished look of the necklace.
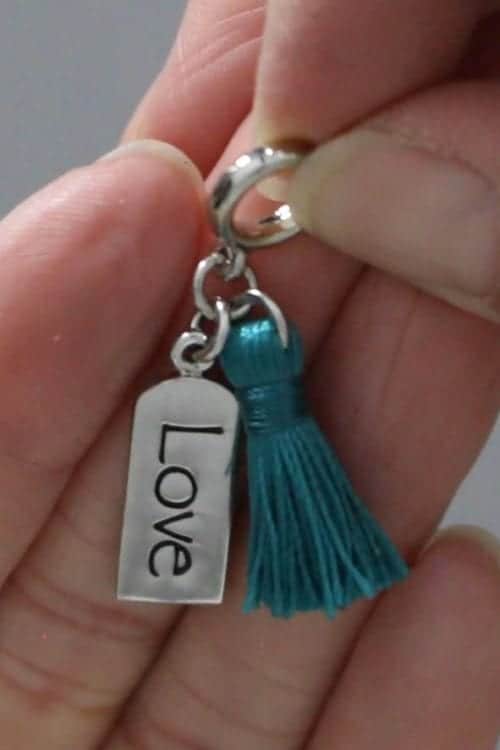
To Make the charm, I added the "love" charm to the tassel charm.
To add the "love" charm we need to open one of the jump rings on the tassel charm.
With the opening to the jump ring at the top of the ring, take two pairs of jewelry needle nose pliers, one on each side of the ring.
Slowly twist your right wrist to open the ring.
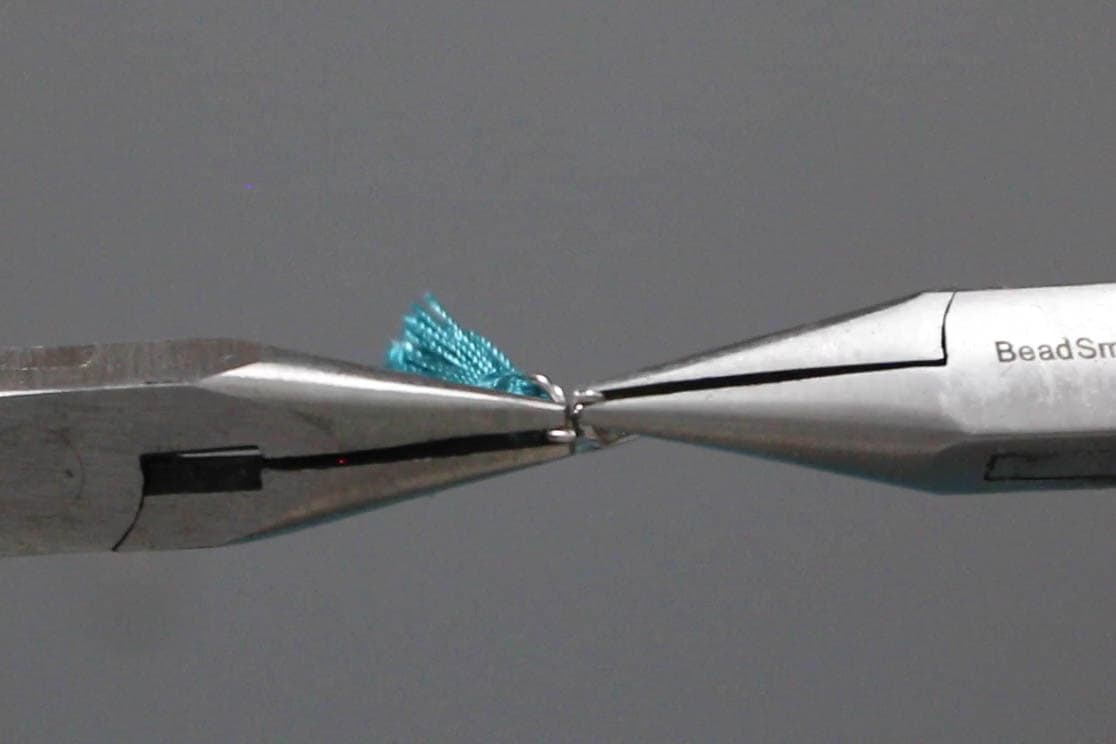
Slide the ring from the "love" charm into the open ring. To close the jump ring, use the same twisting motion used to open the ring.
Isn't the finished charm cute?!
Finishing the Love Heart Pendant Necklace
Using the same technique as above to open and close jump rings, you will want to add one more jump ring to the mini embroidery hoop pendant.
Now all of the pieces are finished, all that is left is to string the stitched heart pendant and charm onto the necklace chain.
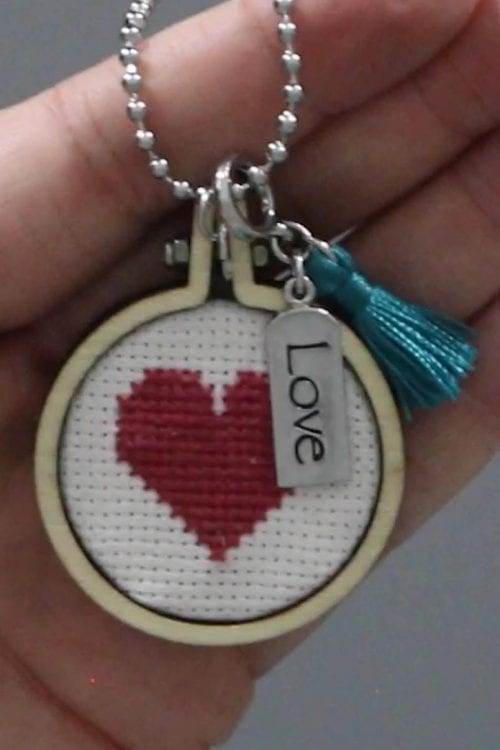
I cut the chain length to 22-inches and that length works really well for me.

What do you think? Would you make one with the same heart design or would you do something different?
Crafting Essentials
- The Cricut Cutting Machine is easily my favorite crafting tool. We use it in so many of our tutorials!
- These MakerX Crafting Tools are perfect for keeping in the craft room and are always ready when needed!
- This Fiskars Paper Trimmer is easy to use and cuts nicely without frayed edges.
- These Scotch Precision Scissors cut like a dream, and you get multiple pairs in a pack!
cARRIE @ Crafty Moms Share
Oh, those are so cute!!
Aki @ Minted Strawberry
So cute! Thanks for linking up at Friday Finds!
Emily
Aw, I love these necklaces! Thanks for linking up with Merry Monday!
Rebecca @ My Girlish Whims
So cute! Perfect for valentines day 🙂 Thanks for linking up to my party!!
jacqui Korroch
What a Treasure Idea for a Special Friend, Teacher or Family member.