

This post is sponsored by MakerX. All opinions expressed are my own.
Want to greet your guests outside? Learn to make this 'Oh Hello Porch Sign' with a wood plank, MakerX tools, and some paint.

Are you looking to update your front door area? If so, a new front porch sign is a great addition!
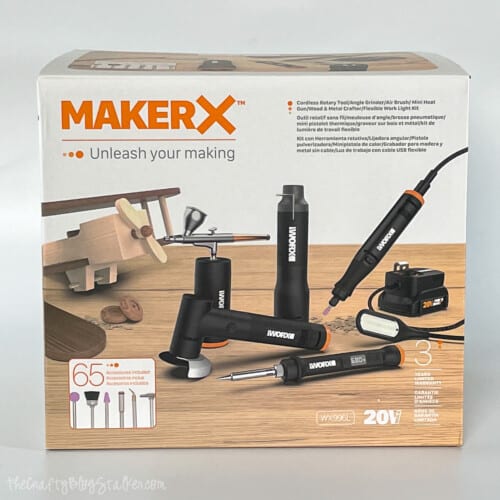
MakerX Ultimate Crafting Tools Combo Kit:
To make this project I used 2 tools from the MakerX 6 pc Ultimate Crafting Tools Combo kit.
The Angle Grinder and the Airbrush are the tools I used. The kit also includes a Wood and Metal Crafter, Rotary Tool, Mini Heat Gun, a USB Flex Light, 2 rechargeable Batteries, the Quick Charger, and the MakerX Hub that connects each tool to the rechargeable batteries.
To learn more about the combo kit and the tools included, visit Unboxing the Best Crafting Tools Kit by MakerX.
Craft Tutorial Video:
Like videos? I have a video tutorial for you! Please subscribe to my YouTube Channel so you don't miss out on any future video tutorials!
Supplies You'll Need to Create this Project:
- MakerX Crafting Tool Combo Kit
- Wood Plank 48" x 9.5"
- Wood Trim 8'
- Wood Glue
- Paper Towel
- White Acrylic Paint
- Paintbrush
- Free Oh Hello SVG
- Cricut Cutting Machine
- Vinyl
- Transfer Tape
- Black Airbrush Paint

If you don't want to purchase the entire kit, you can buy the tools individually. Just don't forget the MakerX Hub and Battery!
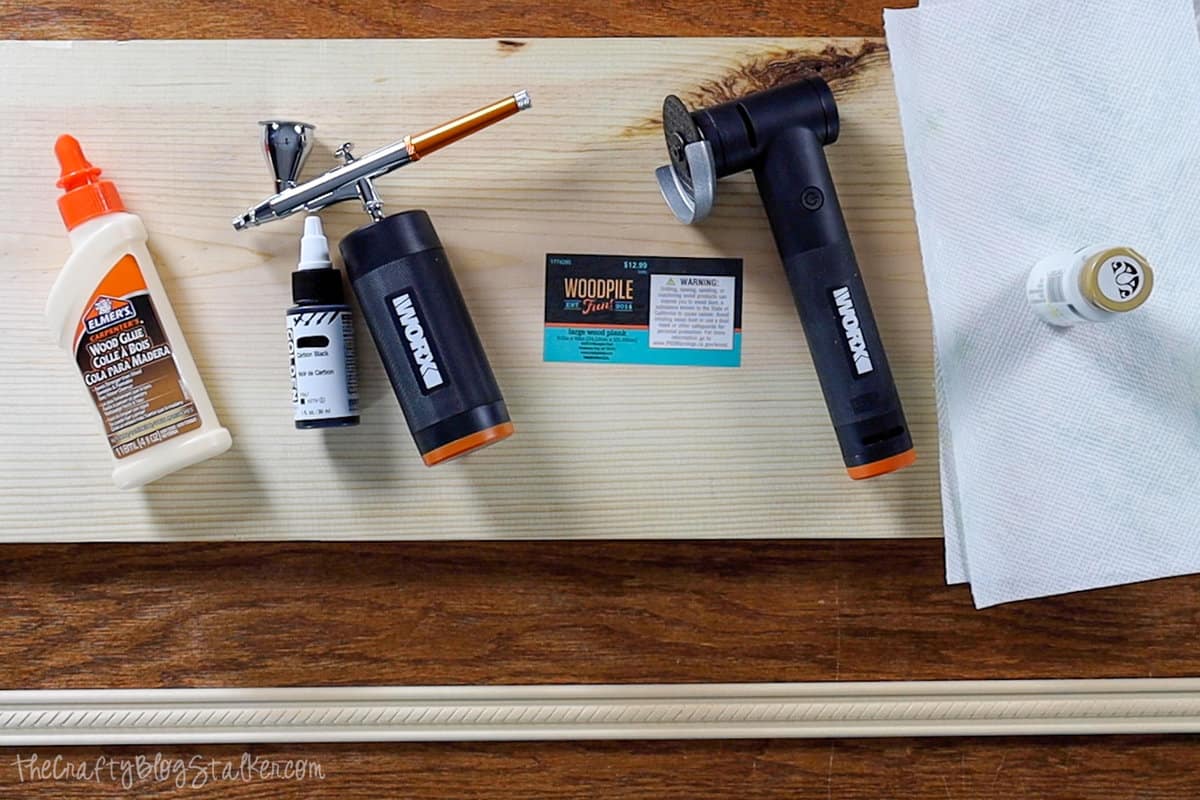
Prepping the Wood Plank:
My wood plank was 48" x 9.5 inches when I purchased it.
If your wood plank is longer, you must cut the length down to 4 feet or the desired length for your sign.
Wood Trim:
The wood trim came in 8 feet, which was perfect because I needed two lengths of 4 feet.
I measured out 4 feet on the back of the trim and marked it with a pencil.
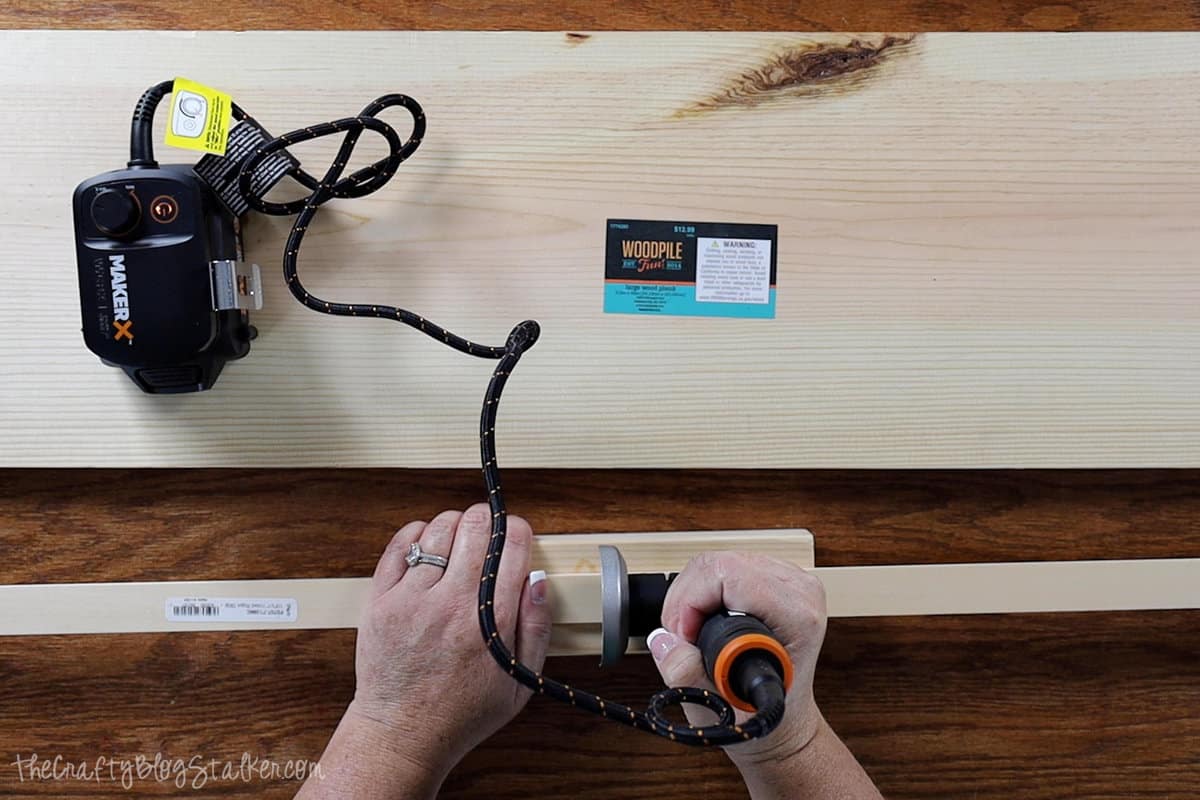
Since I will be cutting wood, I put on glasses to keep my eyes safe.

Then, I cut the trim at the marked line using the MakerX Angle Grinder and a 2" cutting wheel.
I put a scrap piece of wood underneath the trim so I wouldn't cut into my table.
To glue the wood trim into place, I applied a glue line to the back of the trim piece.
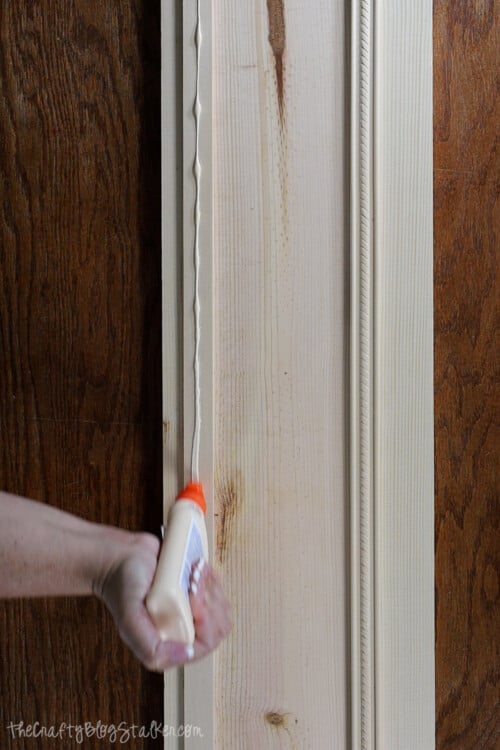
And aligned the trim up with the edge of the wood plank.
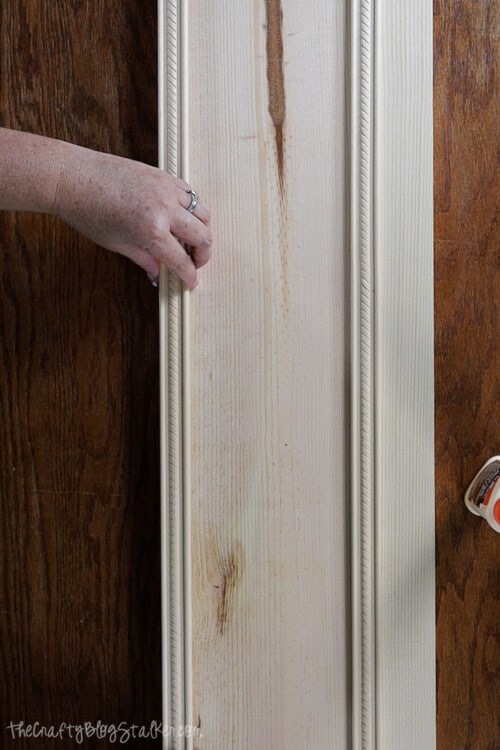
I kept a wet paper towel handy to wipe up any glue that seeped out the edges.
Then, it repeated for the opposite side, so trim was going down both sides of the wood plank.
Let the glue dry for about 45 minutes before moving on to the next step.
Painting the Sign:
Paint the entire front of the sign with a whitewash. This allows the wood grain to be seen through the white paint.
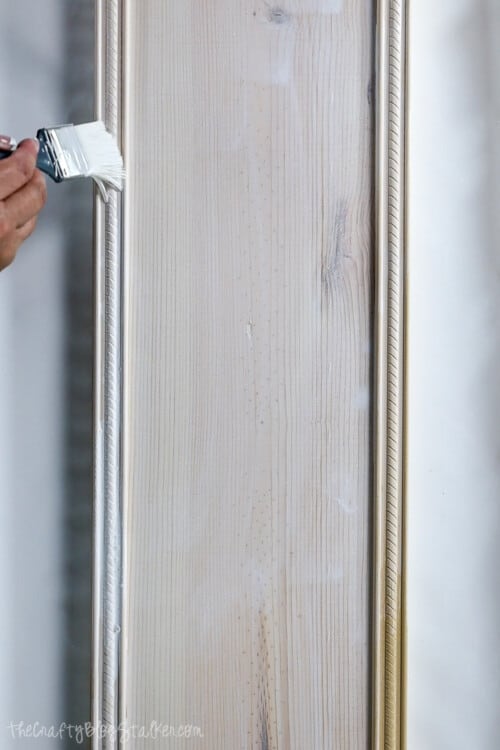
I don't have exact measurements for the whitewash mixture, but you should add a bit of water to thin the white acrylic paint.
Paint a bit on the sign to see if it is consistent. If it to too light add more paint, if it is too thick add more water.
I applied two coats of whitewashed paint, letting each coat dry between each one. Make sure to paint the trim and the edges of the sign.
Grab the Free SVG:
To begin, Grab the Oh Hello SVG design.
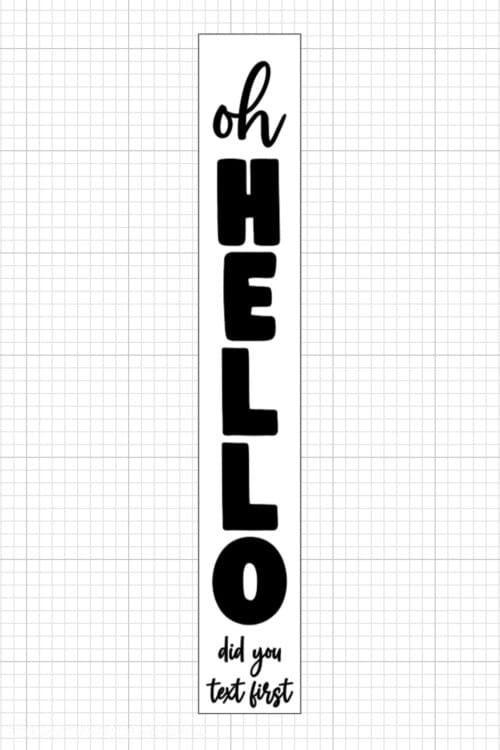
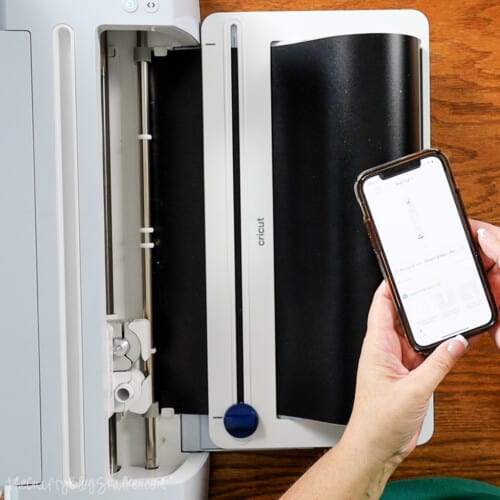
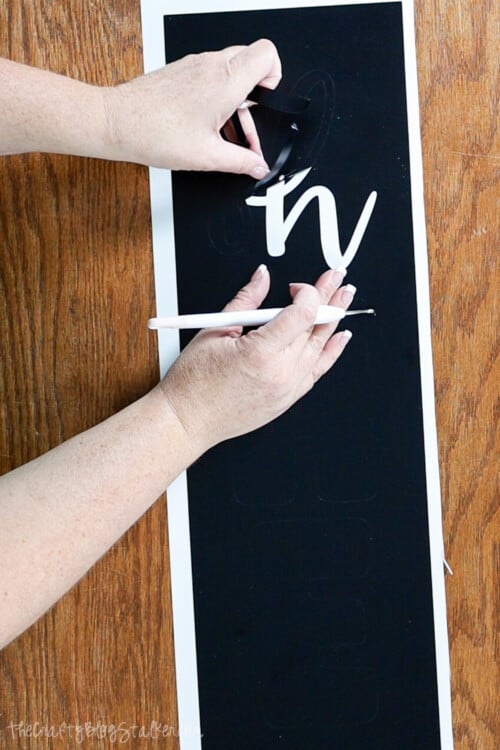
Cut the Stencil Using a Cricut:
Upload the Oh Hello SVG into Cricut Design Space and make sure that it is sized correctly to fit your sign.
Then cut the stencil out using any color of vinyl.
Prepare the Vinyl Stencil:
My stencil is 7 inches wide, so I trimmed off the unused vinyl before weeding so I could use that vinyl for another project.
Since we use this as a stencil, we want to remove the letters from the design.
Once the letters are removed, you'll be left with a large rectangle of vinyl with the letters removed.
Cut a length of Transfer Tape that will fit over the stencil's top, then apply it.
Slowly remove the backing paper from the vinyl, making sure that all pieces of the vinyl stick to the transfer tape.
Applying the Vinyl Stencil:
Ensure the whitewash paint on the sign is completely dry before laying the stencil onto the sign.
Use a Scraper tool to get any air bubbles out from behind the vinyl stencil and ensure the vinyl is suitable and stuck to the wood sign.
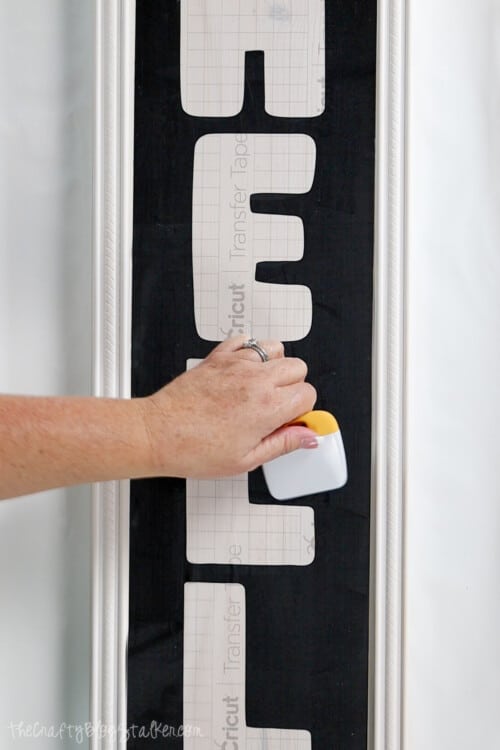
Peel back the transfer tape, and remove it entirely from the wood sign.
Then, go around the edges of the sign with some masking tape to cover up the trim and any exposed area that didn't get covered with the stencil.
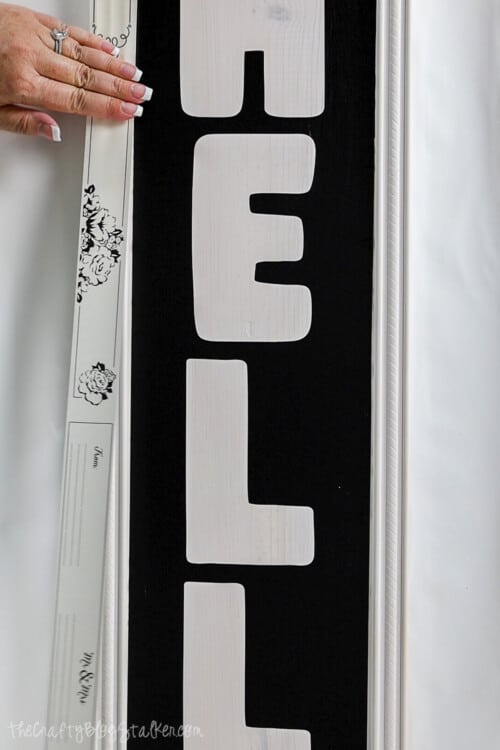
This will protect your sign from any droplets or spillage while painting in the letters.
Paint with the Airbrush Tool:
Fill the airbrush nozzle reservoir with the high-flow airbrush paint.
Plug the airbrush tool into the MakerX Hub and press the power button.
Press a trigger on the top of the airbrush with your finger, and then you begin filling in the stencil with the black paint.
Each letter took about 3 coats of airbrush paint to get complete coverage.
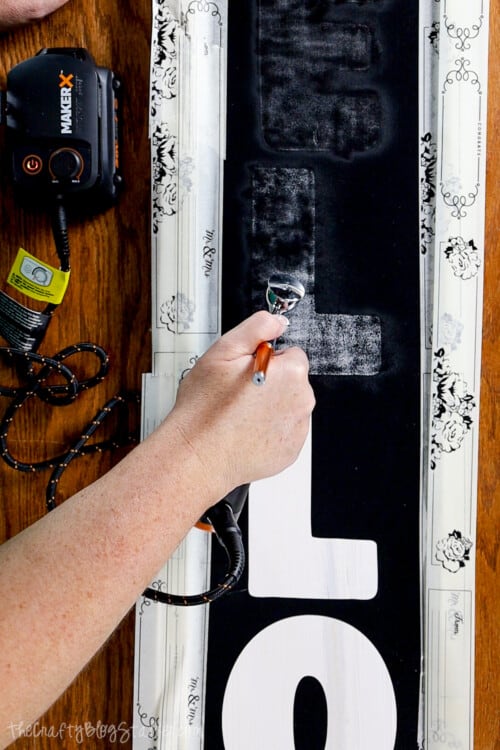
Let the paint dry for about 15 minutes before moving on to the next step.
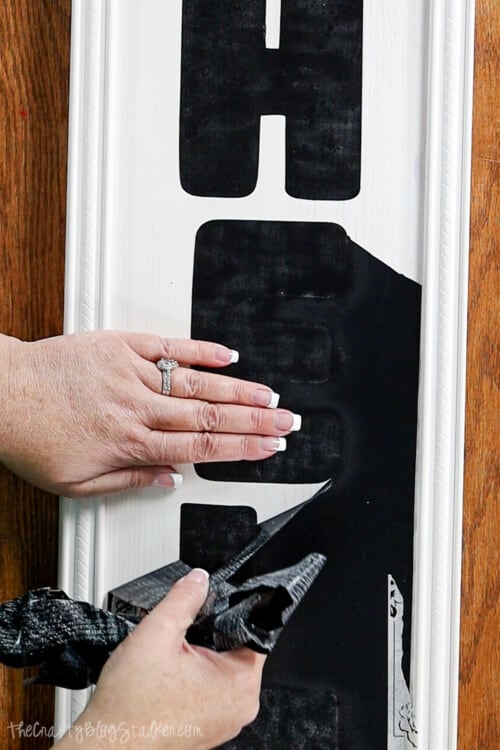
Removing the Stencil:
Once the sign is dry, remove the masking tape around the edges and peel back the vinyl stencil.
I absolutely love how my new porch sign turned out, and I couldn't wait to put my new welcome sign outside by my front door!

Crafting Essentials
- The Cricut Cutting Machine is easily my favorite crafting tool. We use it in so many of our tutorials!
- These MakerX Crafting Tools are perfect for keeping in the craft room and are always ready when needed!
- This Fiskars Paper Trimmer is easy to use and cuts nicely without frayed edges.
- These Scotch Precision Scissors cut like a dream, and you get multiple pairs in a pack!
Laura
This is seriously the BEST “hello” sign saying I’ve seen! Perfectly fitting for me since I’m always saying text when here do NOT knock 😂 (Dog mom issues). I definitely will be making this at some point! I love the trim also!
Katie Adams
Thank you so much, laura. I am so glad that you like this tutorial! ❤️