

Looking for a unique Christmas tree decoration that uses an Arabesque tile? Learn how to make this beautiful ceramic tile ornament using our free SVG.
My very favorite holiday tradition is our family ornament exchange.
Every year each person makes 10 of the same ornaments. Then we get together around Thanksgiving and we swap.
So everyone will leave with 10 different ornaments made by people they love!
We have been doing this for over 20 years, and my Christmas tree only has handmade ornaments hanging on it.
I absolutely love it!
Craft Tutorial Video:
Like videos? I have a video tutorial for you! Please subscribe to my YouTube Channel so you don't miss out on any future video tutorials!
Where to Buy Arabesque Tiles:
You will be able to find arabesque-shaped tile and just about tile, flooring, or home improvement store.
But, not all arabesque shapes are the same.
In the picture below are two different sheets of arabesques tiles from two different stores. The size and shape are different.
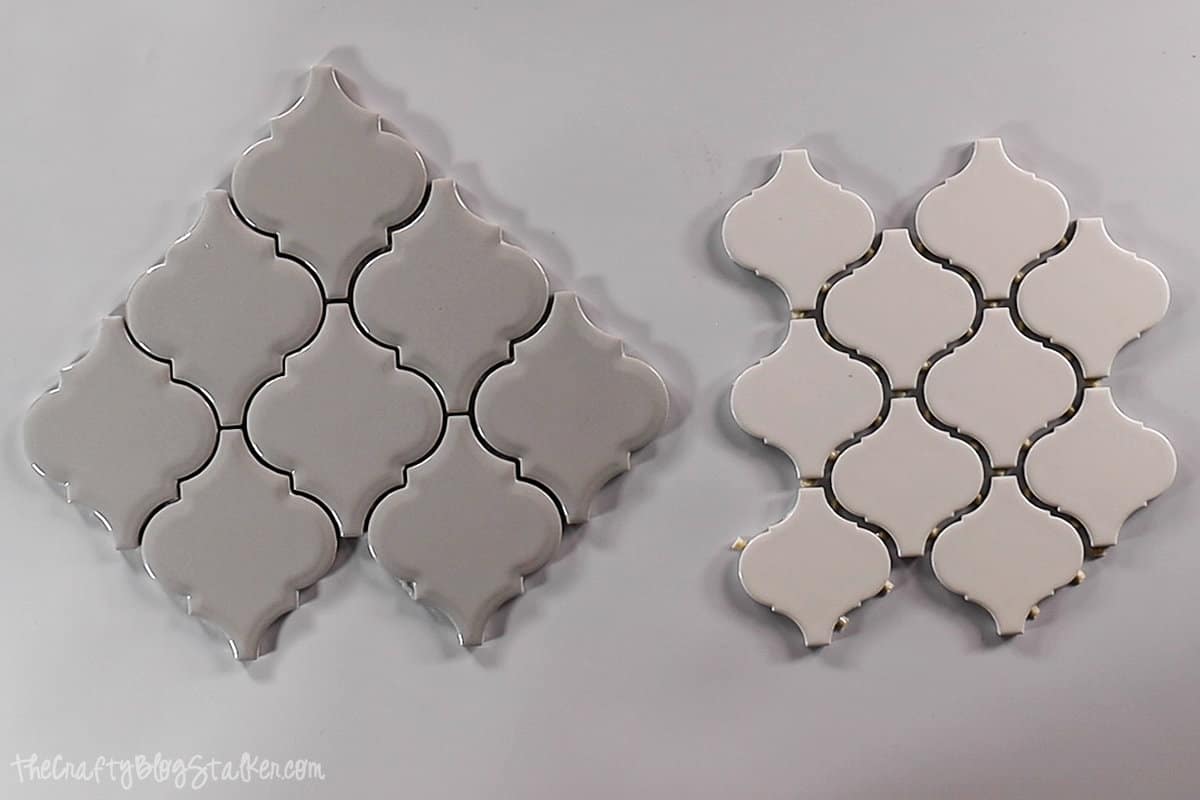
The gray tile on the left is from Lowes, and the white tile on the right is from Home Depot.
What size does the SVG work with?
You can grab this design for either Home Depot tiles or Lowe's tiles.
Just make sure you are grabbing the correct version for the tiles you have because they each are a different size.
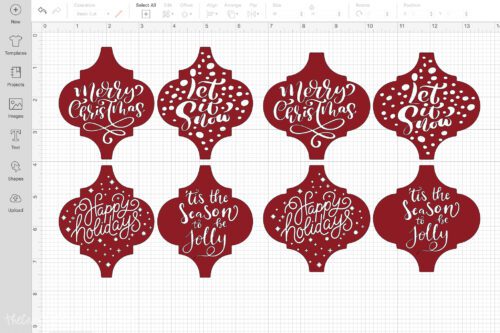
Grab the Free SVG Cut Files Here:
This is the Home Depot Tile SVG File.

This is the Lowes Tile SVG File.

Cut the File in Cricut Design Space:
Upload the SVG files into your cutting software, I use Cricut Design Space.
Measure your tiles and adjust the size of the design as needed.
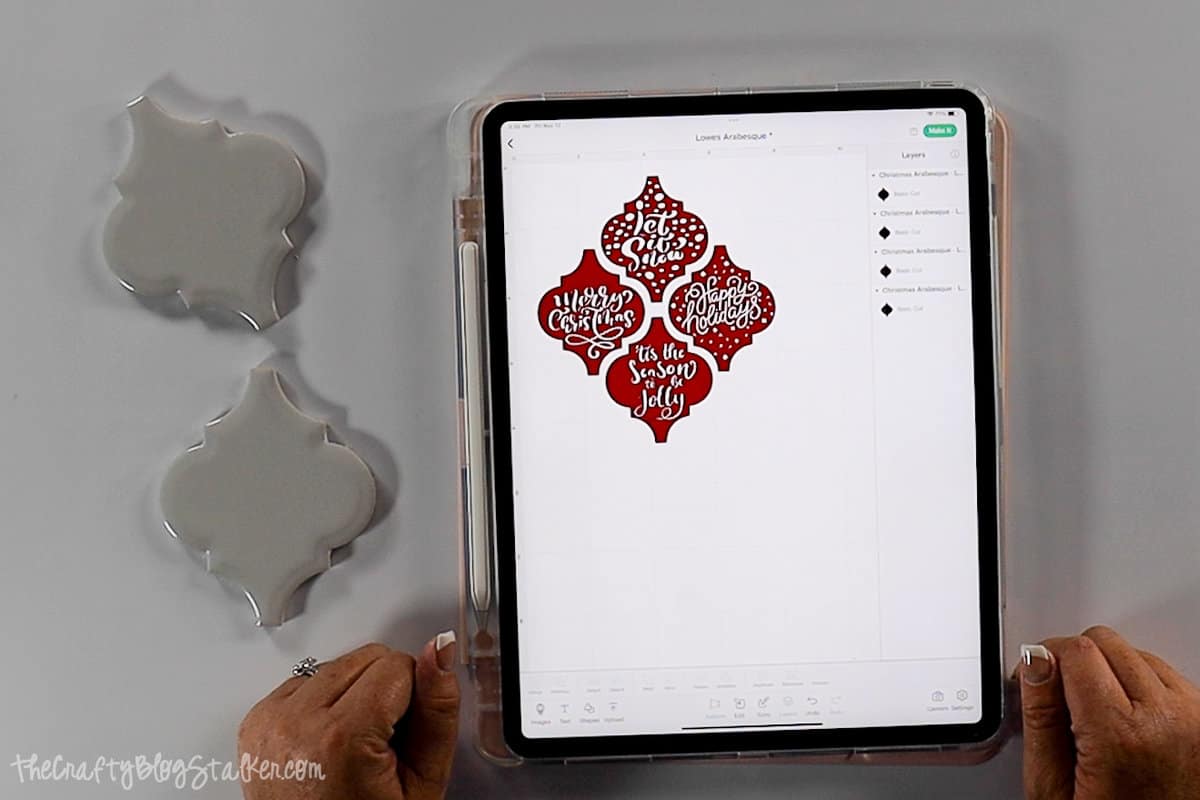
Place the adhesive foil on the mat and load it into your machine.
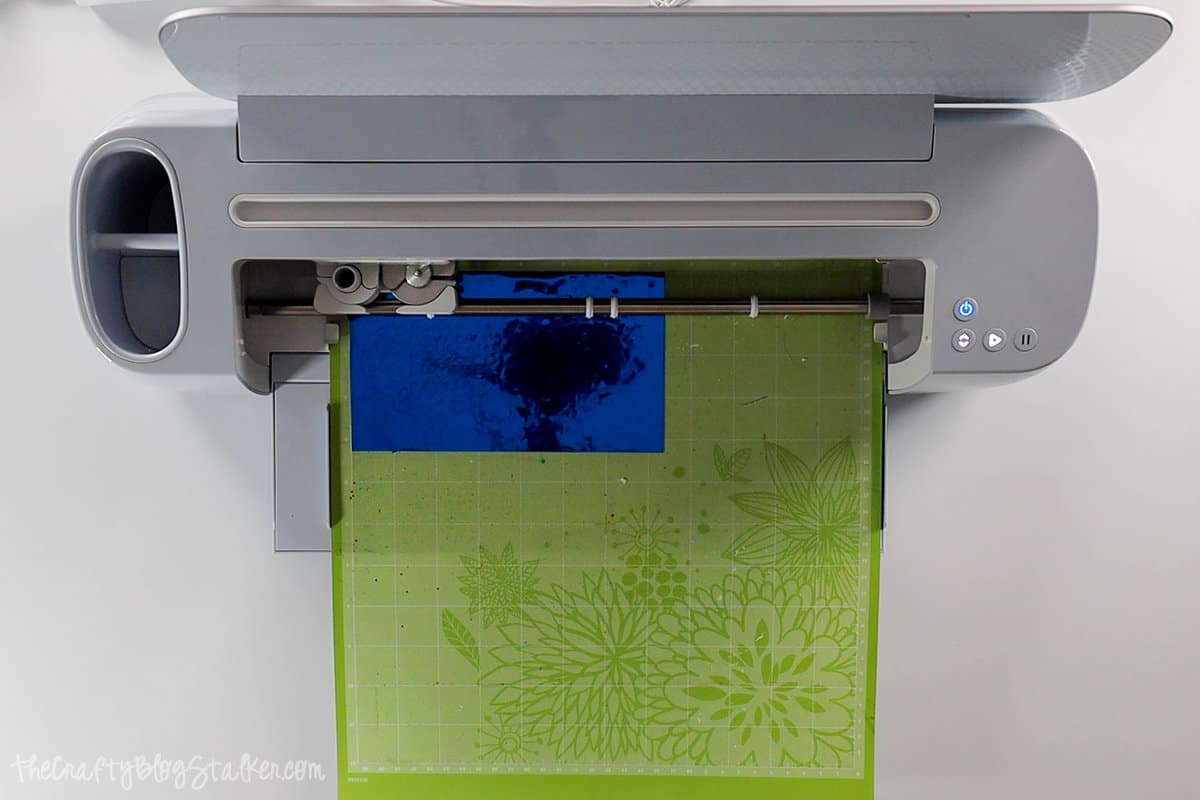
Follow the prompts from your cutting software and cut the design.
Weeding the Design:
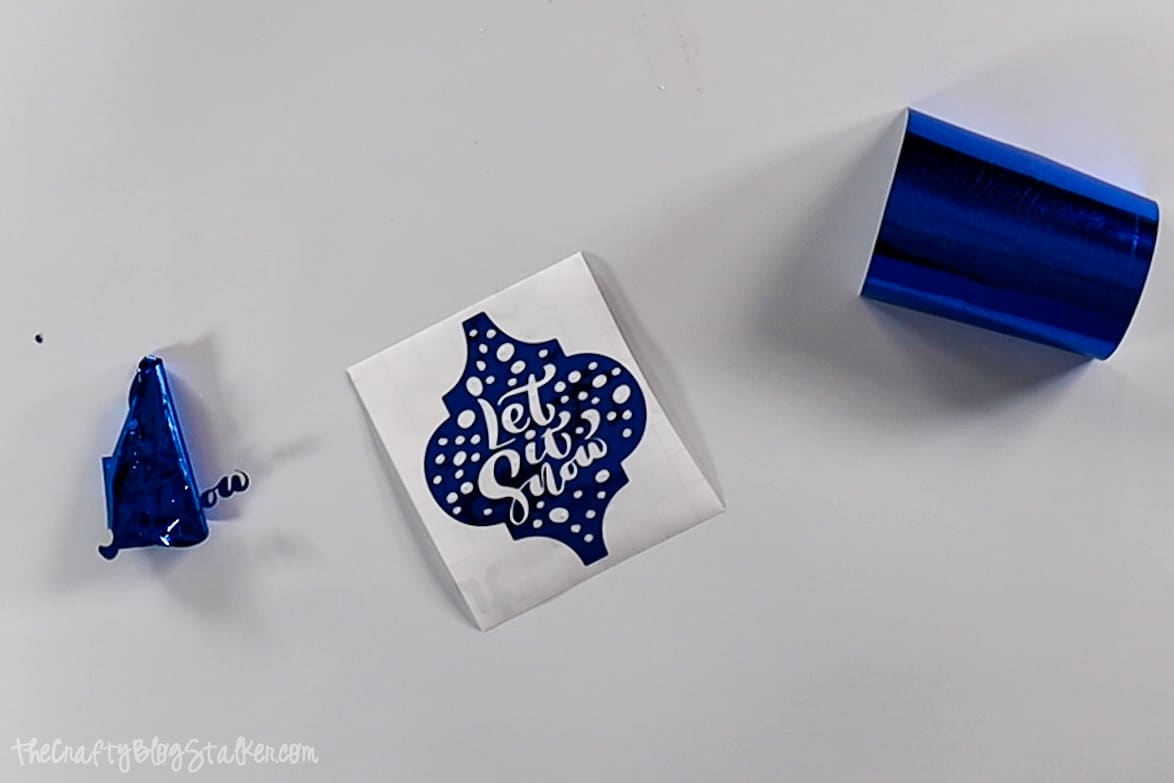
Remove the foil from the mat, and cut the different designs apart with a pair of scissors.
You'll want to weed each design separately.
Using a weeding tool, remove the negative pieces of the design.
Next, apply a square of transfer tape over the design and press it into the tape using the scraping tool.
- If you are using foil, like me, you need to be very patient and move slowly through the next step. Foil vinyl can be a pain to work with. If you are using regular vinyl then just proceed as normal.
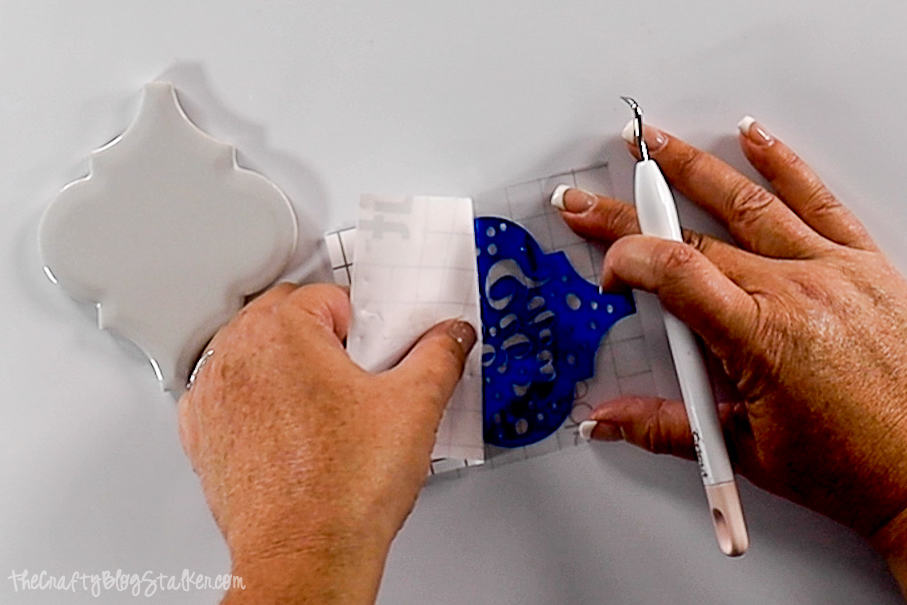
Flip the design so it is facing down. Slowly peel back the paper making sure that every part of the design is sticking to the transfer tape.
Watch out for the inside letter pieces, they can be tricky. Use the weeding tool as needed to help hold pieces to the tape.
Applying the Vinyl Decals:
Hold the transfer tape over the tile and eyeball your spacing. Once you think you have it centered, apply the tape to the arabesque tile and press it all over the ornament using your thumb or scraper tool.
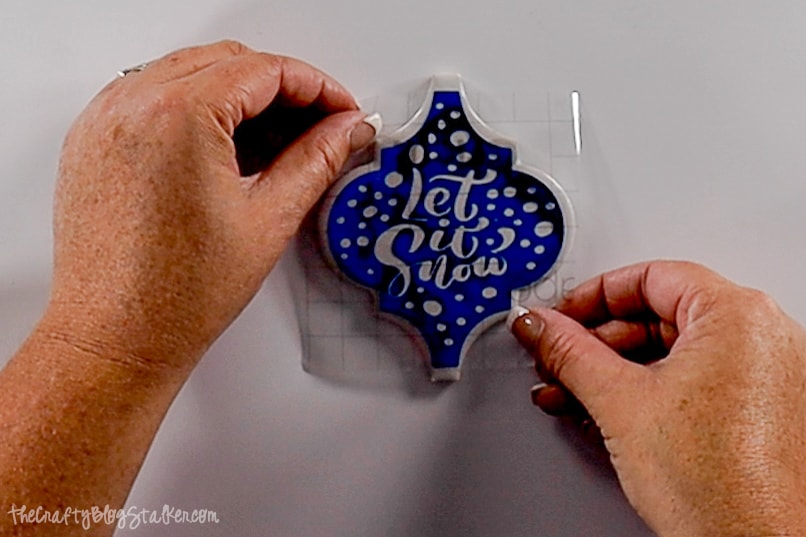
Slowly peel back the transfer tape back. This time you want the design to stick completely to the tile.
It is so cute, and I love that shimmer of the foil!
For my ornaments, I created positive and negative versions of the design.
If you want to learn how to do that watch the tutorial video below.
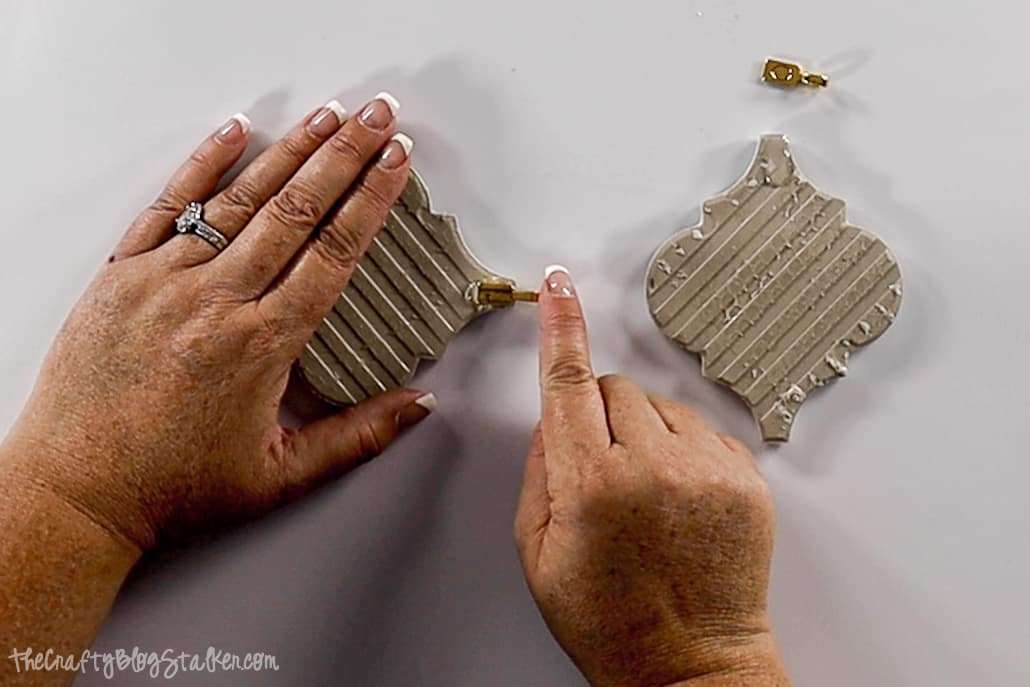
Attaching the Hanger:
The last part of attaching the metal hanger is the easiest part of the whole craft!
Simply apply a good-sized dot of E6000 glue to the back of the tile, at the top of the ornament.
Press the glue-on bail into the glue and let it sit until dried.
Once dried, you can hang them with a piece of ribbon, or an ornament hook.
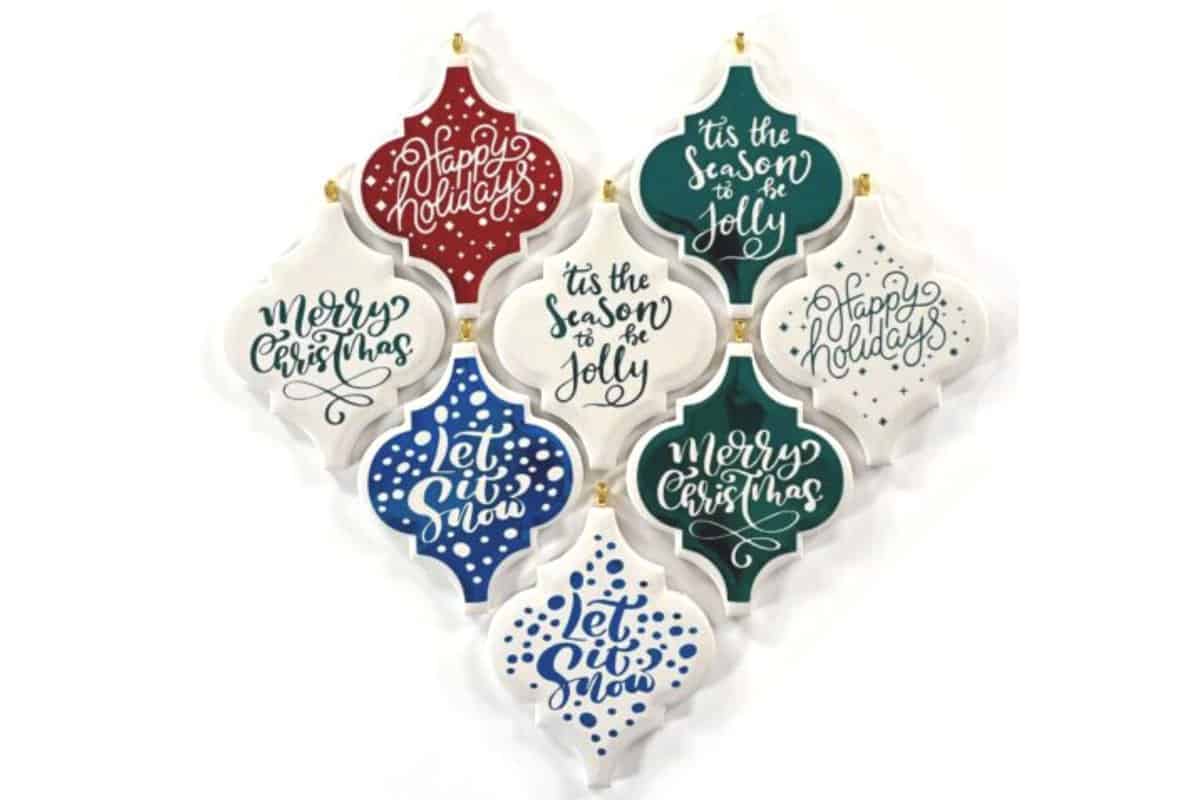
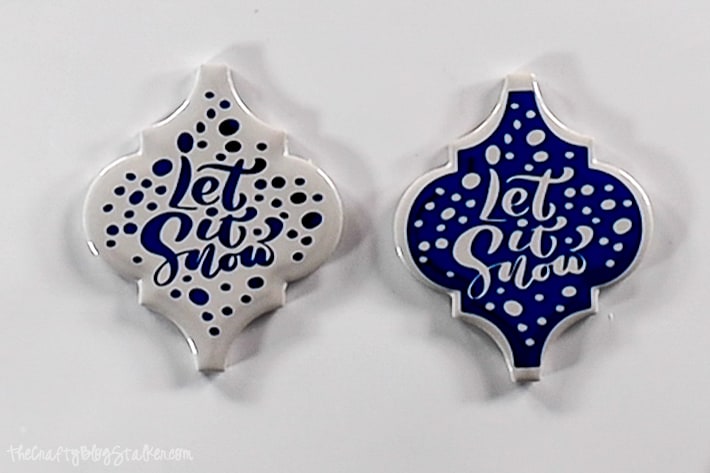
The Finished Arabesque Ornaments:
I absolutely love how these turned out, and I am so glad I stuck with the foil even though it was such a pain. 😂
Here are all of the designs, the positive and negative with the Lowe's tiles.

And here are the Homo Depot tiles.

Which set is your favorite?
Frequently Asked Questions:
How do you hang tile ornaments?
I have found the easiest way to hang a tile ornament is with a jewelry bail. It is a flat metal piece with a hole, that you glue onto the back of the ornament.
Bails can be found at most craft stores where they sell jewelry supplies, or on Amazon.
What do you put on the back of the tile ornament?
The back of the ceramic tiles is pretty rough and not very pretty to look at.
I did put anything on the back of my tile ornaments to cover it up. I figure I won't really see the back because the pretty front of the ornament will be facing out.
But there is nothing wrong with covering it up either.
Trace the ornament onto a piece of felt, and when cutting it out, cut it slightly smaller than that traced outline.
Glue on the bail, and then use a hot glue gun to adhere the felt backing to the ornament.
Do I need to apply a protective covering over the vinyl design?
It isn't a must, but it also doesn't hurt.
If you do want to apply a clear coat I would suggest a clear coat of spray paint.
You don't want anything that will show brush marks, or bubble up.
Crafting Essentials
- The Cricut Cutting Machine is easily my favorite crafting tool. We use it in so many of our tutorials!
- These MakerX Crafting Tools are perfect for keeping in the craft room and are always ready when needed!
- This Fiskars Paper Trimmer is easy to use and cuts nicely without frayed edges.
- These Scotch Precision Scissors cut like a dream, and you get multiple pairs in a pack!
Joani Van Horn
Thank you so much for sharing. I can't wait to try them!
Katie Adams
You are welcome, I am so glad you like them!