

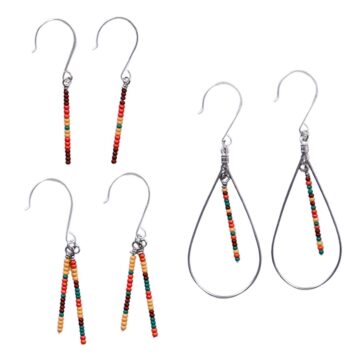
Loop a headpin with confidence using this tutorial. Whether it's your first pair of earrings or your fiftieth, neat loops matter, and we'll show you how.

Let's talk about how to loop a headpin, one of those small but mighty skills in jewelry making.
It's the simple loop at the top of a bead that allows you to attach it to items like earrings or chains.
It's beginner-friendly, but getting a clean, sturdy loop takes a little practice.
Once you've got it down, your jewelry will look more polished and actually stay together.
Skill Level: Beginner
Total Time: 1 minute

Instructions
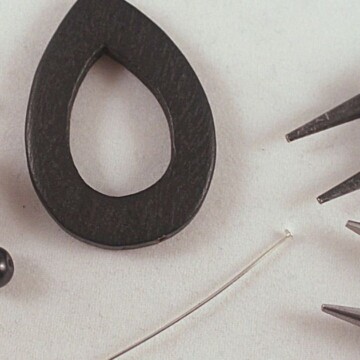
This wire-wrapping technique takes two hands, and since I don't have 3 hands, I will show you what it looks like after you complete each step.
Begin by sliding the bead onto the headpin.

Push the bead to the end of the headpin.
With the Round Nose Pliers, bend the pin 90 degrees at the top of the bead.

With your thumb and forefinger, grasp the wire and pull it up and over the top of the plier's nose.

Remove the wire from the top nose of the pliers and put the loop over the bottom nose.

With the Chain Nose Pliers, grab the wire and wrap it tightly around the bottom nose.

Keep the loop on the bottom of the nose pliers. Grab the wire end with the chain nose pliers and tightly wrap the wire around itself under the loop.

Cut off the excess wire as closely as you can to the wrapped loop. (My Round Nose Pliers also cut wire. If yours do not, you will also need wire-cutting pliers.

Use chain nose pliers to tuck the end of the wire into the wrap by rotating it around the wrapped wire.
The bead is now ready to be added to your jewelry project!

I know this looks like a lot to do for one bead, but with some practice, this step will become effortless.
You can also add loops to eye headpins and ball headpins using this same method.
More Jewelry-Making Tutorials
Now that you know how to add loops to headpins, there are so many fun things to make! Here are a few fun ideas.


Hi, I'm Katie!
I'm so glad you're here. Want to make something fabulous? I'm here to help!
Ornate Splendor
Thank you for this. Very helpful! Will definitely use this next time. Catherine
Cher-Ann Texter
Thank you for sharing! I wanted to add loops to crystals for chandeliers and appreciate you showing me how!
Cher @ Designs by Studio C
Mel@Mellywood's Mansion
thanks for sharing mine never look like that and you've just cleared up where I am going wrong
Onellyantie Chuah
Thanks a lot for this tutorial! I've been trying to DIY my own accessories but having problem with securing the wire 🙂
Ruth Willis
I looked at three different videos and was going crazy! I couldn't get it until I go here and I was able to do it! OK, it wasn't perfect, but it gave me hope!!
Katie Adams
I am so glad you found my tutorial helpful!
Cheryl
Nice and simple, I will try this method, use a few other techniques, but this seems real simple to follow.
Kathi Riemer
You make it look so easy!! Mine never look like this. Maybe I need more practice. Thank you for sharing.
Jill Morgenstern
I need to try this again sometime. It always looks so much easier than it really is!
Laura
Thanks for linking up to The Creative Exchange, Katie! I featured your project this week. xo, Laura
Mary Beth @ Cupcakes and Crinoline
This is such a great tip! I love how pretty the bead looks after adding this detail. Thanks so much for sharing at this week's Project Inspire{d} ~ pinned!
Ricki @ The Questionable Homesteader
Just wanted to stop by and let you know that I am featuring your tutorial on The Weekend Social #28
Feel free to stop by and grab a button
Shanice
Great tip! Thank you for sharing this post at City of Creative Dream's City of Links on Friday! I appreciate you taking the time to party with me. Hope to see you again this week 🙂
Rhondda Mol
Congratulations! How to Wire Wrap A Head Pin Loop was one of my picks at the PIN-spiration Link Party! Thank you for linking up 🙂 Rhondda
LindaB
I had to thank you for a terrific tutorial. I am new to beading and even watching multiple videos on this topic I just didn't get it, BUT within 10 minutes I had a perfectly wrapped pin, I'm very excited! I know this post is old, but wanted to say thanks regardless 🙂
Katie
Thank you LindaB. I am so glad that I was able to help.
Stacy
Thank you for sharing this. The images make it much easier to help people understand. I sometimes find pictures easier to follow than videos. I hope you don't mind but I shared your instructions on my blog. Thank you Stacy xx