
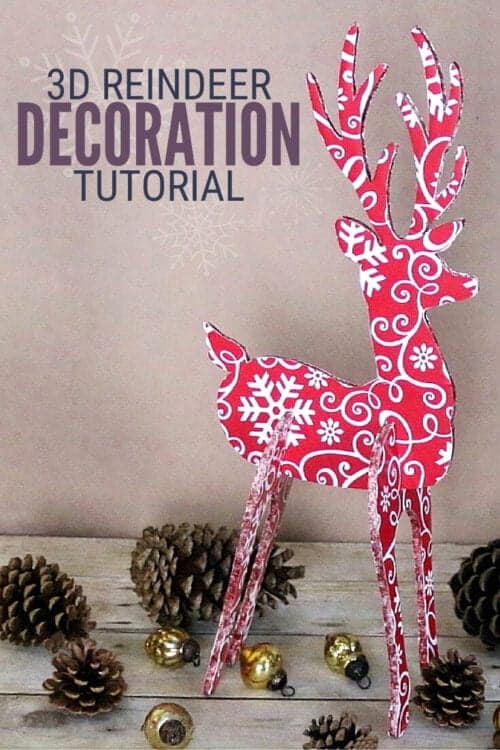
You can make a fun 3D Reindeer Decoration to add to your holiday decor with a Cricut Explore. The video tutorial is below!
When I was a little girl we had a 3D reindeer that was made of wood, I think my oldest sister painted it.
It was one of my very favorite decorations and I would put it together and take it apart over and over again.
I couldn't help but think of that reindeer decoration over and over again as I was in my studio crafting today. That memory is what inspired my own 3D Reindeer Decoration.
Do you love to make handmade Christmas decorations too?
Craft Tutorial Video:
Like videos? I have a video tutorial for you! Please subscribe to my YouTube Channel so you don't miss out on any future video tutorials!
Supplies Used
Items linked below may go to similar items when exact items couldn't be found online. Links are affiliates so I will get a small kickback to help fund the next tutorial!
- Cricut Cutting Machine
- Foam Board
- Holiday Wrapping Paper
- Craft Knife
- Multi-Purpose Spray Adhesive
- Red Glitter Glue
How to Make a 3D Reindeer Christmas Decoration
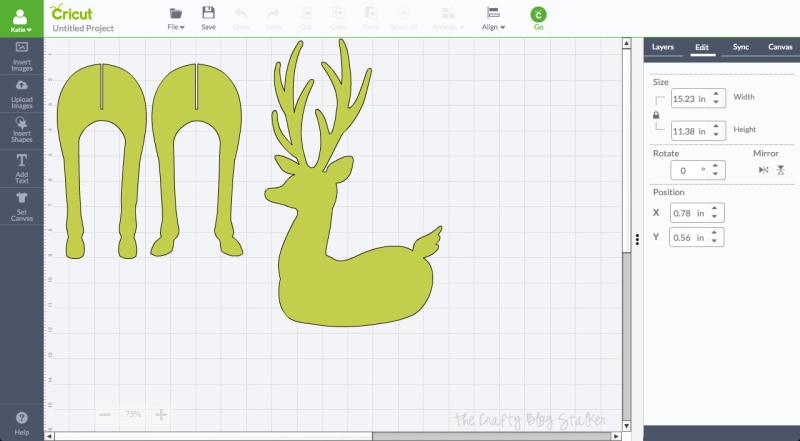
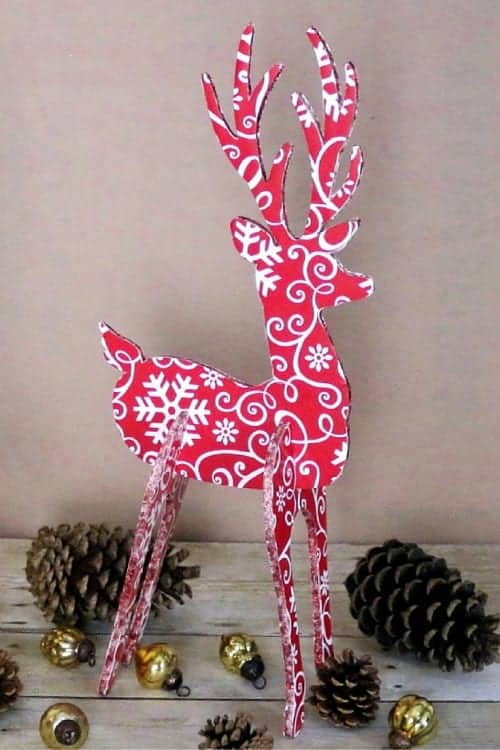
This project started when I was browsing Cricut Design Space for some holiday inspiration. I came across this file called Deer Stand-up Icon. Isn't he cute?

That is when I had my idea to trace the cut-out onto foam board to make him a bit more sturdy and dress him up with wrapping paper.
I wanted my reindeer as big as I could get it while still using my 12x12 cutting mat. I ended up stretching it to where the file would have to be cut out on two sheets of 12x12 cardstock. The body on one and the front and hind legs on the other.
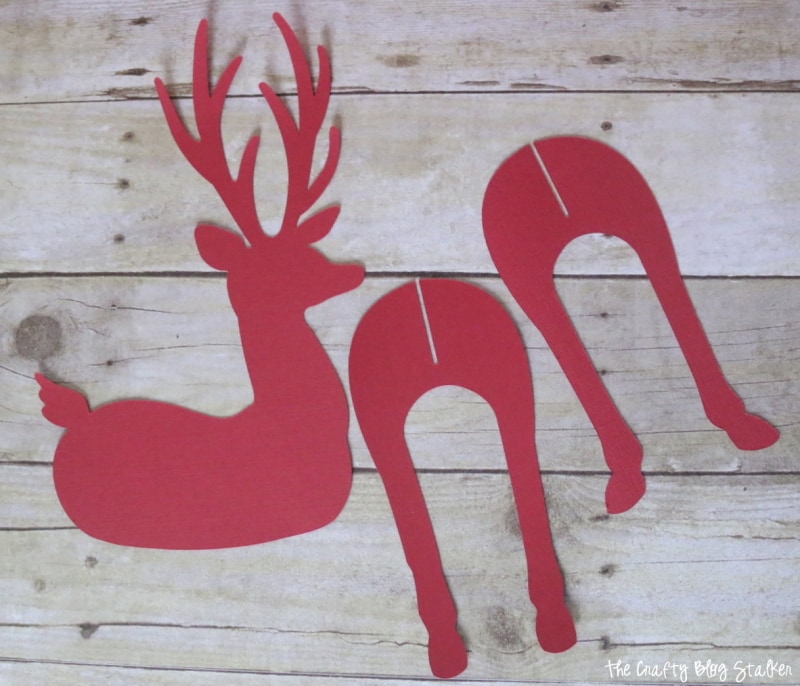
Here are my pieces once cut out. These became my pattern pieces.
I used my pattern pieces and traced them onto my foam core board.
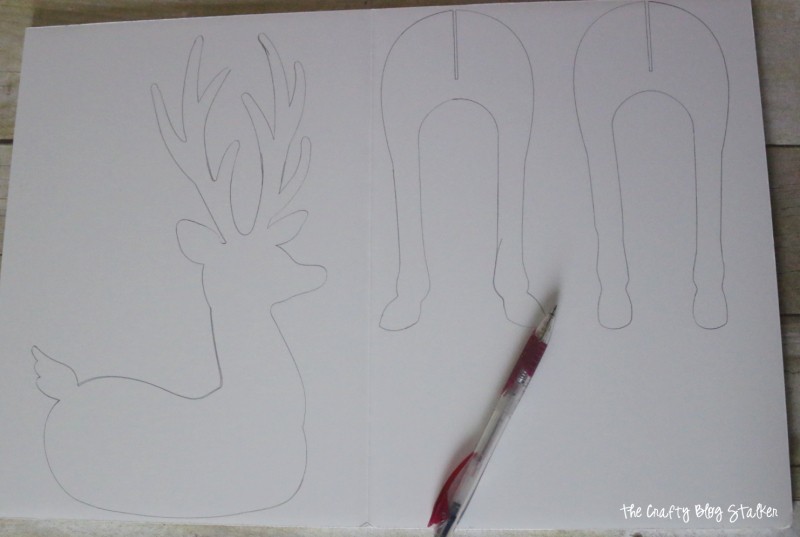
With a craft knife, I went around each line and cut the piece out. This was the most time-consuming part.
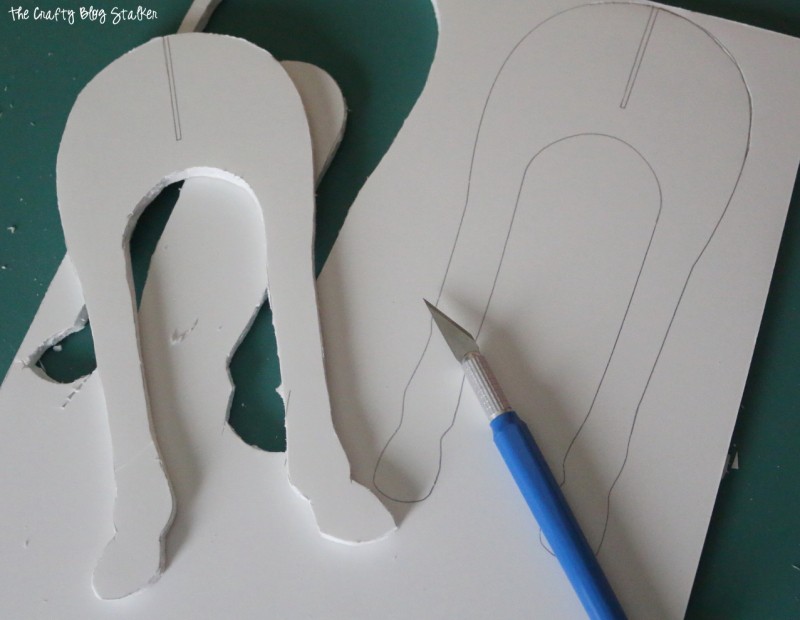
I did have to cut the slit on both of the leg pieces a little bit wider than marked, and when assembled my cute little reindeer already looks awesome!
I decided to cover my reindeer with wrapping paper because I would need 4 sheets of matching scrapbook paper, and I wasn't sure I had that. But I knew I had enough wrapping paper.
Did you know that you can run wrapping paper through your Cricut? You totally can, but I would recommend using a mat that doesn't have a lot of stickiness left to it.
Wrapping paper is much thinner than regular paper and if you have a new or super sticky mat, it will be difficult to remove the wrapping paper without tearing it.
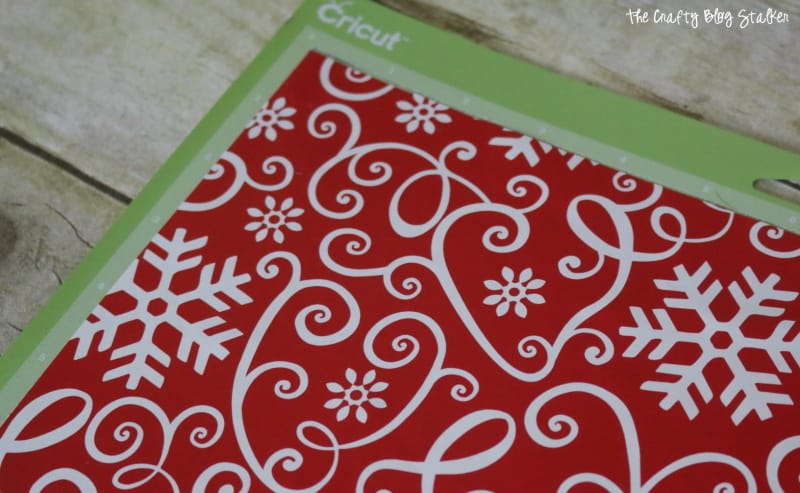
Put your Cricut on the paper setting, and cut.

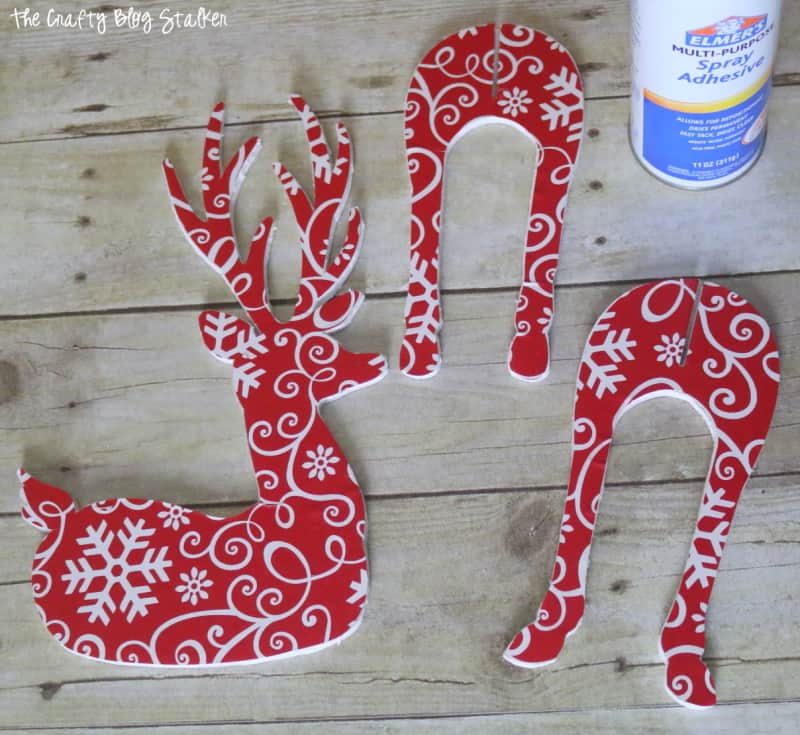
I kept my file the same size as my pattern pieces and just cut them out of the wrapping paper. Then I went back in and mirrored the file and cut out another set so I could cover both sides of the reindeer.
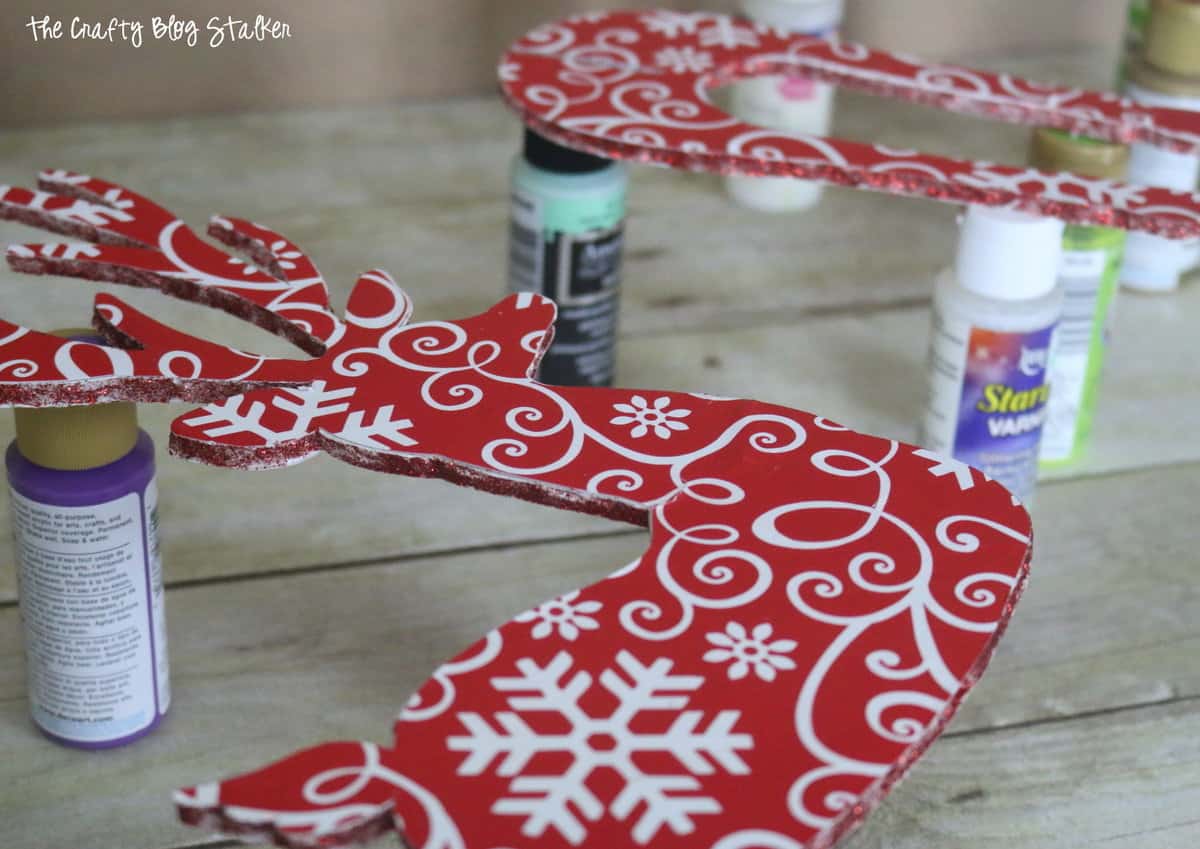
To adhere the wrapping paper pieces to the foam board,, I used Multi-Purpose Spray Adhesive. I thought of using liquid glue, but I didn't want my paper to bubble because it was wet. The spray adhesive worked perfectly.
To hide the stark white edges I applied some Red Glitter Glue all the way around each piece.
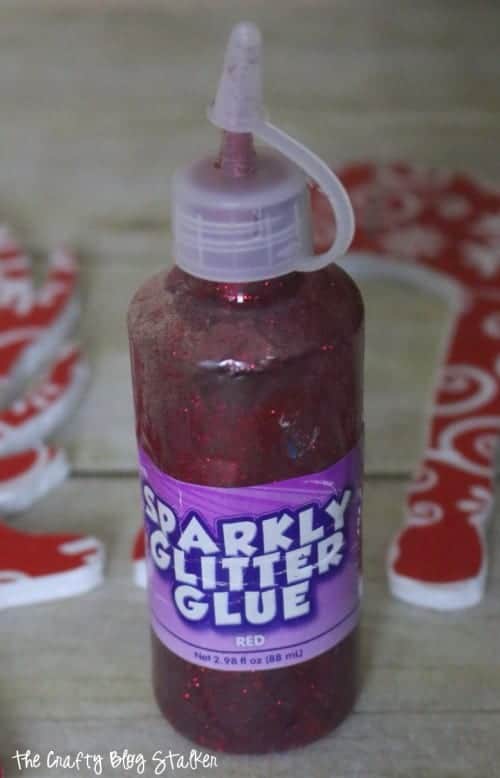
I put a bead along all of the edges and spread it out using a thin paintbrush, only focusing on one small area at a time.

To dry, I balanced each piece on top of a couple of acrylic paint jars. I did this so the glitter glue wouldn't drip and dry the pieces on my table.
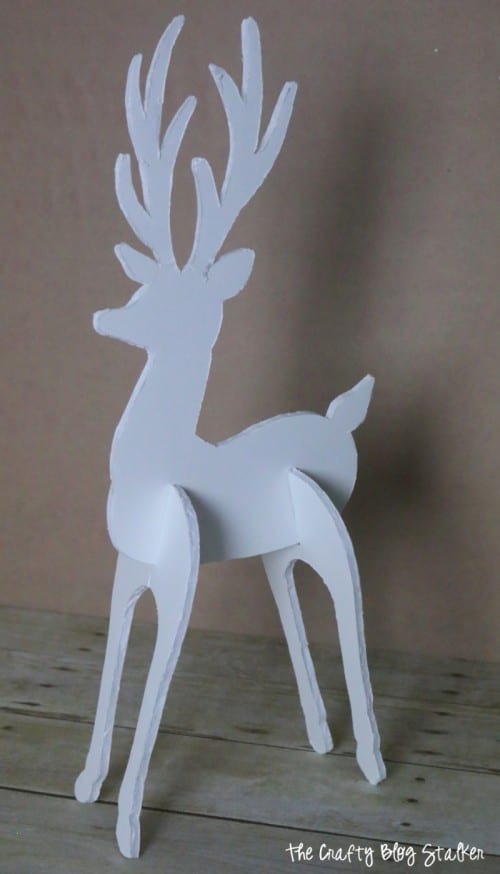
I let the glitter glue dry overnight. The next morning I assembled my majestic reindeer, Prancer. I couldn't be more pleased with how my 3D Decorative Deer turned out.
What was your favorite Christmas decoration you played with growing up?
Crafting Essentials
- The Cricut Cutting Machine is easily my favorite crafting tool. We use it in so many of our tutorials!
- These MakerX Crafting Tools are perfect for keeping in the craft room and are always ready when needed!
- This Fiskars Paper Trimmer is easy to use and cuts nicely without frayed edges.
- These Scotch Precision Scissors cut like a dream, and you get multiple pairs in a pack!
creativejewishmom/sara
great job, cutting out that shape from foam core can be a little bit difficult! thanks for sharing on craft schooling Sunday!
Katie
You're right, cutting the foam core wasn't my favorite part, but I love the finished result!
Sara
This is absolutely adorable! I'm having trouble finding this cut file on the cricut design space. I have searched every which way and cannot find Deer Standup Icon? Please help! I love this and want to make it so bad!
Thanks, Sara
Katie
I am so glad that you like it. I would love to see yours when you are finished with it! It is called Deer Stand-Up Icon #M524E46.
Lynn S.
I had to specify the “Cricut Community” category in order to find the cut file!
Laurie
This is adorable! You are one crafty lady! Thank you for sharing with us at Brag About It!
~Laurie
Celeste
How cute is this? So creative and pretty, and I love that you can totally customize it with all kinds of different paper patterns!
Katie
You totally can! I loved that too. There are so many different paper options out there!
Liz
Wow, this is such a great deco idea!! Have to make this, too! Thanks for sharing your tutorial with us!
Katie
I am so glad that you like it. I would love to see yours and I may just share it on facebook!
Create With Joy
Dear Katie,
Every time I see your reindeer, it brings a smile to my face!
Congratulations - I'm happy to announce that you are one of our Featured Guests at this week's Inspire Me Monday Party #205 at Create With Joy!
Hope you are having a blessed Christmas season! 🙂
cARRIE @ Crafty Moms Share
Beautiful ! I would love to have you share at my craft link party:
Diana Rambles
Super cute! Thanks for sharing.
michelle l
He is gorgeous! The wrapping paper idea is so great, and of course makes the perfect pattern for your Xmas-y deer!
Katie
Thank you Michelle! I am so glad that you like my Reindeer!
Sarah bell
Such a cute idea!!! I love it 🙂
#Let'sBeFriendsBlogHop
Sarah Bell
Katie
Thank you Sarah! I am so glad that you like my 3D Reindeer. Thanks for stopping by!
Cheryl Fanning
Are you able to share the cricut Deer Stand-Up Icon #M524E46? They must have taken it down... I want to make one! Cheryl
Katie
Thank you Cheryl for bringing this to my attention. I was able to locate the file and have created a project for it. If you go to the following link you should be able to access it. https://design.cricut.com/landing/project-detail/5babad8f7b76080629654973
Thanks so much!
Linda
Hi
Could you please share this template? It seems to be the most beautiful shape and easiest to make.
Would really appreciate x
Katie
Hi Linda, The template is available on Cricut Design Space and you can get to it here https://design.cricut.com/landing/project-detail/5babad8f7b76080629654973
Carol
So cute! I love this idea. Just pinned it.
Katie
Thank you so much Carol!
Katie Adams
Thank you so much! I am so glad you like them!