Learn how to use the Cricut Venture for efficient batch creation of your handmade items. Perfect for projects needing multiple cuts and avid crafters! This post is sponsored by Cricut. All opinions expressed are my own. If you make a purchase using any affiliate links below, we may earn a commission.
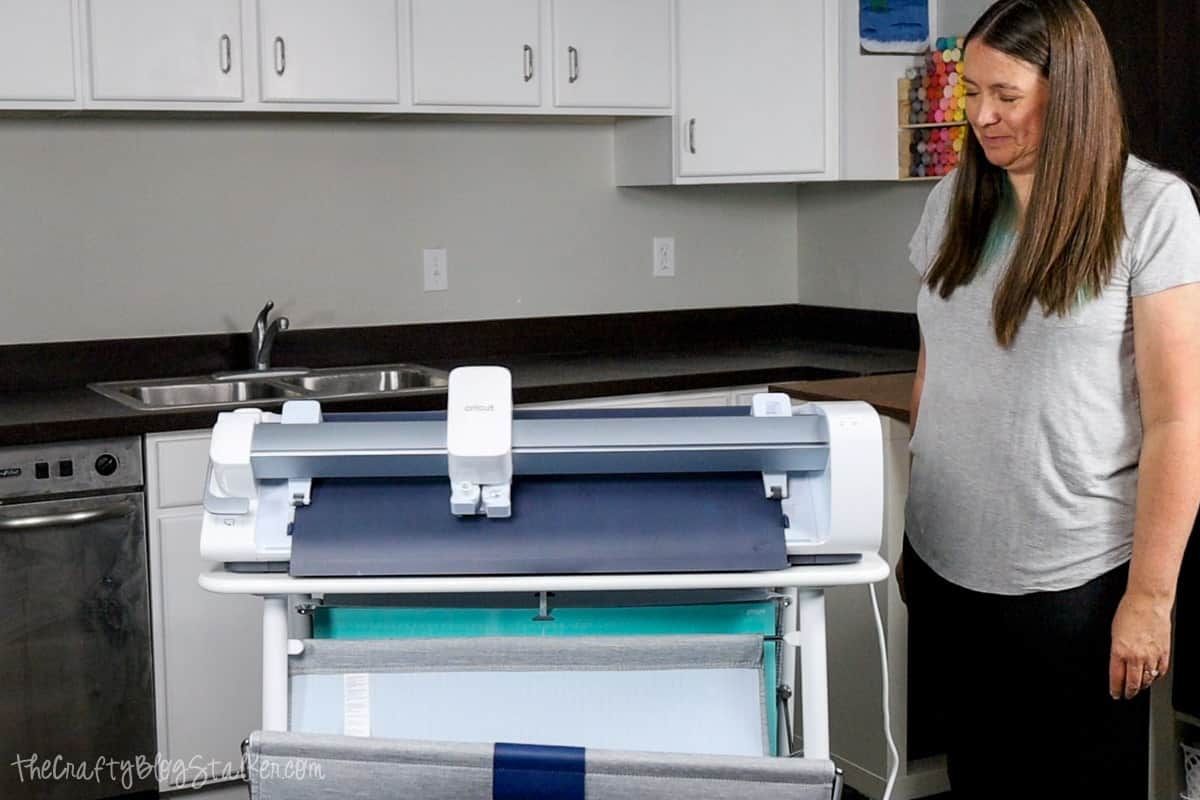
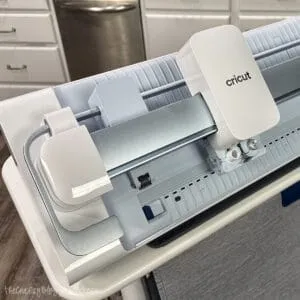
Welcome craft lovers! We're going to delve into an exciting new world of crafting efficiency with the Cricut Venture, a game-changer for those who love to make their crafts in batches.
Whether you're crafting items for your online store, preparing party favors, or even working on school projects, this Cricut cutting machine is a tool designed to make your life easier and your crafting quicker.
Read on to learn how this new Cricut machine can help streamline your handmade crafts, allowing you to produce multiple of the same design with ease and precision.
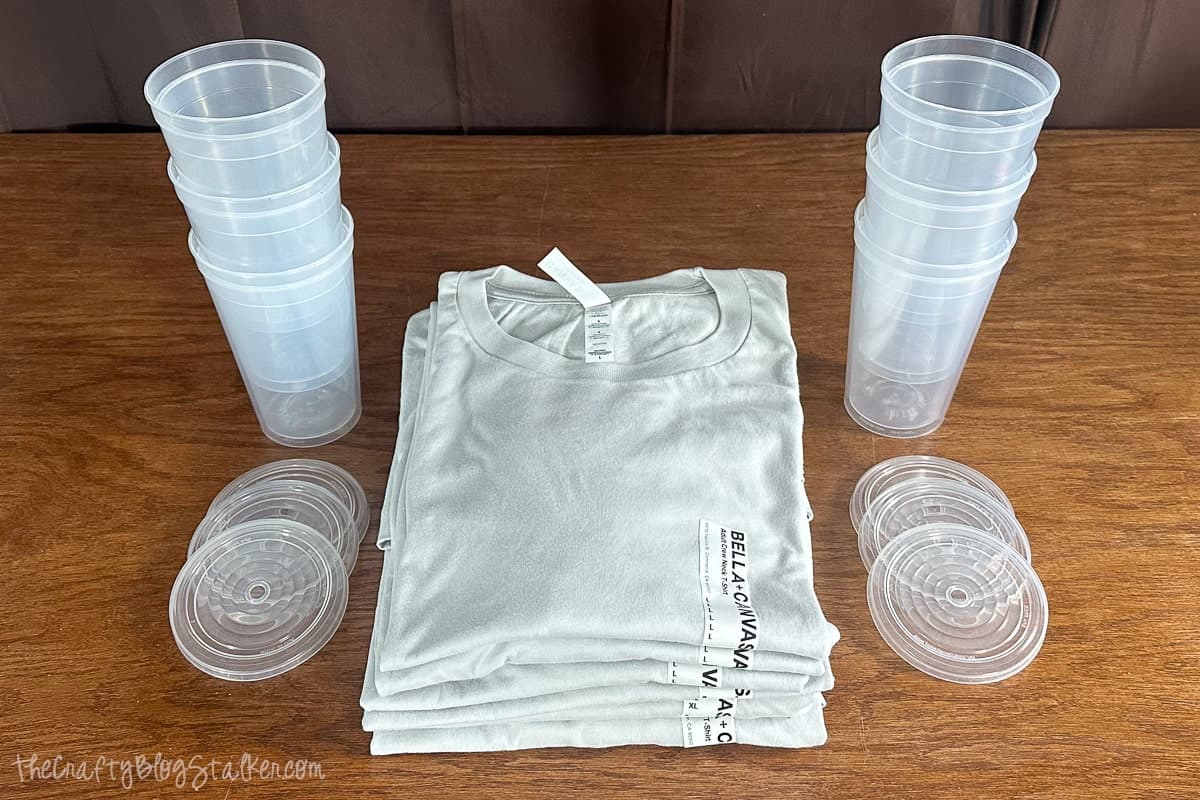
I am going to use this new machine to make a couple of Cricut projects; 6 matching shirts and tumblers for our annual family campout.
If you want to learn more about Cricut Venture's capabilities, I recommend the post Introducing the Cricut Venture 24-inch Professional Cutting Machine.
Let's get started!
AD: Shop Cricut.com
Craft Video Tutorial:
Like videos? I have a video tutorial for you! Subscribe to my YouTube Channel so you don't miss any future videos!
Cricut Design Space for Iron On:
Of course, Cricut Venture works with Cricut Design Space Software. I am so glad we don't have to learn how to use different software!
We are going to cut Smart Iron On first for the shirts, and then we'll cut Smart Permanent Vinyl for the cups.
The campout design that I used for my projects, is available for you to use as well.
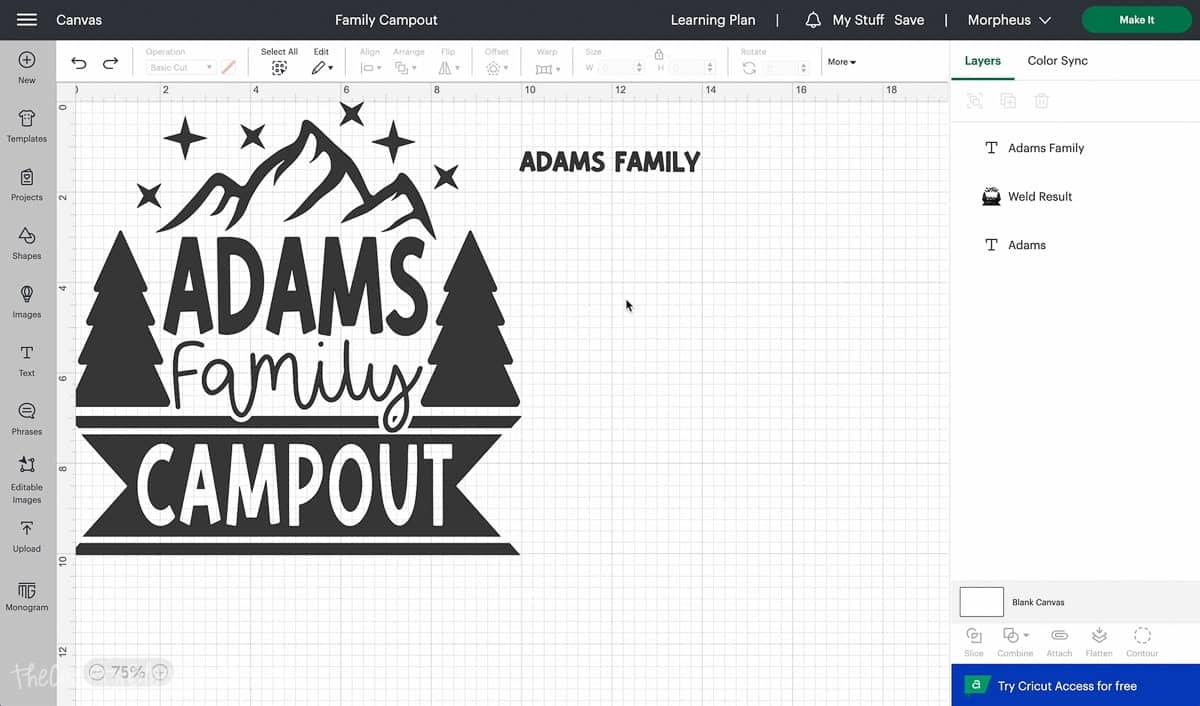
You can even edit the last name test to make it say whatever you want!
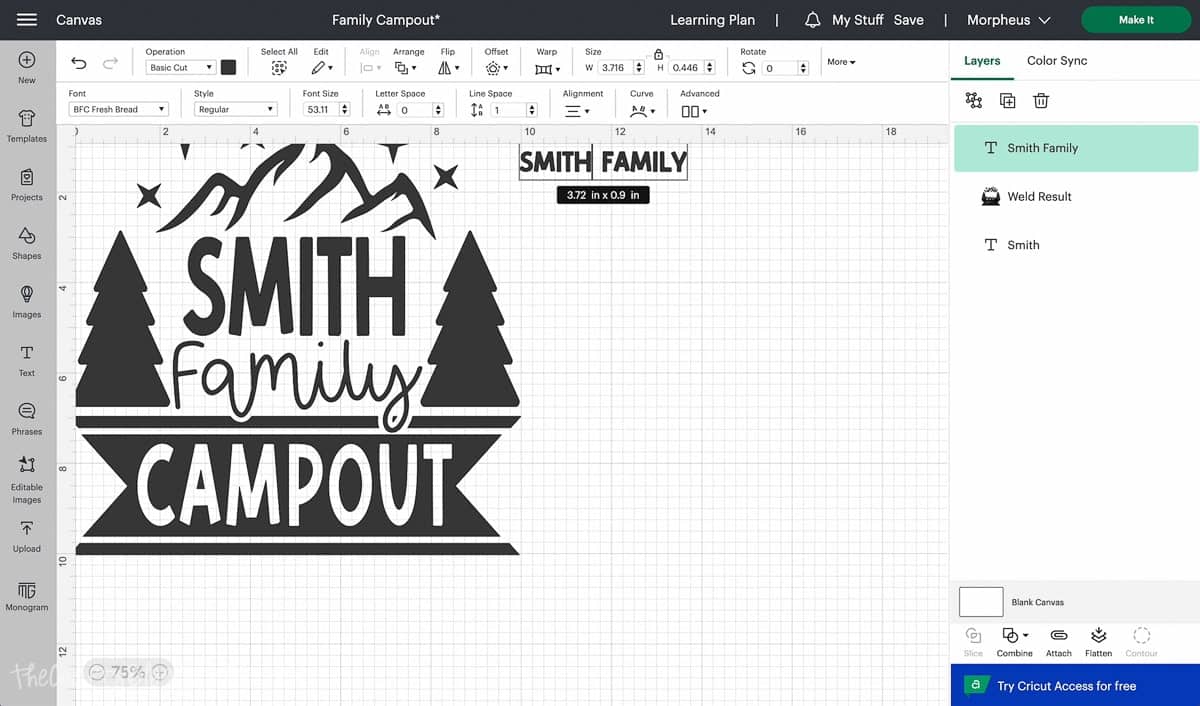
If you have a longer name, simply make the font smaller to fit inside the design.
Since this design can be edited, you'll need to highlight the design and the last name and attach them so they won't separate when being sent to the machine to cut.
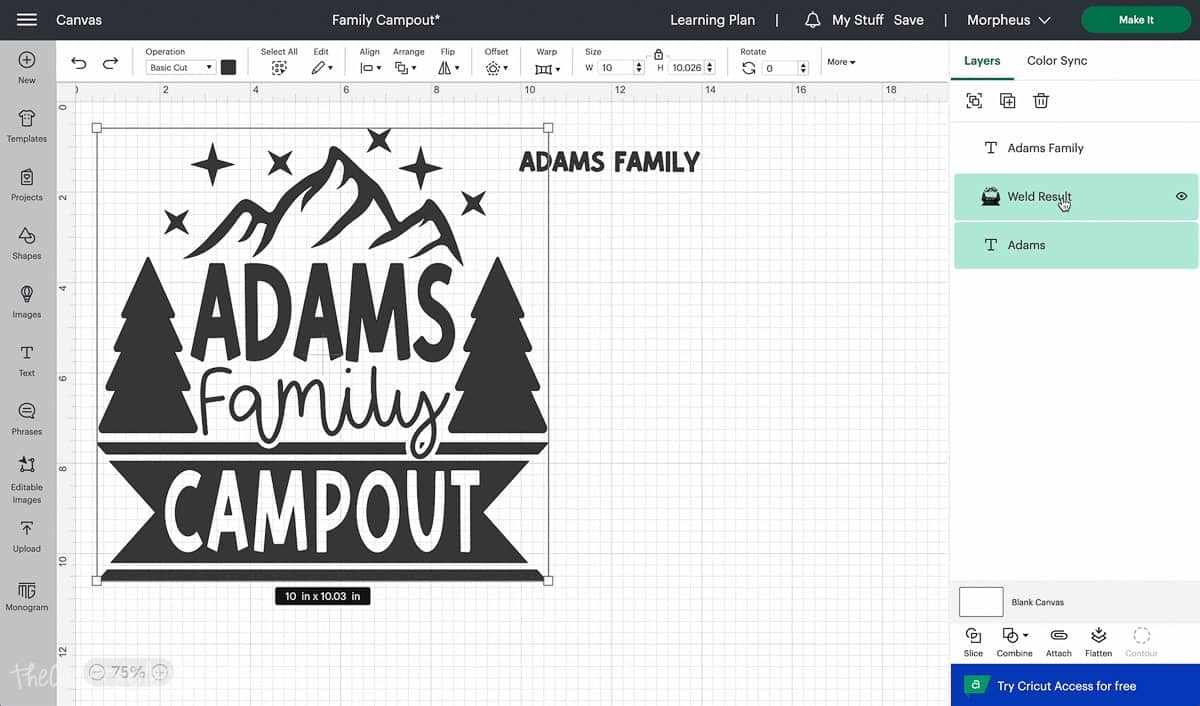
I have the cut file sized to fit on the back of adult-sized t-shirts, but you can resize the design however you need for your projects.
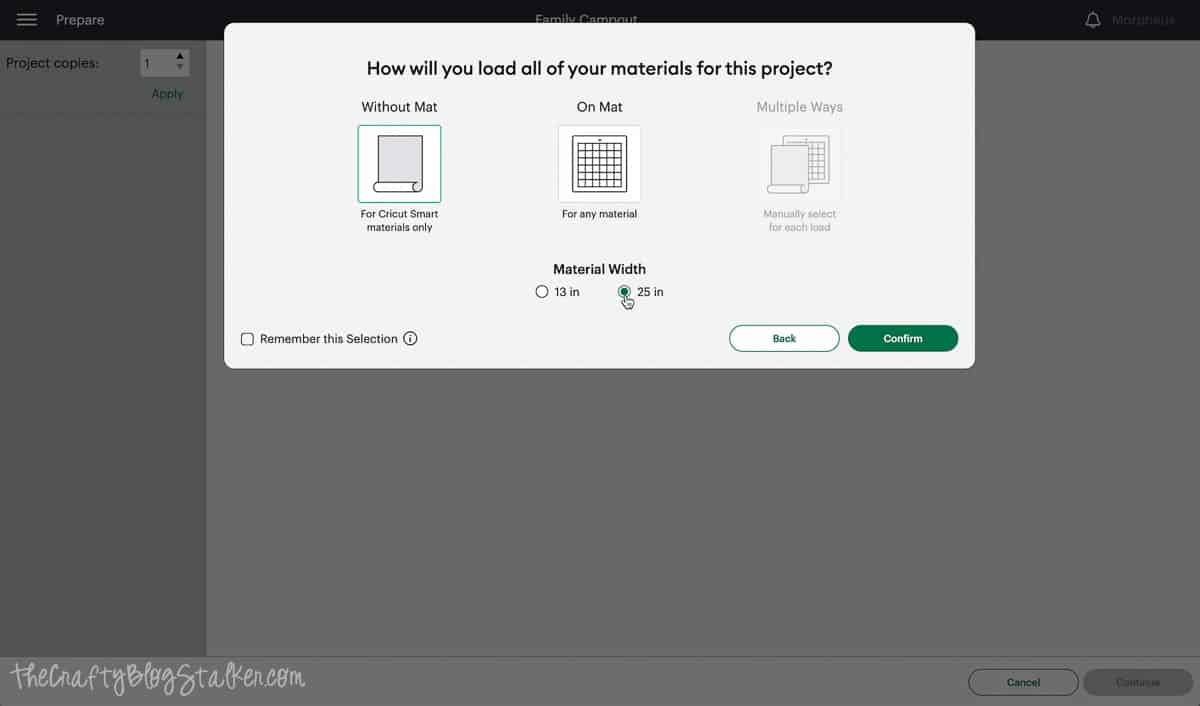
Select Make It. Then Without Mat, and a Material Width of 25 inches.
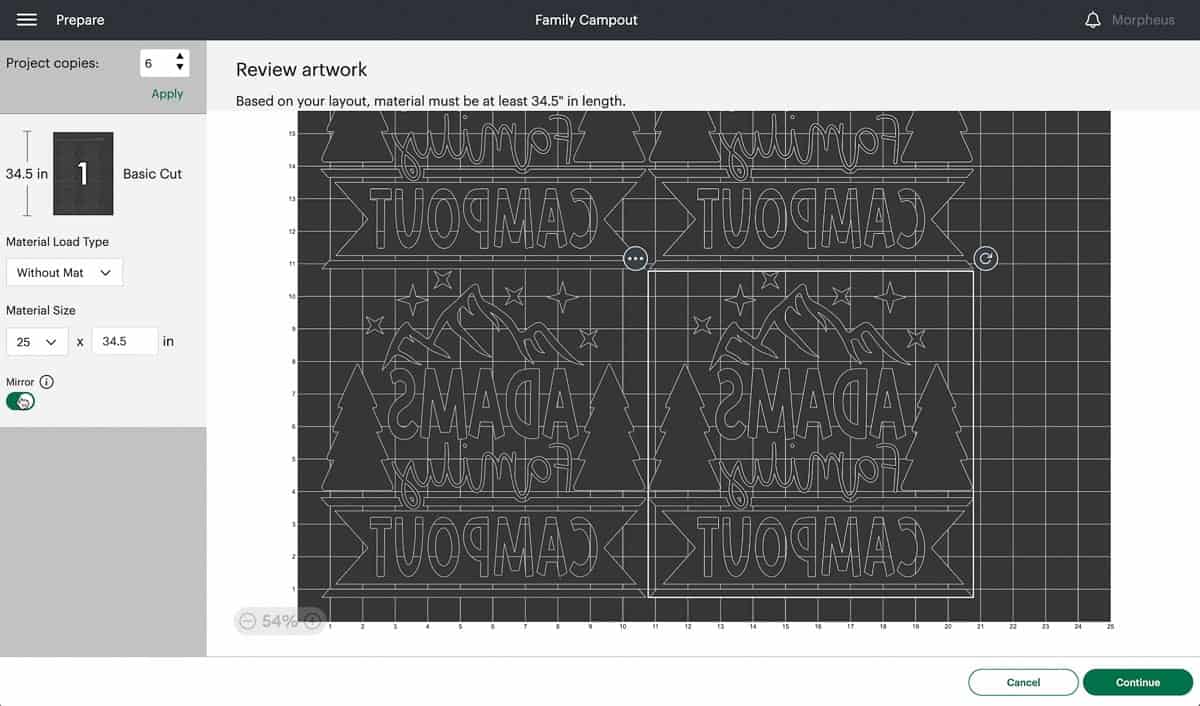
The next screen is a preview of what we are going to cut.
Since I am making 6 shirts, I changed the project copies to 6, then hit Apply.
Also, make sure to Mirror the design since we are using iron-on vinyl.
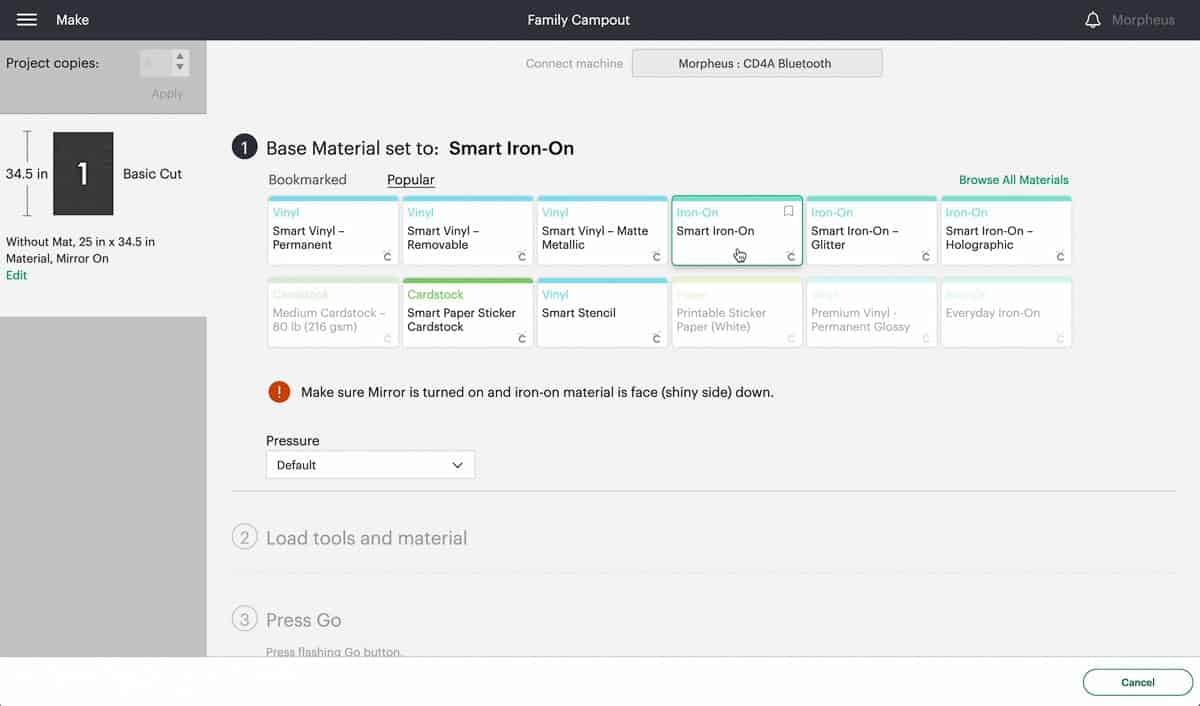
Select Smart Iron On as the Material.
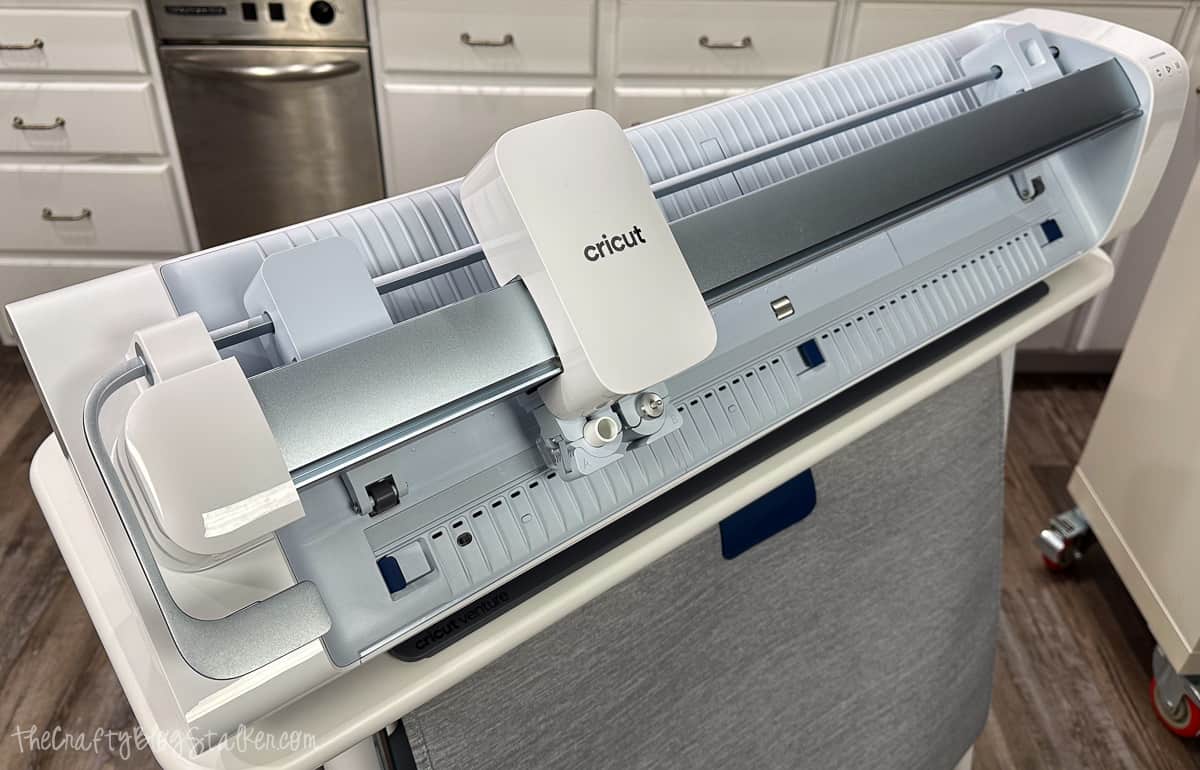
Next, we move to the Cricut Venture.
Preparing Cricut Venture for 25-inch Material:
Lift the lever on the left side of the machine.
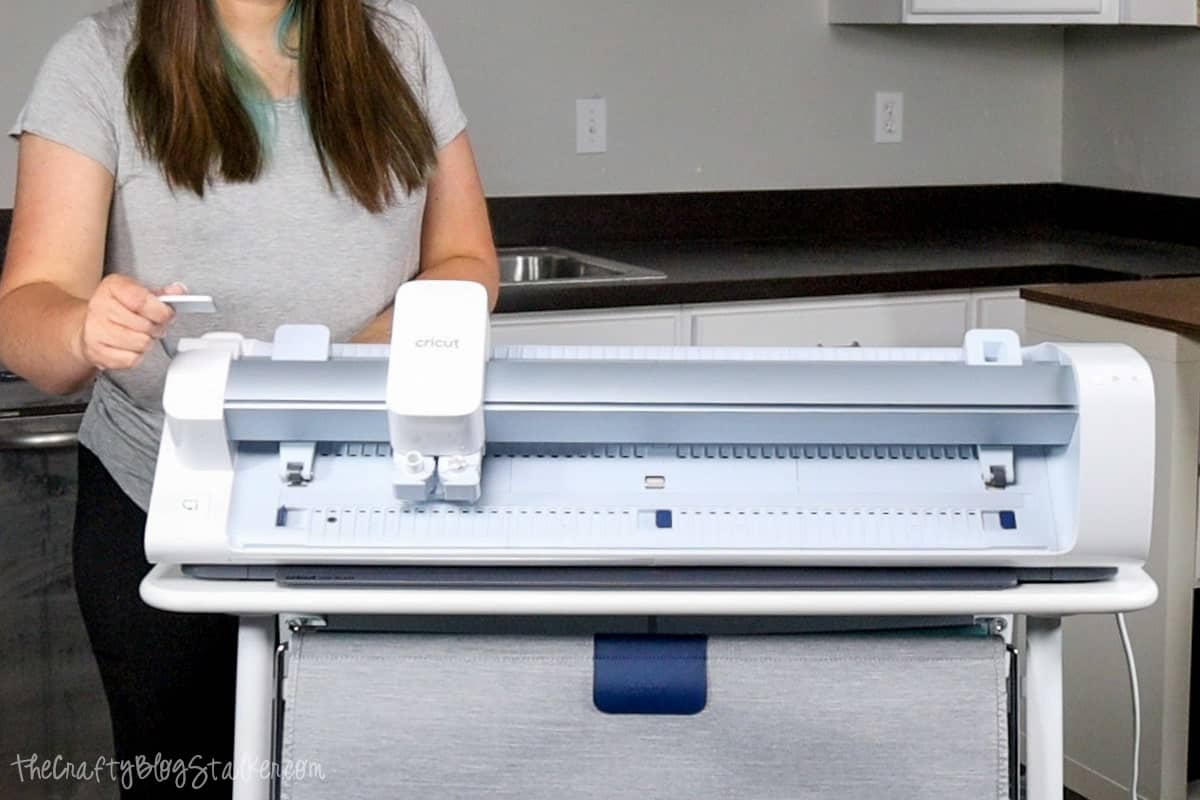
Now that the lever is raised we can move the Pinch Arm.
Since we are using 25-inch vinyl, the Pinch Arm should be moved to the end of the machine.
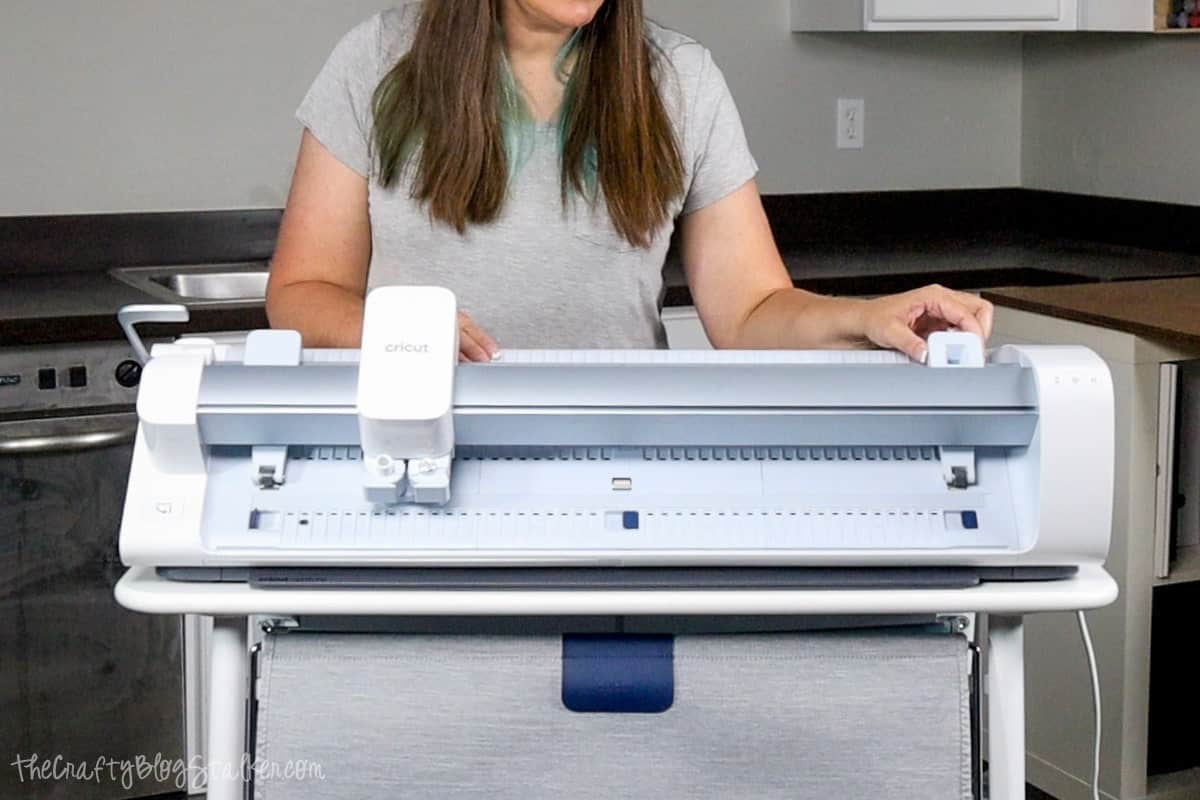
Lift the material guides on the front left and right, making sure the center one is closed.
With the shiny side down, push the Smart Iron On through the guides in the back of the machine.
Inside the venture is a vacuum that will hold your material in place, so you will hear a whir once you insert your material.
Push the material through the machine until it is just barely passed the material guides on the front.
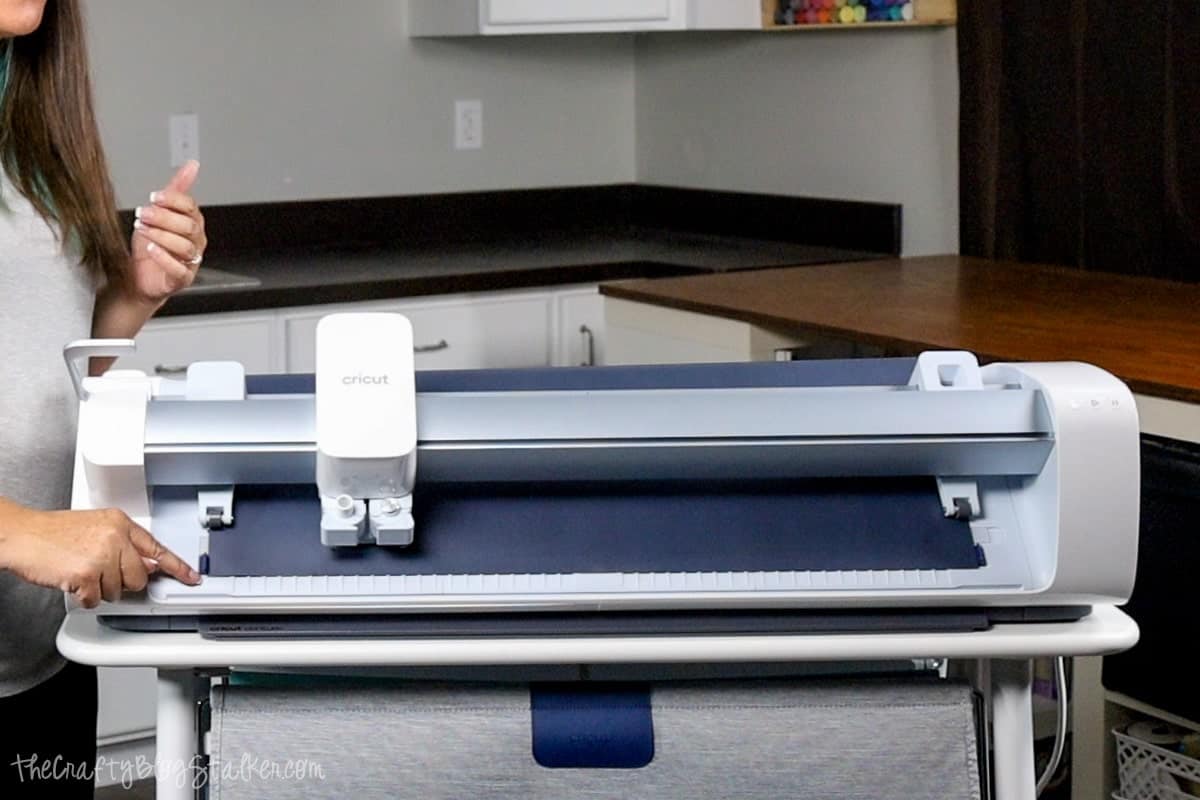
Push down the lever and then the pinch arms will be locked in place.
Cutting Iron On:
On the front right of the machine are the three familiar buttons that are on the Explore and Maker machines. Load, Start, and Pause.
When the Load button begins to blink, you can press the button and that will instruct the machine to measure out the material to make sure you have what is required.
Having the Venture Docking Stand is super handy because it has a front and back catch basket, to keep the material from hitting the floor.
It measures super quickly and can be hard to catch it on your own.
Once measured, the Start button will begin to blink. Press that button and the machine will think for just a moment and then begin cutting.
It is so fast! If you haven't seen one in action you should watch the video above.
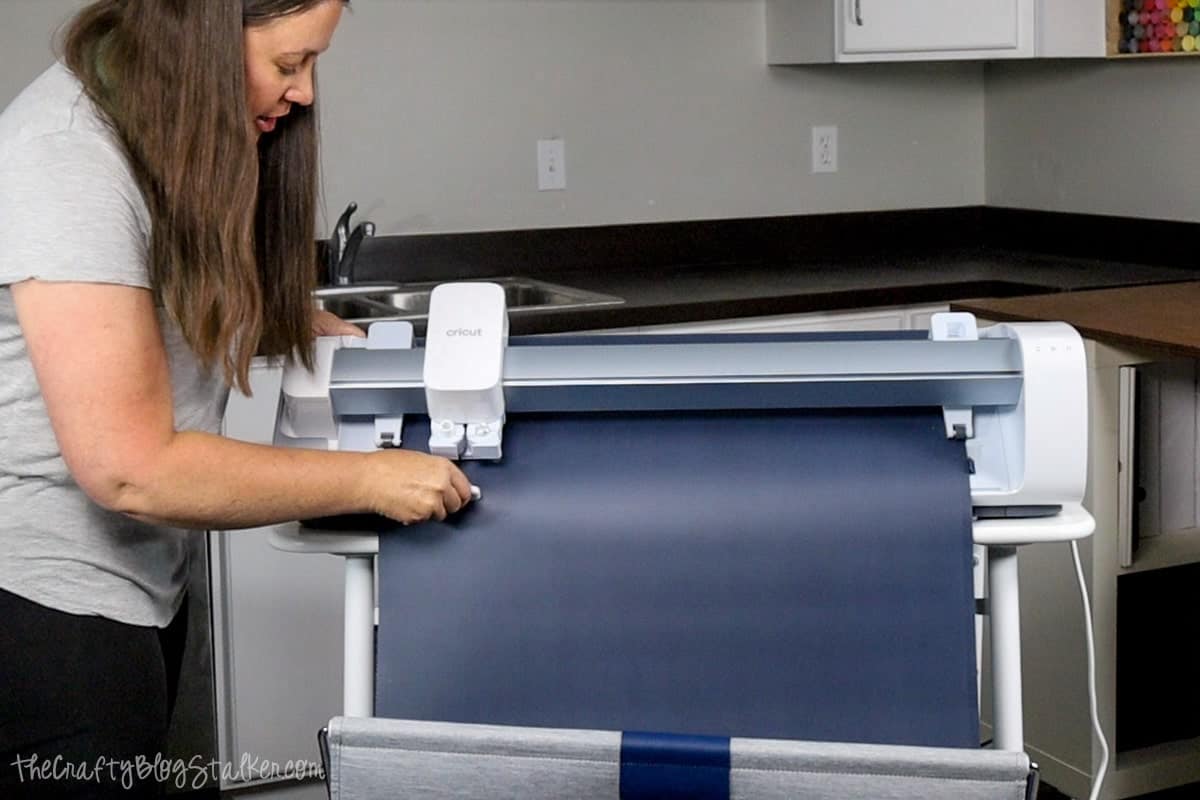
In the back of the Venture is a removable cutting blade.
So once the machine is done cutting you can remove the blade, run it along the track at the base of the machine, and cut off the used vinyl.
Cricut Design Space for Vinyl:
Go back to Cricut Design Space and the same design we used before.
Hide the Adams Family text because we don't need that image for our tumblers. You can hide by selecting the eye icon, or simply highlight and delete.
Highlight the attached image and resize it for the tumblers. I sized mine with a width of 2.25 inches.
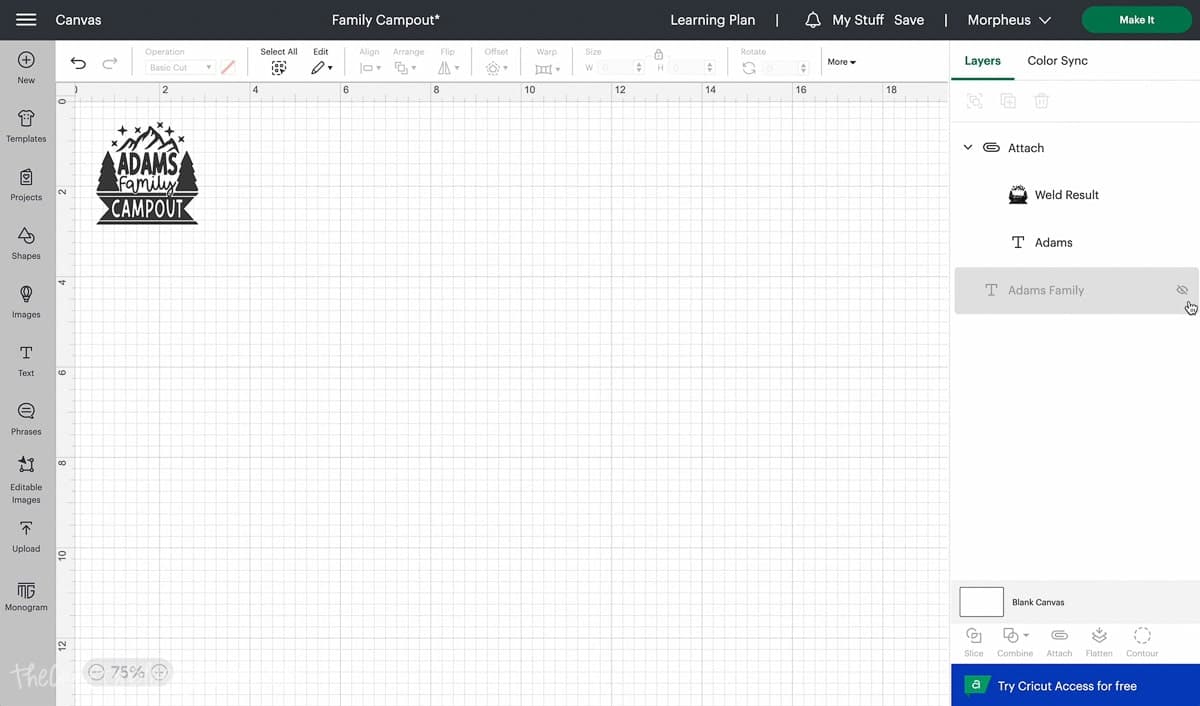
Select Make It. Then Without Mat, and a Material Width of 13 inches.
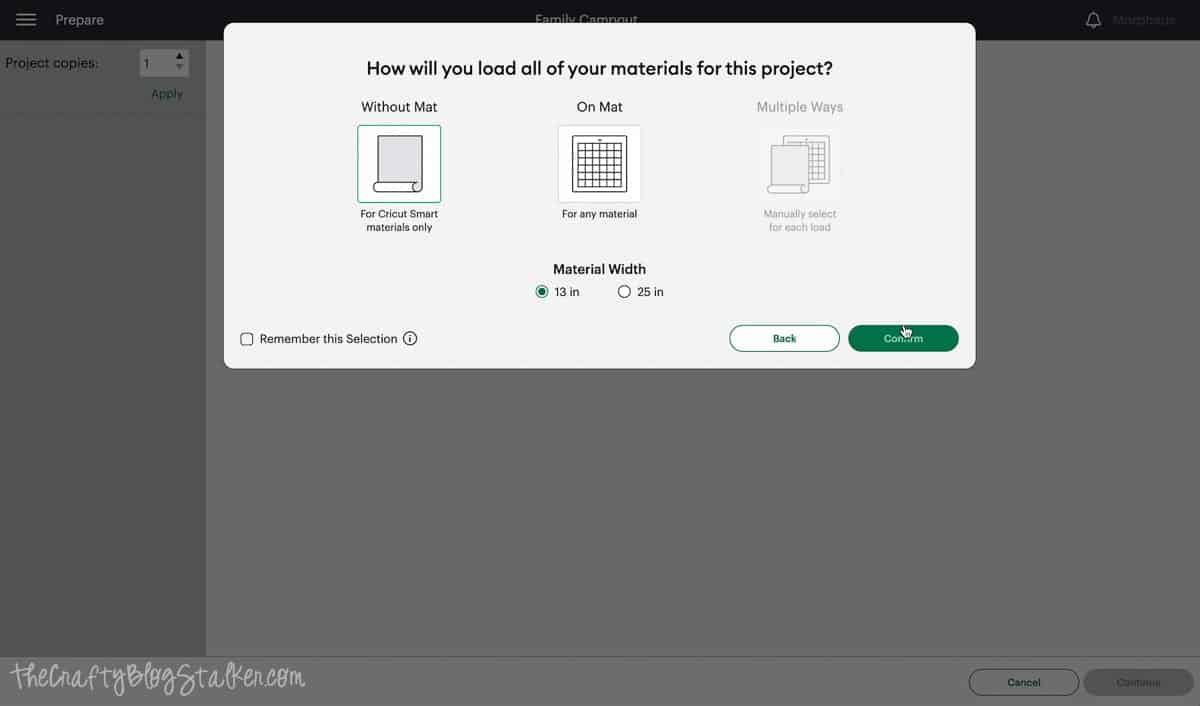
The next screen is a preview of what we are going to cut.
Since I am making 6 tumblers, I changed the project copies to 6, then hit Apply.
This time, you do not need to mirror.
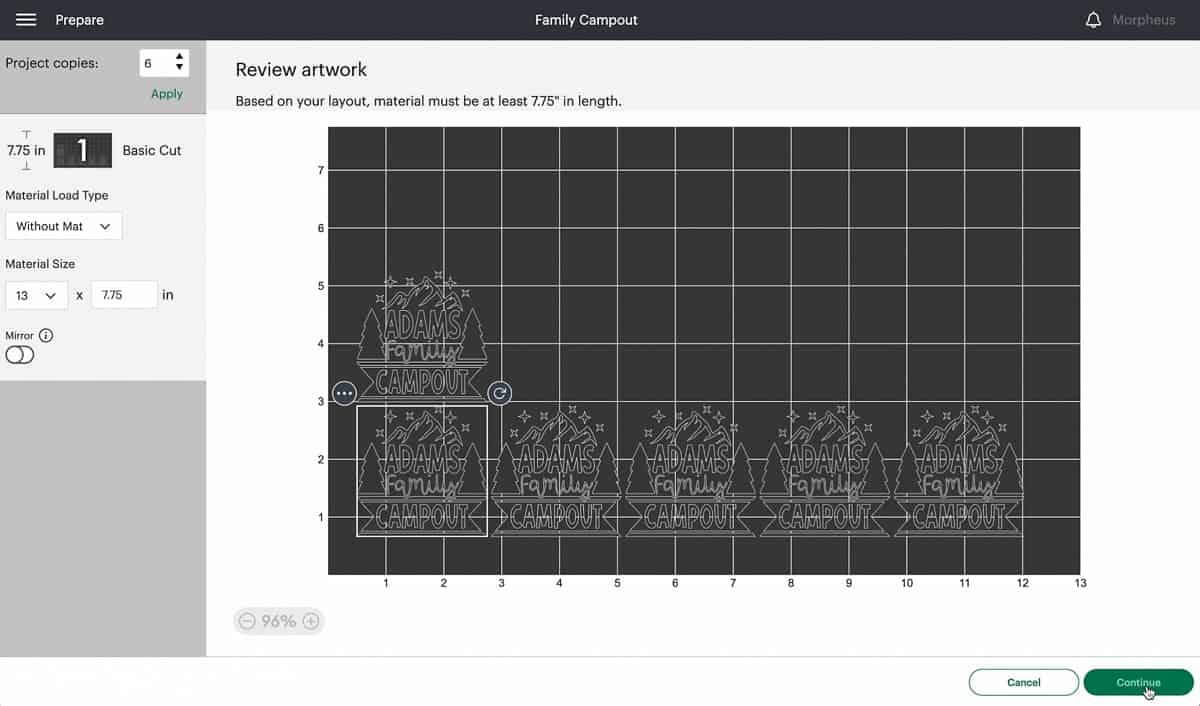
Select Smart Permanent Vinyl as the Material.
Next, we move back to the Cricut Venture.
Preparing Cricut Venture for 13-inch Material:
Lift the lever on the left side of the machine.

This time since we are using 13-inch vinyl, the Pinch Arm should be moved to the center of the machine.
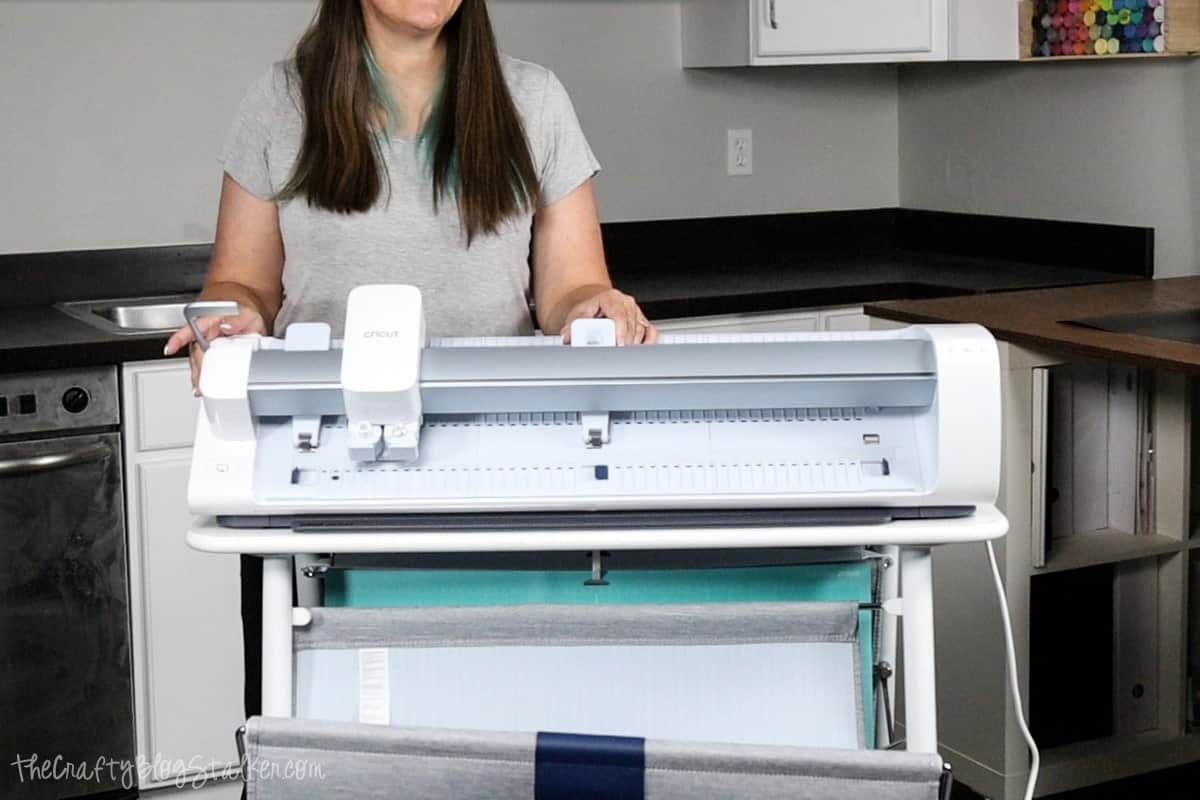
Press down to close the material guide on the front right of the machine and lift the center guide.
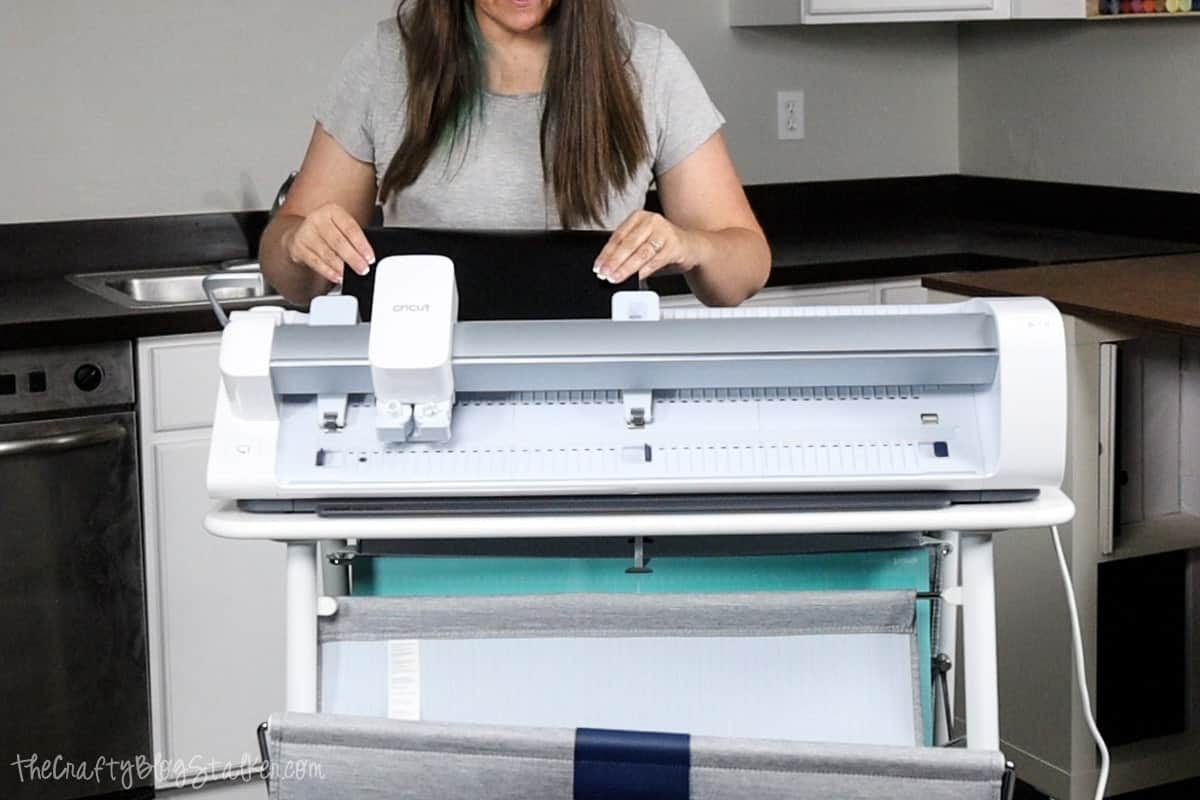
With the vinyl side up, push the Smart Vinyl through the guides in the back of the Cricut machine.
Push the material through the machine until it is just barely passed the material guides on the front.
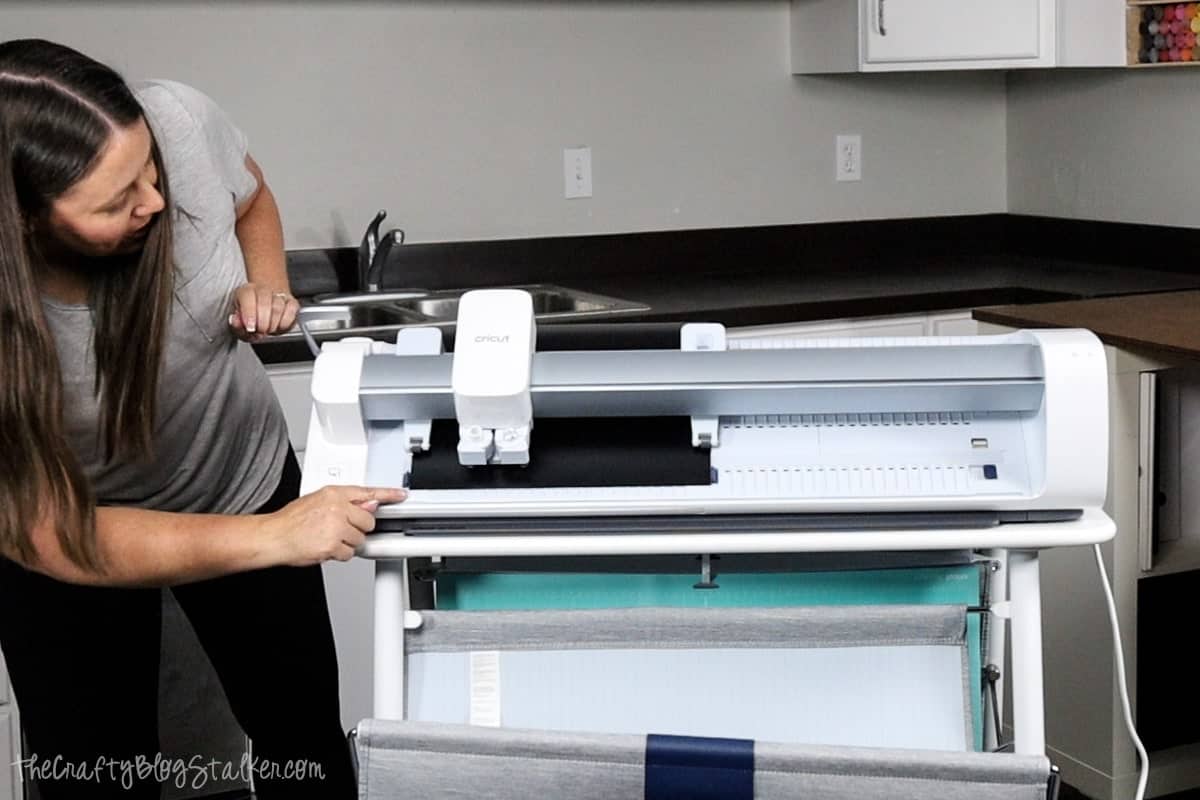
Push down the lever and then the pinch arms will be locked in place.
Cutting Iron On:
When the Load button begins to blink, you can press the button and that will instruct the machine to measure out your material.
Once measured, the Start button will begin to blink. Press that button and the machine will think for just a moment and then begin cutting.
Once the machine is done cutting you can remove the blade from the back of the machine, run it along the track at the base of the machine, and cut off the used vinyl.
Weeding Iron On:
When weeding heat transfer vinyl, I like to weed an entire sheet at a time.
And these sheets are big, I basically have to lay on the table to get started in the corner!
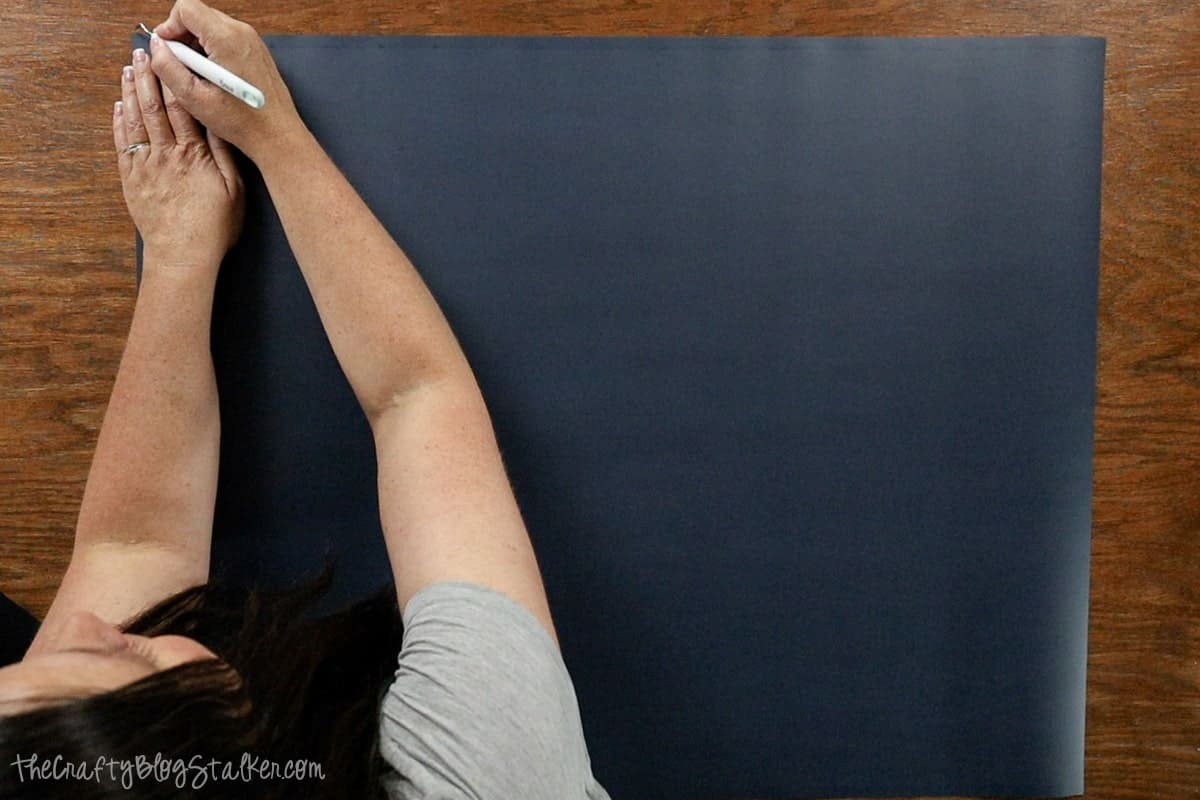
You can be rough with Iron On and it will still peel away perfectly.
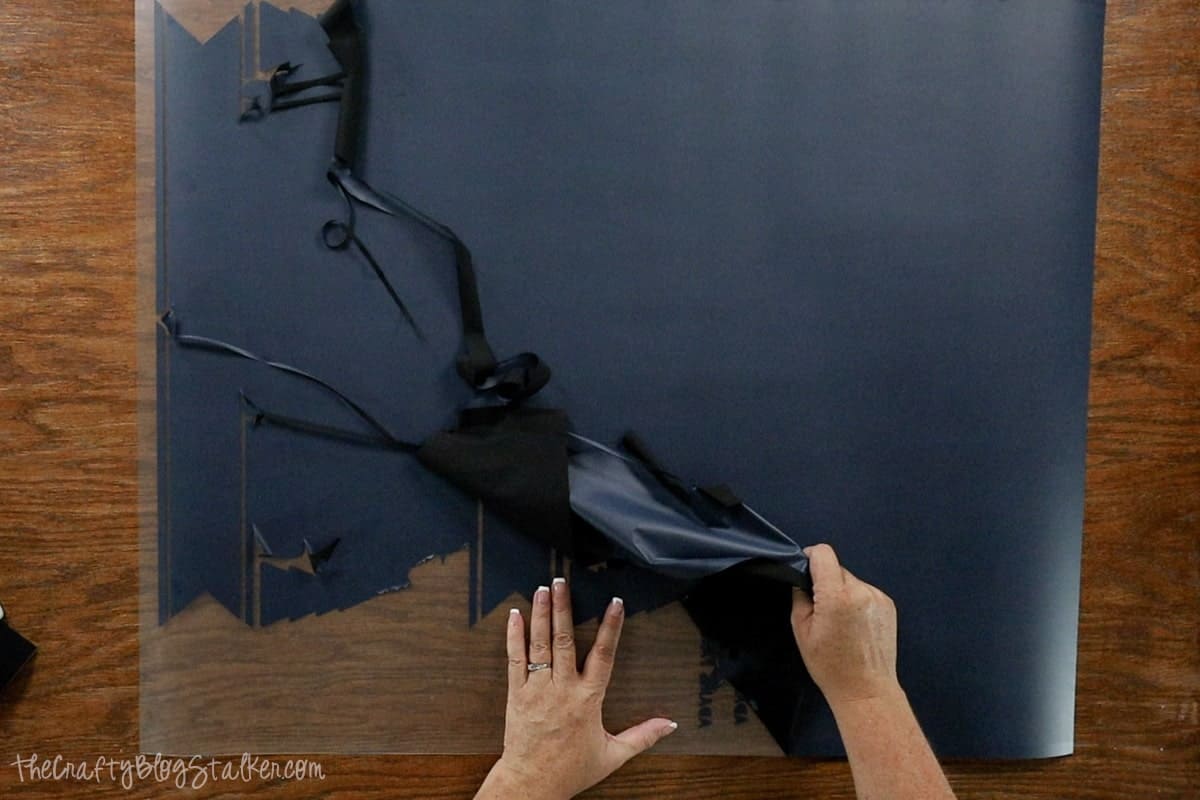
When the entire sheet is weeded, that is when I cut the different designs apart.
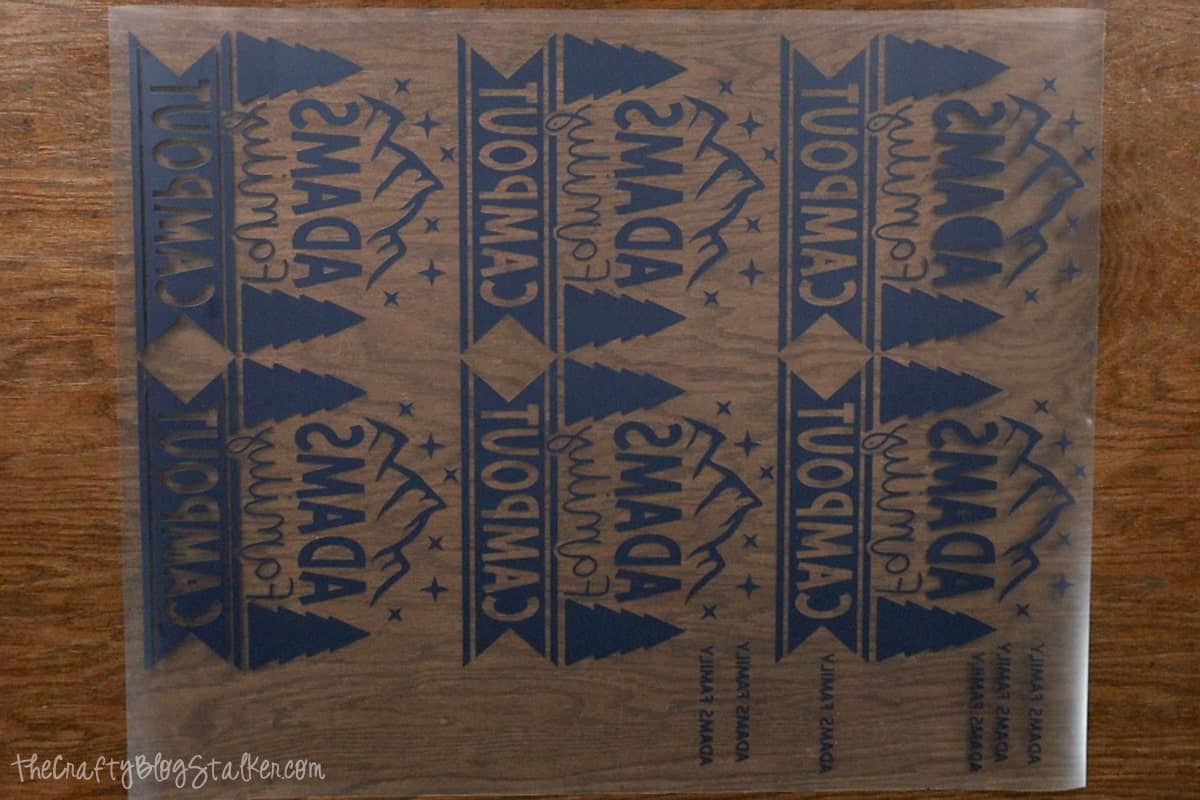
Weeding Vinyl:
Weeding vinyl is a completely different story. Vinyl is sticky on the back, and if it sticks to something you don't want it to stick to, it can be a pain!
With vinyl, I always cut the different designs apart before I begin weeding.
Start in a corner and slowly peel back, making sure that no parts of the design lift off the backing sheet.
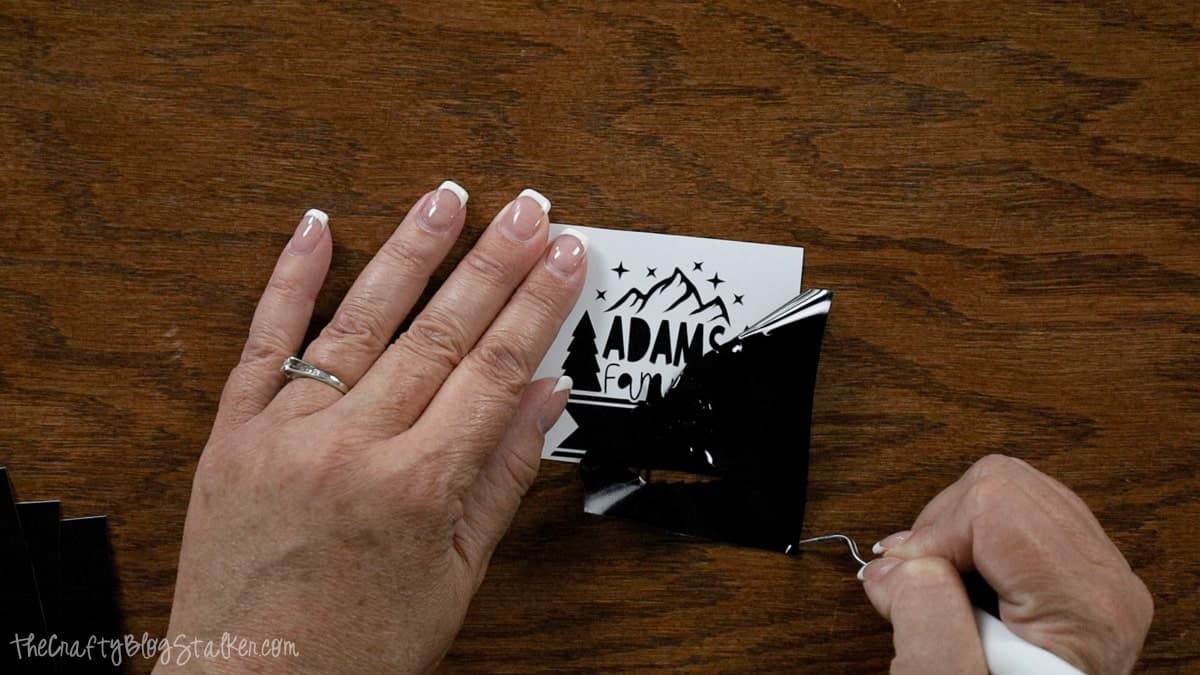
Once the outside has been removed, I loop the scrap so the sticky is on the outside, and then stick it to my table.
Then I can stick the small pieces, like the insides of letters, to it.
Applying the Iron On Design:
To apply our designs to our shirts, I am going to use the AutoPress. This thing is great for batching!
Learn more: Unboxing the Cricut Autopress: Is It the Right Heat Press for You?
When the timer has run, it automatically opens so you don't have to babysit each press. Instead, you can easily move on to preparing the next shirt!
My shirts had a sticker down the front for sizing. Remove any stickers or tags that will get in the way.
Unlock and open the AutoPres. Set to a temperature of 315º and 50 seconds.
Double-check your cut design for any areas you may have missed when weeding. I have accidentally pressed center letter pieces more times than I can count, and they can be a pain to remove once adhered.
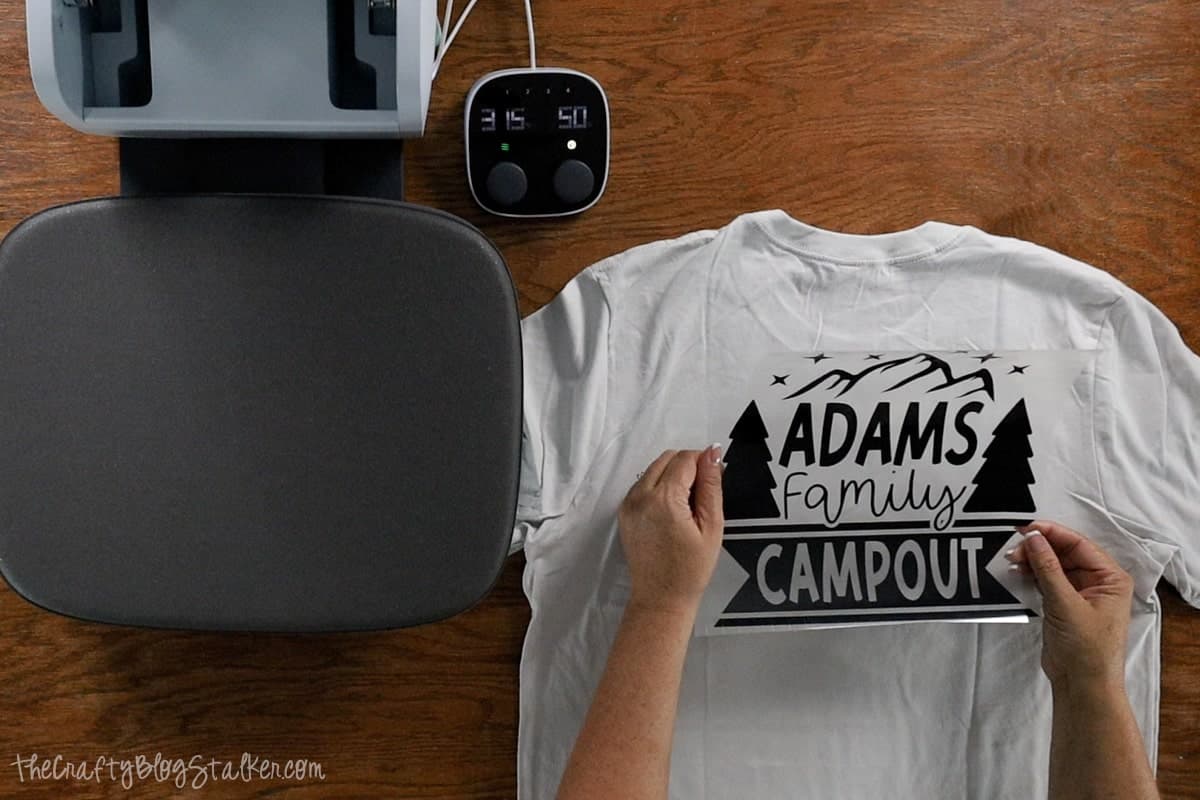
For back designs, they should start about 3 inches from the neckline.
On my shirts, you can easily see the front neckline contrast with the back neckline. I just used the front neckline as my measurement.
Center the design and make it as straight as you can.
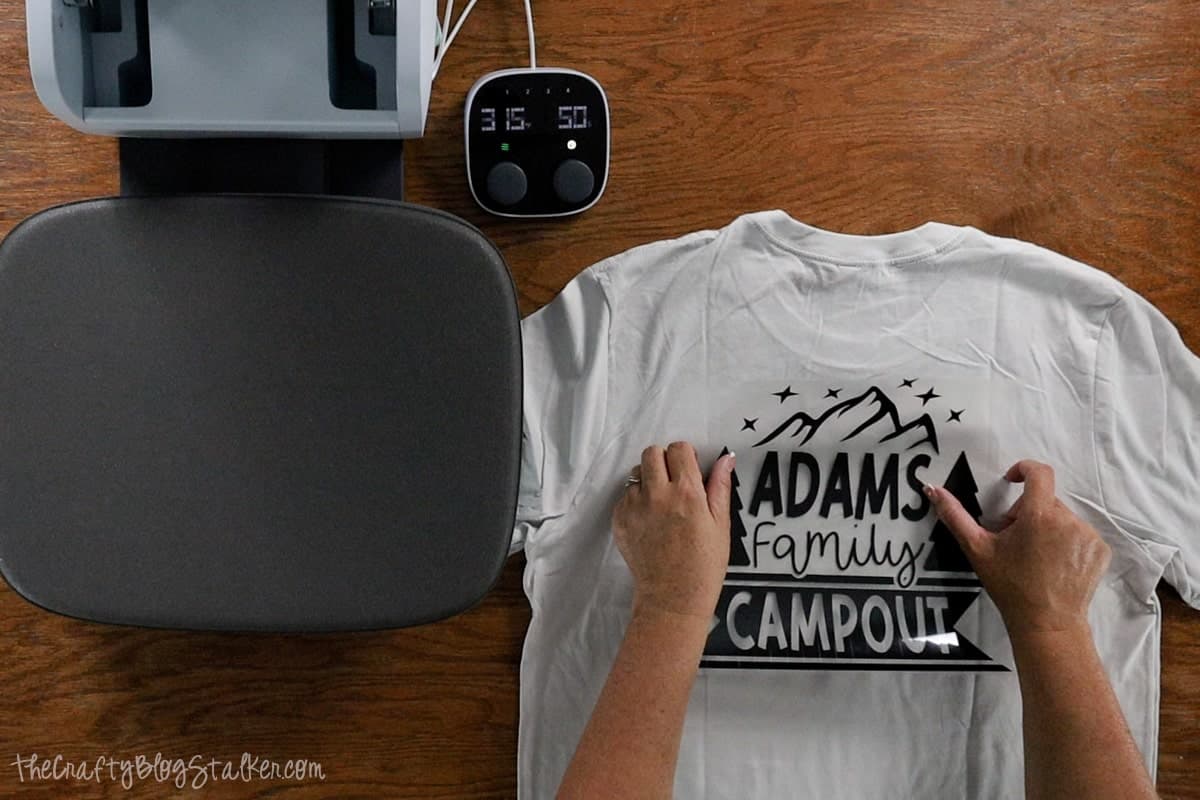
I am an eyeballer, but if you need to measure to make sure you are perfectly aligned, that is totally OK too.
Press the design onto the shirt just with your hands. The carrier sheet is slightly sticky and you can use that to make sure the design stays in place.
Lift the shirt up and place it onto the bed of AutoPress. Make sure that the entire design is supported by the base. Otherwise, it won't press correctly.
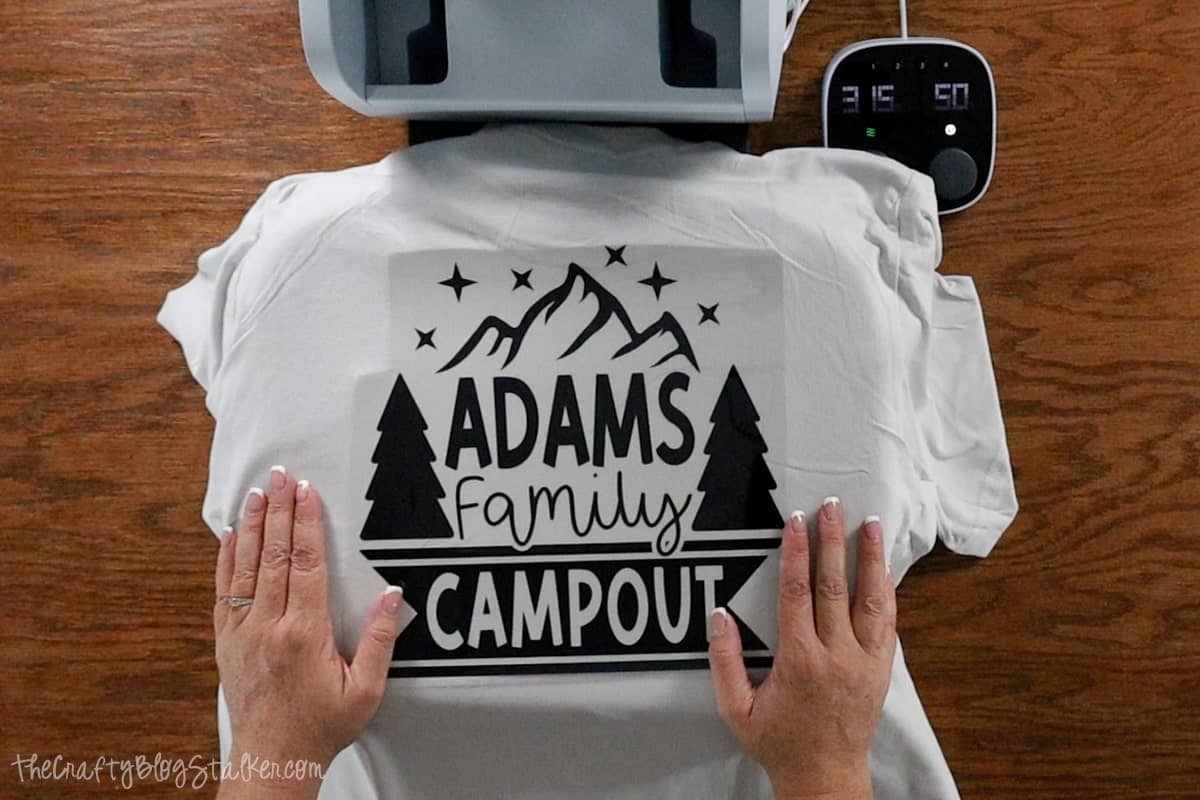
Close the lid to the AutoPress, and the timer will start automatically.
While the first shirt is being pressed, you can begin aligning the design on the next shirt.
The press will open automatically when the time is up.
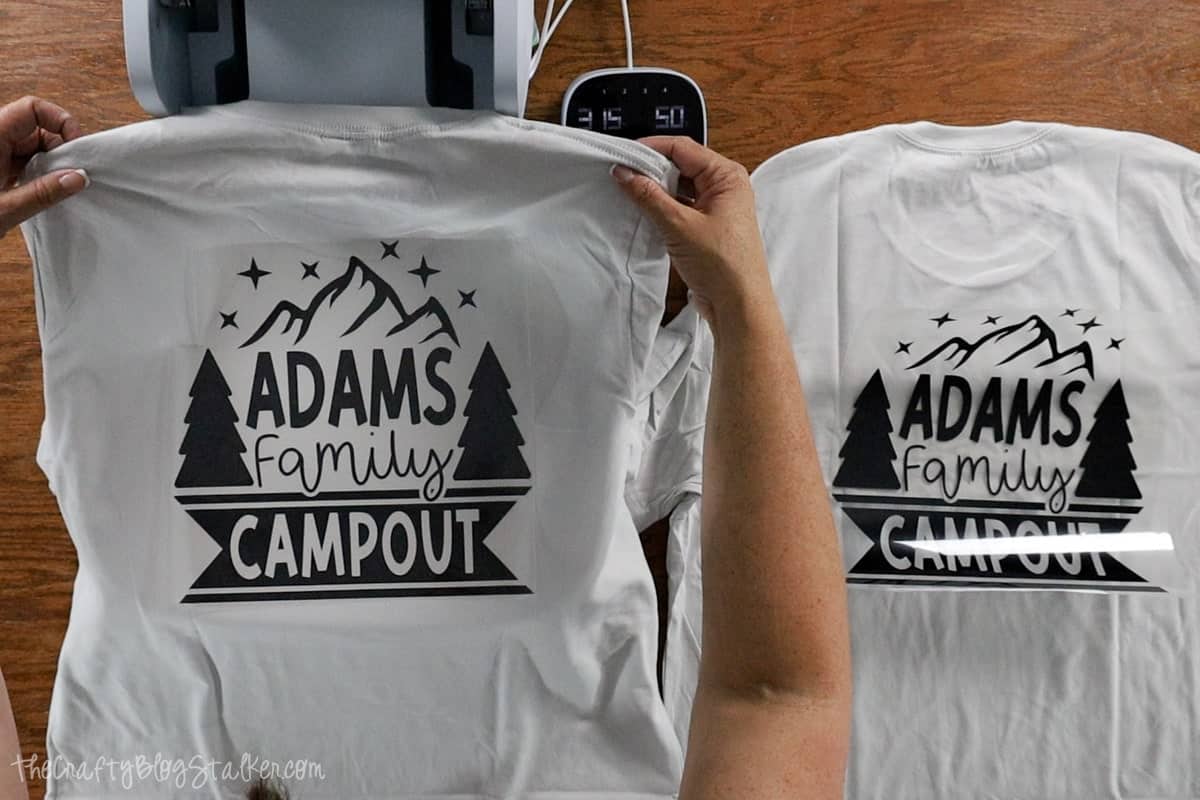
For this material type and t-shirt, a cold peel works best. I did all of the backs, then peeled. Then applied the design to the sleeves, and peeled once they were cooled again.
Applying the Vinyl Decal:
Cut a piece of Transfer Tape that is only slightly larger than the vinyl decal.
Remove the backing paper, and then roll the Transfer Tape onto the vinyl.
Using a Scraper Tool, scrape the front and back of the decal.
Place the decal with the Transfer Tape down, and peel the backing paper away from the Transfer Tape.
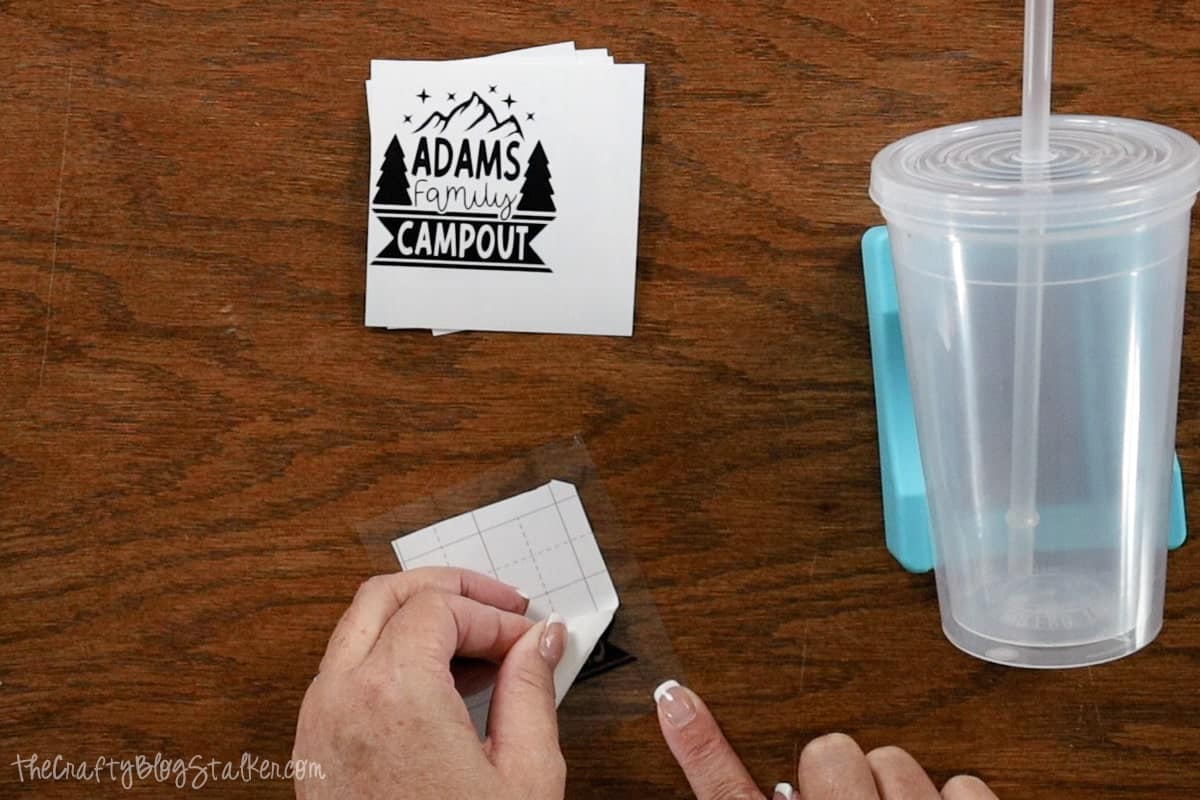
Go nice and slow making sure all parts of the design stick to the Transfer Tape.
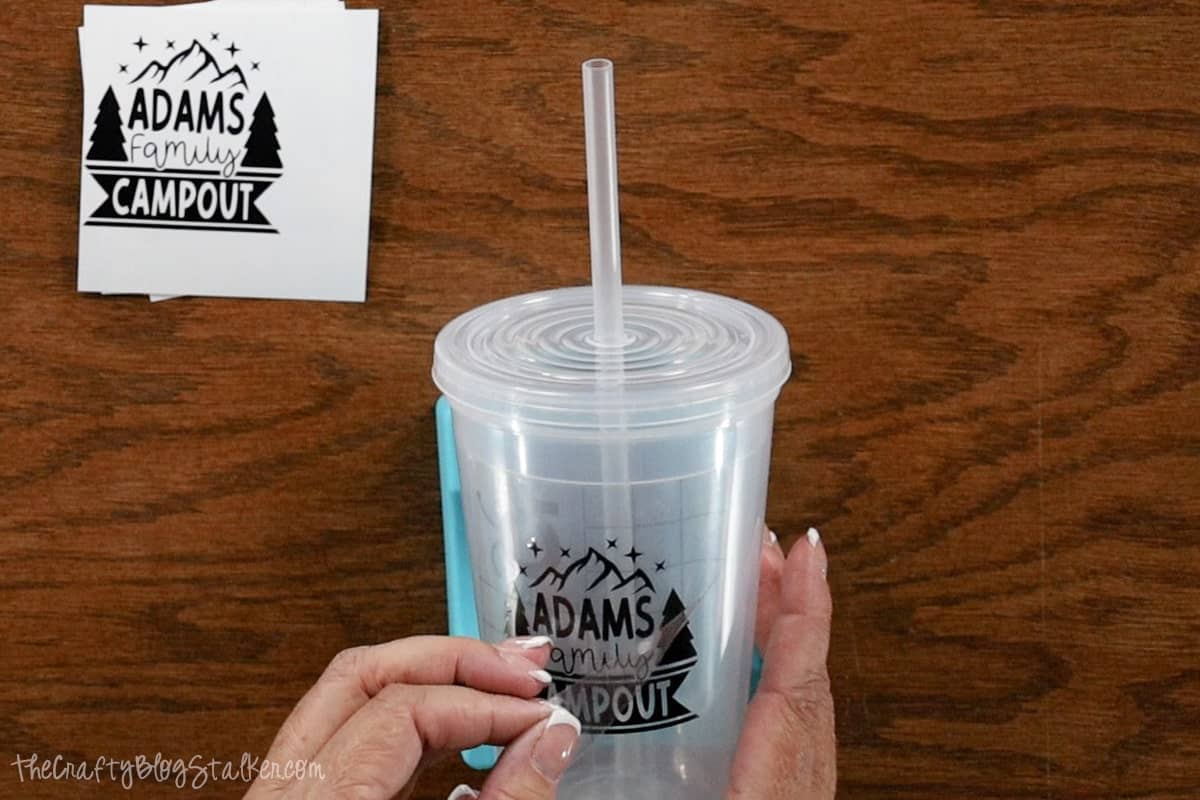
Center the design onto the cup and press it into place using your thumb.
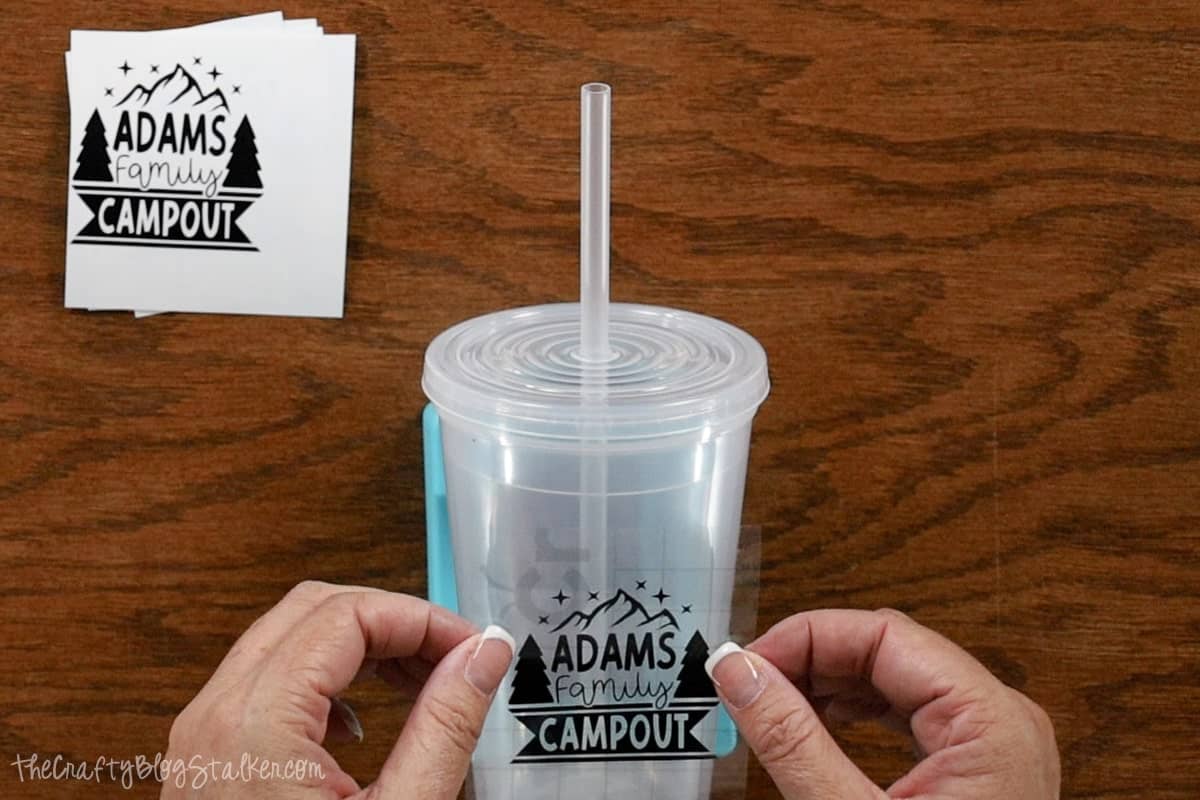
Peel back the Transfer Tape, this time making sure that all parts of the design stick to the cup.
Finished Handmade Items:
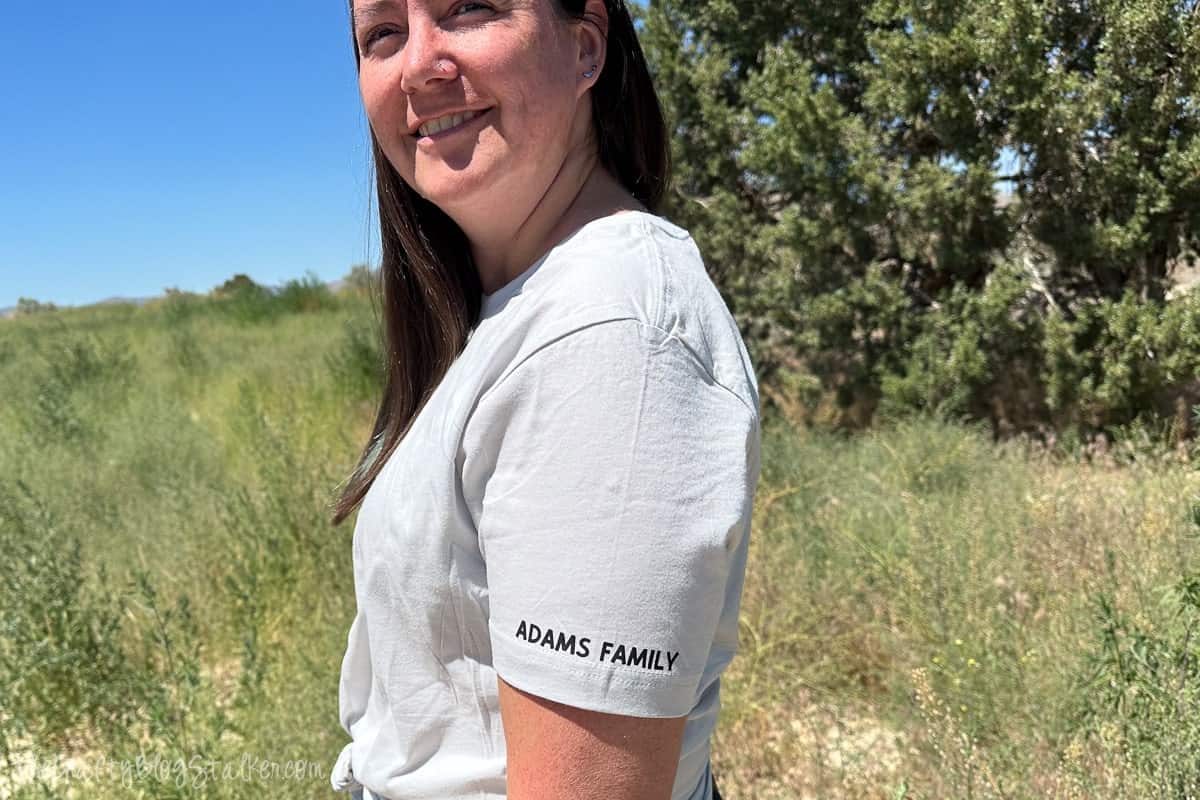
Everything turned out so cute, and now my entire family is excited about our camping trip and our new camp merch!

Check out the sleeve! I love that little added touch.
No one will be thirsty on this trip either.

Using the Cricut Venture made this project so easy! Everything cut out super quick and without having to load multiple mats. It saved me a lot of time. I am a fan!
Thank you Cricut Venture!
Our Crafting Essentials:
- The Cricut Cutting Machine is easily our favorite crafting tool. We use it in so many of our tutorials!
- These MakerX Crafting Tools are perfect for keeping in the craft room and are always ready when needed!
- This Fiskars Paper Trimmer is easy to use and cuts nicely without frayed edges.
- These Scotch Precision Scissors cut like a dream, and you get multiple pairs in a pack!




Leave a Reply