

Grab your friends and create with Cricut Infusible Ink! I will show you the whole shebang with two step-by-step project tutorials. Then you can make it too!
Shout it from the rooftops! Cricut Infusible Ink is AMAZING!!
Have you heard about Cricut Infusible Ink? It is a new product that Cricut has introduced to be used with their already incredible family of products!
Infusible Ink is not Vinyl or HTV but is a special kind of ink that when heated becomes infused into the fabric. The ink is permanent and there will be no peeling or cracking later down the road. It will always be as beautiful as the day you made it!
I have already created a post that really gets into the nitty-gritty of Cricut Infusible Ink and I even talk about the science and how it all works! You can find that here - How to Use Cricut Infusible Ink.
Today we aren't just going to talk about this fun new product but we are going to create with it, and I will show you exactly how it works!
Supply List:
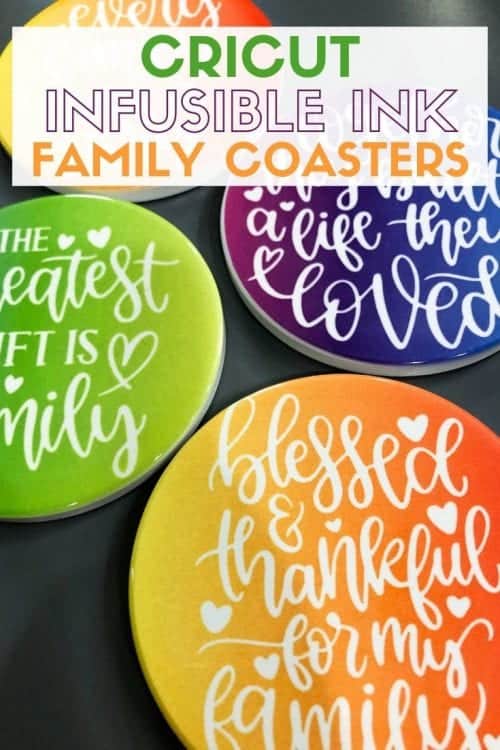
Let's start with a set of family-themed coasters. If you are familiar with Cricut and Cricut Design Space you will find that the process of creating is really the same. It is applying the Infusible Ink that is different.
Supplies Used: Some links may be too similar items when exact items couldn't be found online.
- Family Themed Coasters - Cricut Design Space
- Cricut Cutting Machine
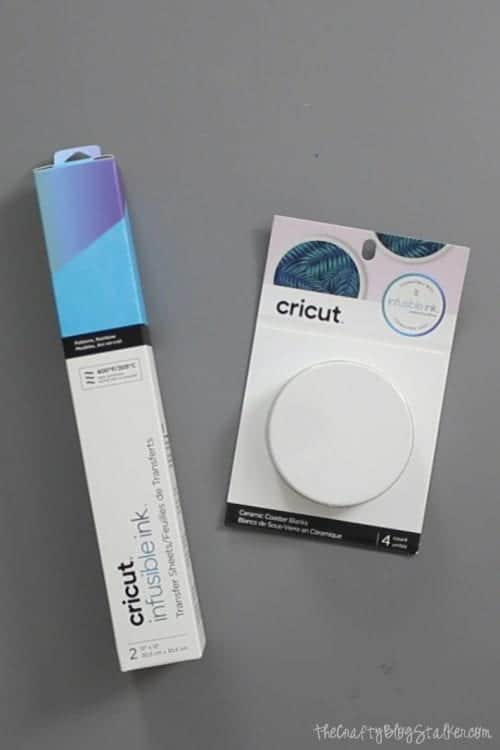
- Infusible Ink Transfer Sheets
- StandardGrip Mat
- Cricut Round Ceramic Coaster Blanks
- Heat Press
- Heat Press Mat
- Cardstock (80lb)
- Butcher Paper - included with Infusion Ink Transfer Sheets
- Lint-free Cloth
Ceramic Coaster with Cricut Infusible Ink Tutorial Video
Like videos? I have a video tutorial for you!Please subscribe to my YouTube Channel so you don't miss out on any future video tutorials!
Cutting the Design out of Infusible Ink Transfer Sheets
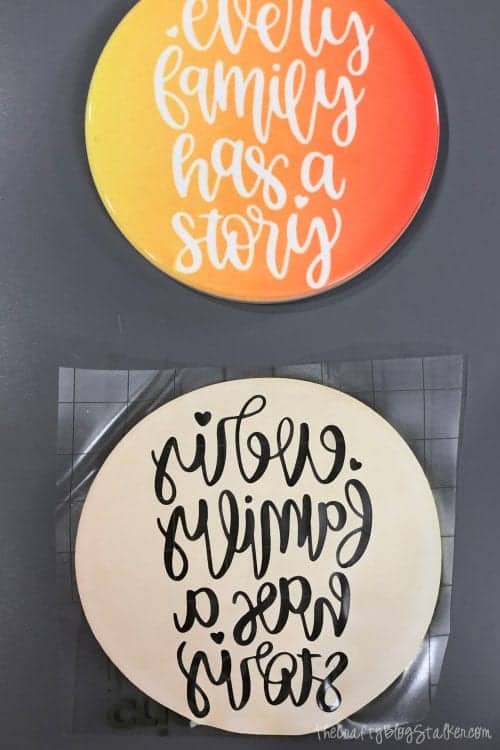
I created the design for these coasters using Cricut images that were already designed. You can create your own design or you are welcome to use mine in Cricut Design Space.
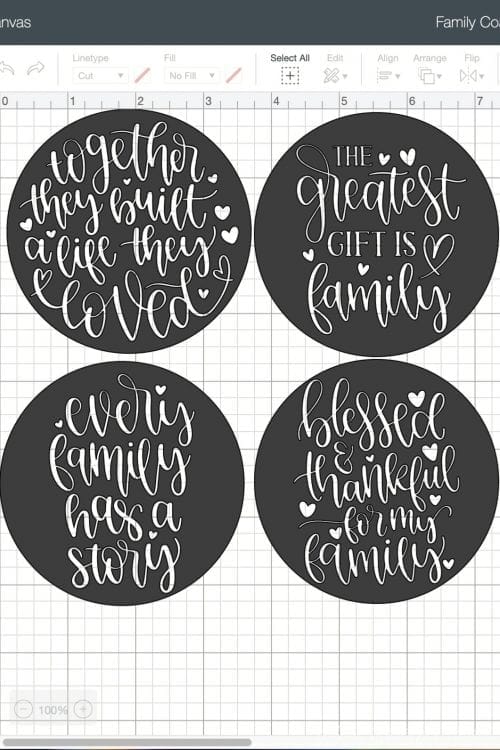
The ceramic coasters have a diameter of 3.6 inches and so I created the design to match.
Once your design is ready select the green "Make It" button to send the images to your Cricut machine to cut.
In Cricut Design Space, make sure to mirror your image before you cut. If you don't then all of your text will be backward.
Select Infusible Ink as the material you are cutting.
I used my Cricut Maker, but Infusible Ink can also be cut with and Cricut Explore Machine as well.
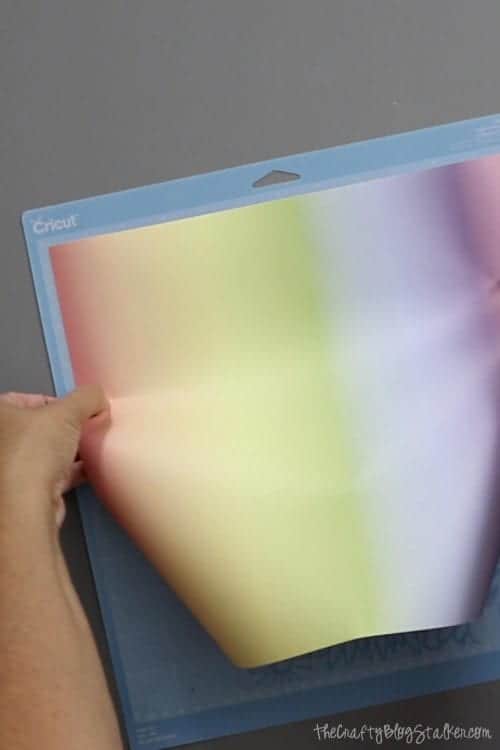
Place the Infusible Ink Transfer Sheet onto the mat with the color side up.
Follow the blinking light prompts on your machine. Load the mat and then cut your infusible ink.
Prepping your Cricut Infusible Ink for Application
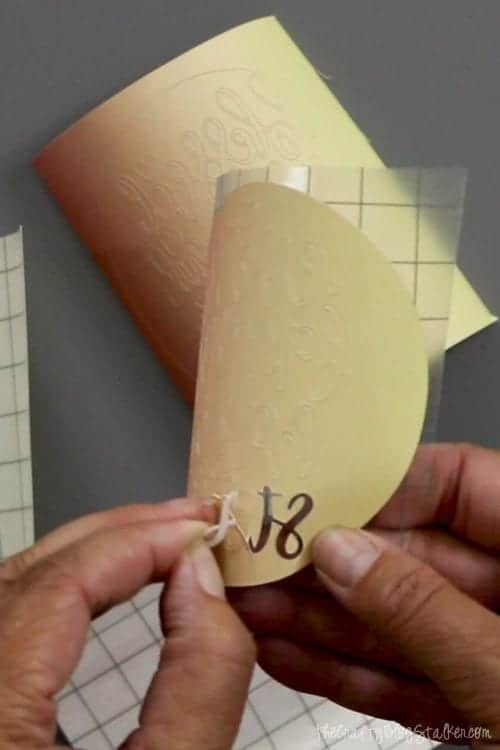
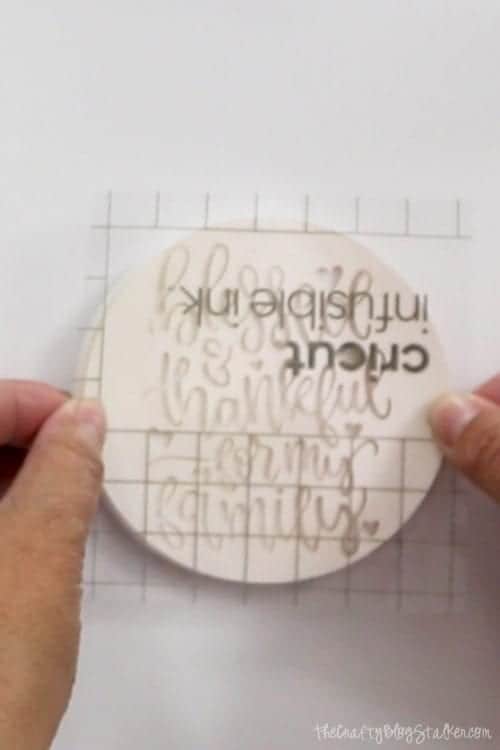
Once cut, carefully remove the transfer sheet from the mat and trim away any unused area of the sheet. Then cut the 4 coasters into different sections as well.
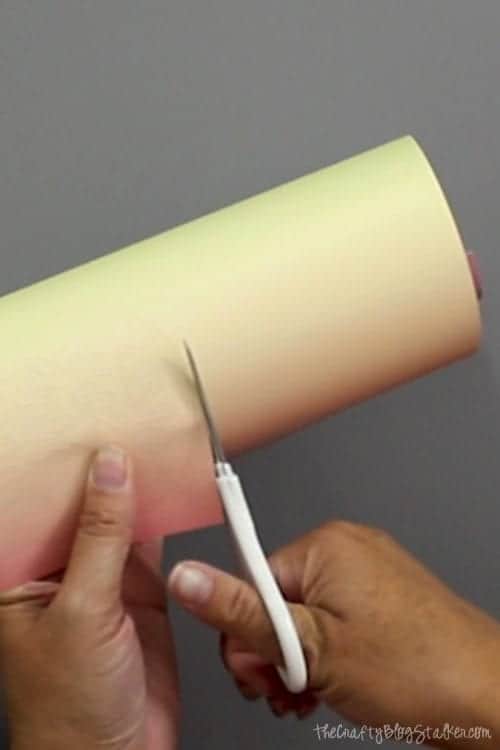
Just like every other material cut with the Cricut, you will need to weed the excess away. You'll notice that the transfer sheet feels a lot like paper, and the unneeded parts pull away from the backing sheet pretty easily. Just make sure your fingers are dry without oil or lotion on them.
Apply your Cricut Infusible Ink
To know exactly what temperature and time to set your EasyPress 2, visit the online Cricut EasyPress Interactive Quick Reference Guide. Enter the Heat-Transfer Material and the Base Material and the guide gives you all the information you need. It even tells you if you should peel the backing while the material is still warm or if you should let it cool!
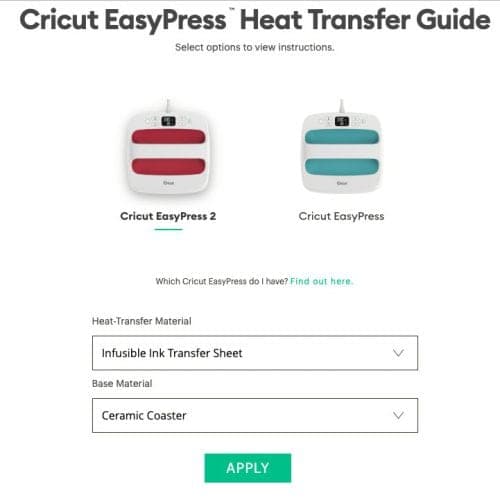
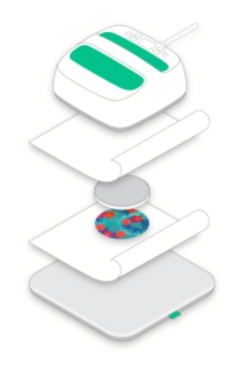
This website also gives a visual of how to layer everything.
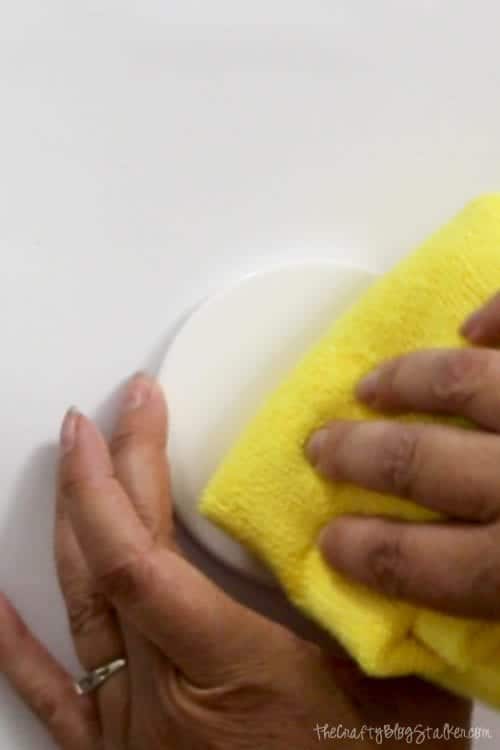
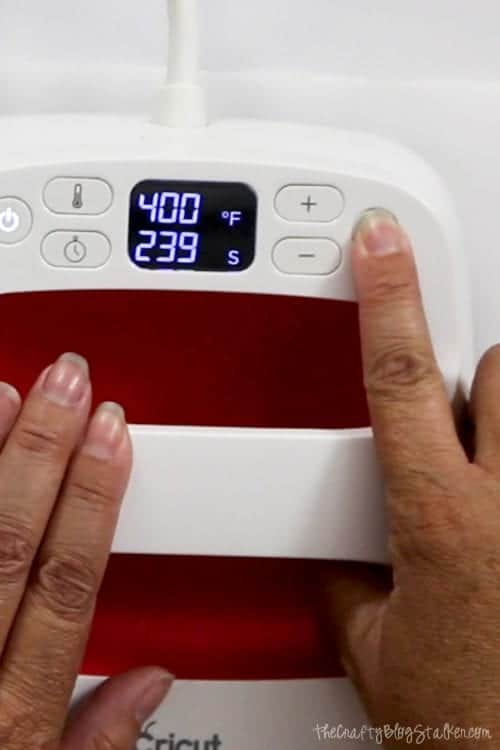
According to the website, heat the EasyPress 2 to 400° F, wipe the coaster with a lint-free cloth and place a sheet of cardstock over the EaspyPress Mat to protect the surface.
Position the design on the coaster, with the color side of the design touching the face of the coaster.
Then place the coaster upside down with the face on the cardstock.
Cover the coaster with a sheet of clean butcher paper.
Centering the EasyPress 2 on top of the coaster, and apply heat with no pressure for 240 seconds. When you press the lit logo, the countdown will begin and will beep when finished.
When complete, carefully lift the press straight up to stop any sliding between the layers.
Remove the butcher paper.
CAUTION: Coaster will be very hot! Let cool completely before you lift the coaster and remove the design backing sheet.
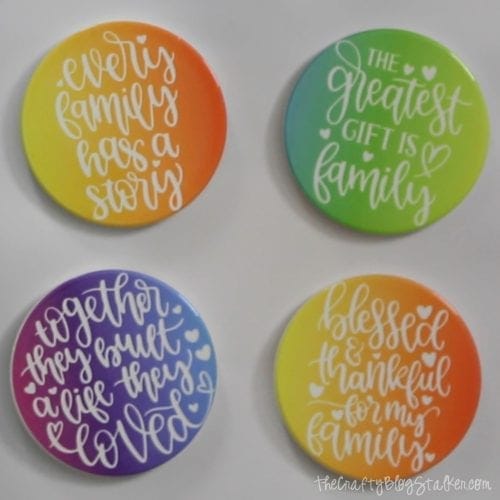
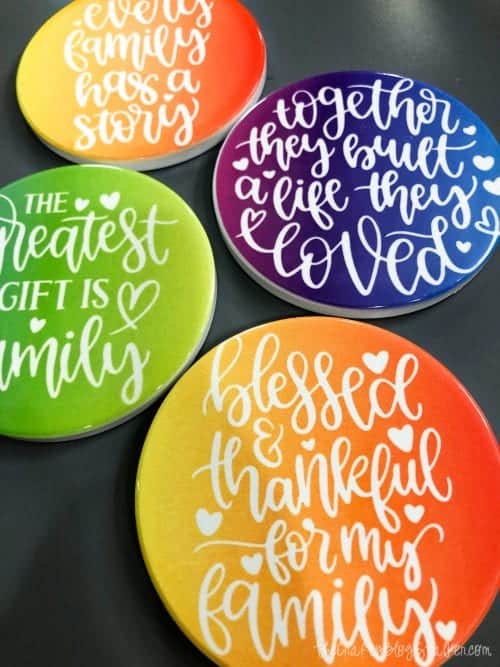
You can see how all of the ink transferred from the transfer sheet to the coaster. What is left is basically just a sheet of paper.
I love how they all turned out, and I am amazed at the quality! The surface is completely smooth and the color is amazing! These seriously look store-bought! But they're not, I made them! How cool is that?!
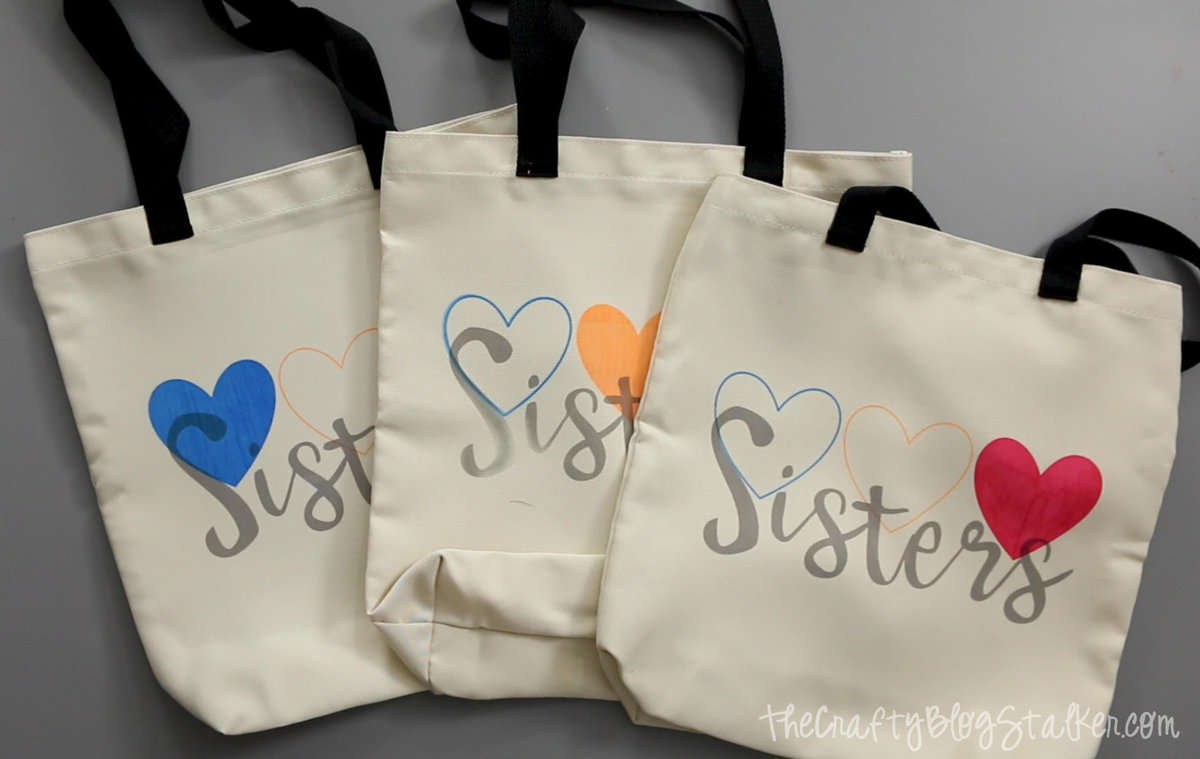
Now that we've seen how to apply Infusible Ink to Coasters, do you want to see how to apply the same ink to a fabric blank? On the next page to see the tutorial for these personalized tote bags I made!
What design would you put on a set of coasters? Share and leave a comment below!
Diane Tubbleville
can you make a printible version of the step by step how to use infusible ink? and also what do i need to get started on my projects what do i need to buy. thanks for all your help!!
Katie
Thank you for this suggestion Diane!
Collette Gay
Loved these. I clicked on the link and it said thus website could not be reached. I would live to use your designs to make my own coasters.
Katie
Cricut Design Space has moved from a website to an app. So you will need to download the program. Then when you click on Open Cricut Design Space it will take you directly to this project.
Thanks Collette!
michelle landers
I can not find this file in design space app
Katie
Here is the link Michelle. http://shrsl.com/1opwm
Angela
Can you share what font this is and where I can get it. I want to use a different saying but same font
Katie
For which project? I did not create the design for the coasters, so I don't know what font was used. I found the design in Cricut Design Space.
The tote bag uses the Babette font.
Marissa
If they are going to actually be used for coasters & not just looks, do they need to be sealed? Will moisture/sweat make the ink run/ruin? And if so, what would you recommend sealing it with?
Beautiful coasters you made!
Katie
Thank you, Marissa, great question!
No, they do not need to be sealed. The ink is permanent and will not bleed or run. It is really quite cool!
Rell
Thank you so much for the file and idea; these came out GREAT!
What font was used? I'd like to create a few customs ones but can't figure out the font 🙁
Katie
Thank you Rell!
I didn't use a font, I used a finished design. So I am not sure what font was used to create the word art. I am so sorry.
MonIca chaVez
Hi Katie,
Just saw this and love it but I’m unable to find your file (family coasters) in Design Space after I click on the link. What is your file’s name?
Thanks,
Monica
Katie
Sorry you are having a hard time finding it.
Here is a different link you can try - https://design.cricut.com/landing/project-detail/5d1bb0dea4763a060538bb9b
It is called - DIY Ceramic Coasters with Cricut Infusible Ink