

Create a personalized birthday candy poster with Cricut Venture. A fun and memorable gift idea for any birthday celebration!
Looking for a unique and delightful birthday gift idea?
Get started with this tutorial and learn how to create a personalized birthday candy poster using the Cricut Venture.
It's more than just a present; it's a crafted expression of joy and celebration for a happy birthday!
Plus, it can double as a giant birthday card and have multiple people sign the back.
By filling the poster with the recipient's favorite candy, you'll make an easy gift idea with a fun birthday message.
Follow along for a fun and easy way to make a candy bar poster truly special.
Craft Tutorial Video
If videos are your thing, you're in luck-I've got a full tutorial ready for you!
Subscribe to my YouTube channel and stay inspired with every new project.
Supply List:
Some links may lead to similar items when the exact item is unavailable.
- Cricut Venture
- Project in Cricut Design Space
- StandardGrip Performance Mat
- 24" x 28" White Cardstock
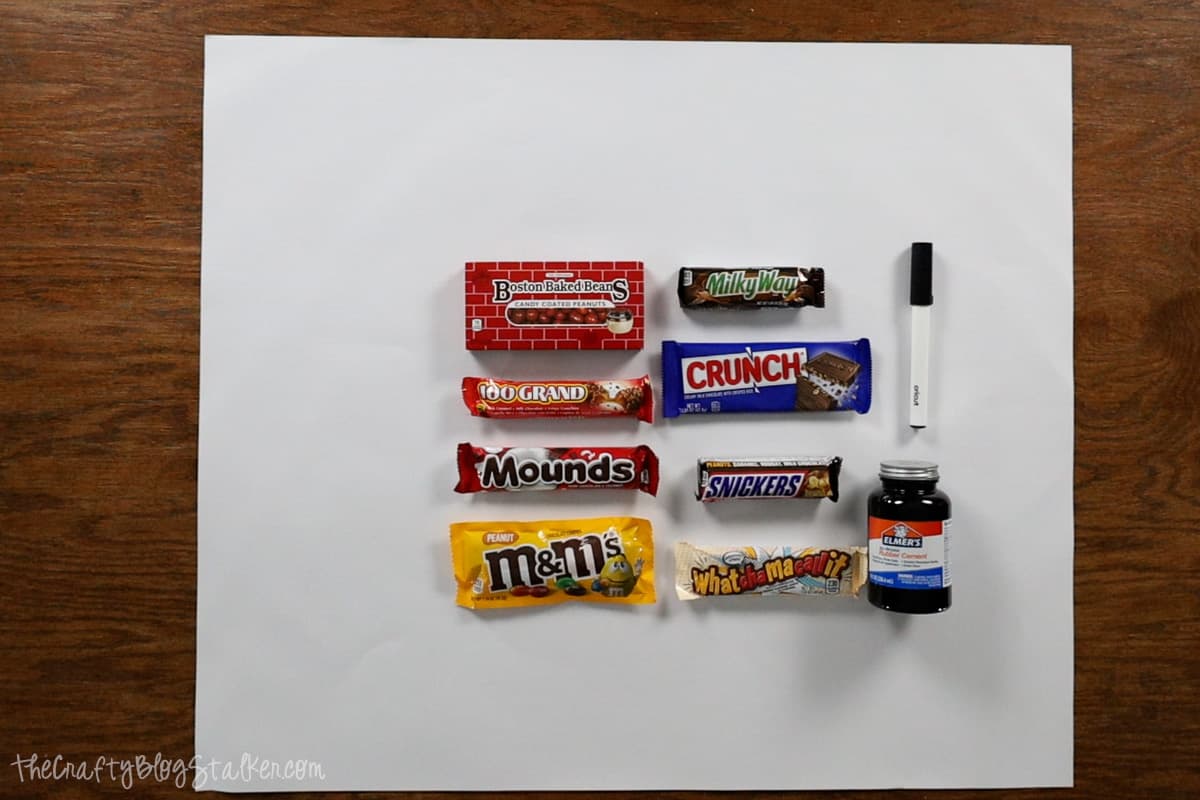
- 2.5 mm Permanent Marker
- Rubber Cement
- Different Candy Bars
- Snickers
- Crunch
- Whatchamacallit
- Boston Baked Beans
- Milky Way
- M&Ms
- 100 Grand
- Mounds
I found the best place to find candy bars was at my local gas station. At my grocery store, king-size was about the only option.
You could also substitute poster board for the large sheet of cardstock, as long as the dimensions are 24 x 28 inches.
Cricut Design Space:
The candy poster is all ready to go in Cricut Design Space.
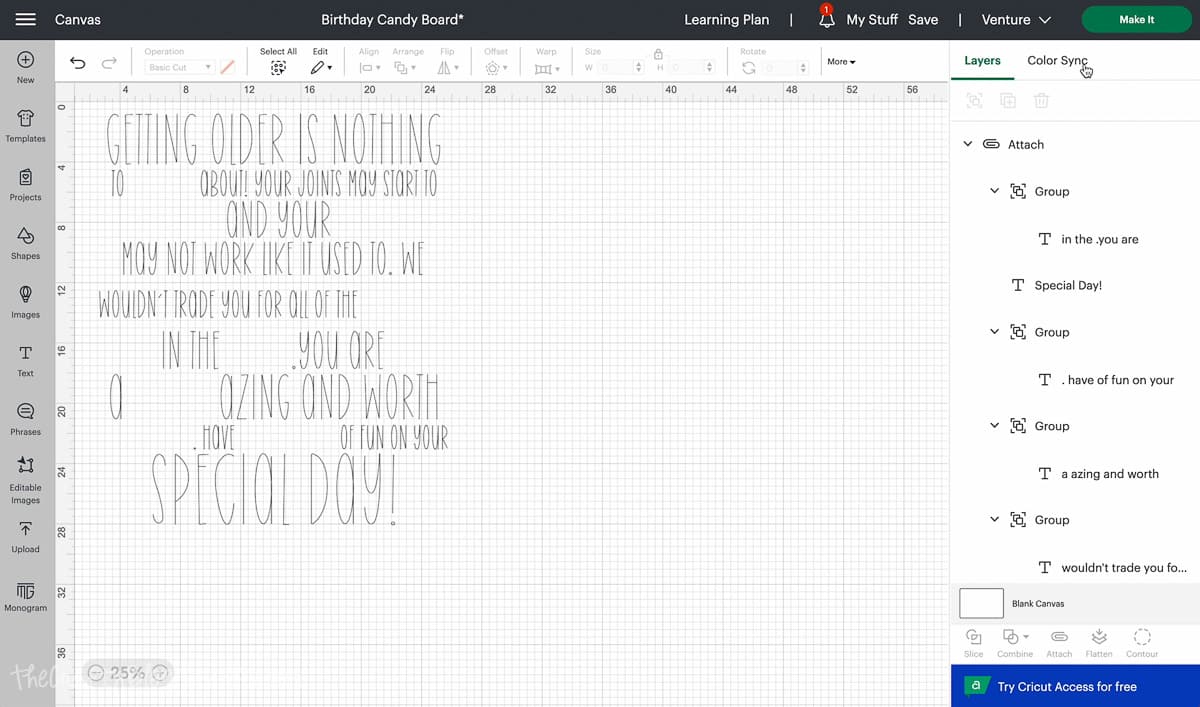
The design is sized to fit the 24 x 28 inch Cricut Cardstock.
Click on Make It and select On Mat with a Mat Size of 24 in x 28 in.
On Mat Preview, click on the design and drag it to better center the design on the mat.
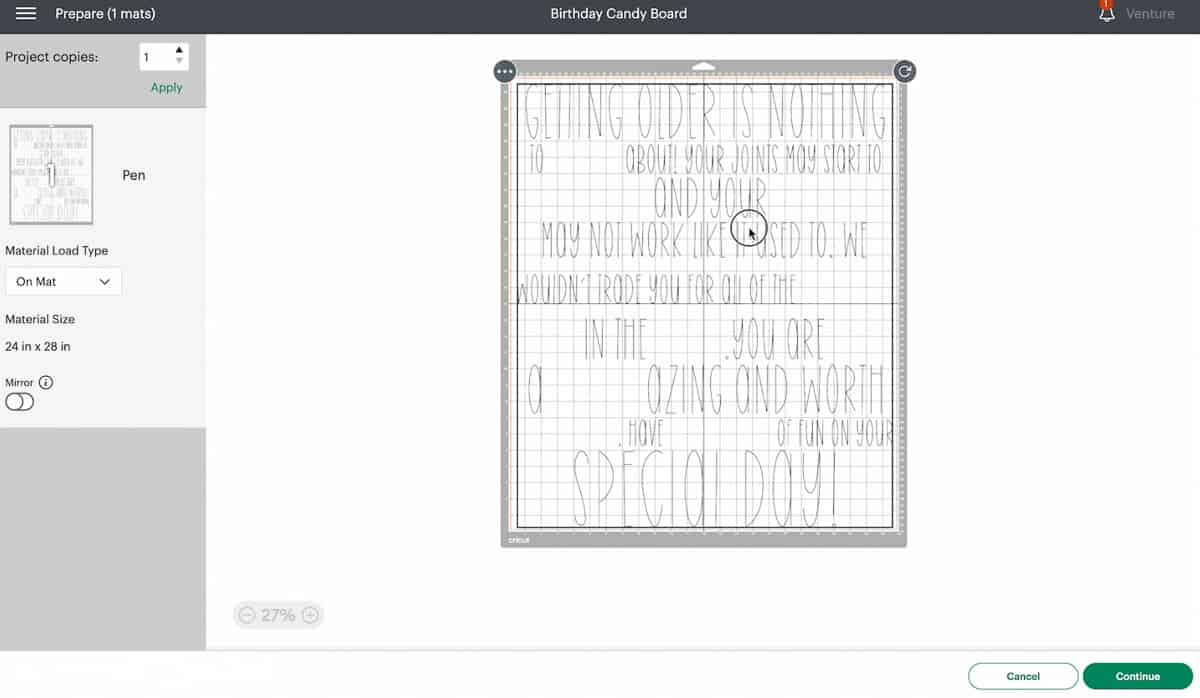
Lastly, select Cardstock as the material.
Laying the Cardstock on the Mat:
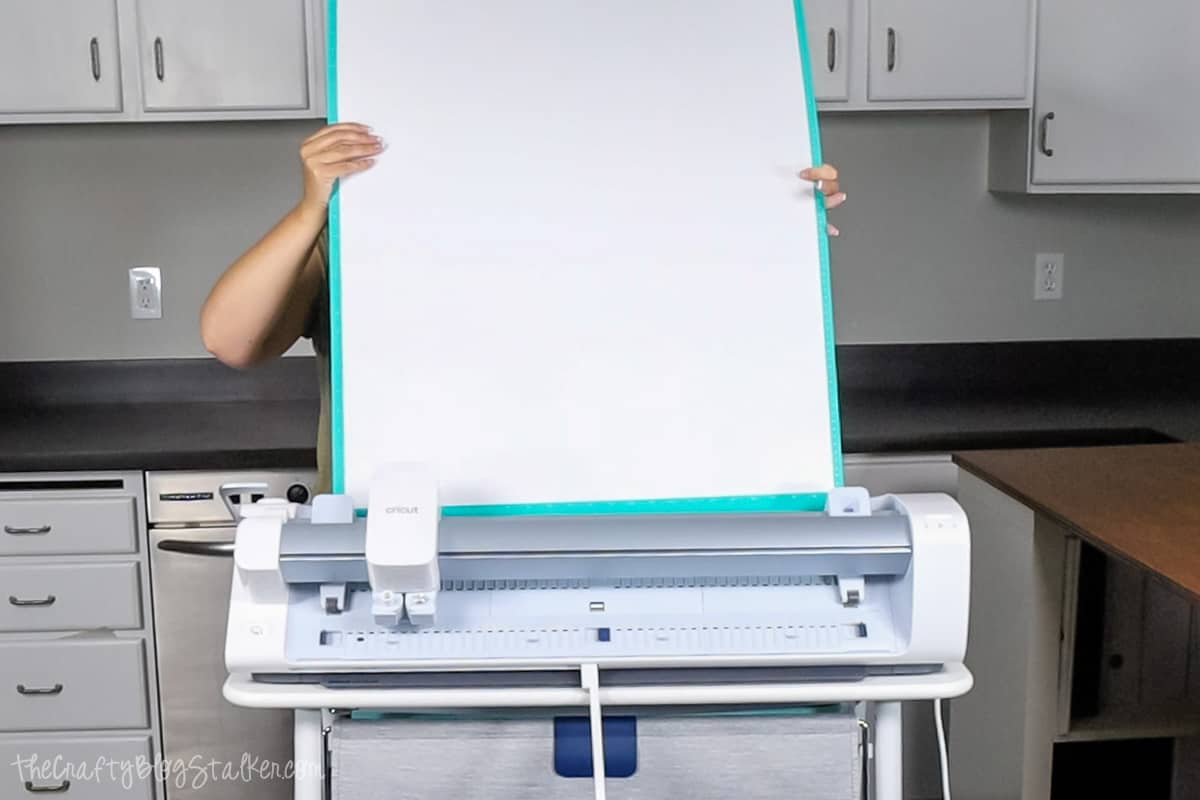
Since we are using large material it can be difficult to lay the 24 x 28 inch sheet of cardstock onto the mat.
First, remove the protective liner sheet by peeling it back from a corner.
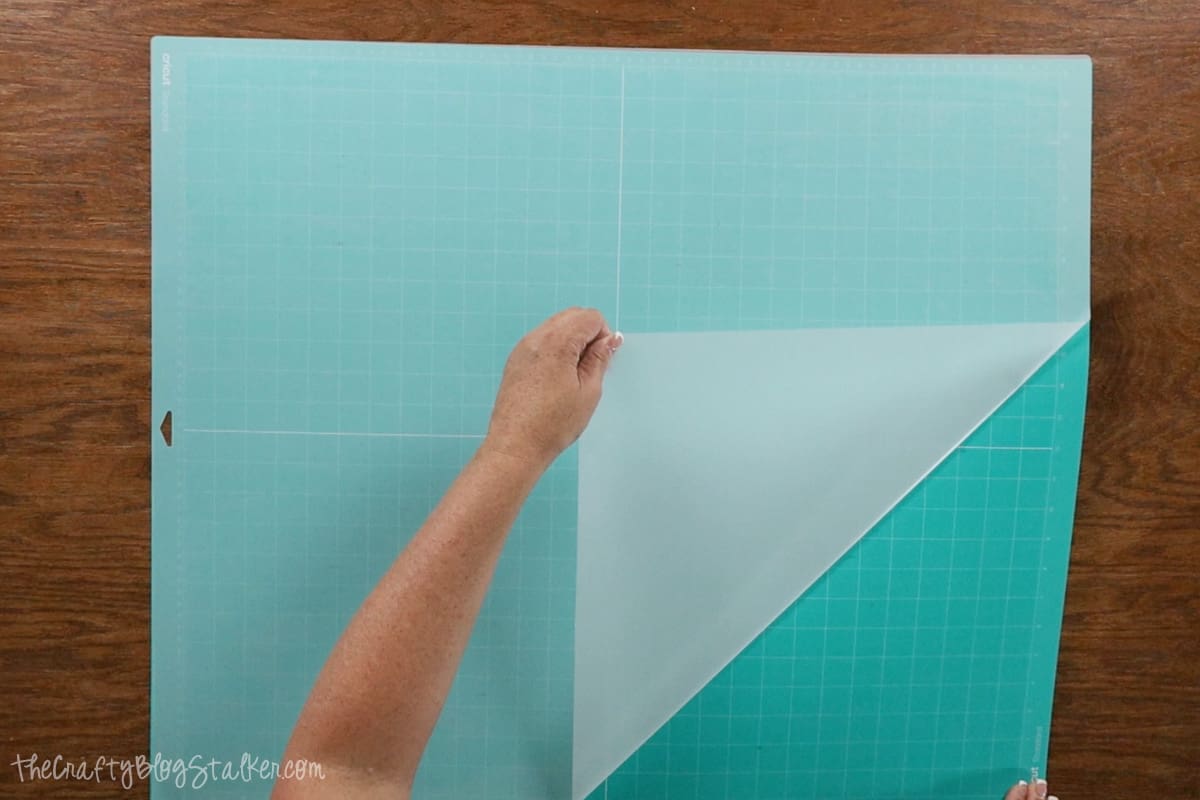
Hold the sheet up with both hands and align the top edge of the paper with the top edge of the mat.
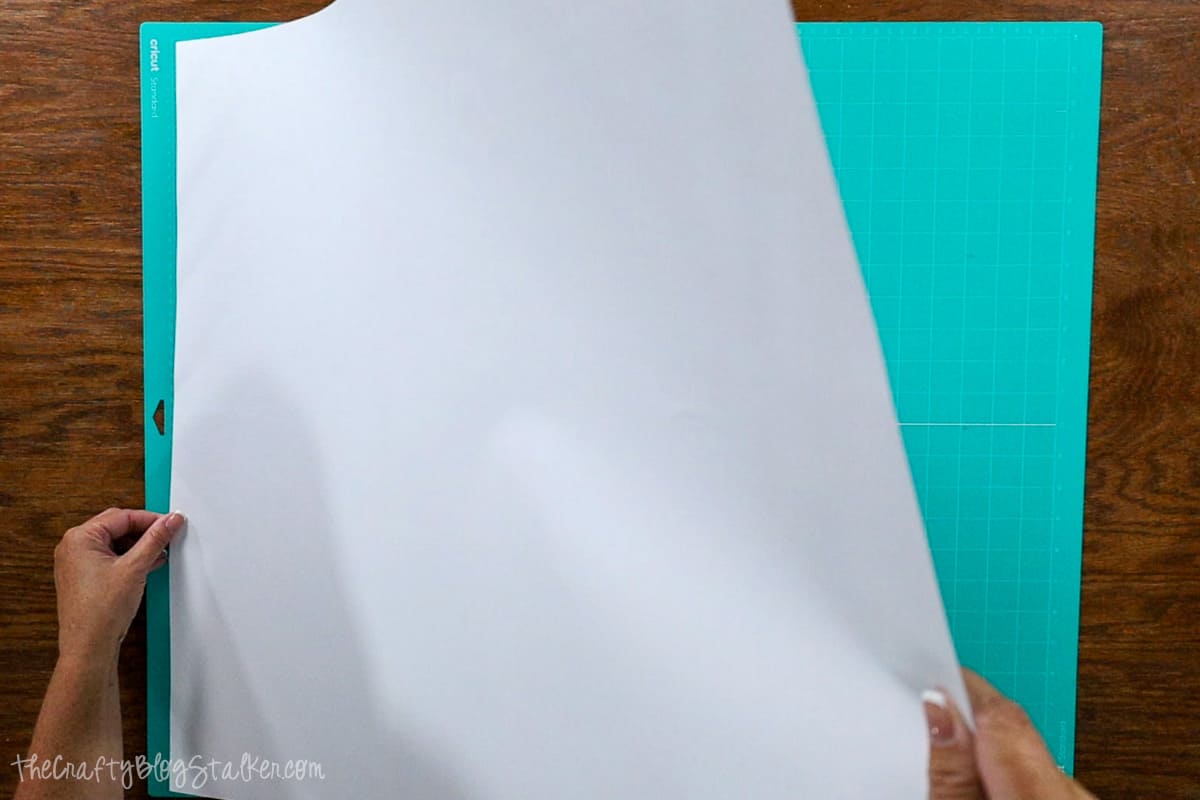
Once in place, roll the rest of the paper onto the mat, and gently press the paper into the mat with your hands.
Cricut Venture:
Lift up the lever on the Cricut Venture and move the pinch arm to the end, making sure the left and right material guides are up, and the center one is down.
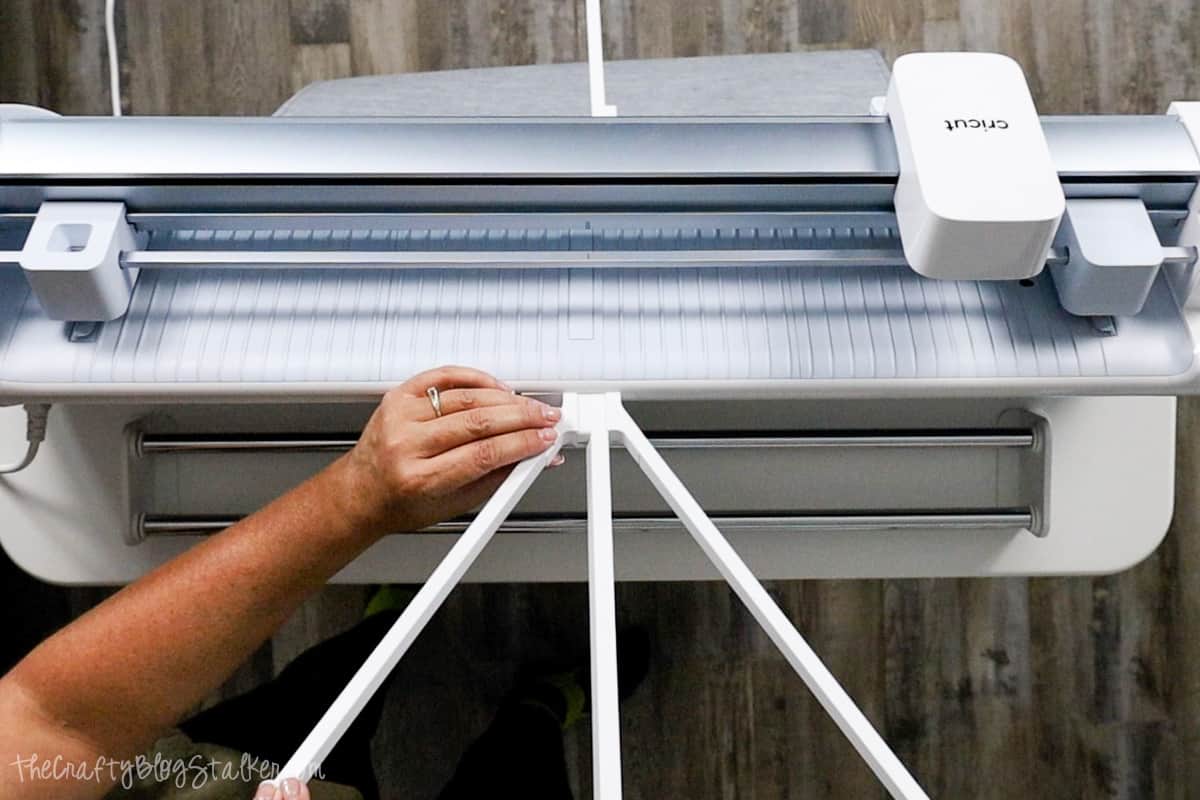
With the lever still up, press the button below the lever. This will open the support arms.
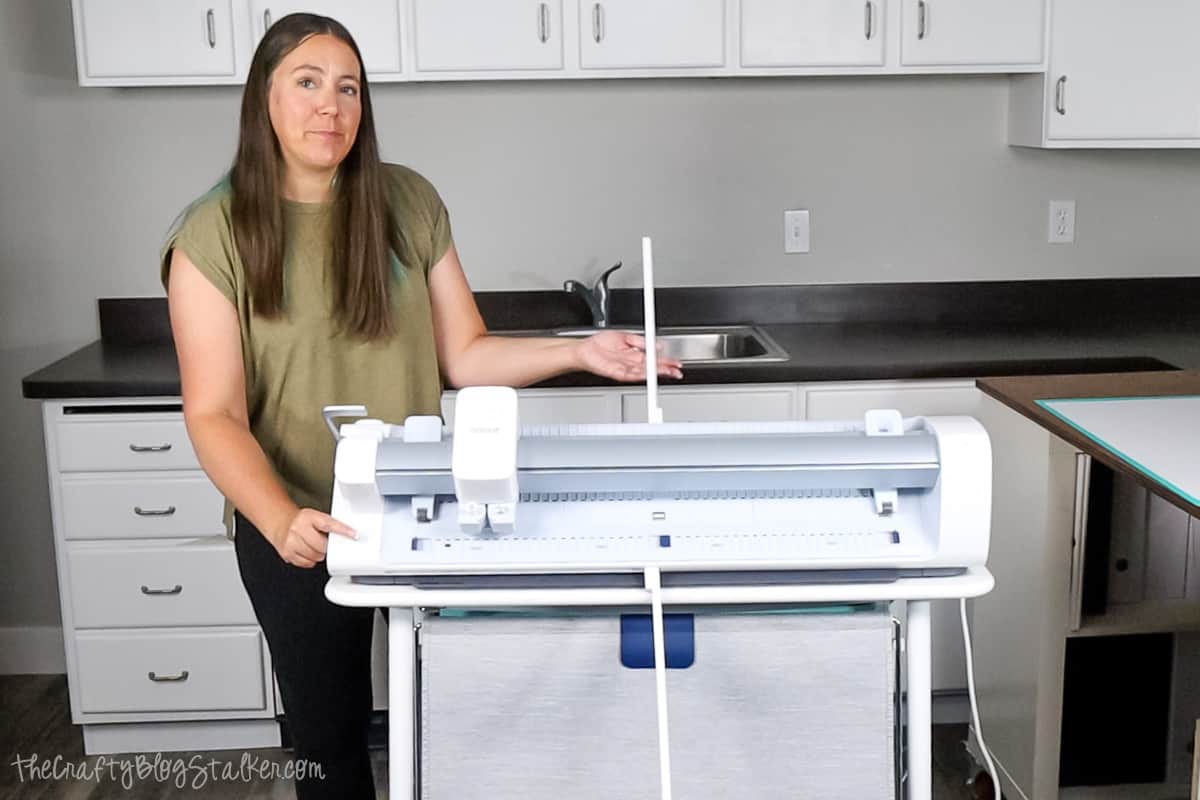
Slide the Mat Support Extensions onto the top support arm and attach the other two arms.
Load the mat into the top of the machine through the material guides.
After you load the mat, you will hear a whirring noise. That is the vacuum inside that will help hold your mat in place.
Close the lever.
Remove the pen adapter from clamp A by pushing it up from the bottom.
Remove the cap from the permanent marker, place it in clamp A, and shut the clamp.
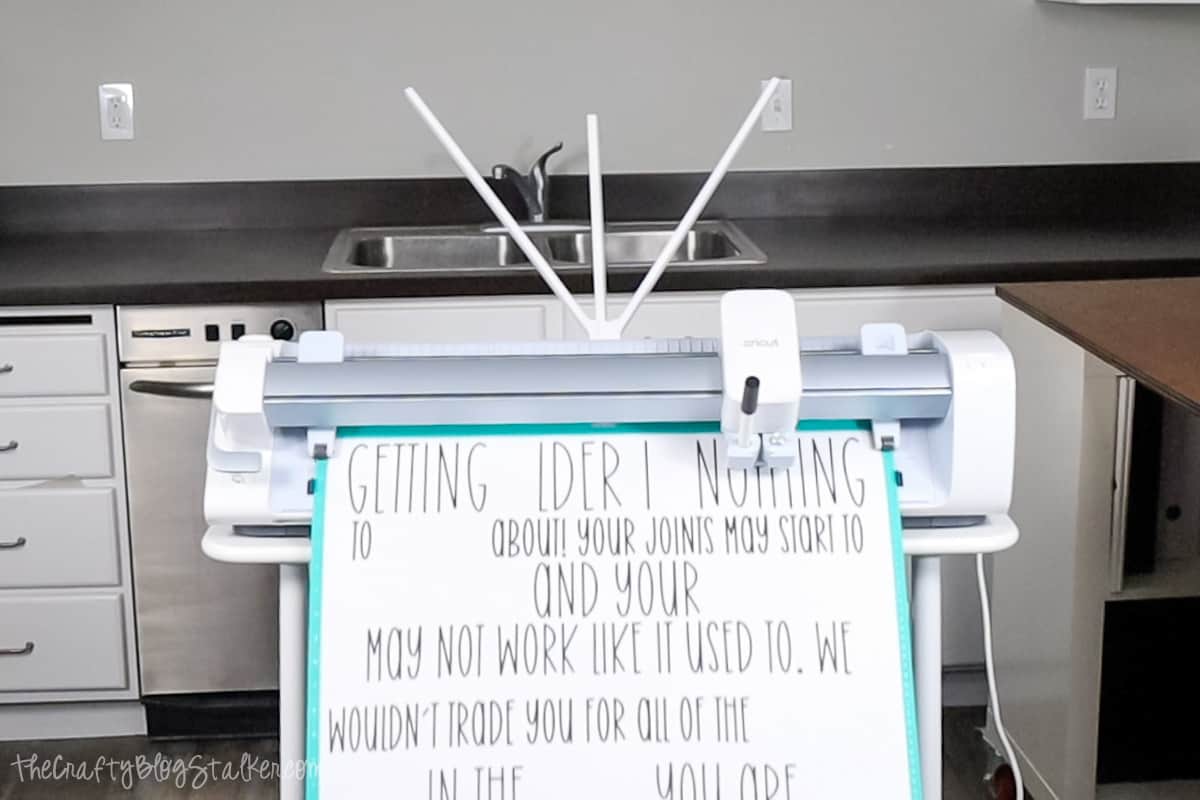
Press the blinking load button, this will load the material making sure you have enough material for your project.
When the start button begins to blink, press to begin the draw. The machine will think for just a moment and then begin.
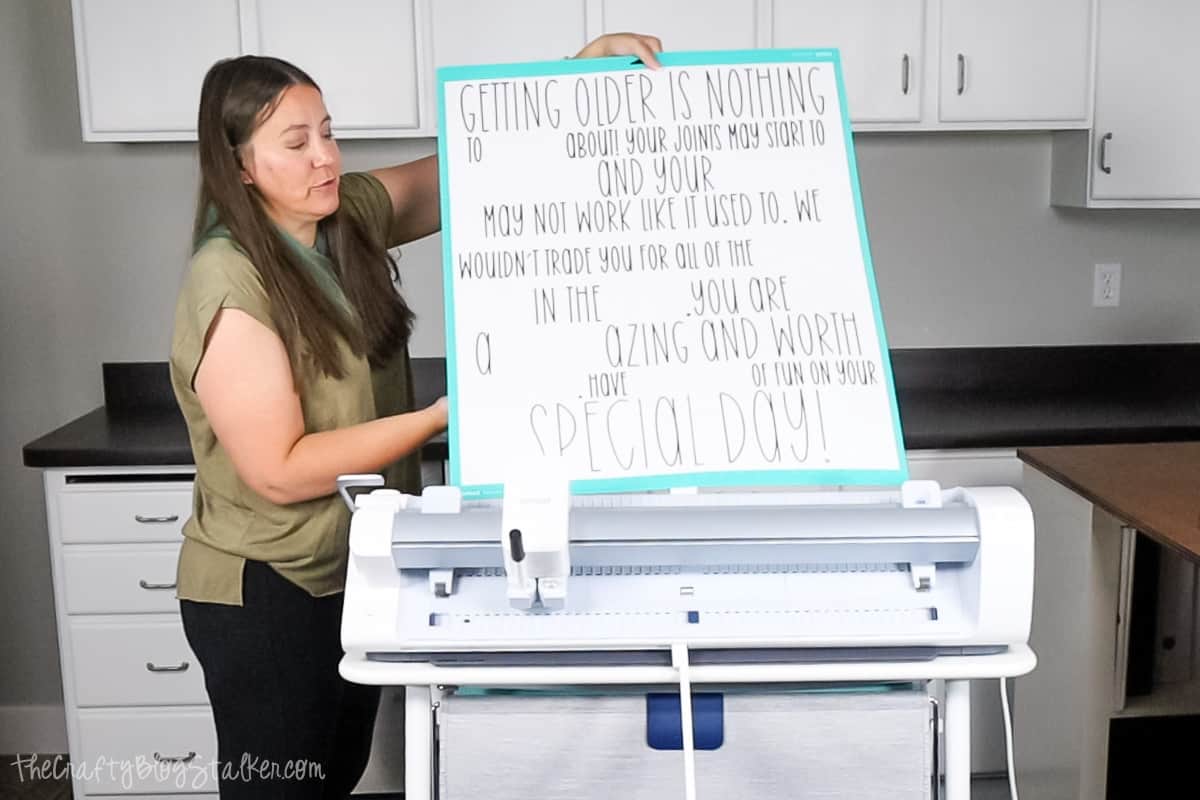
When the Venture is done writing, hold the mat with one hand while lifting the lever with the other hand.
Then pull the mat out of the machine.
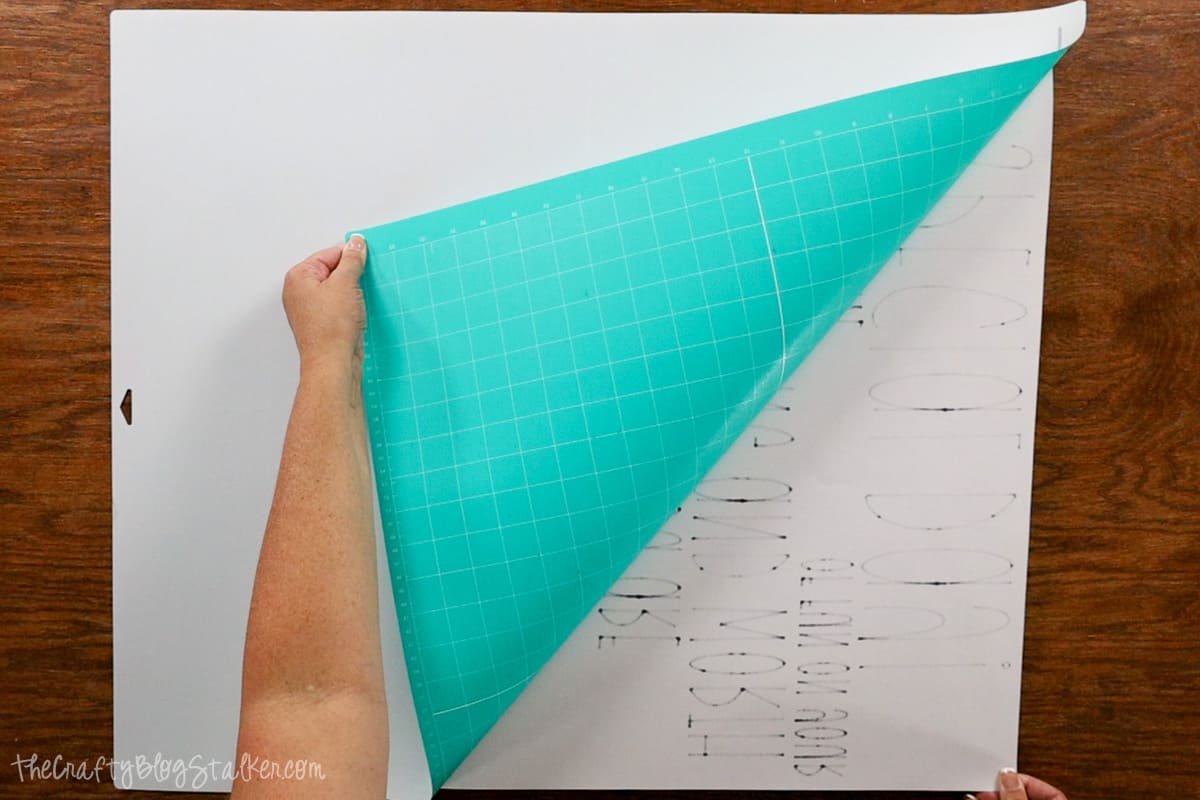
Removing the Cardstock from the Mat:
Turn the mat face down so the cardstock is touching the table and the mat is on top.
We are going to remove the mat from the paper, this will keep your cardstock nice and flat and it won't curl.
Attaching the Candy:
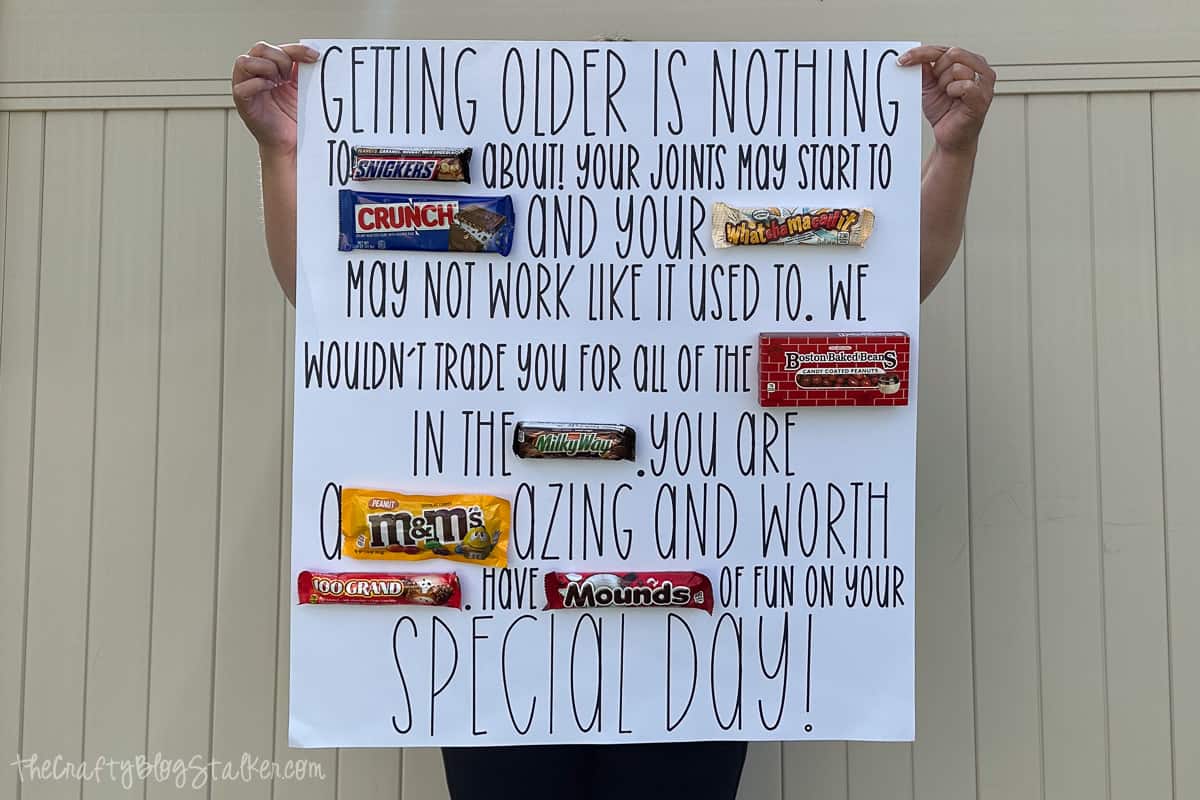
Lay the candy bars out on the poster so that when you read it, it all makes sense.
It should read: Getting older is nothing to "Snicker" about! Your joints may start to "Crunch" and your "Whatchamacallit" may not work like it used to. We wouldn't trade you for all of the "Boston Baked Beans" in the "Milky Way". You are a-"M&Ms"-azing and worth "100 Grand". Have "Mounds" of fun on your special day!
To adhere the candy put two good-sized dots of rubber cement onto the left and right backside of the candy.
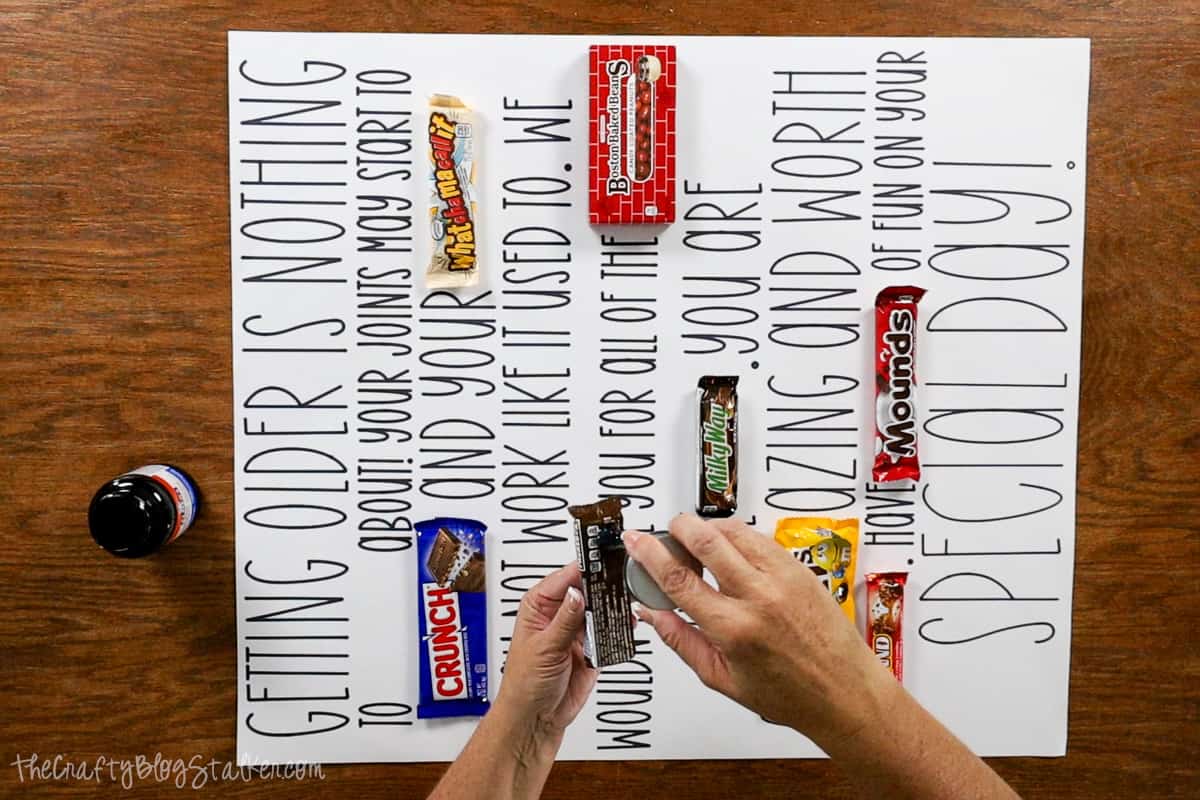
Rubber cement is a great adhesive choice because the candy can still be easily removed and enjoyed, although it will take about 20-30 minutes to dry completely.
Once the glue is completely dry, you can lift the poster, and the candy won't fall off.
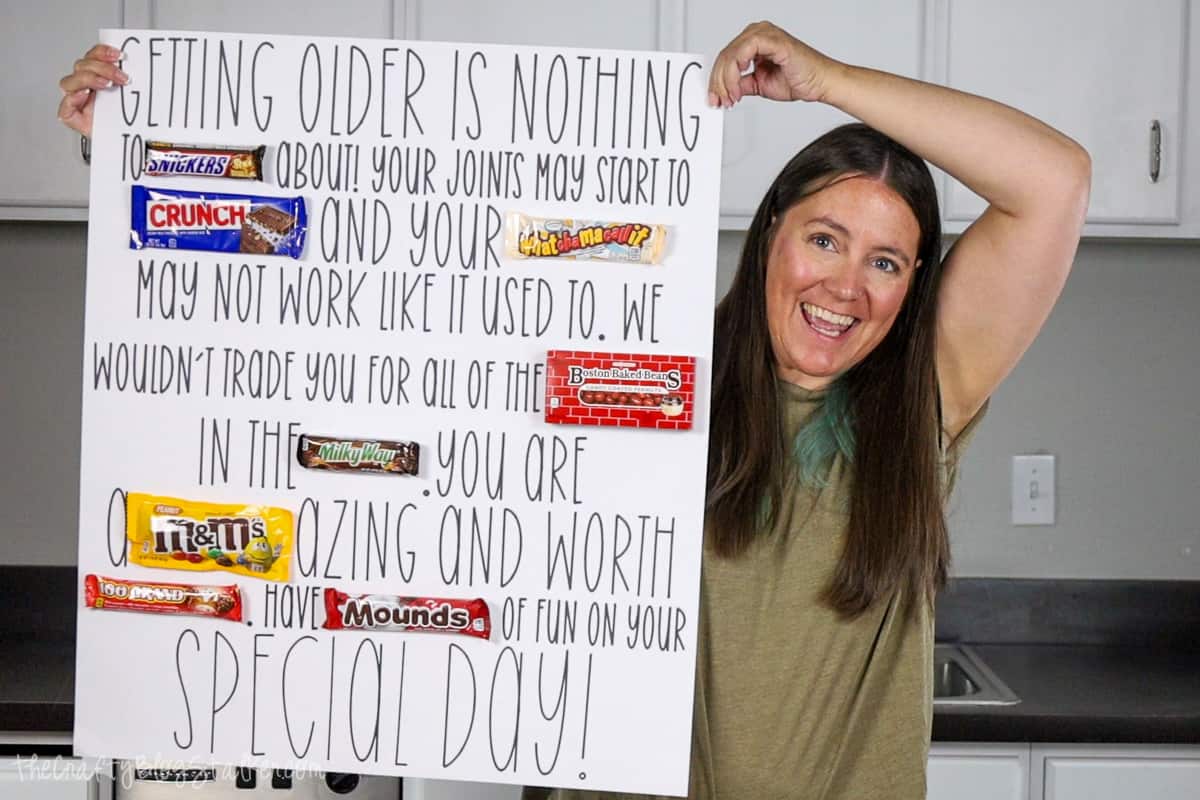
That means it is ready to gift. Perfect for Mom, Grandma, or just your favorite person!
Who will you gift a Birthday Candy Poster to?
Crafting Essentials
- The Cricut Cutting Machine is easily my favorite crafting tool. We use it in so many of our tutorials!
- These MakerX Crafting Tools are perfect for keeping in the craft room and are always ready when needed!
- This Fiskars Paper Trimmer is easy to use and cuts nicely without frayed edges.
- These Scotch Precision Scissors cut like a dream, and you get multiple pairs in a pack!