

Celebrate St. Patrick's Day in style with this easy DIY project! Learn how to make a festive door hanger using a free SVG file.
St. Patrick's Day is just around the corner, so what better way to celebrate than by making your own festive decorations?
A festive wreath is a perfect way to add a touch of holiday cheer to your home, and with this easy DIY project, you can create one in no time.
This blog post will show you how to make a St. Patrick's Day door hanger using a free SVG (scalable vector graphic) file.
Even if you don't consider yourself particularly crafty, this project is simple enough for beginners to tackle.
So grab your supplies, and let's get started on this festive holiday decor!
Craft Tutorial Video
If videos are your thing, you're in luck-I've got a full tutorial ready for you!
Subscribe to my YouTube channel and stay inspired with every new project.
Craft Supplies:
- Cricut Cutting Machine
- Cross-Stitch Shamrock SVG
- Green and Black Iron-On
- EasyPress
- EasyPress Mini
- Teflon Sheet
- Circle Wooden Sign (mine is 15-inches)
- Green Metallic Paint
- Green Glitter Paint
- Sponge Brush

Cross Stitch Clover SVG Design:
To begin, grab the Cross-Stitch Clover SVG.

The file includes the SVG, DXF, EPS, and PNG versions of this cut file, so you should be able to use it with any cutting machine.
Cricut Design Space:
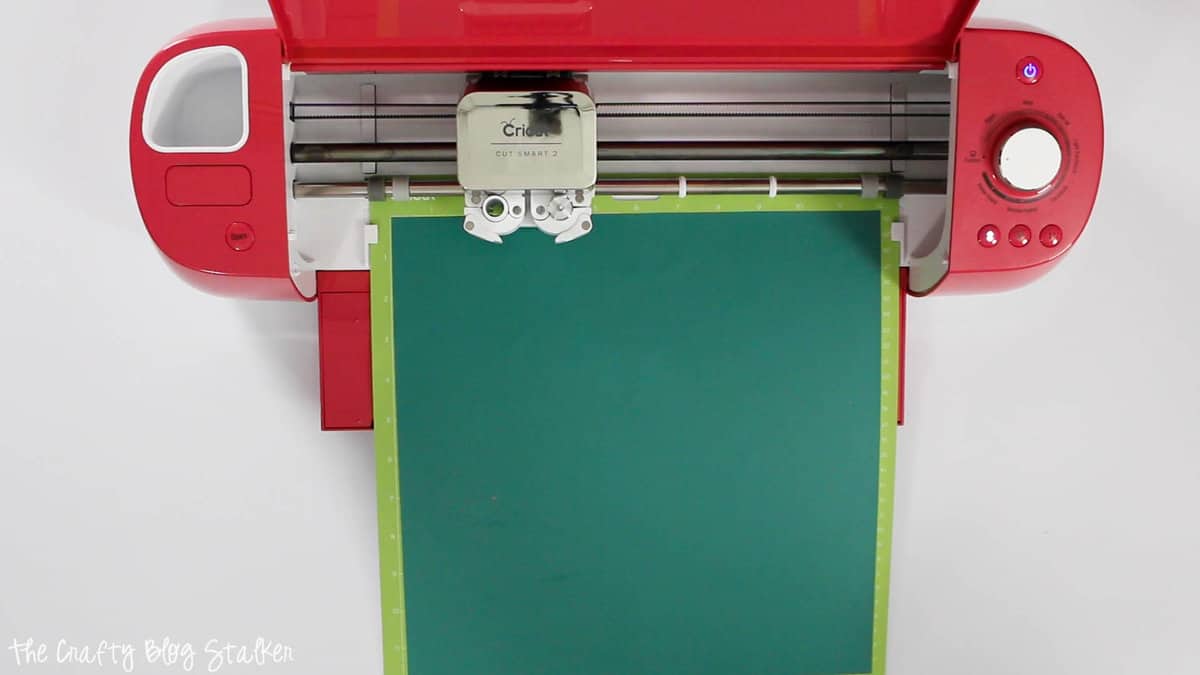
I will use my Cricut to cut my design, and this part of the tutorial will use Cricut Design Space. However, this file can be cut on a Silhouette, Brother, or any cutting machine that accepts SVG files.
Upload the SVG file into your cutting software.

Since we are cutting the design out of heat transfer vinyl, mirror the design before cutting.
I love watching my Cricut machine cut!!
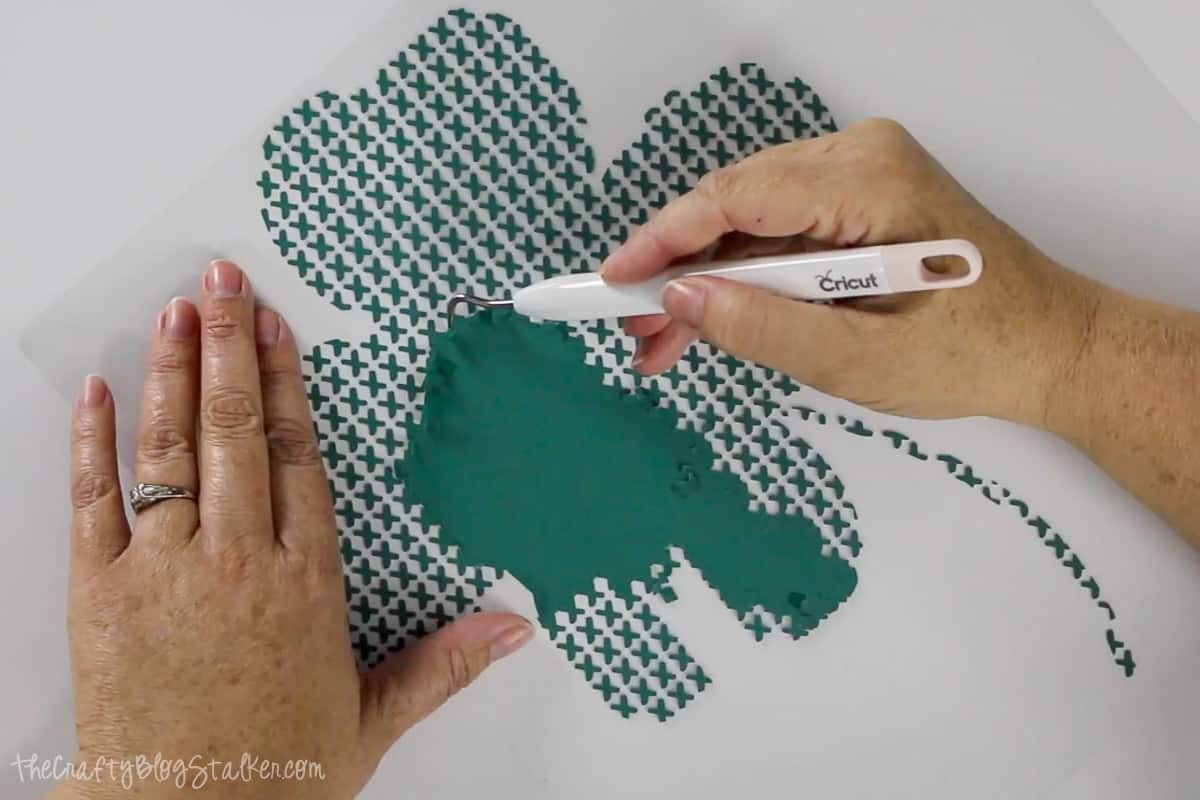
Prepare the Vinyl Design:
Weed the clover pattern and remove the excess.
This can take a little bit of time since there are so many cuts in this design.
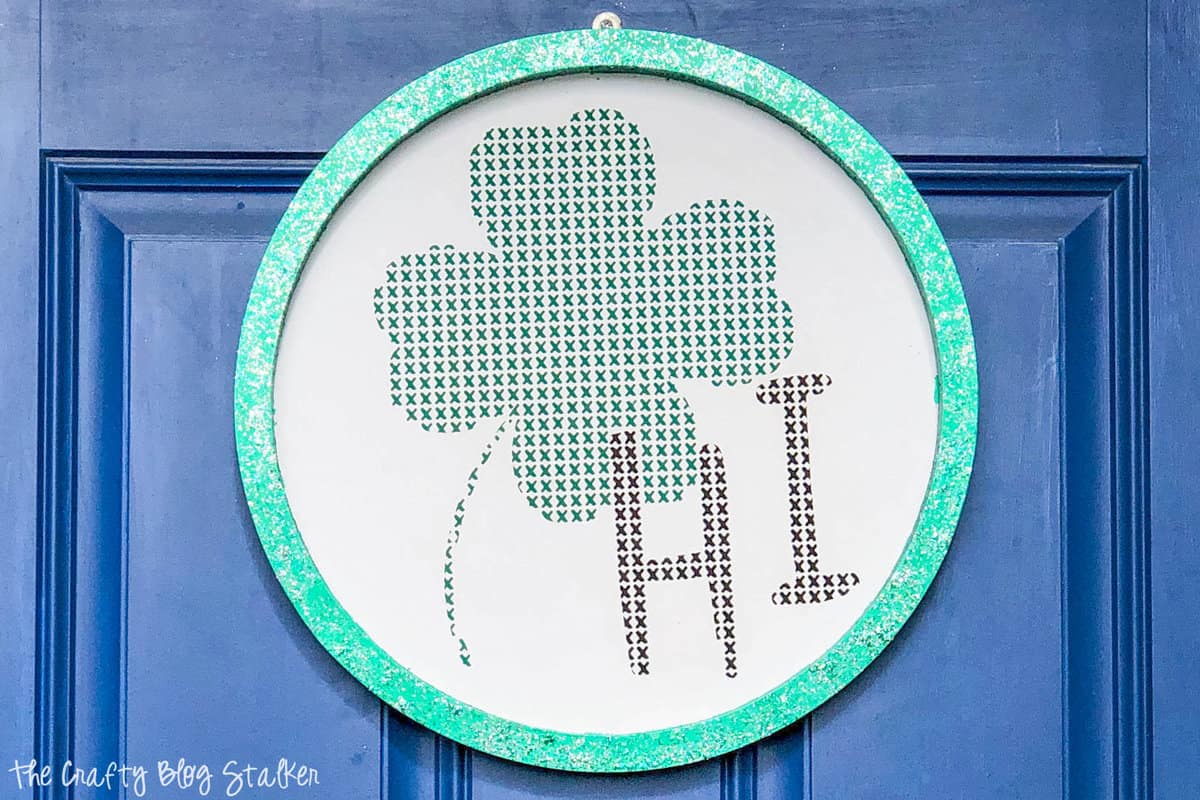
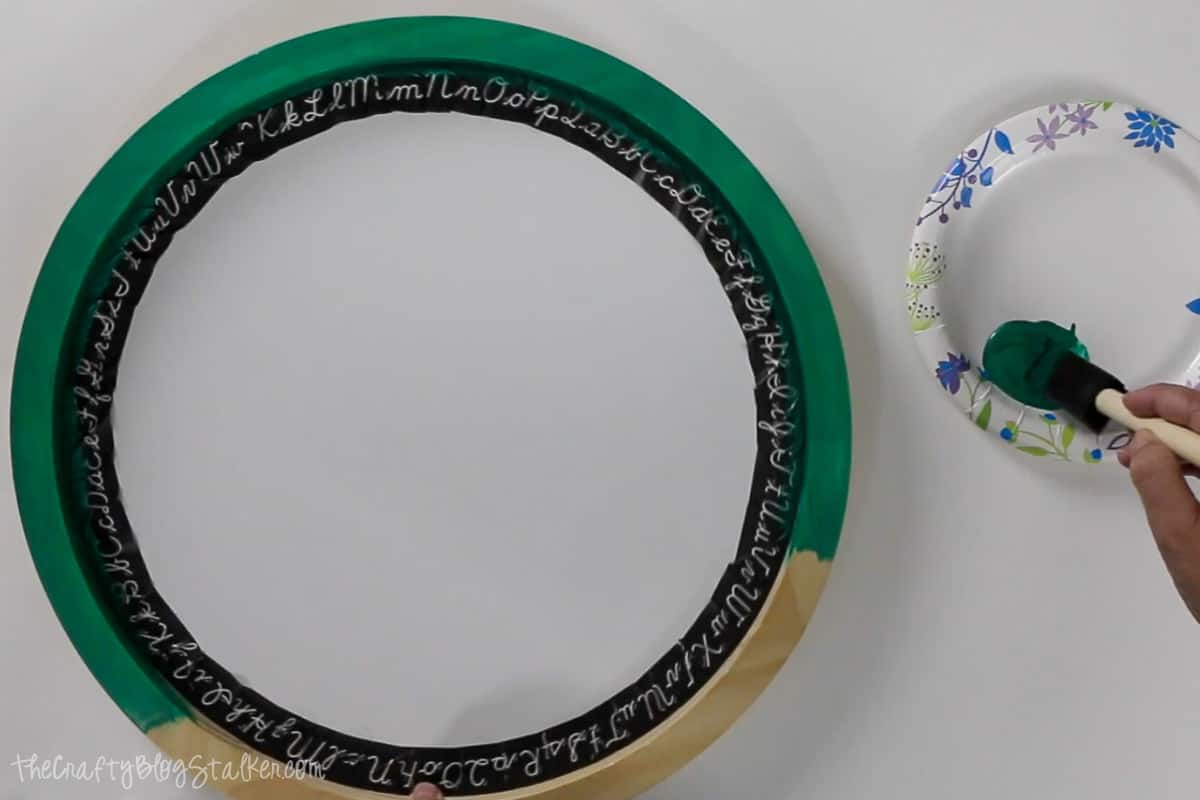
Paint the Circle Frame:
When I purchased the circle sign from Hobby Lobby, the inside was painted white. Yay! That's a win!
That means all we have to do is paint the outside frame of the sign.
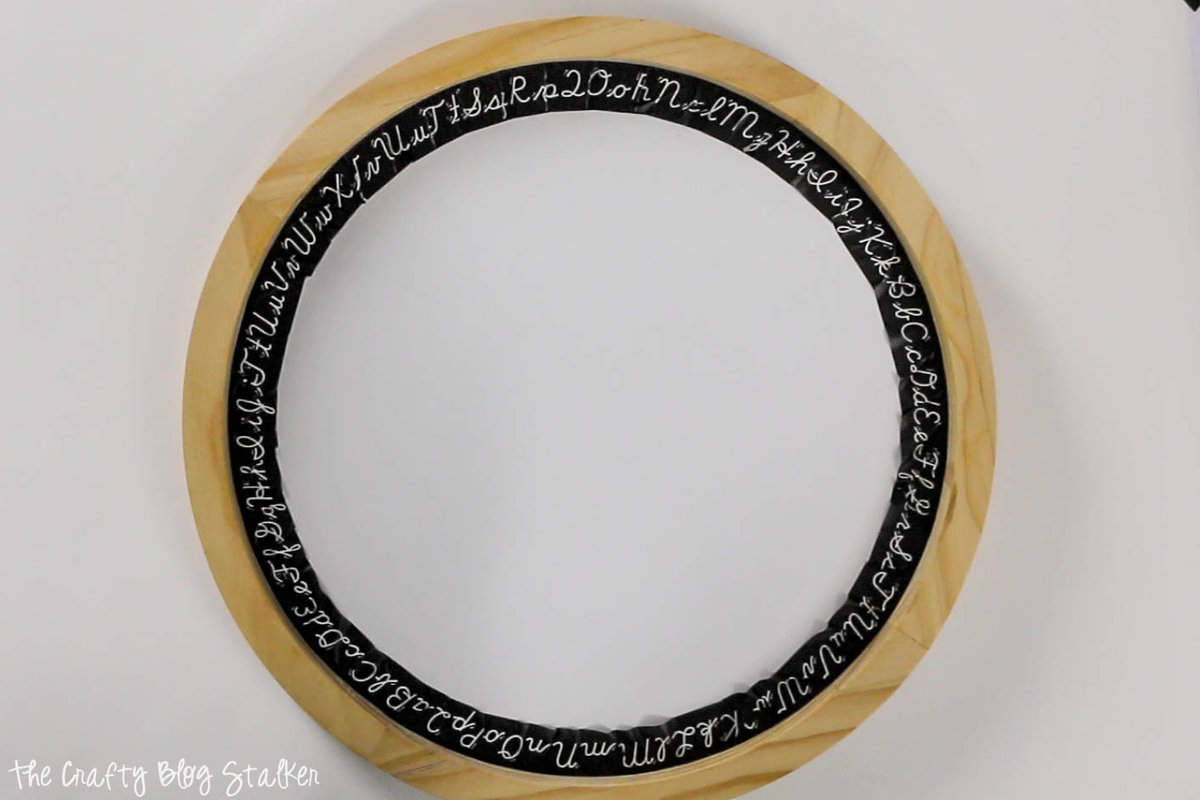
Make sure to tape around the inside so we don't get paint on the white background.
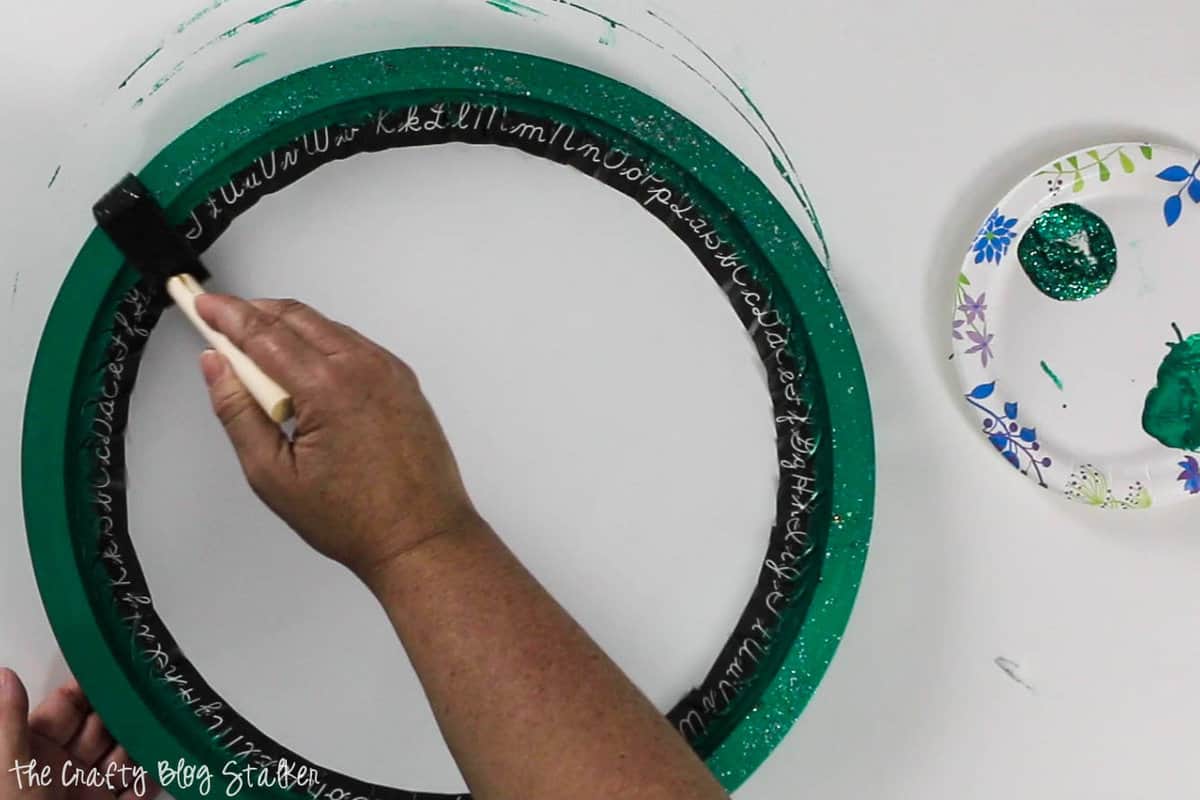
Apply two coats of the Deco Art Metallic Green and let dry.
If you lay the glitter paint on really thick, you can do it with only one coat, but a heavier coat will take a while to dry.
Apply the Design:
You can remove the tape from the edges once the paint is dry around the frame.
Lay the four-leaf clover design on the sign and find your placement.
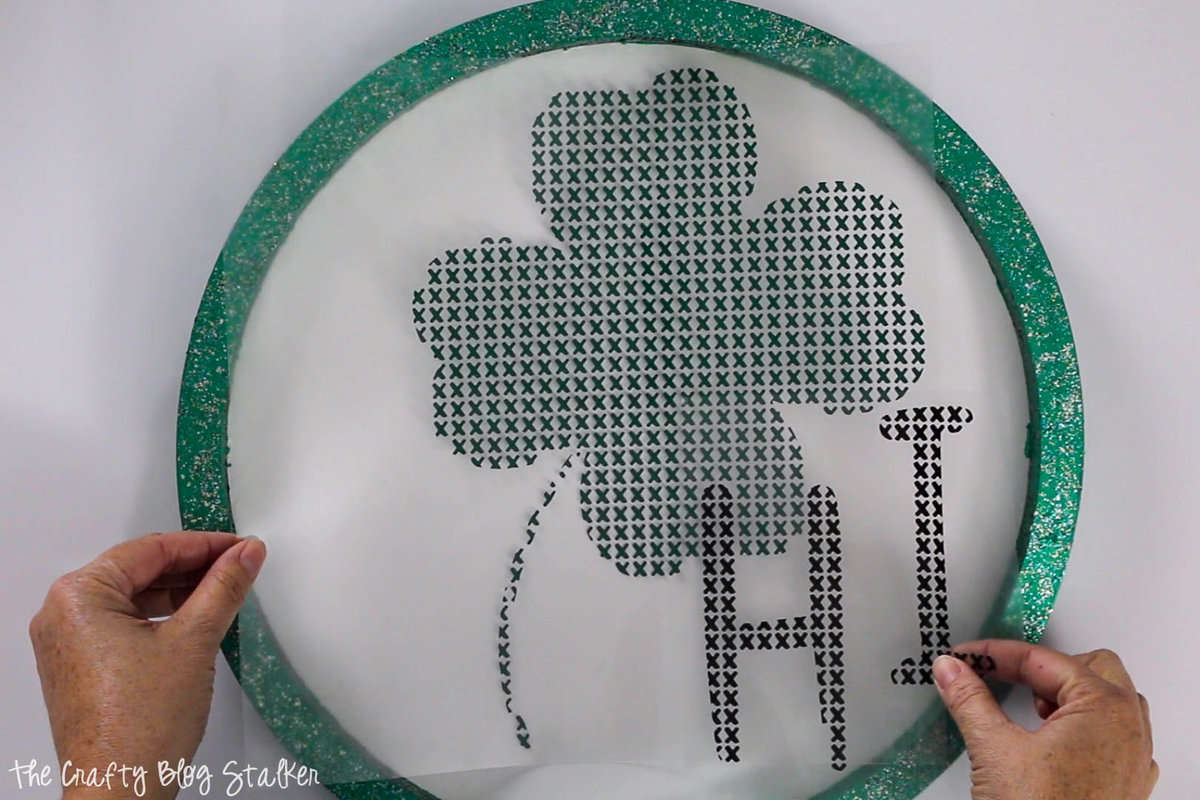
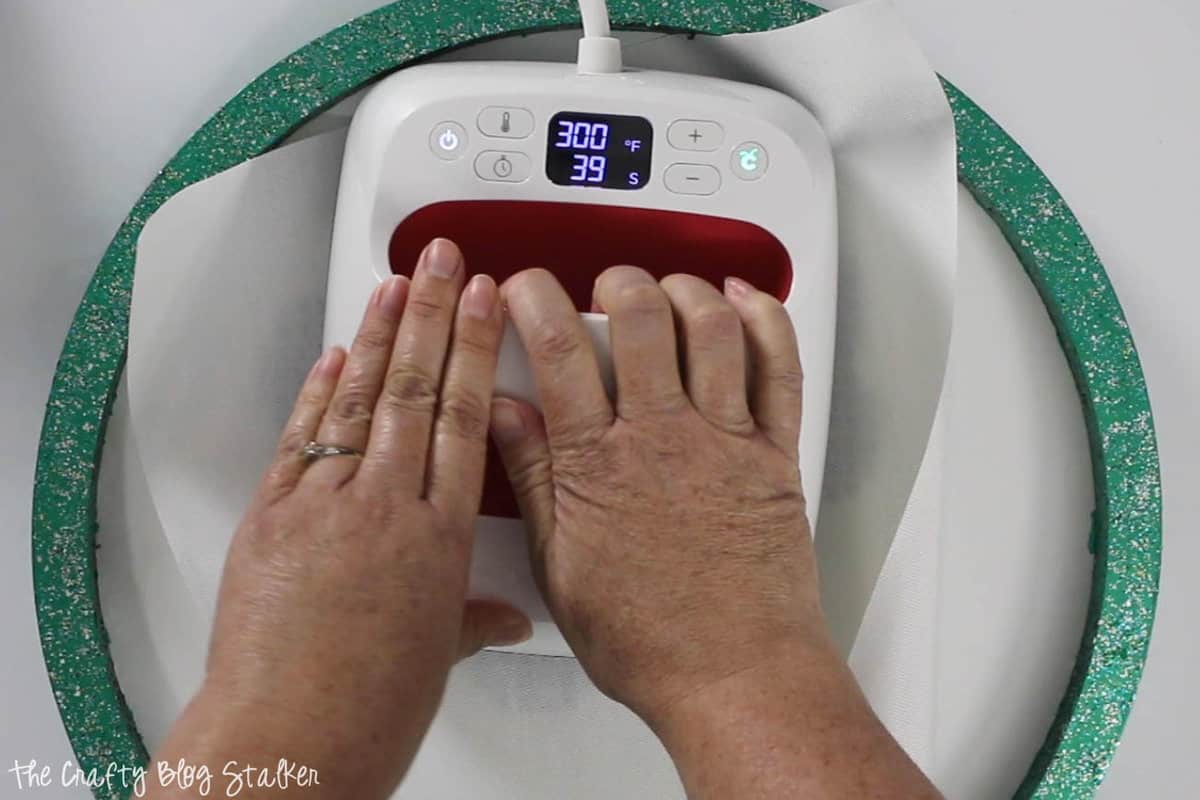
Start with the clover piece and lay the protective sheet over the design. This will protect your painted surface from the heat press.
Set your Cricut EasyPress to 400 degrees with a time of 40 seconds.
Apply the EasyPress to the heat transfer vinyl. Repeat as many times as necessary to cover the entire design with heat.
Wait until the back plastic sheet is cool enough to touch and begin peeling it back from the design. Peel it nice and slow because some of those Xs may not stick.
When you reach a section that didn't stick, grab the EasyPress Mini and go back over it with medium heat.
Again, let cool a smidge before you resume peeling.
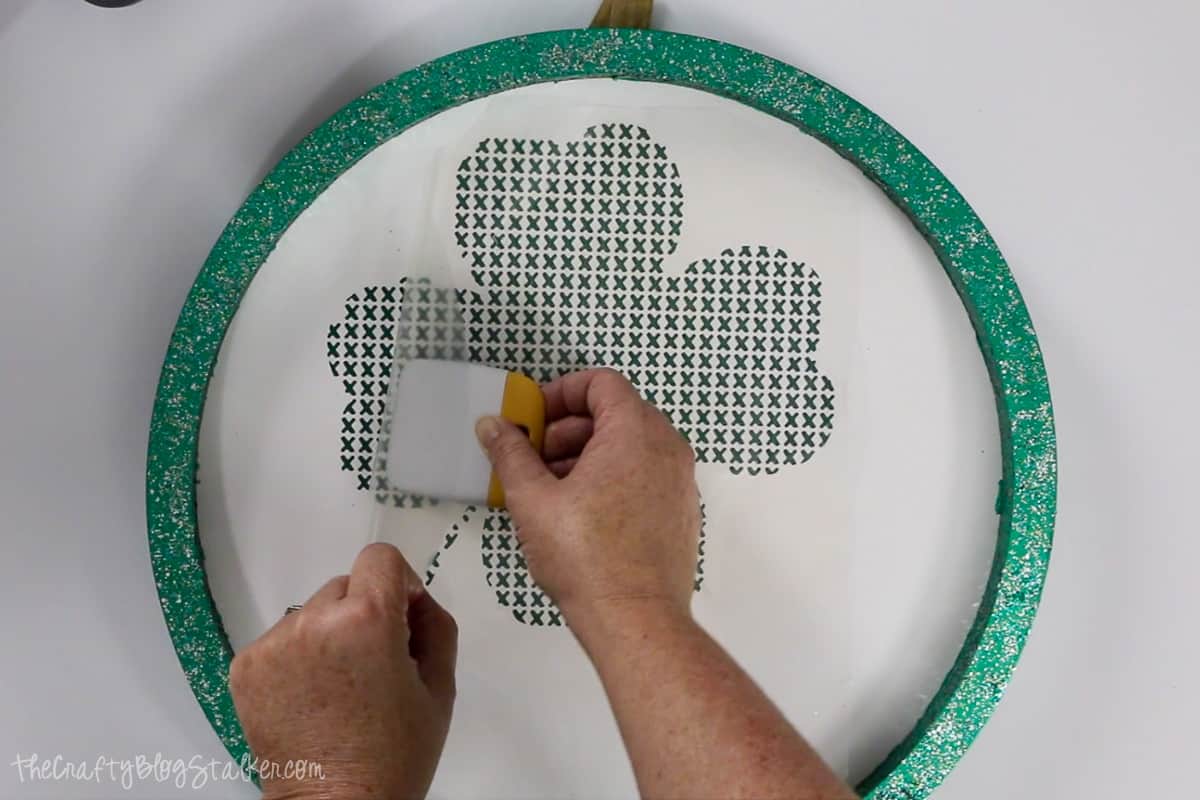
This step requires some patience. I found it helpful to keep the scraper tool nearby to press the pieces onto the surface.
Once the Clover is applied, repeat to use the "hi."
I think this smaller portion is better for the EasyPress Mini. Otherwise, you are reheating and possibly moving the greens you must stick down.
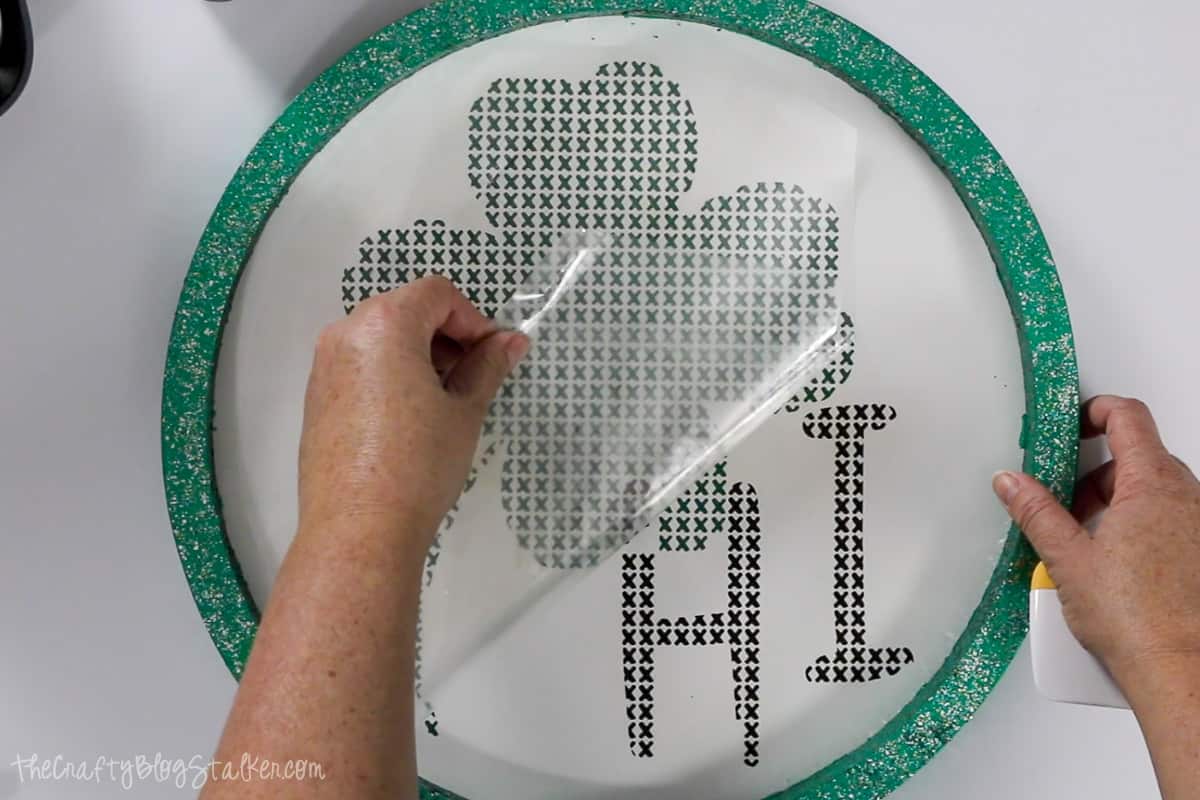
You are done after all those little cross-stitch Xs are stuck in place! See, now that wasn't too bad!
I hung this St. Patrick's Day Decor on my front door, but it would look great anywhere, inside or out!
Who knows, it might have some magic and bring me good luck. I sure hope so!
Frequently Asked Questions:
What is the traditional way of celebrating St. Patrick's Day?
St. Patrick's Day can be observed through several different traditions. These include eating corned beef and cabbage and decorating with symbols like shamrocks and leprechauns.
What decorations are used on St Patrick's Day?
You can decorate with many types of decorations, but one thing they all have in common is green. Green is the primary color of St Patrick's Day, and you could even get pinched if you aren't wearing it on the day.
A couple ideas to include in your St. Patrick's Day Decorations include
- Flag of Ireland
- Pot of Gold
- Leprechauns
- Rainbows
Is a wreath the same as a door hanger?
A wreath is a door hanger, but a door hanger isn't a wreath.
A wreath is usually round and has a hole in the center. A door hanger can be any shape or size and is used to decorate your front door.
Crafting Essentials
- The Cricut Cutting Machine is easily my favorite crafting tool. We use it in so many of our tutorials!
- These MakerX Crafting Tools are perfect for keeping in the craft room and are always ready when needed!
- This Fiskars Paper Trimmer is easy to use and cuts nicely without frayed edges.
- These Scotch Precision Scissors cut like a dream, and you get multiple pairs in a pack!
Laurie
This turned out really cute! Thanks for sharing with us this week at Brag About IT! Pinning to share.
Katie
Thanks, Laurie! I love how it turned out!
Jennifer Perkins
What a cute kit. I'll have to check out that website I've never heard of them but I love this shamrock.
Katie
Thank you so much Jennifer, it is really a fun kit to put together and looks super cute hanging on a wall or door.