

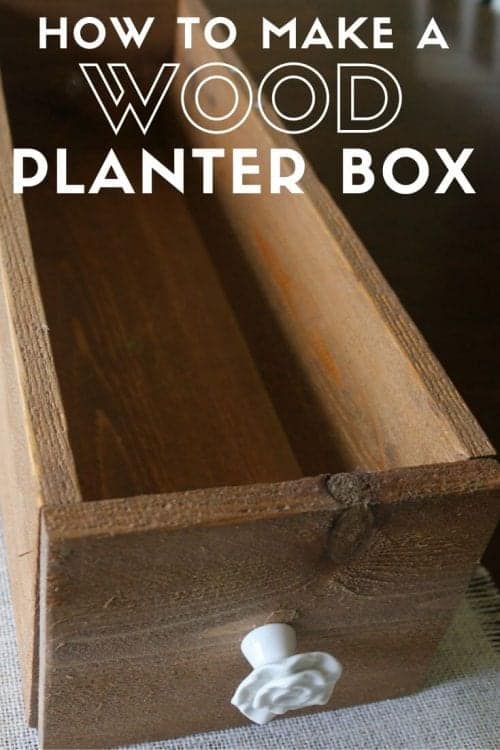
How to Make a Wood Planter Box Centerpiece. This project is easier than you might think. An Easy DIY Craft Tutorial Idea to make your own Home Decor.
Have you ever been terrified about something, but once you faced your fear you realized it wasn't nearly as big of a deal as you had thought? For me, it was a miter saw. My husband has one and I have watched him use it safely several times. But for whatever reason, it freaked me out and I pictured myself cutting off all of my fingers if I ever used it. Well, I faced my fear! I still have all of my fingers, AND I have this totally awesome Wood Planter Box Centerpiece to show for it.
I absolutely love my new planter box centerpiece for many reasons. One, it works for any season! I can fill my planter box with all sorts of different items to match any season or dinner theme. Two, I made it! I conquered that big scary power tool and made it all by myself! I have always thought one of the purposes of this blog was to help others feel that "I made that" feeling, and today I am proud to shout and share "I made that!"
Craft Tutorial Video
If videos are your thing, you're in luck-I've got a full tutorial ready for you!
Subscribe to my YouTube channel and stay inspired with every new project.
Supplies Used to Make Wood Planter Box
Some links may lead to similar items when the exact item is unavailable.
How to Make a Wood Planter Box Centerpiece
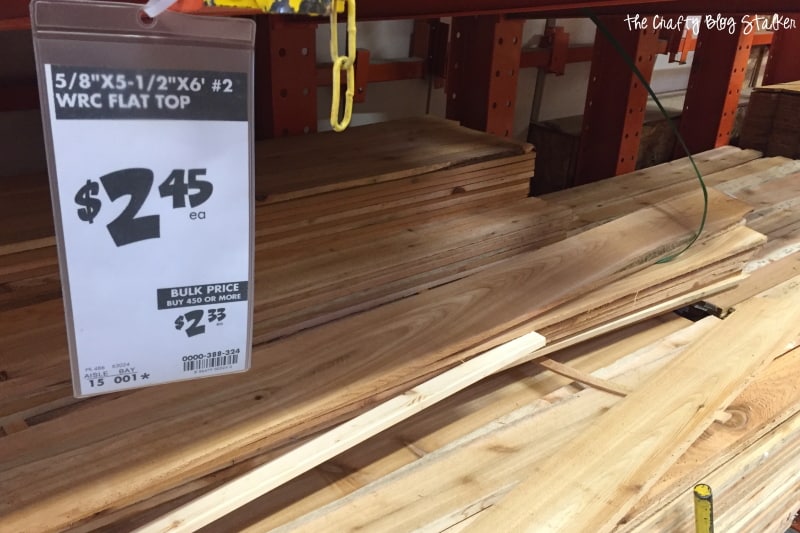
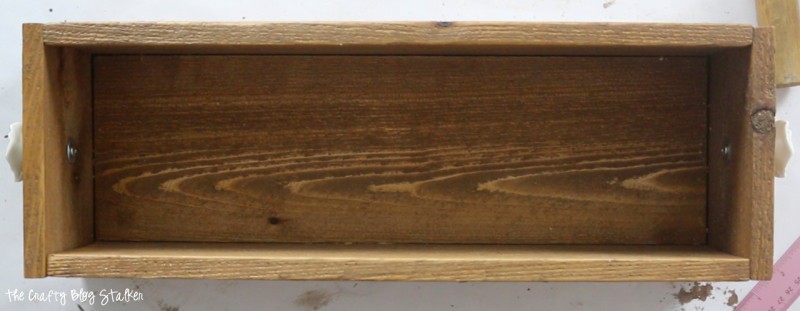
Many different types of wood would work for this project. I chose a piece of Western Red Cedar Flat Top Fence Picket from Home Depot. I chose this wood because of its texture. I just love how it looks.
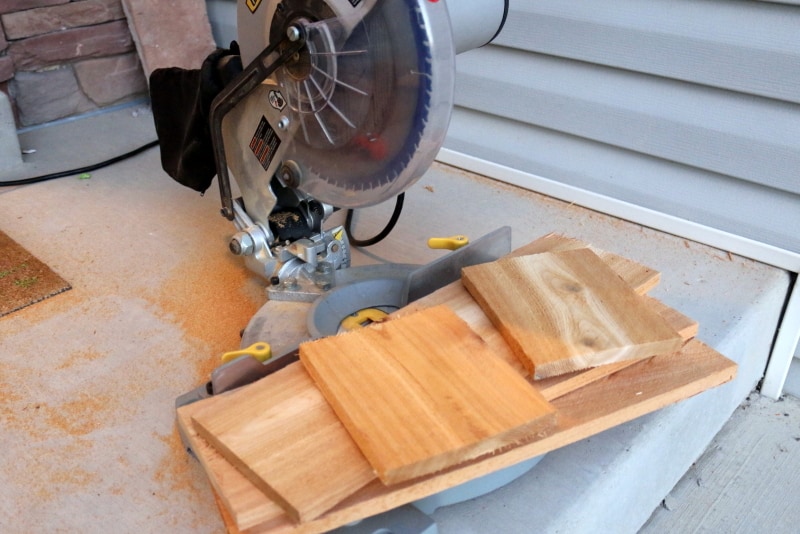
Depending on the wood you choose your measurements might need to be different. I cut 2 different lengths. Three 18-inch long pieces for the base and two sides, and two 6 ¾ inch pieces for the ends.
I got the lengths of the end by adding the width of the base plus the two widths of the sides.
5.5 + (.625 x 2) = 6.75 inches
After I had all of my measurements, I took a deep breath and cut the wood using a miter saw. Hey, it wasn't nearly as scary as I thought it would be. In fact, it was kinda fun!
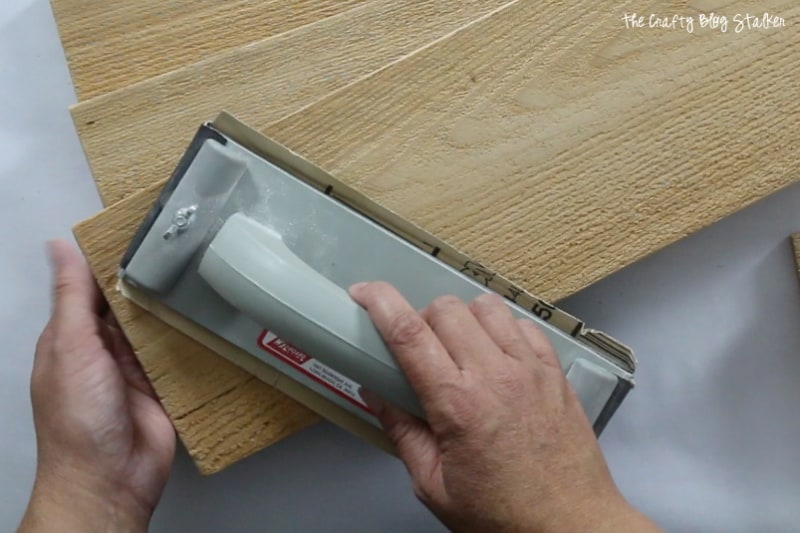
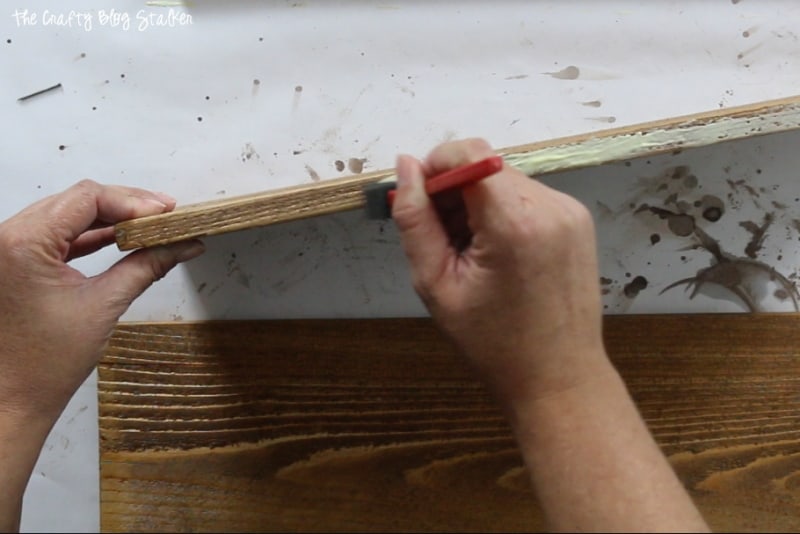
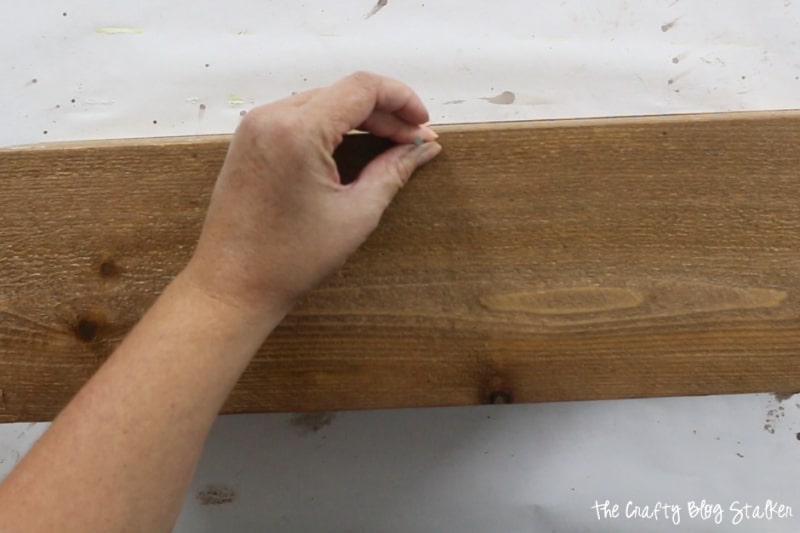
The next step is to sand the sides and edges of all of the pieces. I wasn't worried about getting them super smooth, my biggest concern was getting rid of any pokies that might cause splinters.
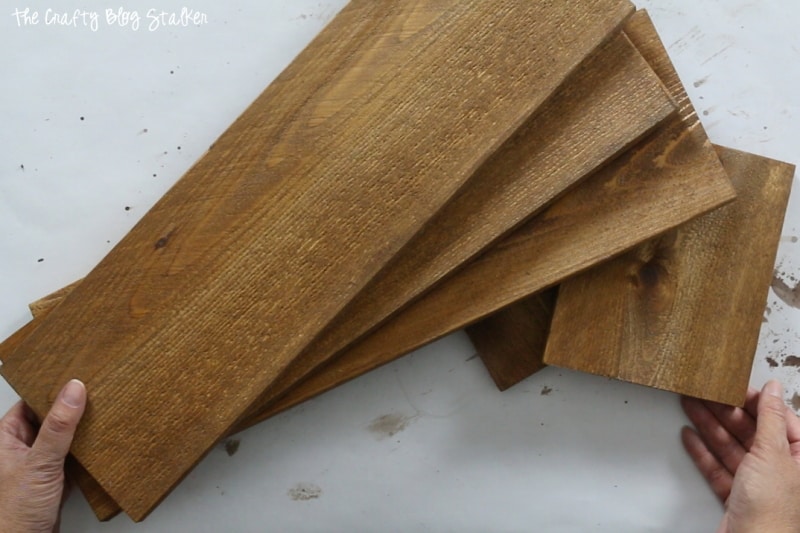
I wanted my planter box to be a darker color stain so I went with Antique Walnut from Minwax.
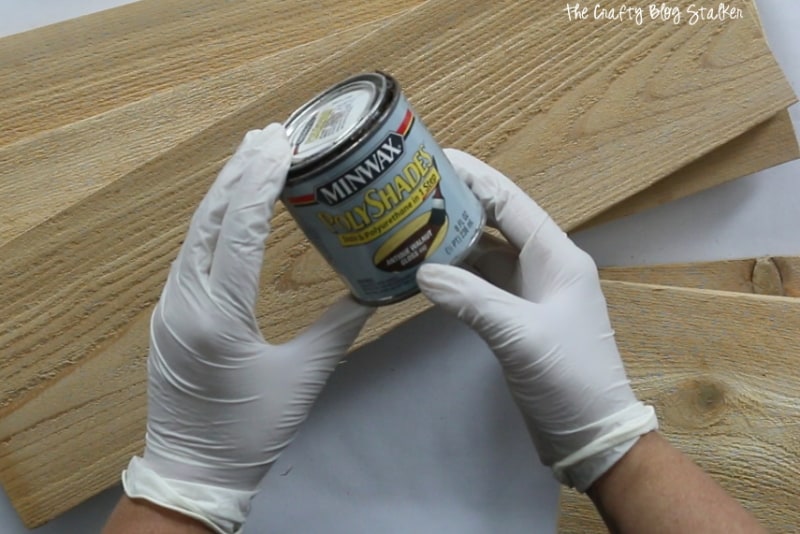
I painted all of my pieces with a stain using a foam brush. Paint the stain on in the same direction as the grain, and then wipe off the excess with a cloth rag. The stain will need several hours to dry before assembling the box.
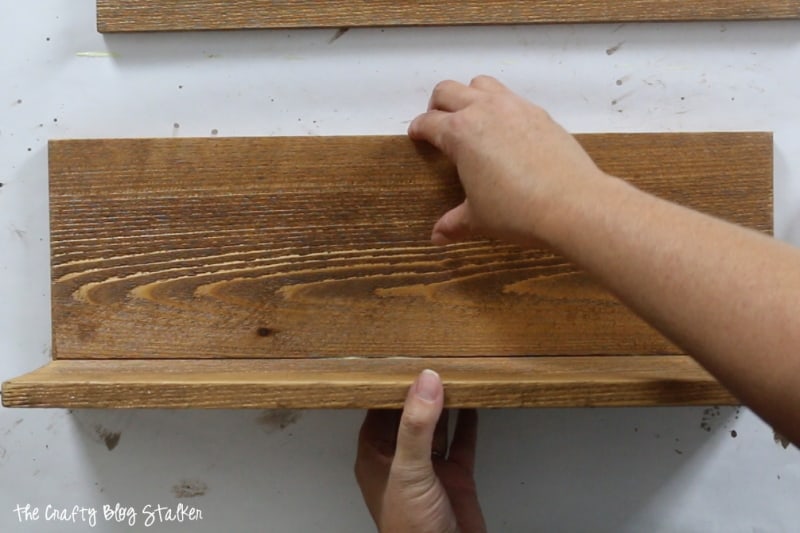
When the pieces are dry decide what piece is going to be the base and what sides of the wood pieces are going to be the outer edge of the box. Apply wood glue to the edges of the base piece. We are also going to be using nails, but the glue will help hold the wood in place while hammering.
Put the sides in place next to the base. Let dry.
When the wood glue is dry carefully turn the box on its side and hammer in a 1" nail into the center of the base. Hammer in two more nails, one in each corner. Carefully turn the box over onto the other side and hammer in three more nails; one in the center and one in each corner.
Attach the two ends with a nail in each corner. There is no need to glue the ends on because the box should now be sturdy enough to handle and move around.
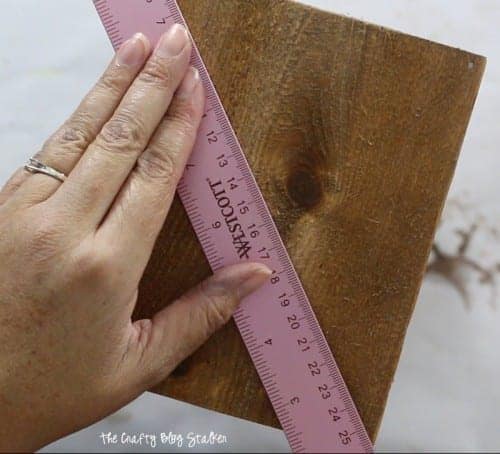
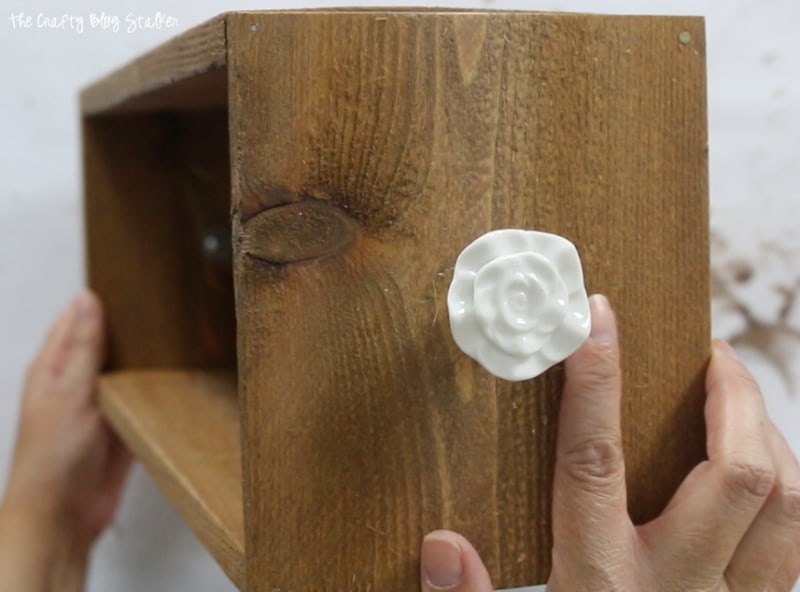
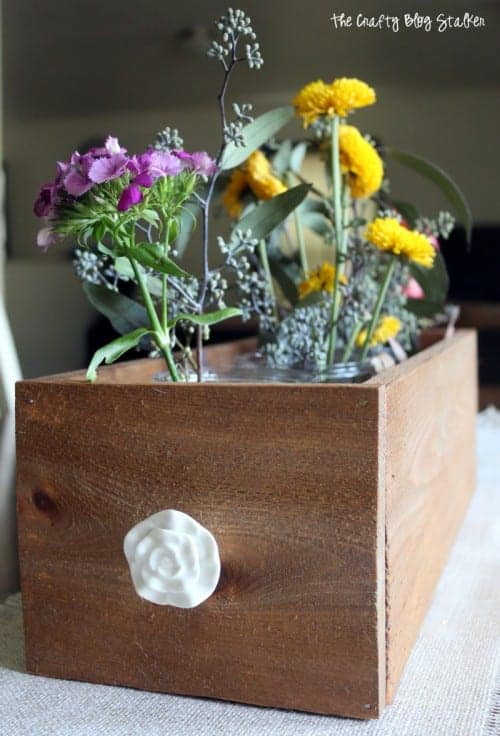
To add a drawer pull to each end, find the center point by placing a ruler corner to corner and drawing a line. Put the ruler in the opposite corners and draw another line in the center. This will show you the center point.
With a handheld drill and 3/16" bit drill a hole where x marks the spot.
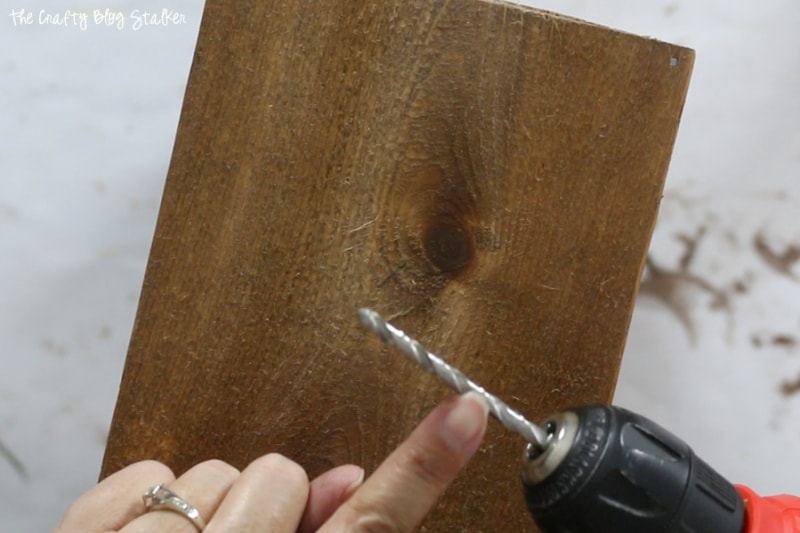
The screw from the drawer pull will fit in that hole and then tighten the pull by twisting it over the screw.
That's it! The Planter Box is done. Was it easier than you thought it would be? I thought it was.
Now comes the fun part of filling it with more beautiful things to complete the centerpiece. It's a rare occasion that I have fresh flowers but a good friend had just given me some and they look beautiful separated out into different jars and put into the box.
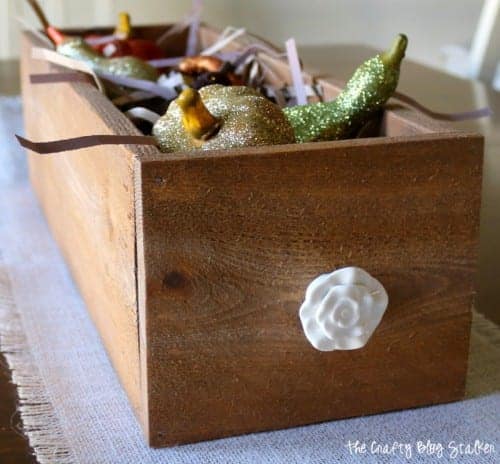
I also recently did a tutorial on How to Glitter Pumpkins and those look totally amazing in the Planter Box.
What would you put in your Planter Box Centerpiece? Share and leave a comment below!
Crafting Essentials
- The Cricut Cutting Machine is easily my favorite crafting tool. We use it in so many of our tutorials!
- These MakerX Crafting Tools are perfect for keeping in the craft room and are always ready when needed!
- This Fiskars Paper Trimmer is easy to use and cuts nicely without frayed edges.
- These Scotch Precision Scissors cut like a dream, and you get multiple pairs in a pack!
Mary-In the boondocks
This is so pretty and I especially like the little white rosebuds at the ends. They are the unexpected touch wich takes the box to the next level.
Katie
Thank you Mary. It was a fun project to make!
Mary
Yay for you you. I will stick to my sander and drill
found you at DIY Vintage Friday 5
Paola @ Do IT With Heart
Love the simplicity of this project and that it's multipurpose. Thanks for sharing
Misty
Very cute.. I've always wanted one of those for my kitchen table.
Katie
Misty you can make one! It wasn't nearly as difficult as I thought it was going to be.
Laurie
Katie - this is really awesome and especially since you overcame you fear of power tools to make it! Something I have not been able to do! Thank you for sharing with us at Brag About It! I will be featuring your post on our next Brag About It Link Party! Hope you will join us - Party starts Monday at Midnight!
~Laurie
Katie
Thank you for the feature Laurie!