

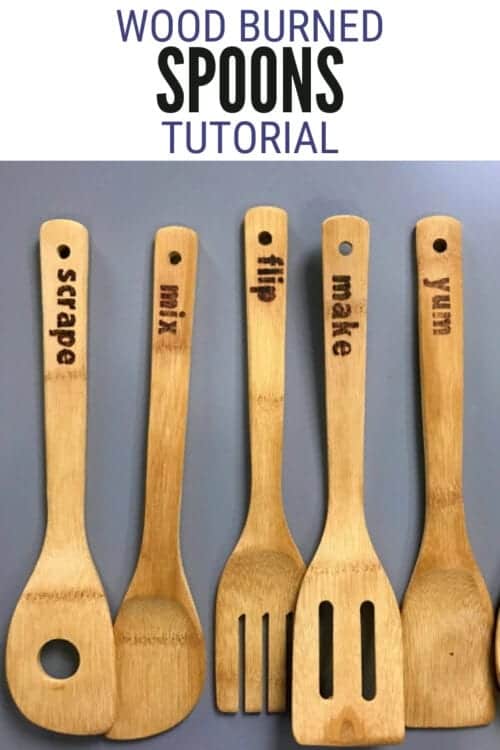
Wood Burned Spoons make a great handmade gift or personalize and keep to use yourself! Below is the step-by-step tutorial and video.
Do you love having one-of-a-kind pieces in your home?
Or giving that perfect personalized gift?
Either way, these wood-burned wooden spoons will fit the bill and they are so fun to make!!
Video Tutorial:
Like videos? I have a video tutorial for you! Subscribe to my YouTube Channel so you don't miss out on any future video tutorials!
More Home Decor Craft Tutorials:
Creating your own home decor pieces is a great way to show off your style! We have shared a lot of home decor crafts like Hanging a Mirrored Wall, Burlap Napkin Rings, and these Mini Pallet Coasters.
Be sure to look around the blog for more fun kid craft tutorials!
Supplies You'll Need to Make This Craft:
This post contains affiliate links.
- Cricut Design Space Cut File
- Cricut Cutting Machine
- Standard Grip Mat
- Vinyl (any color)
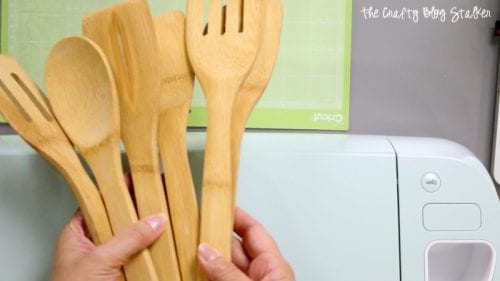
- Wood Spoons
- Ink Pad (any color)
- Ink Sponge
- Wood Burning Tool
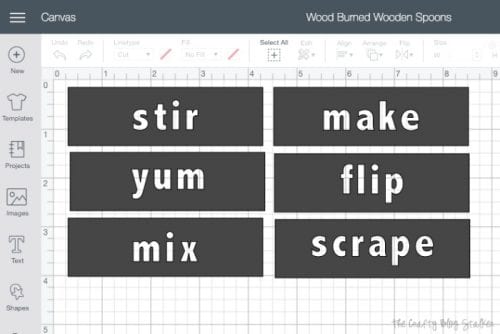
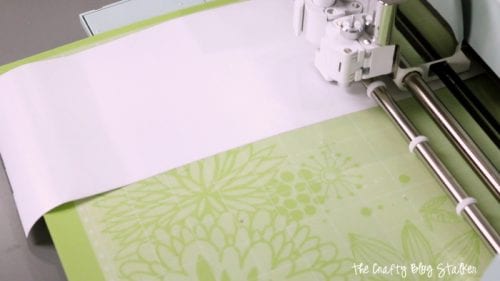
Cutting Stencil on Cricut
The cut file for this project is completely ready to go on Cricut Design Space. I have the file sized to fit most wooden spoons.
If this size works for you then you can select Make It. If you need to adjust the sizing, select customize.
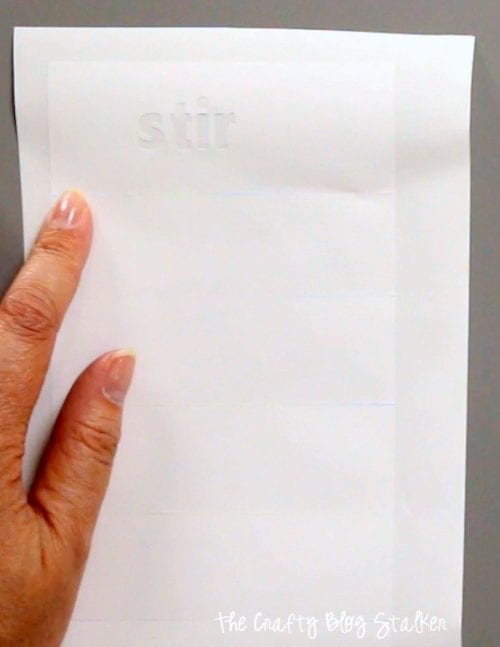
My wood spoons came in a set of 6 so I made 6 word stencils. If your set has more or less feel free to pick and choose which words you want or duplicate some of the words.
Place the vinyl onto the light-grip mat. Follow the prompts in Cricut Design Space to cut the image out.
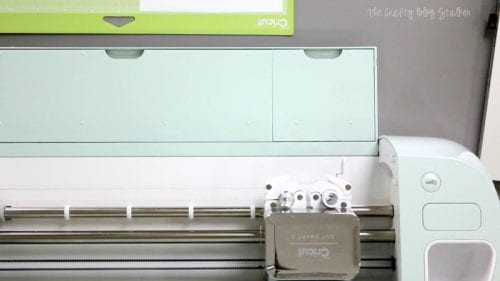
I cut this out on a Cricut Explore Air 2 but all Cricut machines cut traditional vinyl so it will work with any Cricut Cutting Machine.
Once the image is cut, weed the excess iron-on vinyl from the backing sheet. The BrightPad is super helpful during this step because it shines light through the lines so you can easily see the areas you need to weed.
This time, we are creating a stencil so we remove the letters inside the rectangle. Make sure to leave the center of the letters too!
Using the Vinyl Stencil:
Apply the vinyl stencil to the handle of the wooden spoon. Once you are happy with its location, press it into place.
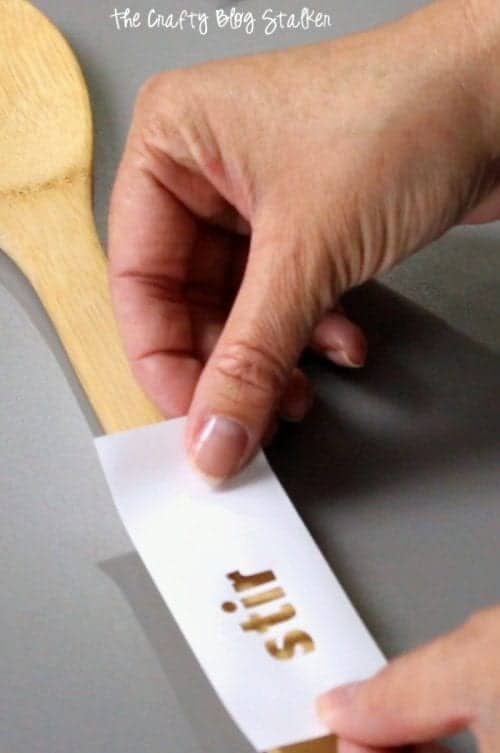
Using an ink pad and a sponge, apply ink to the stencil by rubbing the sponge in ink and then rubbing it over the stencil on the spoon handle.
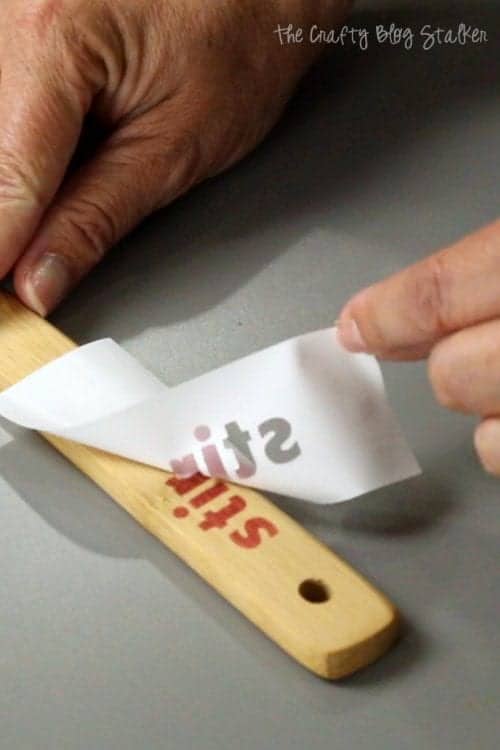
When the vinyl stencil is removed you will see exactly where you need to burn the handle. You can use a pencil and outline the stencil as well. Although I think the ink is much faster.
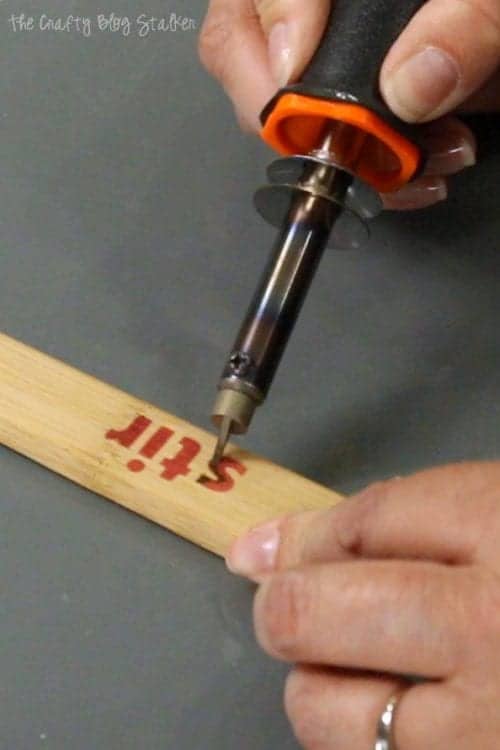
Using the Wood Burning Tool:
The next step is to wood-burn. Before we begin there are a
The wood-burning tool gets VERY HOT. Watch the cord and make sure there are no little ones are at your feet where they could get burned if the tool is dropped.
This will also mar a countertop if the tip of the tool is laid against it. I suggest using a silicone mat. It will protect your surface and won't melt.
Also, before you begin on your project, play a little with a scrap piece of wood. Make sure the tool feels comfortable in your hand and you know the pressure needed to create the look you want in your spoons.

Using the wood-burning tool, carefully go over the inked letters. Different wood burns differently so you may need to go over each letter several times to get a nice dark burned look.
When all of the spoons are finished you have a fun set of personalized spoons that you can give as a gift or keep for yourself!!

New to wood burning? Here are some Woodburning Tips and Techniques.
What will you do with your fun wood-burned wood spoons?
Crafting Essentials
- The Cricut Cutting Machine is easily my favorite crafting tool. We use it in so many of our tutorials!
- These MakerX Crafting Tools are perfect for keeping in the craft room and are always ready when needed!
- This Fiskars Paper Trimmer is easy to use and cuts nicely without frayed edges.
- These Scotch Precision Scissors cut like a dream, and you get multiple pairs in a pack!
Tracy Rushton
Love this. Great Idea and so personal.
Katie
Thank you Tracy!! They were so fun to make!
Carrie Senining
I so love this. I'm happy I was able to find this wood burning tool here in the Philippines and I hope I can also find this Personal Electronic Cutting Machine so I can make my own stencil. Thank you Katie for sharing your ideas.
Katie
You are welcome, Carrie. I am happy to share!
Lynette
I just love making these and I just got started!! I've noticed with the Bamboo there is a very distinct smell while burning. Will this dissipate over time?
Katie Adams
Hi Lynette,
Yes, it goes away after use and washing. At least I can't smell it anymore! 😂