

Learn how to make Mini Wood Pallet Coasters with Popsicle Sticks. Below is the step-by-step tutorial and video!
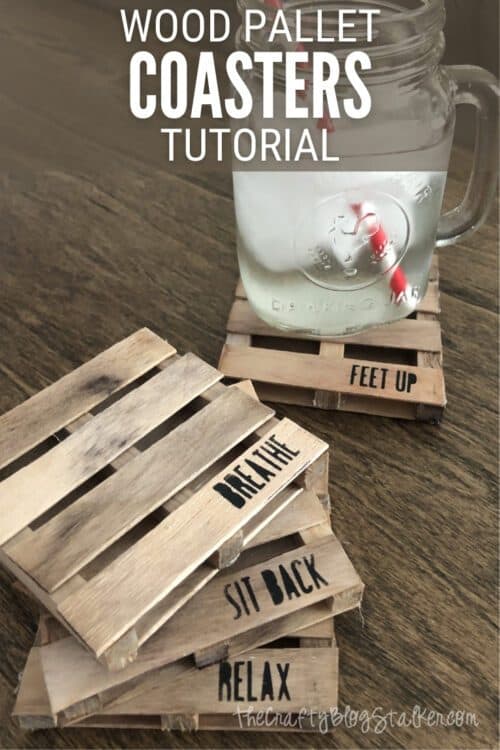
Why is it that all things mini are so cute? I have worked in a warehouse and I would never say a pallet is cute. But when it is mini, all I can say is "awwwww!".
Craft Tutorial Video:
Like videos? Please subscribe to my YouTube Channel so you don't miss out on any future video tutorials!
Supplies You'll Need to Make This Craft:
This post contains affiliate links.
- Jumbo Popsicle Sticks
- ⅜ inch Square Dowel Rod
- Low Temp Glue Gun with Glue Sticks
- Gridded Cutting Mat
- Heavy Duty Scissors or Snips
- Small Hand Saw or Razor Blade
Optional Supplies for a Distressed Colored Pallet
Optional Supplies for Added Text on Coasters
Cutting the Wood Pieces:
The first step is cutting the wood pieces down to size.
My coasters are 3 ½ inches square. Most coasters measure 4 inches square but I decided to go a bit smaller since my coasters have some thickness to them, and I wanted to keep my mini pallets mini.
Cut the square dowel into three lengths. Each 3 ½ inches long.
You don't have to get out the saw for this size of a dowel, a razor blade will work too. I just don't get to use my little saw often enough. 🙂
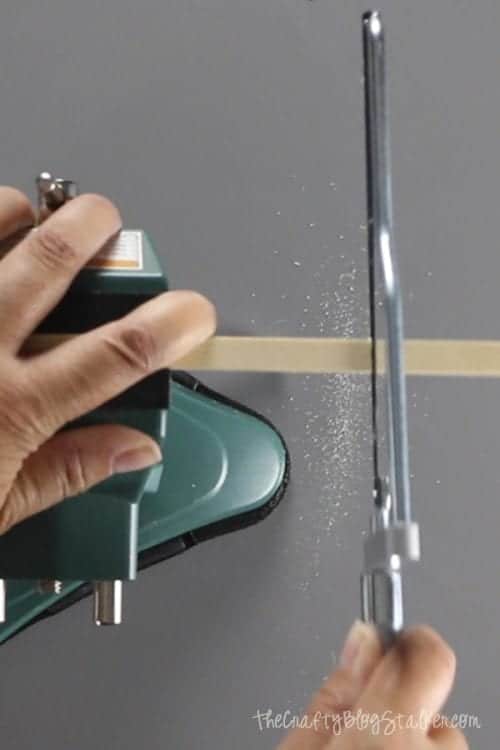
Use a pair of heavy-duty scissors to cut the jumbo popsicle sticks into lengths of 3 ½ inches as well.

Popsicle sticks actually cut fairly easily and that surprised me.
Distress the Wood Sticks (optional step):
I want these mini pallets to actually look like pallets, and if you've ever worked with pallets you know they rarely look nice and clean. The wood is discolored and often stained.
To give these pallets the same look, I dipped them in ink and an isopropyl alcohol mixture.
In a flat-bottom dish add just a little bit of water to cover the bottom of the dish. Add twice as much isopropyl alcohol as water and several drops of brown ink and yellow ink.
The ink I used is from an ink drop bottle meant for reinking stamp pads or water coloring.
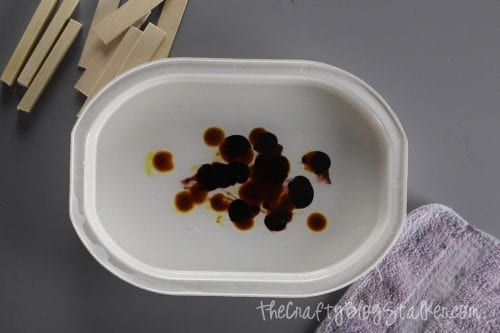
Add the wood sticks and give the mixture a stir. The longer you leave the wood in, the more coloring they will get.
You can also redip if you decide they didn't get enough color as they dry. But of course, you can't take color away.
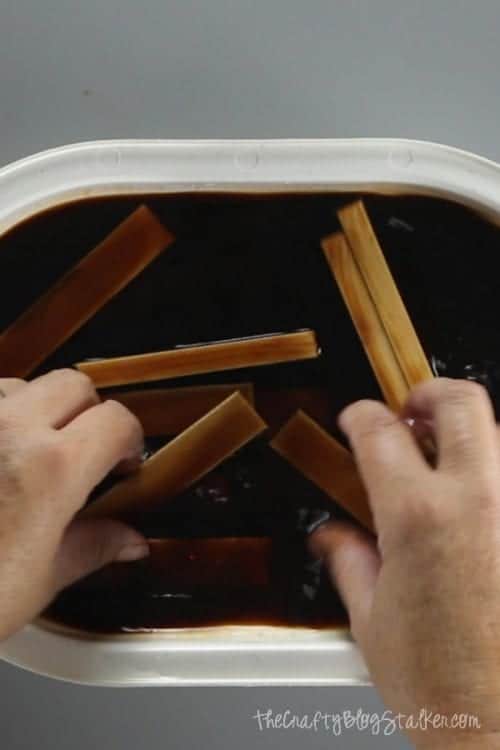
Set the wood sticks aside on a towel to dry. The wood must be completely dry to assemble the coasters.
If you are impatient like me, you can put the wood sticks on a baking sheet and put them in the oven at 350 degrees for a couple minutes to help speed up the drying. But keep your eye on them because they can still burn and change colors while in the oven.
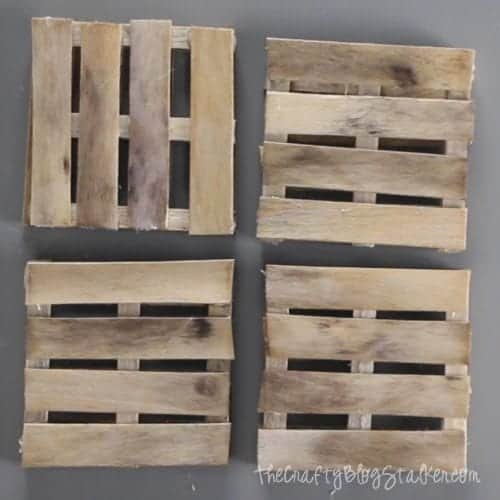
Don't the wood pieces look great already?!

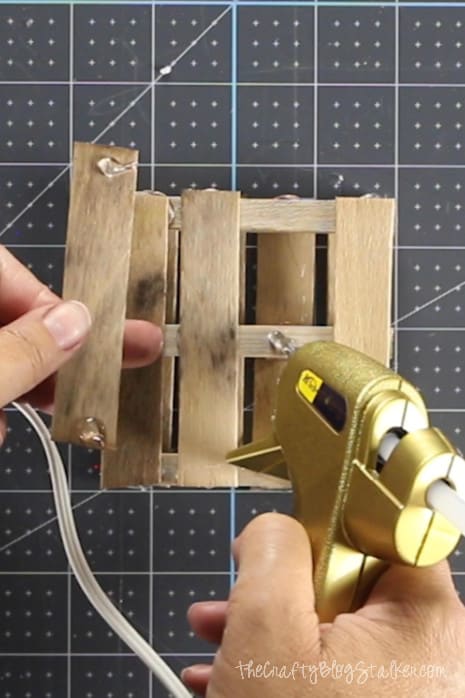
Assembling the Mini Pallet Coasters:
For one pallet you will need 3, square dowel pieces and 8 cut popsicle stick pieces.
I placed a gridded cutting mat on my work surface to help me keep the pallets nice and square as I was assembling.
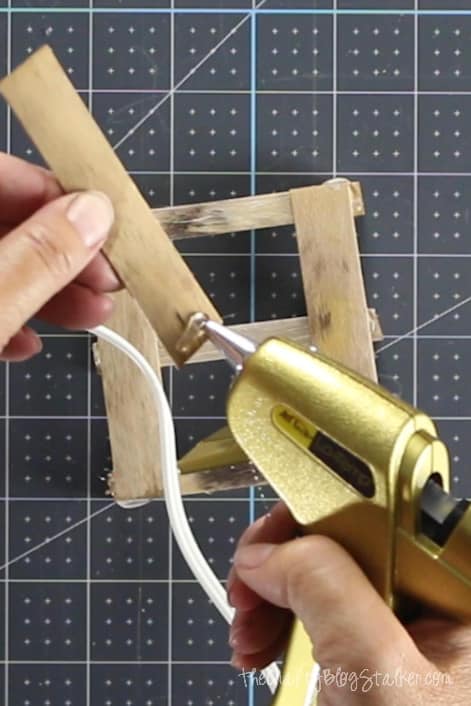
Start with one square dowel and 1 popsicle stick. Put a dot of hot glue at the top and adhere to the popsicle stick at a 90-degree angle.
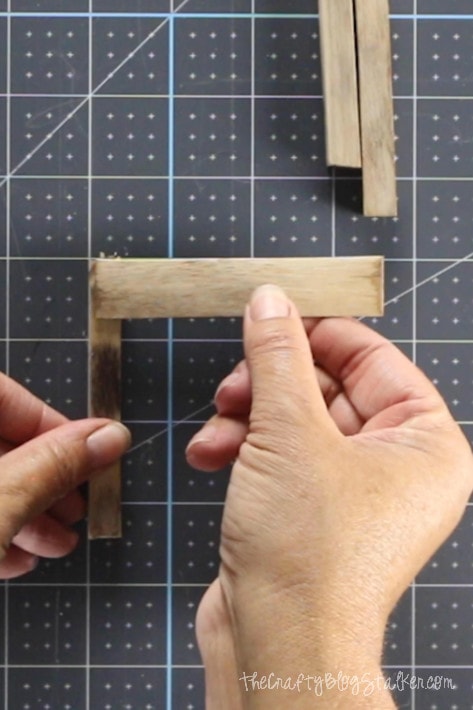
Add a second popsicle stick at the bottom of the first square dowel, also at a 90-degree angle.
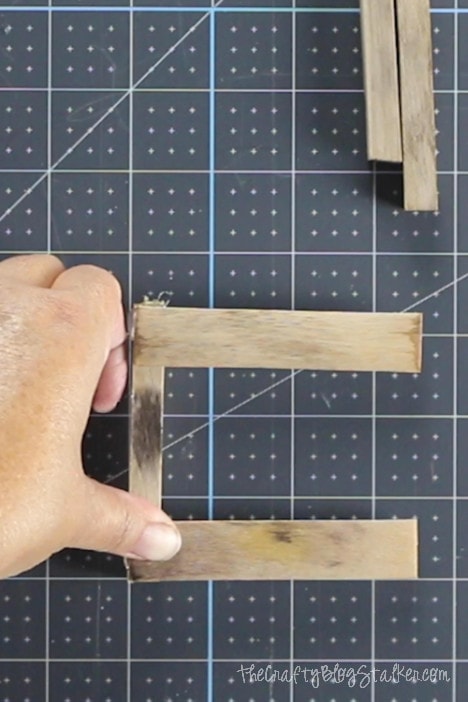
Take a second square dowel length and glue it to the other end of the two popsicle sticks.
Then glue the third square dowel in the middle, between the other two square dowels.
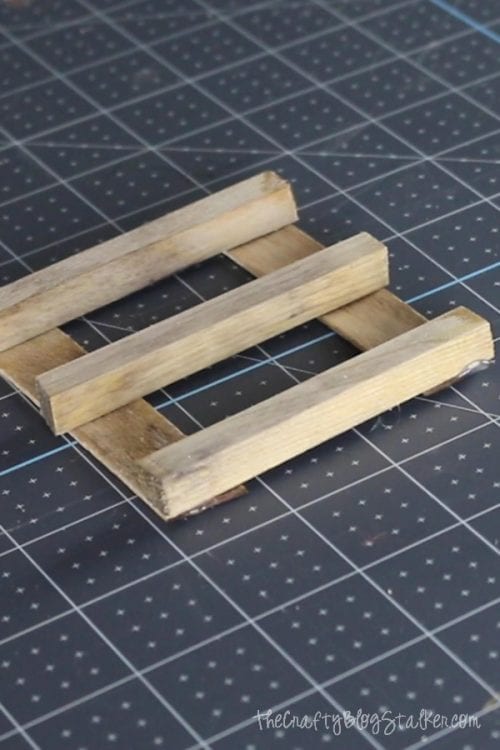
Turn the pallet over so the square dowels are on the underside of the pallet. Glue two popsicle stick slabs into place in between the two outer slabs.
Turn the pallet over and glue the other 4 popsicle stick slabs into place, spacing them out just a bit.
And that's it! You have made super cute little mini pallet coasters!
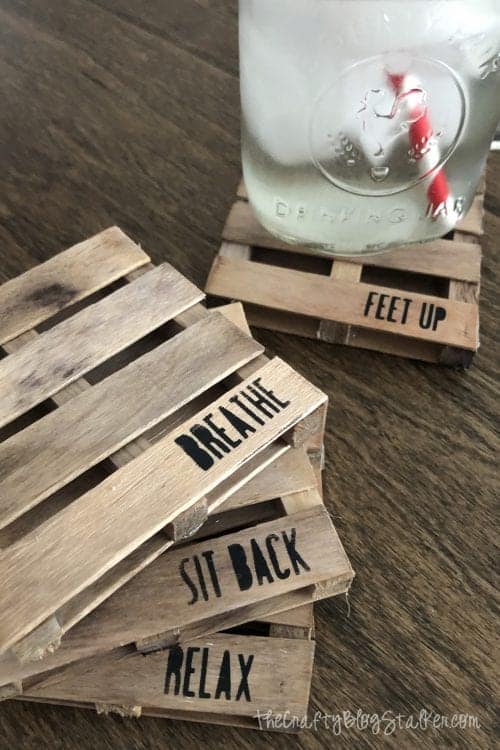
Adding Text to Pallet Coasters (Optional Step):
The coasters are so cute and handy as is, but I wanted to step them up just a bit further.
Using a Cricut and some vinyl, I cut out these little word stencils. If you would like to use my same file, it is available on Cricut Design Space.
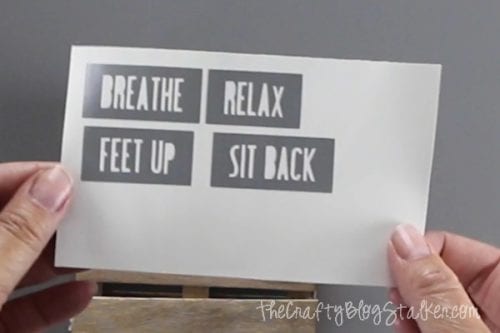
Apply the stencils like you would a sticker. Simply peel and apply to the pallet coaster.
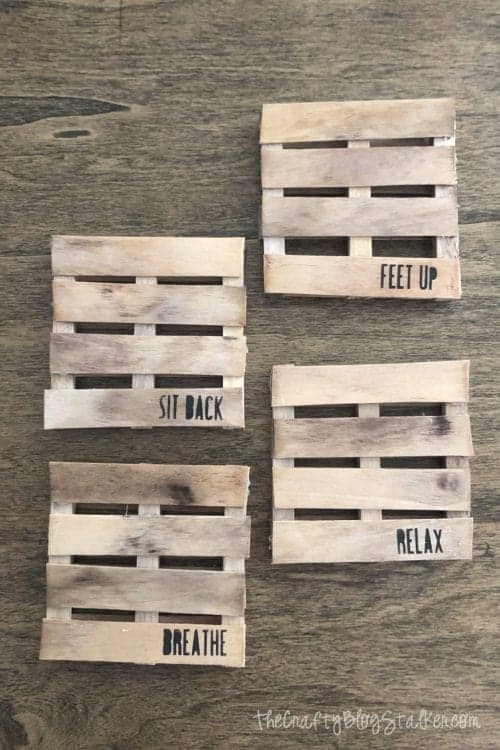
Using a paint sponge and pick up a little bit of paint. You really don't need a lot, just the very edge of the paint sponge. Dab the sponge over the stencil until you have it covered with paint.

Carefully remove the vinyl stencil and your text magically appears!

This extra step really does add that wow factor. I can't get over how cute they turned out!!
When you make these Mini Pallet Coasters please share a photo! I'd love to see them.
Crafting Essentials
- The Cricut Cutting Machine is easily my favorite crafting tool. We use it in so many of our tutorials!
- These MakerX Crafting Tools are perfect for keeping in the craft room and are always ready when needed!
- This Fiskars Paper Trimmer is easy to use and cuts nicely without frayed edges.
- These Scotch Precision Scissors cut like a dream, and you get multiple pairs in a pack!
Dena
Thanks for sharing this great idea. My grandson and I always make his Christmas gifts for all his grandparents. His maternal grandfather owns a pallet business. It'll make a perfect handmade gift for Christmas.
Katie
This is a perfect gift! 🙂 Have fun crafting with your grandson. Such a fun tradition!
Lisa
This is perfect AND summer is coming so I will make them! Thanks!
Katie Adams
Thank you so much!