

Create your very own felt garland! It's the perfect project for a fun craft night with friends or for adding a touch of seasonal charm to your decor.
Looking for a simple yet eye-catching way to spruce up your living space? A colorful felt garland could be just the thing you need!
Making your own felt garland is an easy and affordable way to add a touch of whimsy and charm to your decor.
In this easy DIY tutorial, we'll show you how to make a vibrant DIY felt garland using easy-to-find materials and step-by-step instructions.
Whether you're a seasoned crafter or a beginner, this is the easiest way to make a felt garland.
Craft Video Tutorial:
Like videos? I have a video tutorial for you! Subscribe to my YouTube Channel so you don't miss out on any future video tutorials.
Supply List:
Some links may lead to similar items when the exact item is unavailable.
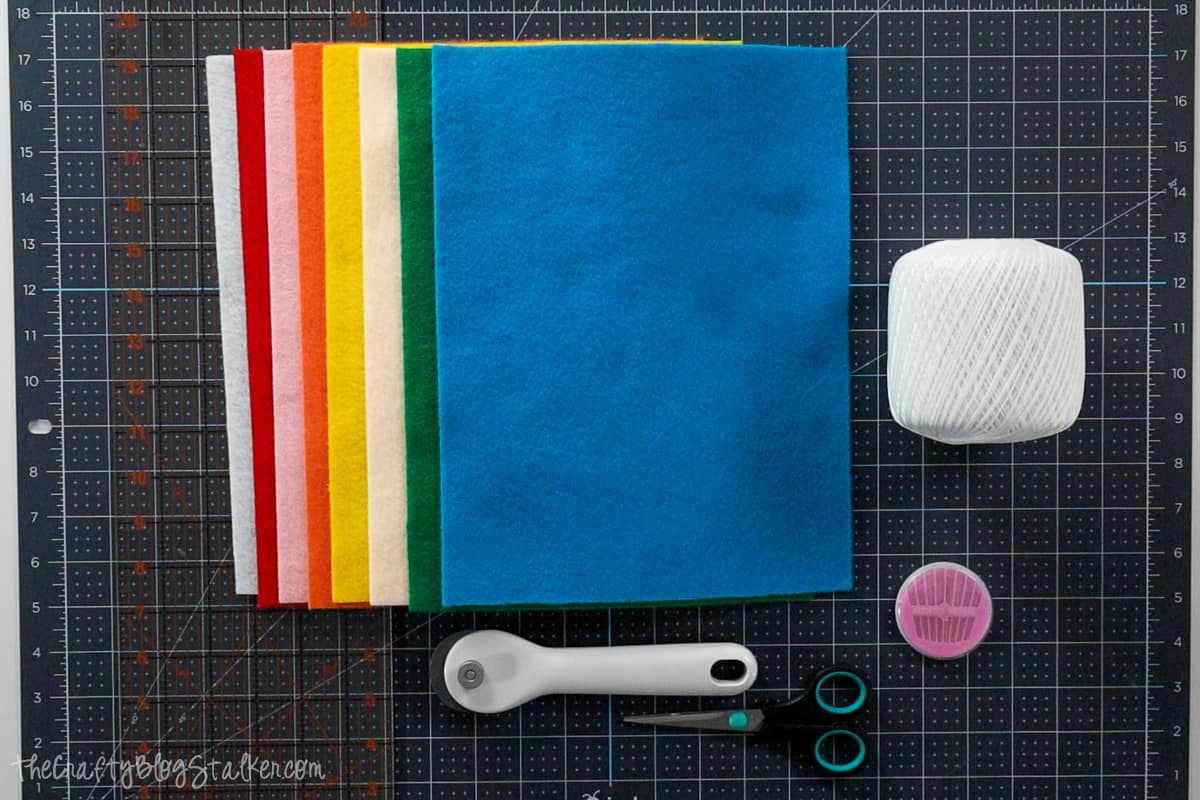
I used the thicker felt that has a thickness of 1.4mm.
One 9x12-inch sheet will give you about 4.5 inches of garland. If you know how long you want your garland length to be this math can help you know how many felt sheets to purchase.
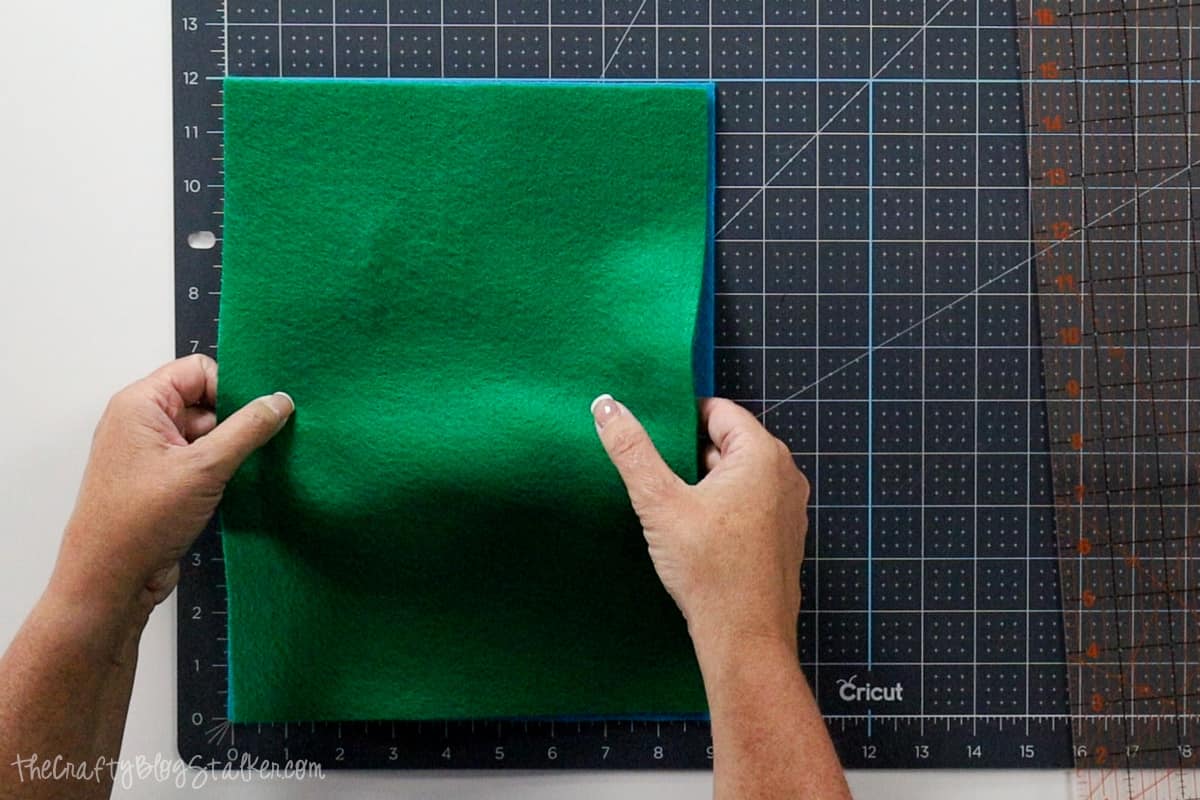
Cut the felt:
To start, cut the felt sheets into 1x3inch strips.
Layer two sheets of felt together, and line the stack up on the cutting mat.
Begin by cutting the strips lengthwise with a width of 1 inch.
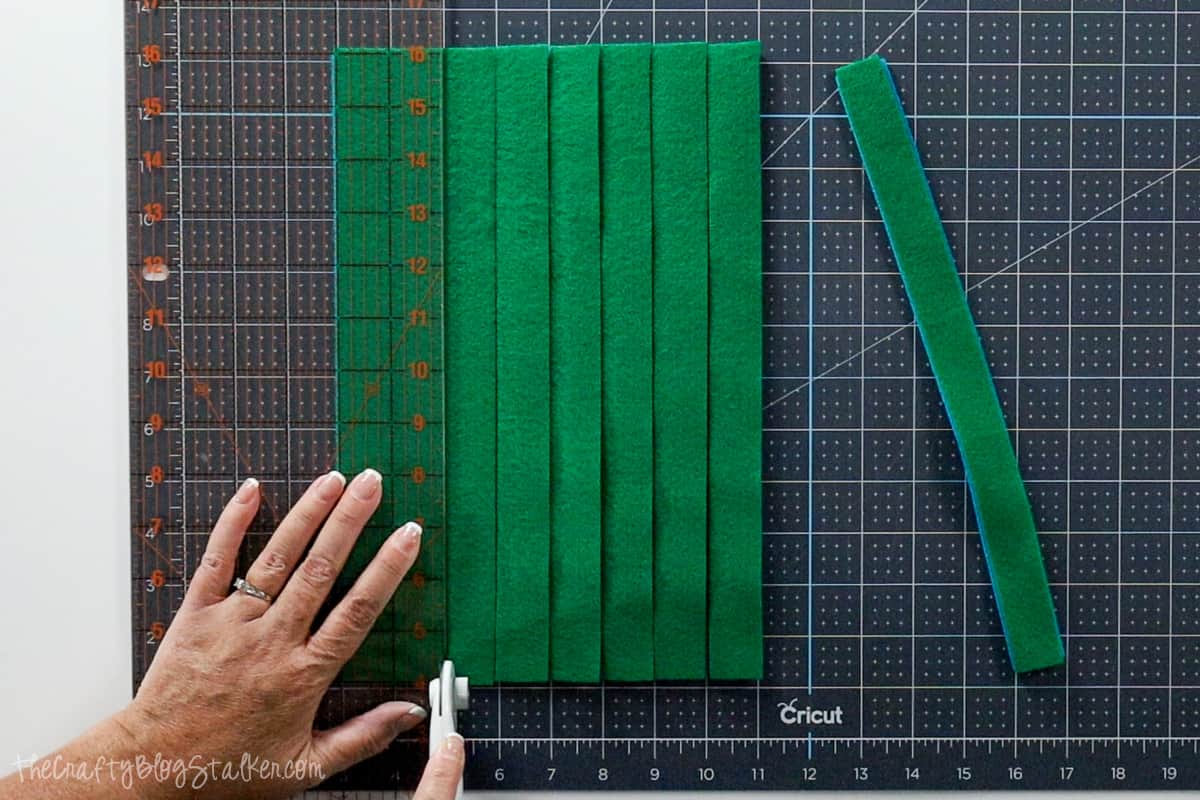
Keep the rows together and cut across every 3 inches.
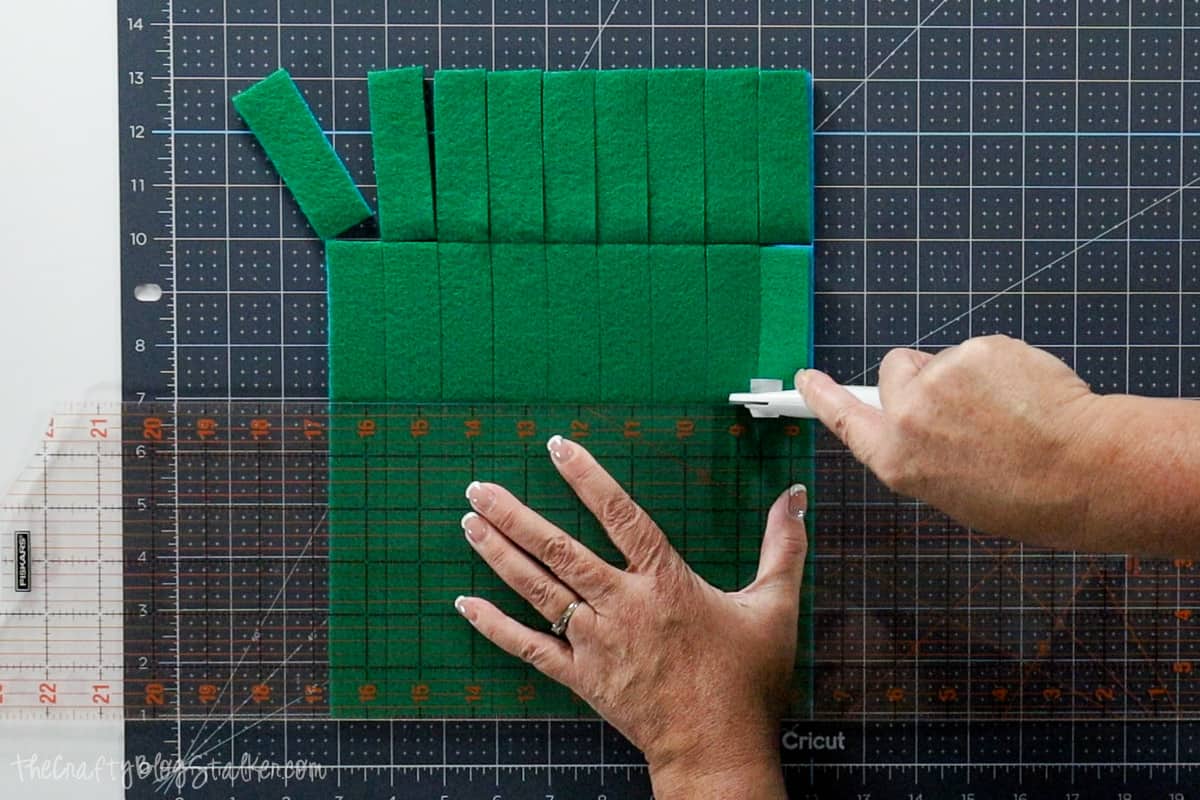
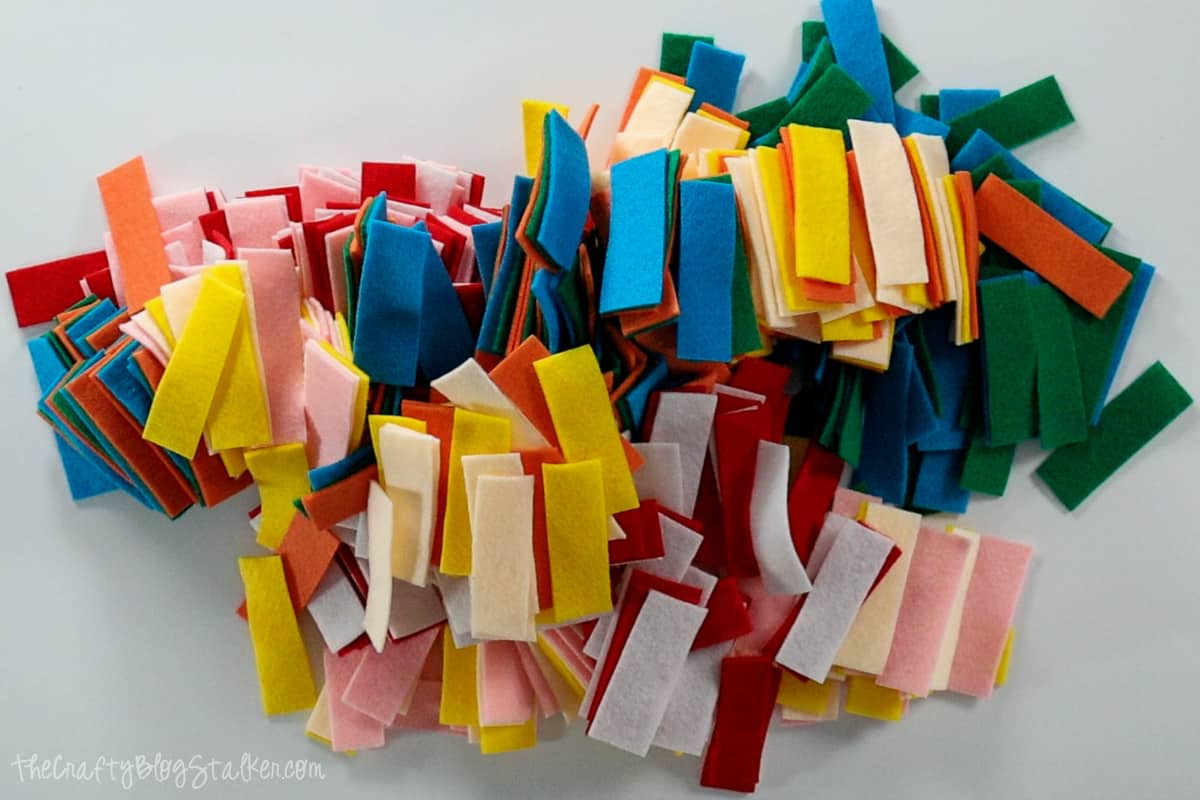
Repeat until all of your felt sheets are cut into strips. I love all of the colors!
Needle and Thread:
Most importantly, make sure that you have a sharp needle that has an eye large enough for your thread.
I am using a crochet thread that is nice and storing which makes it a bit thicker.
Cut off a length of string that is longer than how long you want the garland to be. If your string is really long you'll need to be careful that you don't get it twisted and tangled.
At the end of the string tie a big fat knot by tying the knot over and over again in the same place.
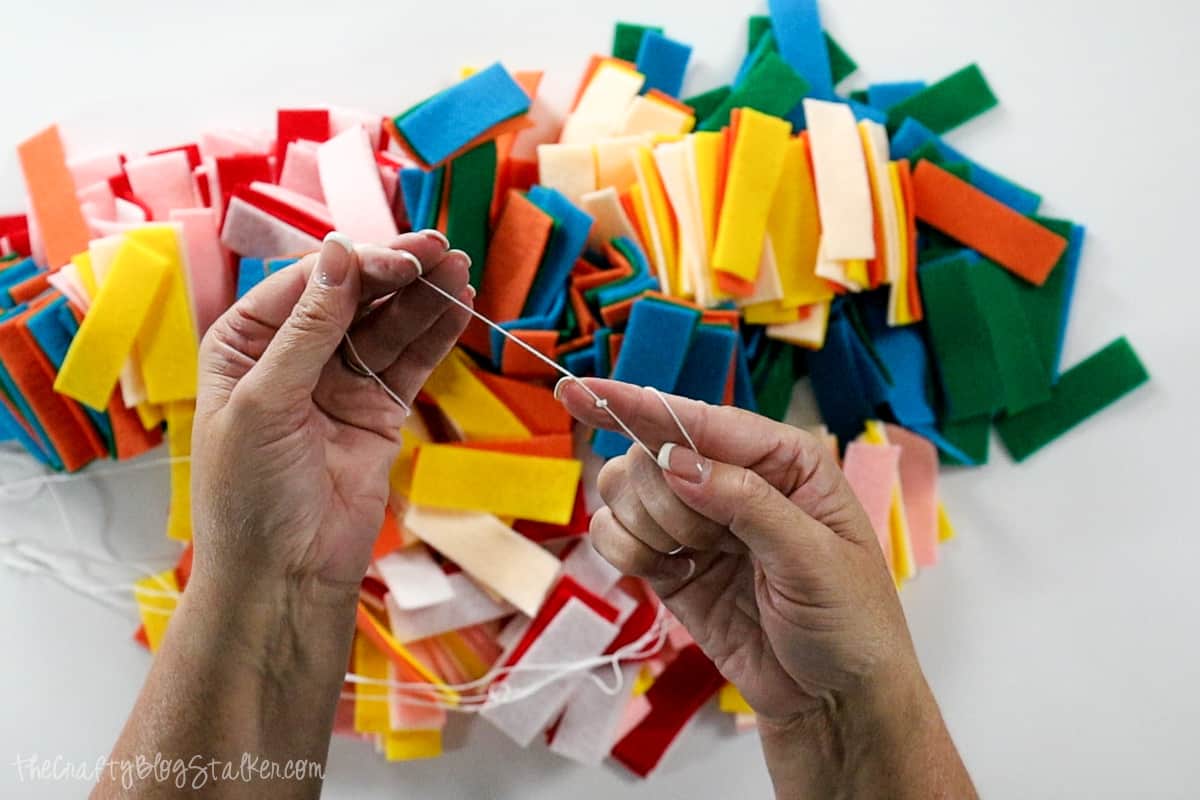
Pull the front end of the thread through the eye of the needle. You can double the string to make the length more manageable, but remember to shorten that doubled portion so it doesn't get stuck in the garland.
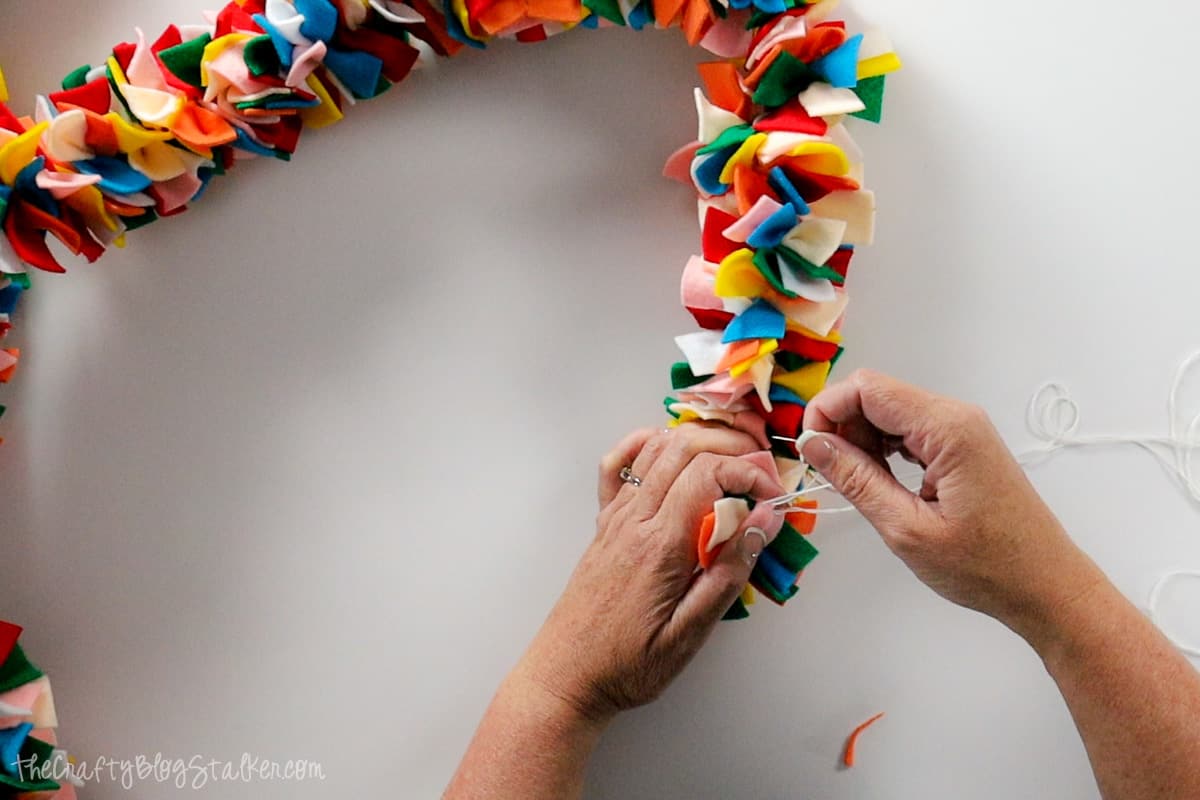
Stringing the Felt Pieces:
This is an easy process but can take a long time depending on your desired length. This is a great time to sit down and watch your favorite show while you are sewing the strips together.
Hold a strip of felt in your hands and fold it in half lengthwise.
Run the needle and thread through the center and pull the needle through.
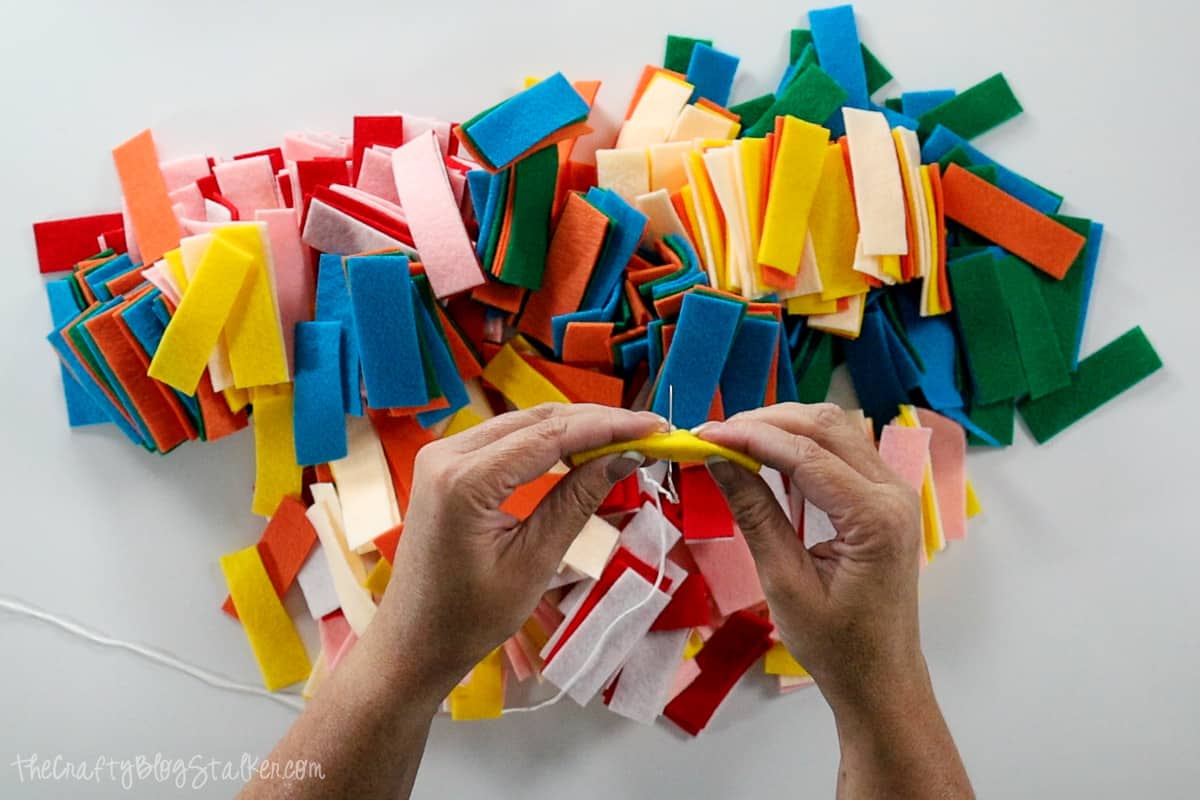
Repeat with each strip of felt until they are all strung on the string.
The great thing about this project is that it doesn't have to be perfect. If some aren't perfectly folded in half, or sewn in the middle, you won't be able to tell on the finished garland.
I would put on about 8 to 10 strips and then push them all to the bottom of the string at the same time. Be careful not to tangle the length of the string.
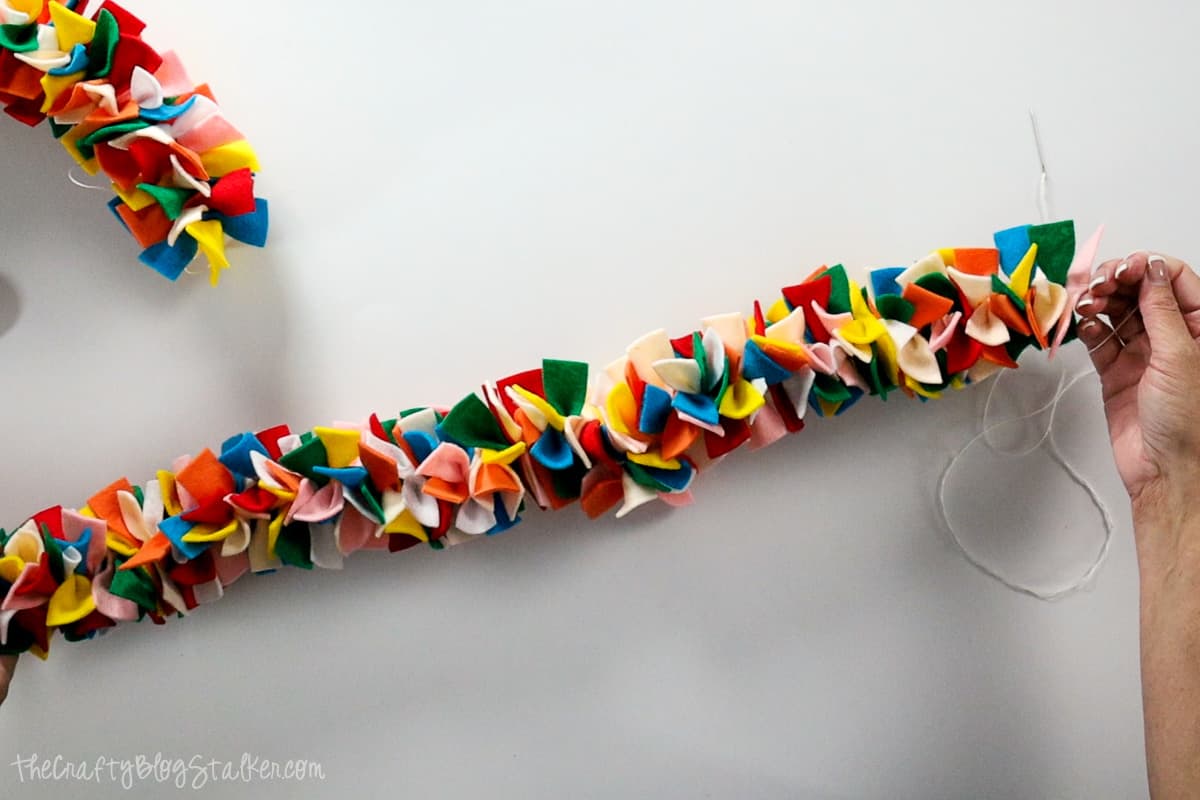
Hour(s) later when all of the felt strips have been attached, tie another knot on the new end of your garland.
I stitched through the last strip, tied and knot, then stitched and tied a last knot to make sure it was good and secure.
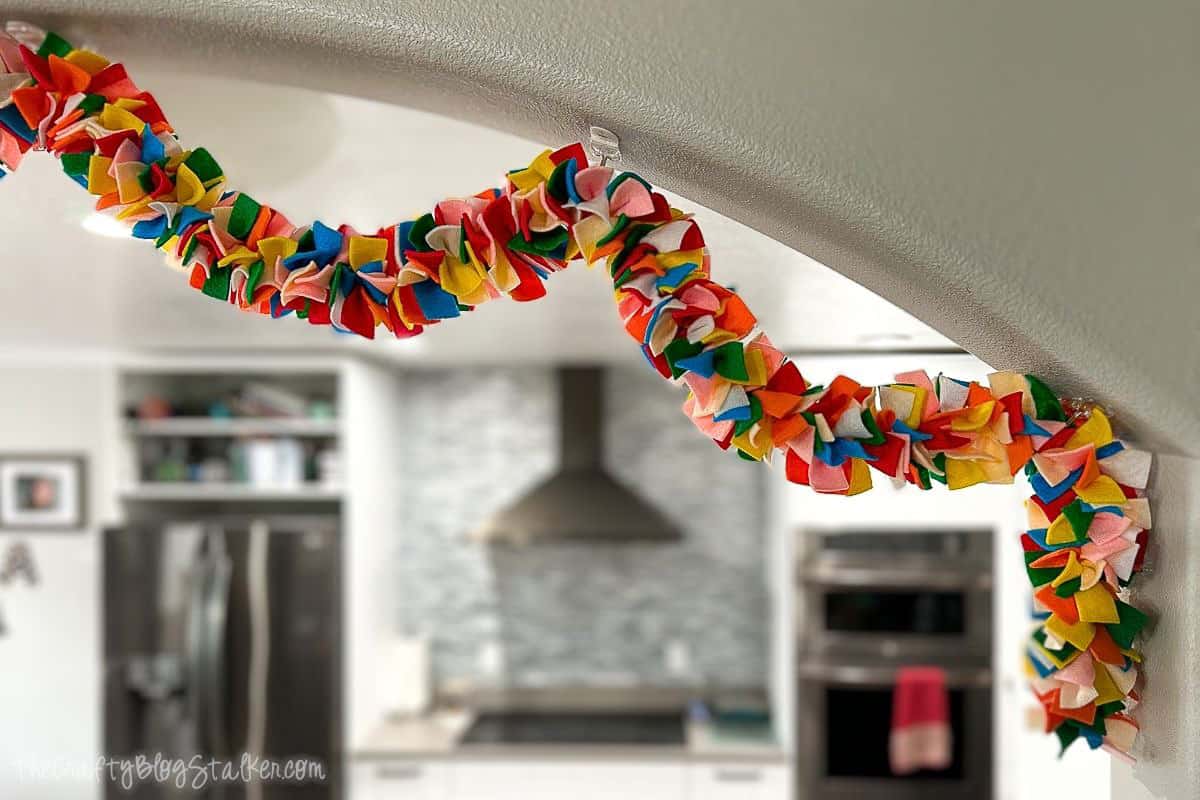
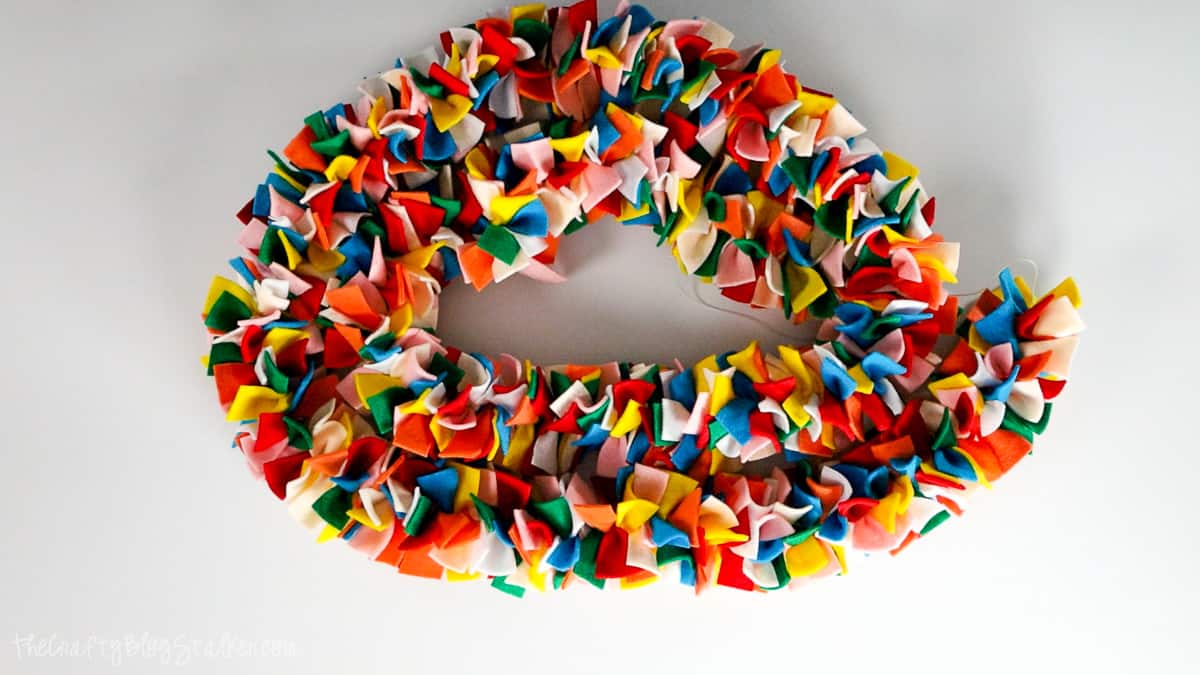
Finished Garland:
I am in love with my new finished garland. All of those fun bright colors make me think it is party time!
I had a couple of different ideas of where to hang it, but I ultimately decided to hang it in our kitchen window separating the kitchen and living room.
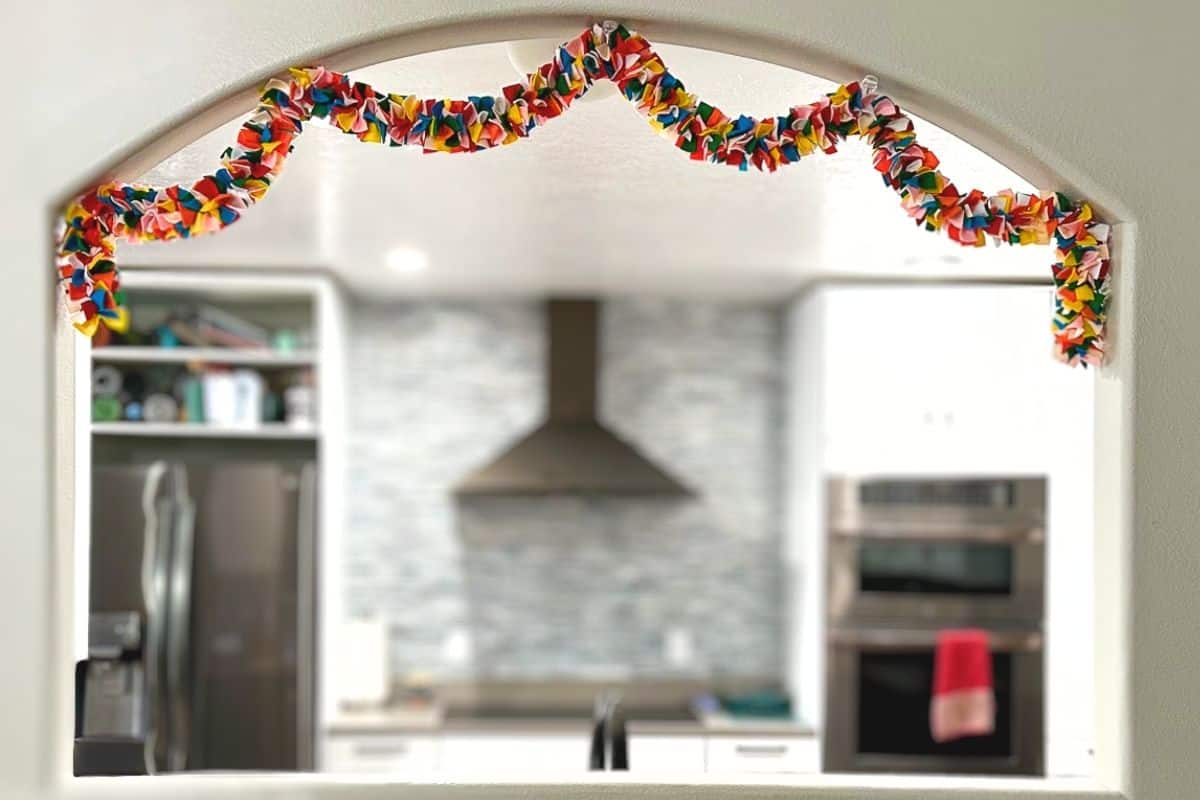
Well, what do you think? is this an easy craft or what? Where will you hang your own garland?
Substitutions:
Here are some easy substitutions you can use for items in the supply list.
- String - You can use any kind of cord, nylon string, or baker's twine. Just remember to have a needle with an eye large enough to accommodate the thickness of the string.
- Material - Experiment with the material to get a bun of different looks. You could use fabric, thick rope, or paper.
Variations:
Want to customize your project? Here are a few ideas.
- Color - I used 8 different colors, try using only 2 or 3 to stick within a color palette. You could also do a color scheme for a specific holiday like red, green, and white for Christmas.
- Pattern - Group like colors together in sections, or go in a specific order.
- Length - This garland could easily be made any length to fit any need.
- Additions - Add wooden beads, different-sized felt balls or hanging elements from the garland.
Frequently Asked Questions:
A great way to hang a garland is with Command Hooks. They work great and are easily removable when no longer needed.
To make a felt garland longer, tie it off when you have reached the end of your string.
Cut a new length of string and tie the end with a large knot. Then run the needle and thread through the last couple of felt strips of the previous garland and continue adding strips of felt.
There are many times of year you can use a felt garland to decorate. Like a Christmas, Valentine's Day, Easter, Halloween, a baby shower, wedding showers, birthday parties, and more. Really any time of year!
Crafting Essentials
- The Cricut Cutting Machine is easily my favorite crafting tool. We use it in so many of our tutorials!
- These MakerX Crafting Tools are perfect for keeping in the craft room and are always ready when needed!
- This Fiskars Paper Trimmer is easy to use and cuts nicely without frayed edges.
- These Scotch Precision Scissors cut like a dream, and you get multiple pairs in a pack!
Justine Young
I love this idea and I have so much scrap felt I could definitely pull it off!
Katie Adams
Thank you. I am so glad you like it!
Stina
What was the exact order of colors you did yours in? I love it.
Katie Adams
Thank you! Mine were totally random, no specific order.