

The Easy To Use Cricut Hat Press is one of the best accessories for the Cricut. Watch me make a hat with the Cricut Hat Press and learn how it works.
I am lucky to work very closely with Cricut. This Hat Press was gifted to me, but this is not a sponsored post. The opinions and text are all mine.
Have you heard all of the buzz about the release of the new Cricut Hat Press?
I love how innovative Cricut is! This Hat Press makes adding heat transfer vinyl to hats a breeze!
Recipe Video Tutorial
If videos are your thing, you're in luck-I've got a full tutorial ready for you!
Subscribe to my YouTube channel and stay inspired with every new project.
Can you use a heat press on a hat?
Up till now, adding heat transfer vinyl to hats has been tricky. The curve of hats makes it difficult to apply the heat and the correct amount of pressure.
With the new Cricut Hat Press, it is so simple! The hat press has a curved design that glides easily over the hat, ensuring you get the right amount of heat and pressure.
I am excited to show you more about it in the tutorial below!
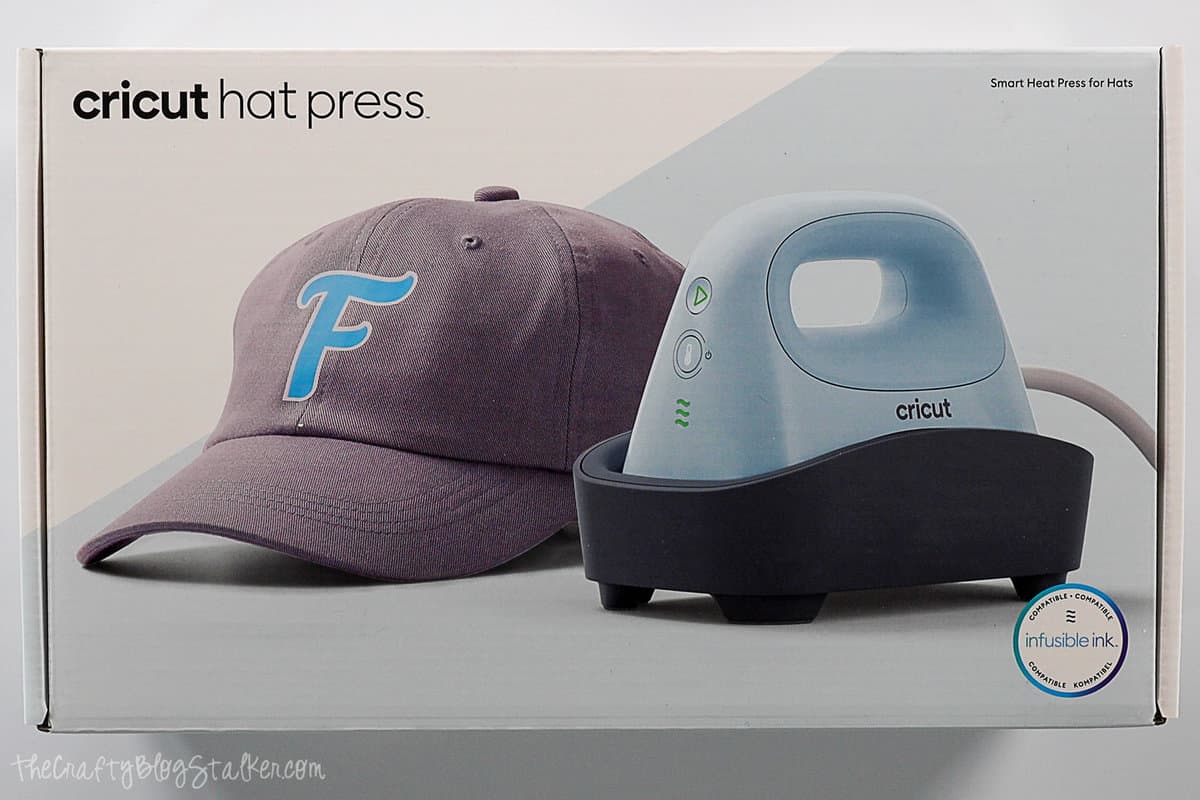
Can you use the Cricut Hat Press with Infusible Ink?
Yes, you can. It works the same way that I'll step out below, with different temperature settings.
Unboxing the Cricut Hat Press:
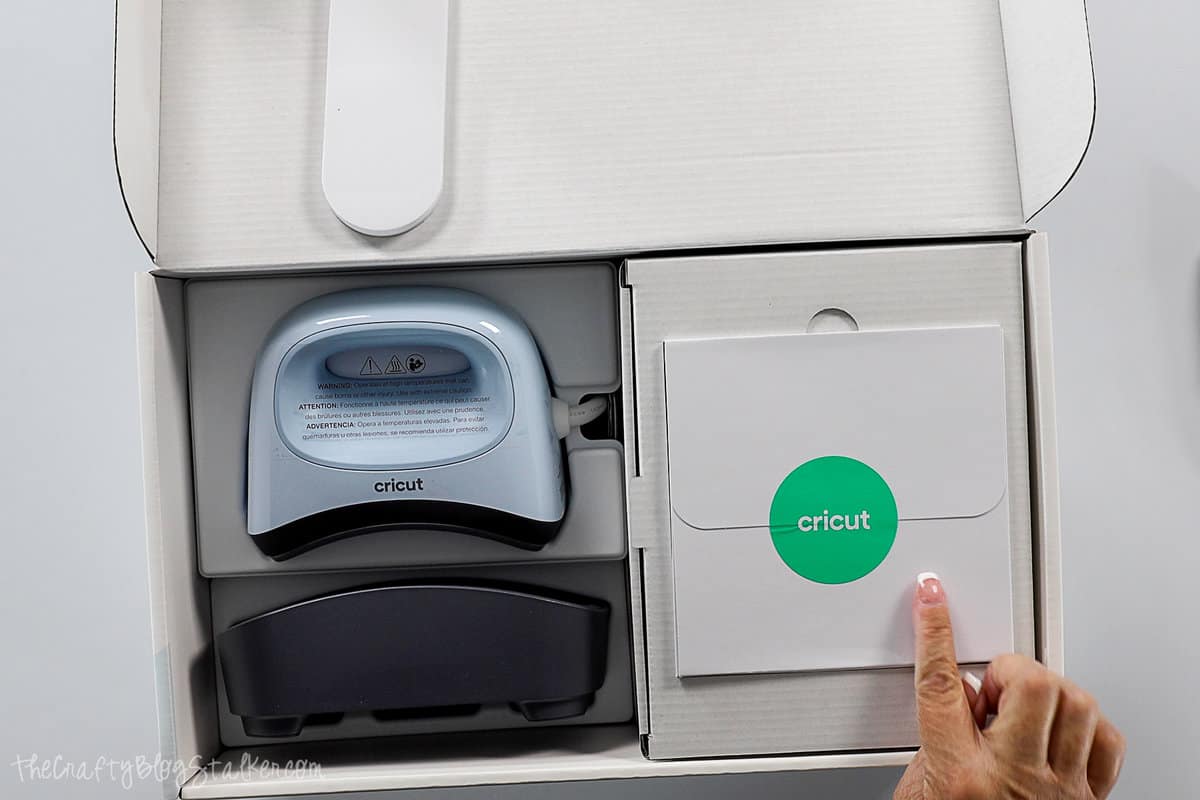
Inside the box, you will find...
- Cricut Hat Press™ 5 in x 3 in
- Hat Pressing Form
- Safety Base
- Strong Heat-Resistant Tape
- Let's Get Started Packet
I was so excited to see that the Hat Pressing Form was included, and it wasn't an additional item I would need to purchase.
In the video below, you can watch as I unbox everything and see how it is packaged inside the box.
Setting Up the Cricut Hat Press:
To use the Hat Press, you must access the Cricut Heat App on either a mobile device or tablet. The app then connects wirelessly to the Hat Press and controls all of the settings.
The app is available for both Apple and Android devices.
To find it, simply go to your app store and search for Cricut Heat.

Open the app, and it will walk you through connecting to your Cricut Heat Press.
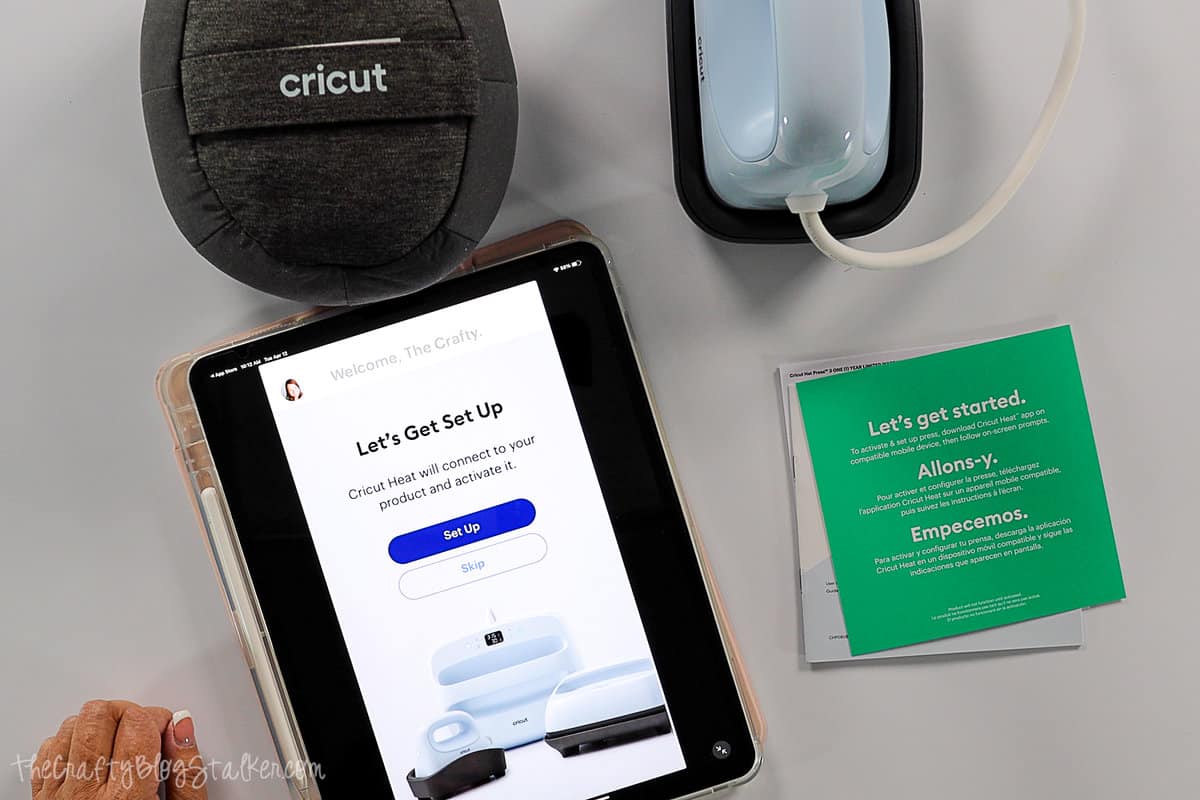
Now that it is ready to use, let's make a hat!
Supplies You'll Need to Create this Project:
- Cricut
- Hat Design in Cricut Design Space
- Iron-on Vinyl
- Gray Hat
- Heat Tape
- Cricut Hat Press (no longer available)
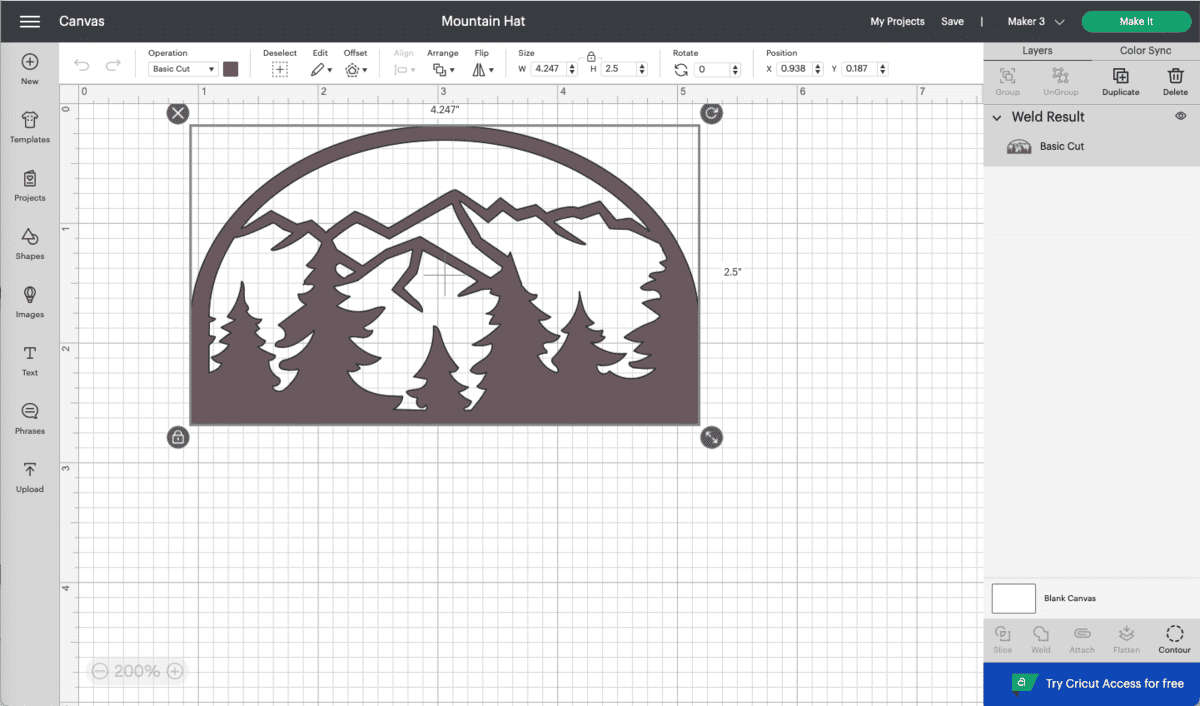
Cut Design on a Cricut:
If you would like, you can use the hat design I created just for this project. It is already sized exactly as needed for an adult hat.
You can also create your own design if you would rather! I would suggest sizing the design to about 4.25 x 2.5 inches so it fits nicely on the front of the hat.
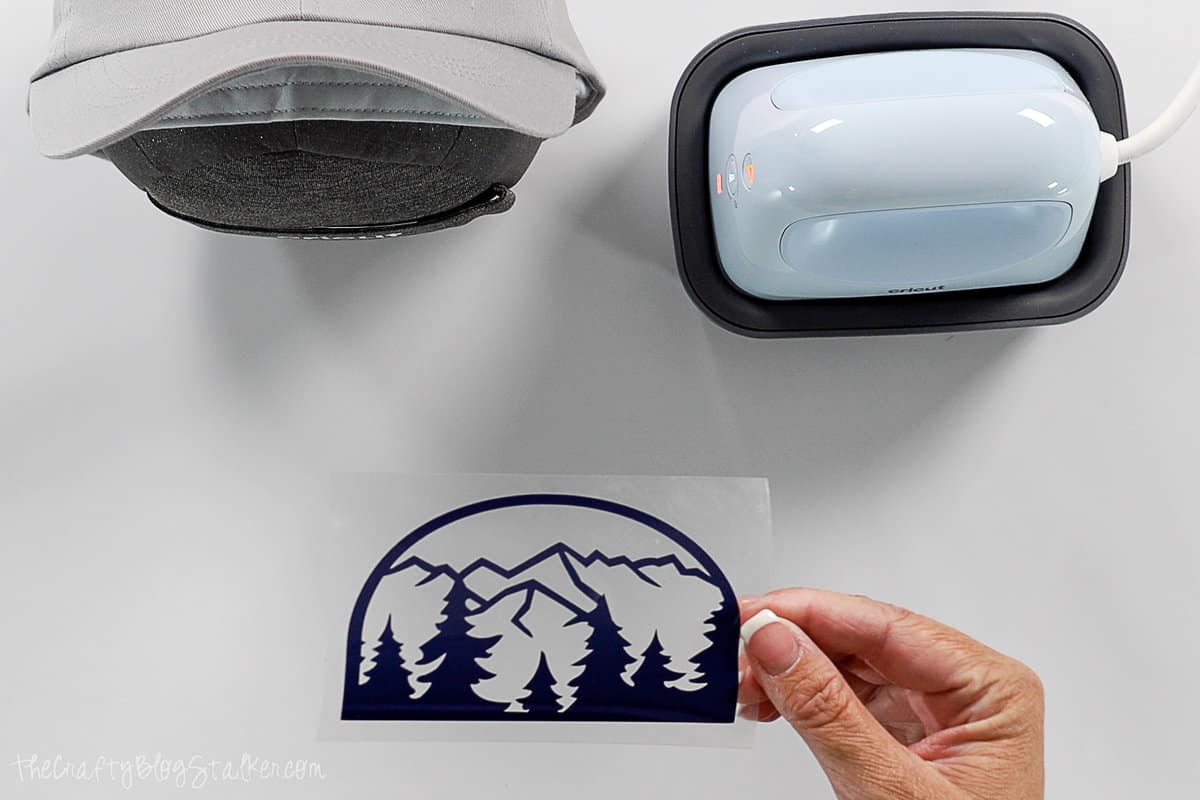
Cut the design out of Iron-on with the shiny side down on a mat.
Once cut, weed the design using some weeding tools.
Applying the Iron-on to the Hat:
Open up the Cricut Heat App and select Start New Project.
Select your transfer material, which is Everyday Iron-on for this project.
And select what you are applying to, which is a Ball Cap.
All of your instructions appear on the screen now but will be repeated when each step is reached.
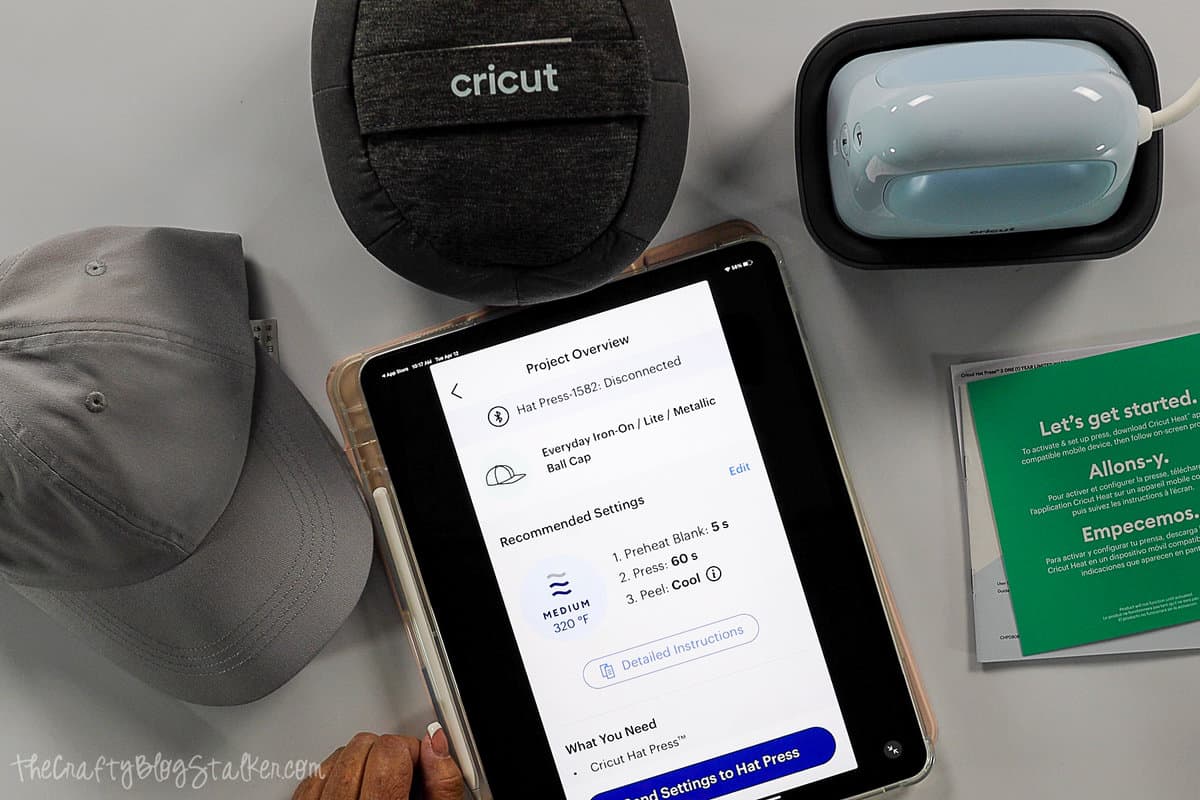
Then select Send Settings to Hat Press.
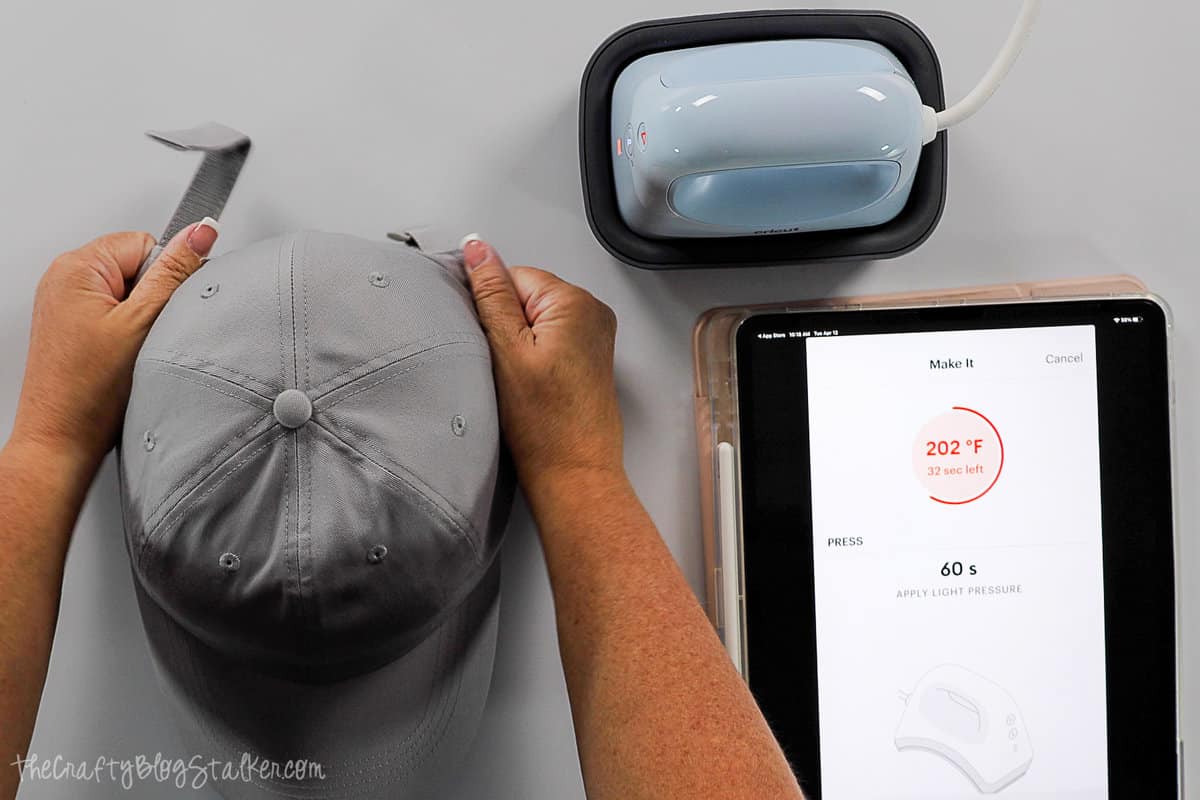
While the heat press is warming up, prep the hat.
Remove any cardboard packaging from the hat, lift the liner out and away from the inside of the hat, and open the clasp in the back of the hat.
Place the hat on the hat form, making sure it is snug.
Center the Design and use Heat Tape to secure the design in place.
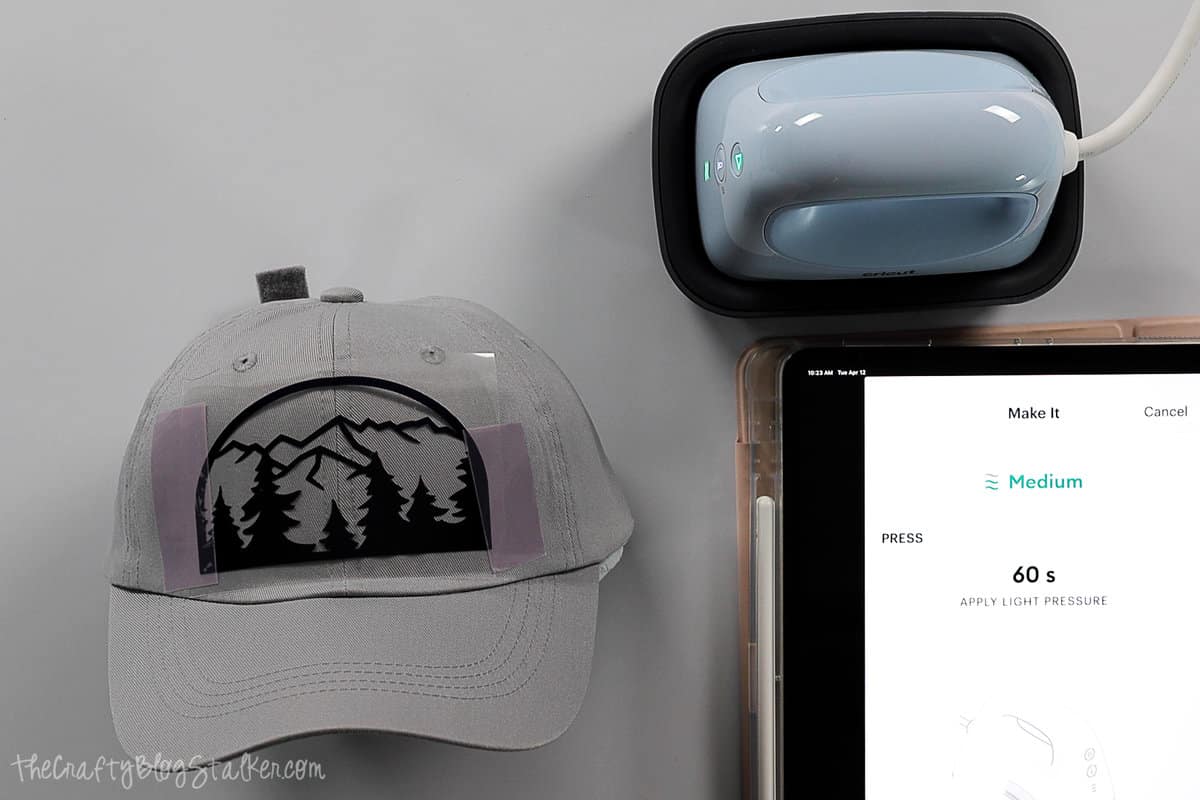
Usually, with iron-on material, you don't need to secure it to the project with tape. But with the Cricut Hat Press, you'll be constantly rocking the press back and forth, so you want to make sure the design stays in place until it has adhered.
The app will alert you with a beep when the Hat Press reaches the set temperature and is ready to use.
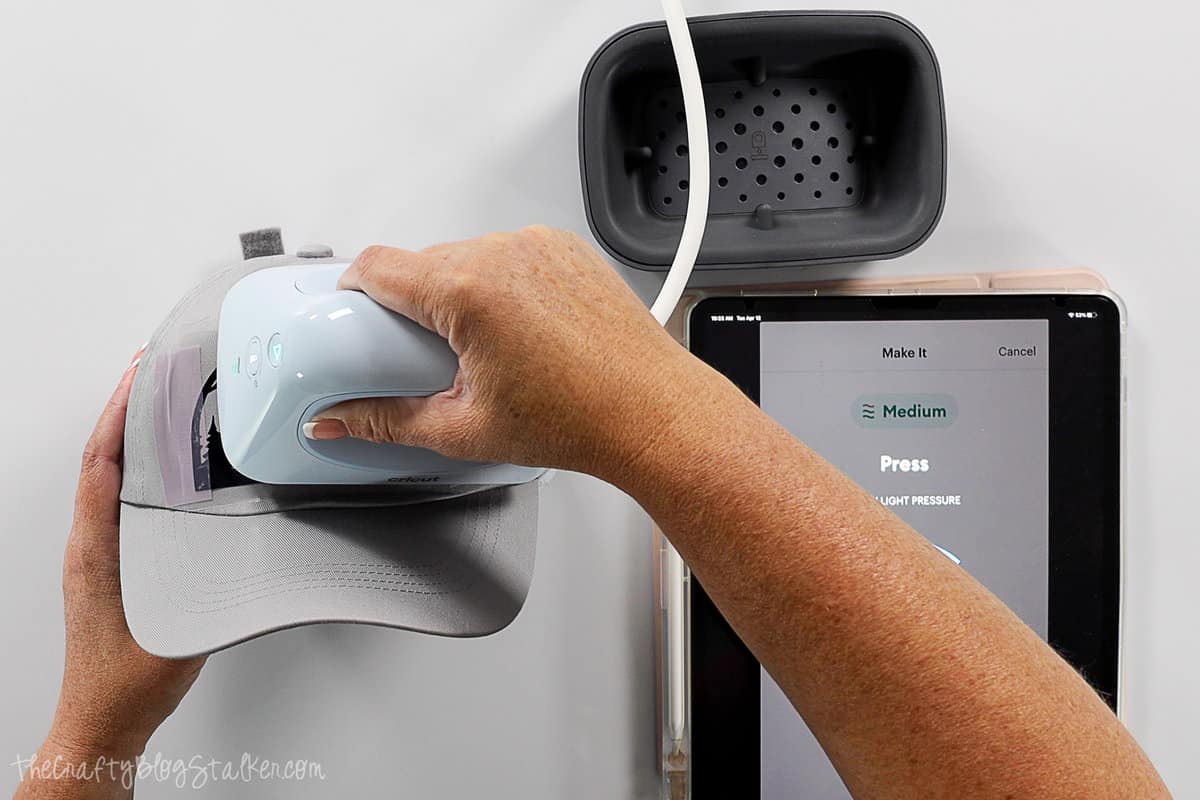
Press the play/start button on the press, then apply heat to the design in a constant rocking motion. Do not let the heat sit still.
Once the timer was done, the app prompted me with a Cool Peel, which means I need to wait till the backing sheet is cool to the touch before peeling it off.
I waited about 5 minutes, then began peeling the backing sheet off the design.

If any part of the design peels up with the carrier sheet, put it back down and go over that area of the design for a bit longer with the Cricut Hat Press.
Repeat until the backing sheet peels completely from the design.
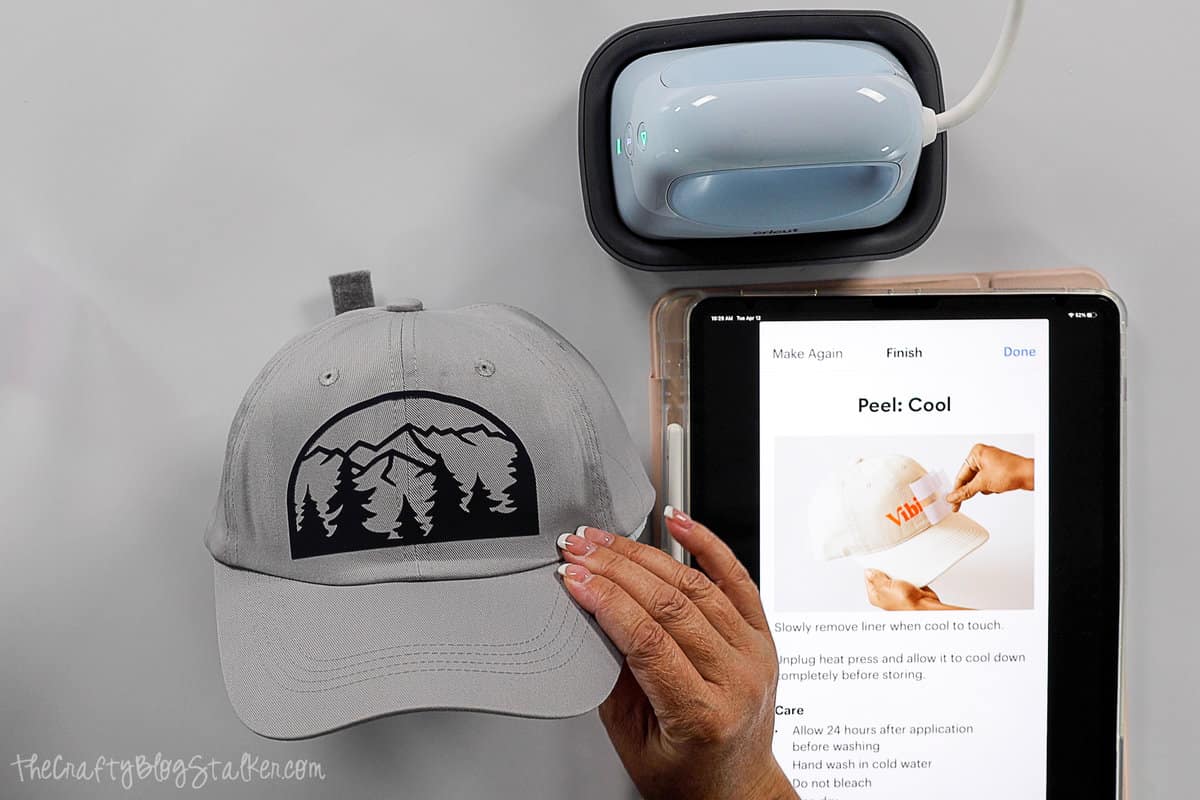
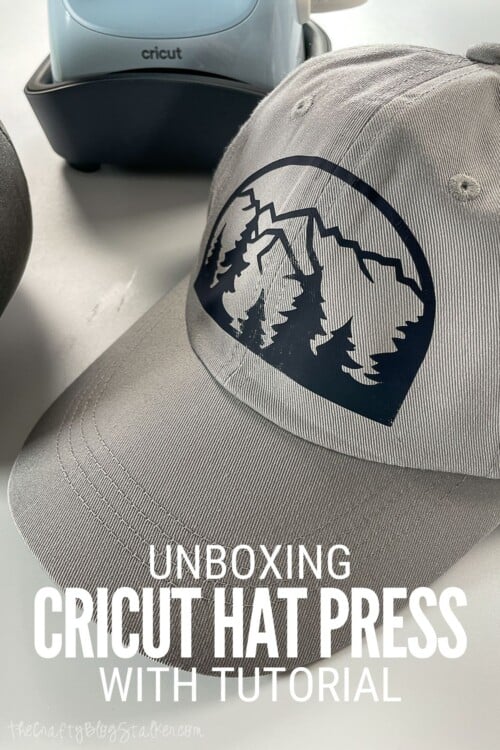
Look at how cute it turned out! I made this for my daughter, and she is going to love it!
But I still had to try it on! 😂

Crafting Essentials
- The Cricut Cutting Machine is easily my favorite crafting tool. We use it in so many of our tutorials!
- These MakerX Crafting Tools are perfect for keeping in the craft room and are always ready when needed!
- This Fiskars Paper Trimmer is easy to use and cuts nicely without frayed edges.
- These Scotch Precision Scissors cut like a dream, and you get multiple pairs in a pack!