



Try layering iron-on vinyl to make a cute Happy Camper shirt with multiple colors and a clean, polished finish.
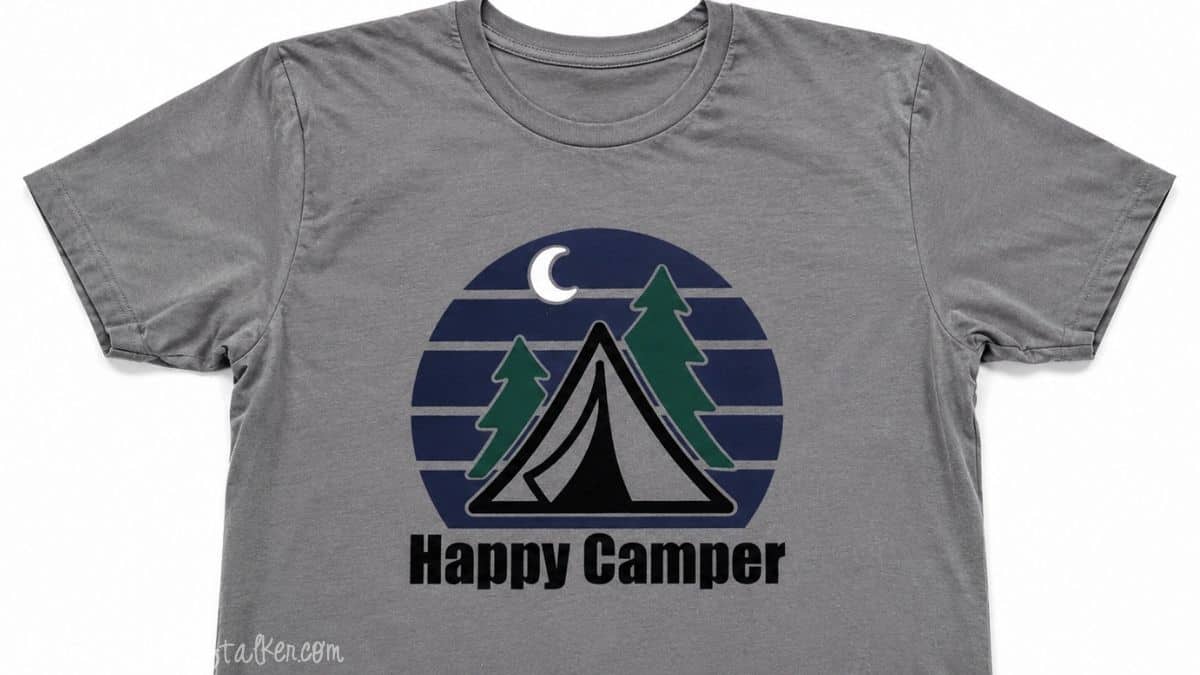
There's something so satisfying about making your own custom shirt with heat transfer vinyl, especially when the finished design looks like something you could buy in a store.
Layering different colors can seem a little intimidating at first, but once you understand the pressing process, it's actually pretty simple.
The trick is knowing which layer goes down first, how long to press each one, and how to keep everything perfectly aligned.
Today I'm walking you through the entire process with this Happy Camper design, plus sharing a few tricks that make layering HTV so much easier.
Jump to:
Skill Level: Beginner
Estimated Cost: $10 - $20
Total Time: 30 minutes
Craft Tutorial Video
If videos are your thing, you're in luck-I've got a full tutorial ready for you!
Subscribe to my YouTube channel and stay inspired with every new project.
Supply List
Some supplies were gifted at no cost. When exact items are unavailable online, links may point to comparable products.
- Tshirt Blank
- Cutting Machine
- Happy Camper SVG File
- Heat Transfer Vinyl
- Weeding Tools
- Teflon Sheet
- Heat Press Mat
- HTVRont Heat Press
Grab the Free SVG

Measure, Cut, and Weed the HTV
Before cutting anything, measure your shirt. This helps you determine how large to make the entire design so it looks proportional once it's pressed.
I'm using a men's large T-shirt and sized my Happy Camper design to 9 inches wide.
Your measurements may differ depending on your shirt size, so don't automatically use mine.
Hold a ruler across the front of your shirt and decide what looks best before cutting your vinyl.
Prepare the Design
Upload the Happy Camper SVG into your Cricut software and size the design for your shirt.
This design uses several layers, which means each color will be cut from a separate piece of vinyl.
I used navy, black, forest green, and silver gray, but it is also fun to customize with your favorite HTV colors.
Once you're happy with the size and colors, send the design to your cutting machine.
Don't forget that iron-on vinyl needs to be mirrored before cutting.
Place the HTV on your mat with the shiny carrier sheet facing down, then cut each color separately using the appropriate material setting.
Weed Each Layer
After cutting, weed away all excess vinyl so that only the pieces that belong in the finished design remain on the clear carrier sheets.
Take a moment to look at each layer before moving on. It can help to loosely stack the layers on your work surface so you understand how the complete design fits together before you start pressing.
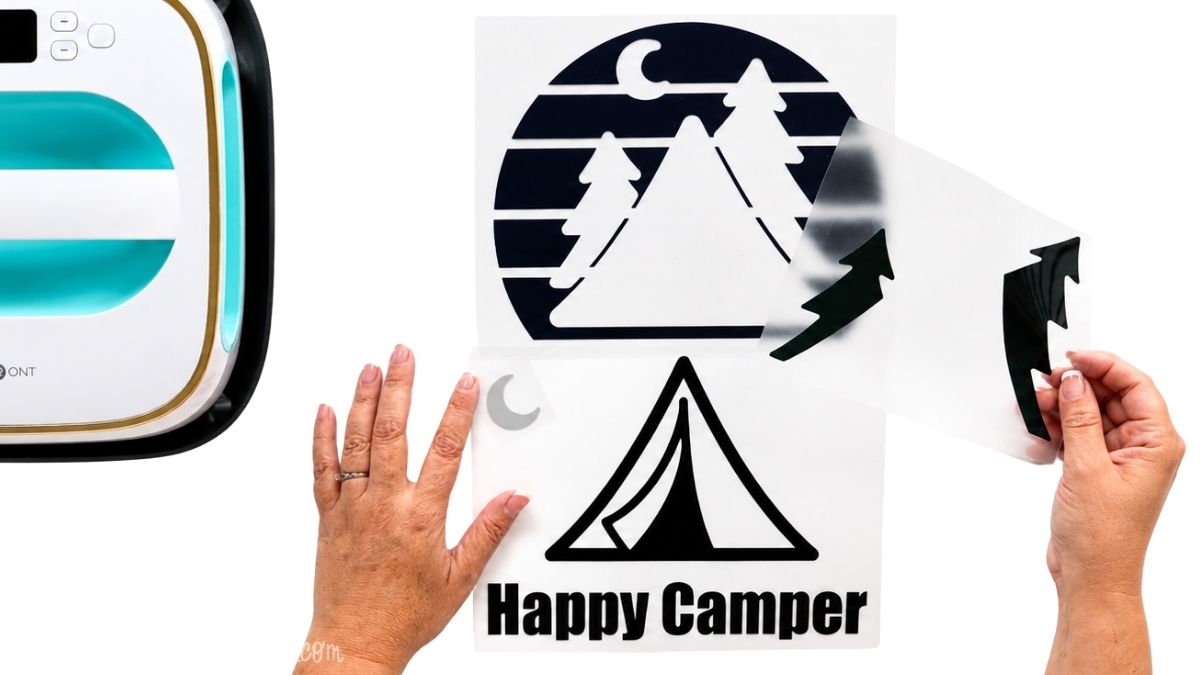
This is also a good time to trim away extra carrier sheet around each piece of vinyl. Just be careful not to cut into the actual design.
Center the Design on the Shirt
Before applying the first layer of HTV, we need to find the center of both the shirt and the design.
Luckily, there's a really easy trick for doing this.
Find the Center of the Shirt
Fold the shirt in half lengthwise, lining up the sleeves and side seams.
Lightly press the folded shirt for just a few seconds. You don't need to create a deep crease. You only want a faint center line to use as a placement guide.
Open the shirt and lay it flat on your heat press mat.
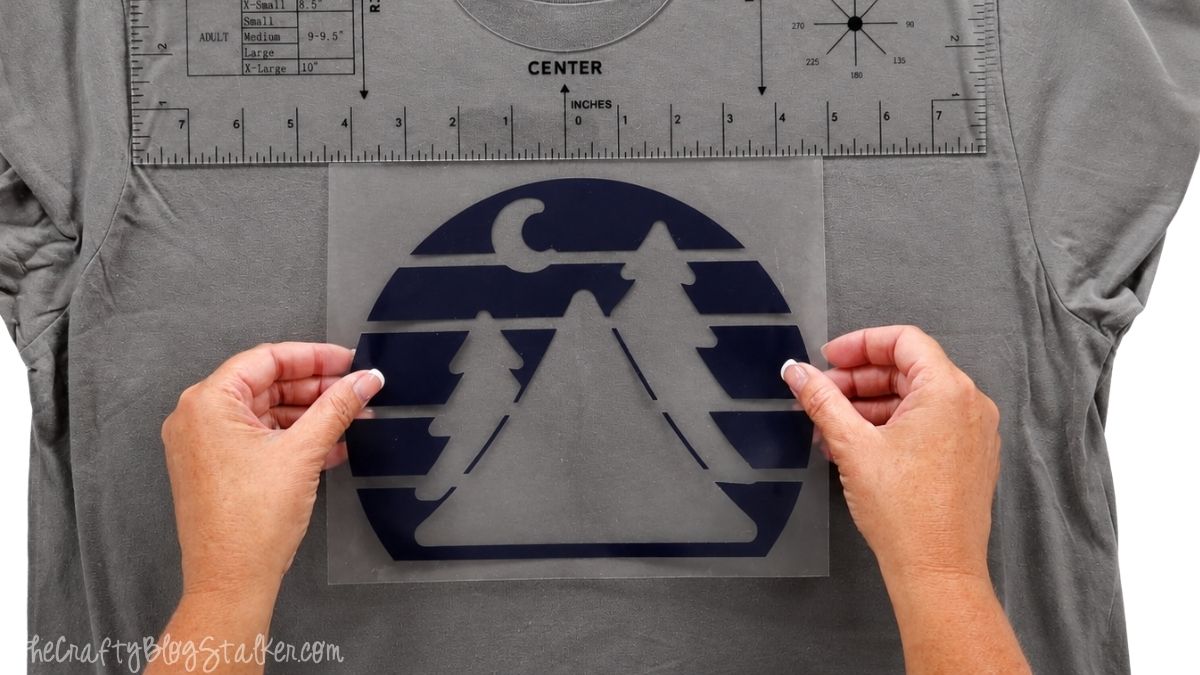
For an adult shirt, I generally place the top of the design about 2 to 3 inches below the collar.
You can measure this distance with a ruler, but I love using a T-shirt ruler. It helps with both placement and alignment, so I spend a lot less time staring at my shirt, wondering if the design is actually straight.
Find the Center of the Design
Now we need to find the center of the HTV.
Gently fold the carrier sheet in half without creasing the vinyl. Lightly pinch the carrier sheet at the top and bottom to create small center marks.
When you're ready to place the bottom layer, line up those marks with the fabric's center crease.
It's such a simple trick, but it takes nearly all of the guesswork out of centering a design.
How to Layer Iron-On Vinyl
Now for the fun part!
Before pressing anything, check the instructions for the specific heat transfer vinyl you're using. Temperature, press time, pressure, and whether the material is a hot or cool peel can vary between brands.
My HTV calls for 315°F for 30 seconds.
Normally, that would mean pressing the design for the full 30 seconds. But when you're working with several layers, you don't want to press the bottom layer for 30 seconds every single time another color is added.
Instead, we'll tack the first layers into place with shorter presses and use the full recommended time for the final layer.
Press the Bottom Layer
Place the first navy layer onto the shirt using the centering method above.
The clear carrier sheet is slightly sticky, so once the design is positioned, it should stay in place as long as you don't move the shirt around too much.
Cover the entire design with a Teflon sheet.
Press at 315°F for 15 seconds.
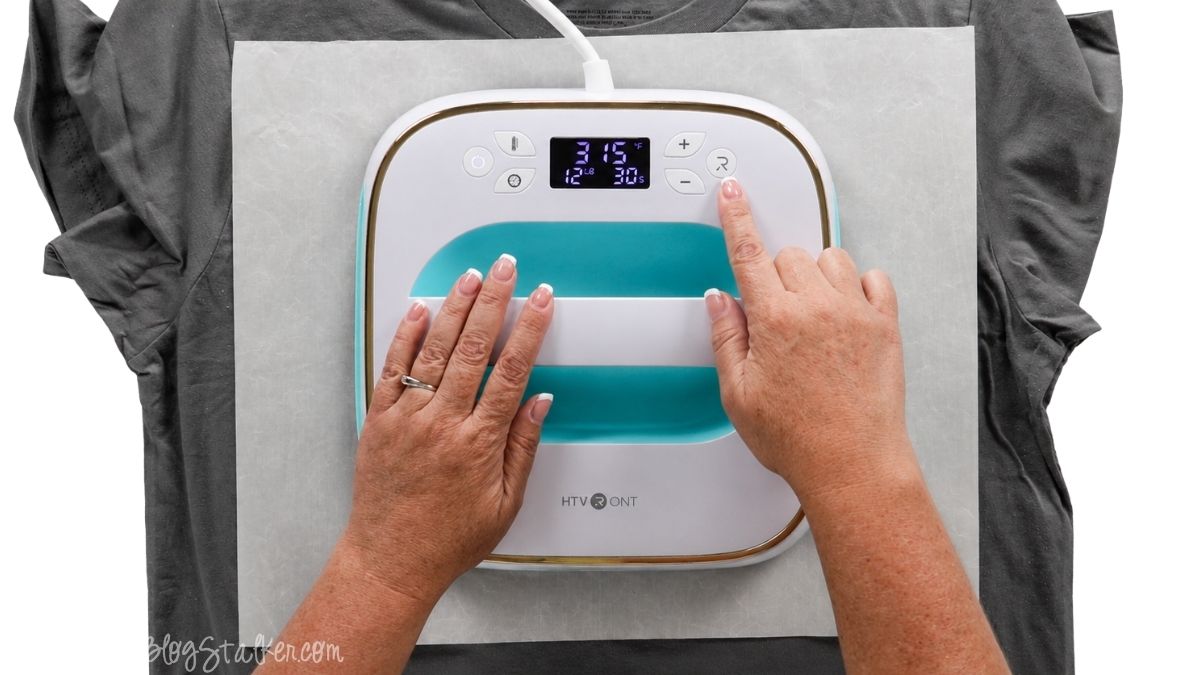
The HTV I'm using is a cool peel, which means the carrier sheet needs to cool before it is removed.
Here's my very technical cooling method: I grab the bottom of the shirt and give it a few gentle flaps.
Fancy? No.
Effective? Absolutely.
Once the vinyl has cooled, slowly peel away the carrier sheet.
As you peel, watch the vinyl carefully. If any portion begins lifting away from the fabric, lay the carrier sheet back down and press that area again before continuing.
Add the Second Layer
Position the black layer over the navy layer, carefully aligning the two sections of the design.
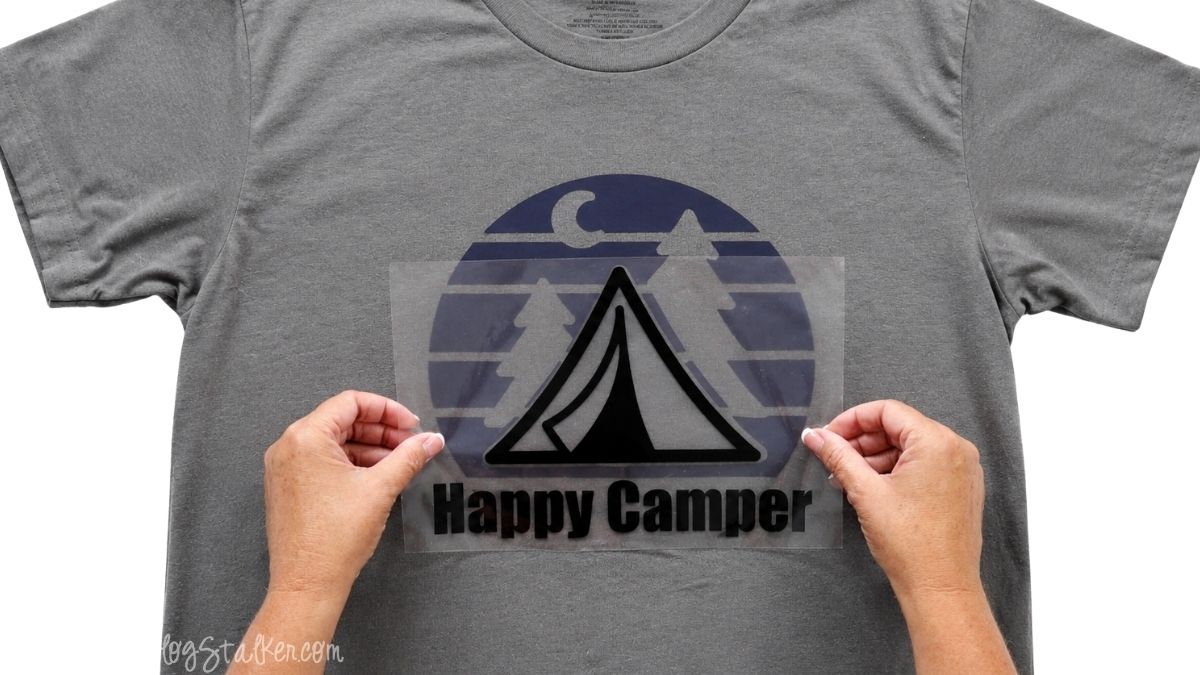
Before pressing, check the carrier sheet around the new layer. You don't want any exposed HTV touching the heat press directly.
Cover the entire design with your Teflon sheet and press for another 15 seconds.
Allow the shirt to cool, then remove the carrier sheet.
At this point, the Happy Camper design is really starting to come together.
Add the Top Layers
For the remaining colors, we can save a little time by pressing multiple pieces at once, since they don't overlap.
I trimmed the carrier sheet around the trees to separate the individual pieces. Then I positioned the two trees and moon in their correct locations.
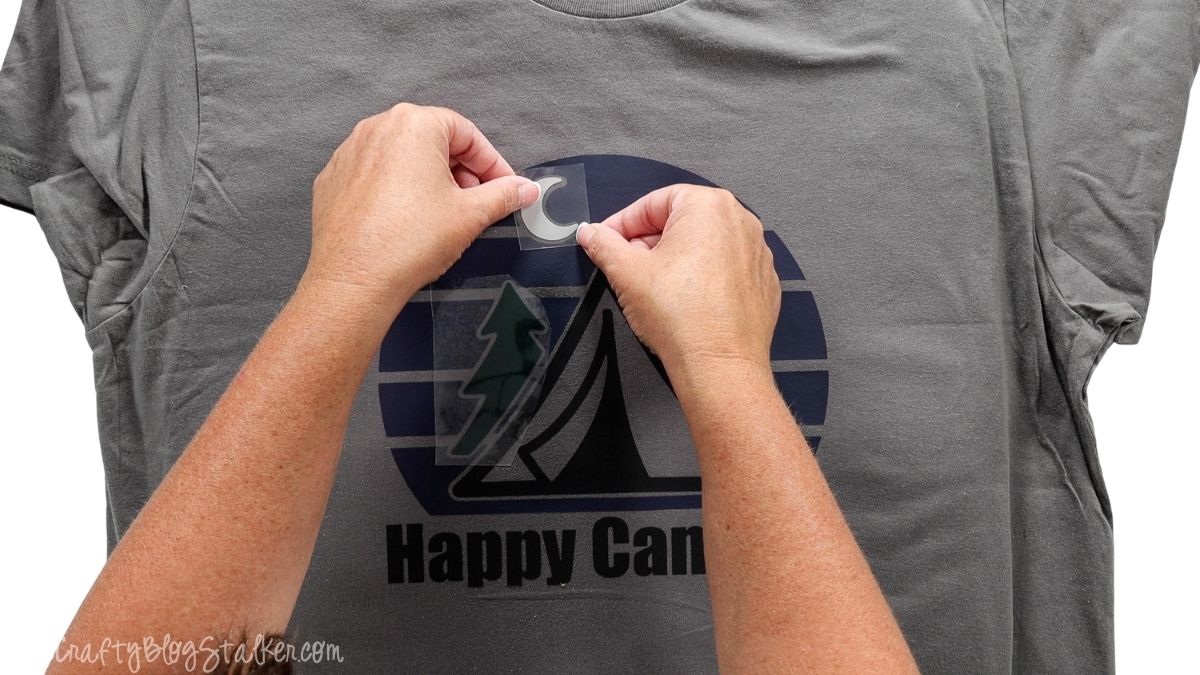
Whenever you trim a carrier sheet, make sure you're only cutting the clear backing and not the actual iron-on vinyl.
Once everything is aligned, cover the entire design with the Teflon sheet again.
Since these are our final layers, press for the full recommended 30 seconds.
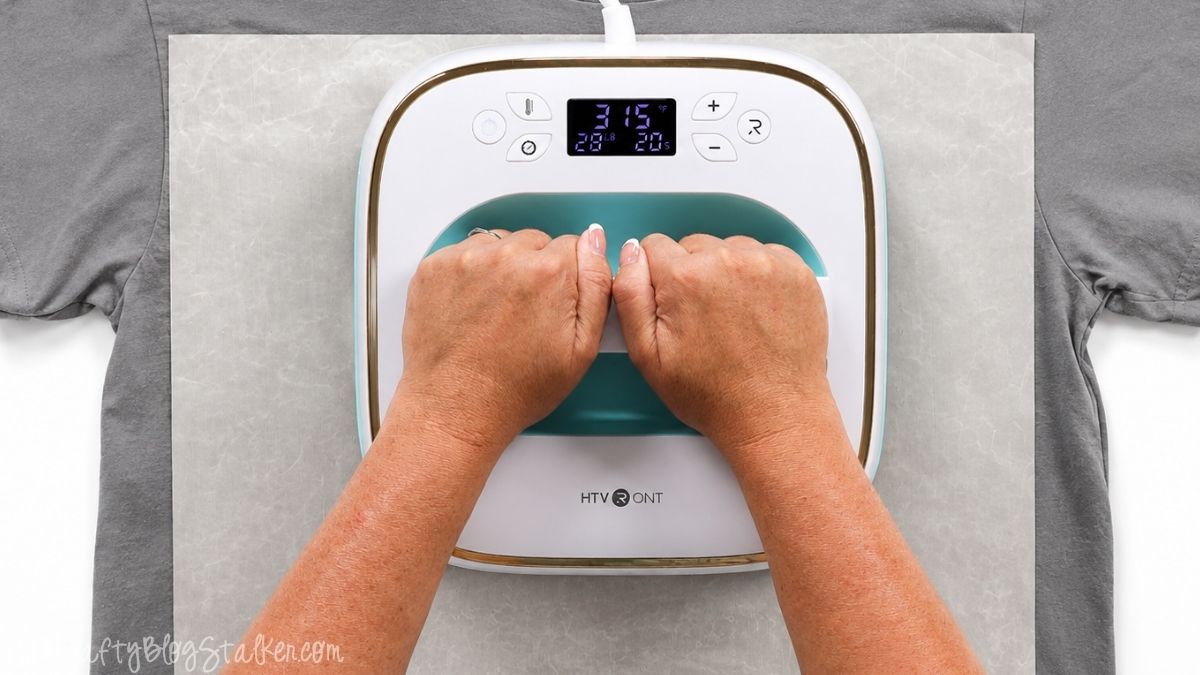
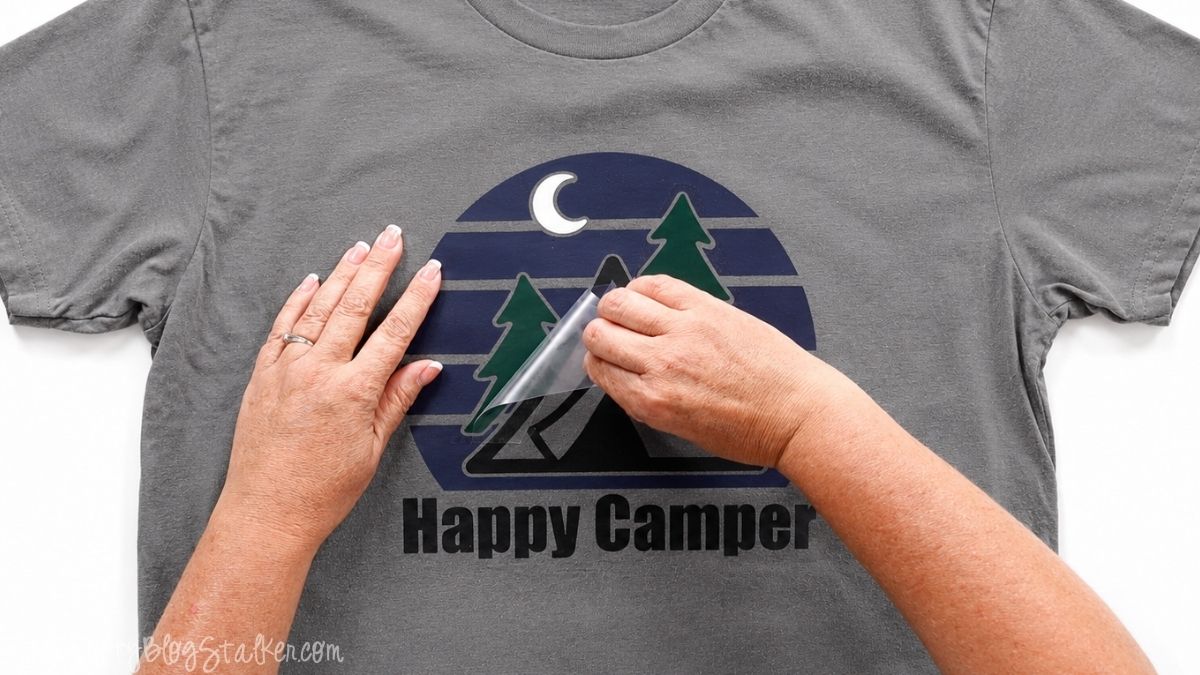
Allow the shirt to cool completely, then carefully peel away each piece of carrier sheet.
Give the Shirt a Final Press
There's one more little step I like to do to help everything bond securely.
Turn the shirt inside out or flip it over so you're pressing from the back of the fabric.
Press the back of the design for an additional 15 seconds.
This final press gives the different layers another chance to bond with the shirt without applying direct heat to the finished vinyl.
And that's it!
My Happy Camper shirt is finished. Now all that's left is to actually go camping.
Tips for Layering Heat Transfer Vinyl
Layering iron-on vinyl is pretty straightforward once you've done it a couple of times, but a few simple tricks can help prevent peeling, shifting, and overpressing.
Always follow the temperature and application instructions for your specific HTV. Not every brand behaves the same way, so the settings that work perfectly for one material may not be right for another.
Use shorter presses for the first layers. Each layer of HTV receives additional heat each time you add another color, so the bottom layer doesn't need a full press.
Protect previously applied vinyl whenever it goes back under the heat. A Teflon sheet works perfectly for this. A piece of parchment paper can also work as a protective sheet when recommended by your vinyl manufacturer.
Make sure the clear carrier sheets don't accidentally overlap exposed vinyl. If a carrier sheet ends underneath another layer of HTV, you could end up pressing vinyl onto plastic instead of fabric.
Most importantly, don't rush the alignment. Lay each top layer into place and check it from several angles before pressing. Once that heat press comes down, there's no easy undo button.
If you're nervous about your first layered project, choose a design with larger pieces and only two or three colors. Once you're comfortable with the process, designs with more layers become much easier.
Frequently Asked Questions
It depends on the design, but generally I start with the largest layer. Centering the largest layer typically centers the entire design.
Usually, no. Pressing every layer for the full recommended time can expose the bottom layers to too much heat. For this project, I pressed the first layers for 15 seconds and the final layer for the full 30 seconds recommended for my vinyl. However, you need to press long enough to remove the liner sheet.
Always check the instructions for your particular HTV before changing the recommended pressing process.
Can all types of heat transfer vinyl be layered?
No. Some specialty HTV should only be used as a top layer and shouldn't have another layer of vinyl applied over it. Always check the manufacturer's instructions before combining different types of vinyl.
Peeling can happen when the vinyl hasn't received enough heat, pressure, or pressing time. It can also happen if the fabric isn't compatible with the HTV or if the carrier sheet is removed before the material has cooled when using a cool-peel vinyl.
If you notice a section lifting while removing the carrier sheet, stop peeling and press it again.
Yes. A Cricut EasyPress works well for layered HTV projects. Make sure you're working on a firm heat-press mat and follow the recommended temperature, pressure, and timing for your specific iron-on vinyl.
You can use an iron with some types of HTV, but consistent temperature and pressure are harder to achieve. A heat press or EasyPress gives you much more control, especially when working with several layers.
Need help with this project?
Click a button below to ask AI how to tell if the HTV is properly pressed.
More Iron-On Vinyl Projects
Can you have too many bookmarks? I don't think so! Here are a few more fun ideas.



Hi, I'm Katie!
I'm so glad you're here. Want to make something fabulous? I'm here to help!