


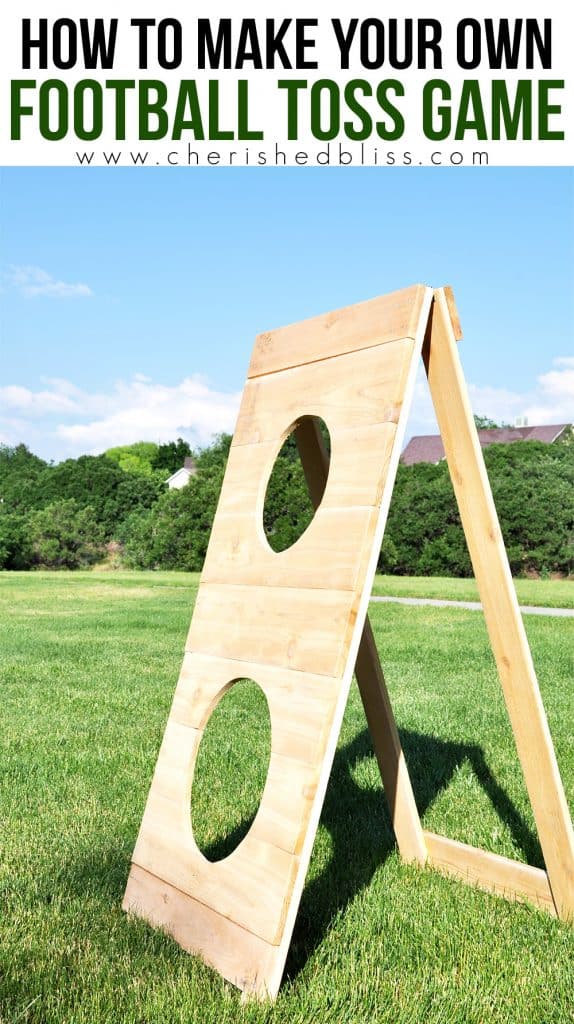
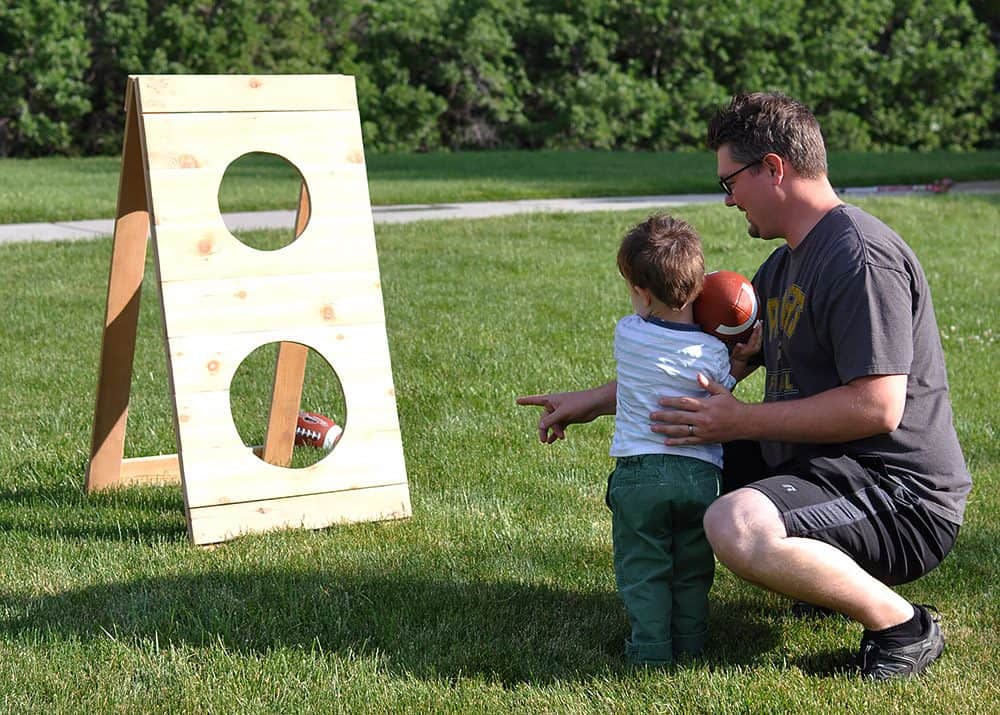
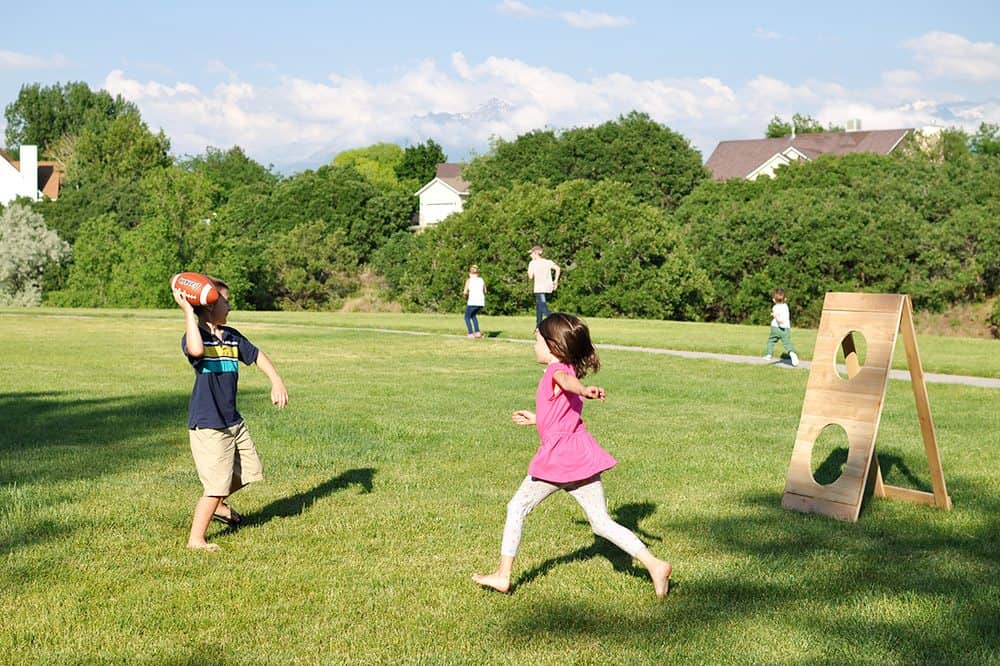
Father's Day is just around the corner, and today I've teamed up with The Home Depot to give you the perfect gift idea: A DIY Football Toss Game! This Saturday 6/18/2016 The Home Depot will be holding a DIY Workshop where you will learn the skills necessary to build this awesome Football Toss! Today I'll be sharing my version of this outdoor game and how you can build one just like ours!
Here's a little info on the workshops available at The Home Depot:
Disclosure: This is a sponsored post written by me on behalf of The Home Depot. All opinions are my own!
- The Home Depot offers Workshops at all of their locations for do-it-yourselfers of all ages and experience levels, so don't ever feel like you can't join in! They are there to teach you!
- There are three types of Workshops offered - Do-It-Yourself (DIY), Do-It-Herself (DIH) and Kids.
- Customers can learn how to build décor projects, how to make easy home repairs and how to operate tools through demonstrations and step-by-step instructions. A great opportunity to learn a new skill set!
Let's Do This!
Supplies:
- (3) ⅝" x 5 ½" x 6' Cedar Flat-Top Fence Picket
- (4) ⅝" x 3 ½" x 6' Cedar Flat-Top Fence Picket
- 1" Wood Screws
- 1 Pack Narrow Utility Hinges
- String
- 2 Small nails
- 1" Kreg Jig Screws
- 1" Finish Nails
Tools:
- Miter Saw
- Drill
- Drill Bits
- Nail Gun
- Jig Saw
- Measuring Tape
- Pencil
- Sander
- Sandpaper
- Kreg Jig or Foreman
Cut List:
- (4) 3 ½" Cedar Boards @ 4'
- (4 3 ½" Cedar Boards @ 2'
- (7) 5 ½" Cedar Boards @ 2'
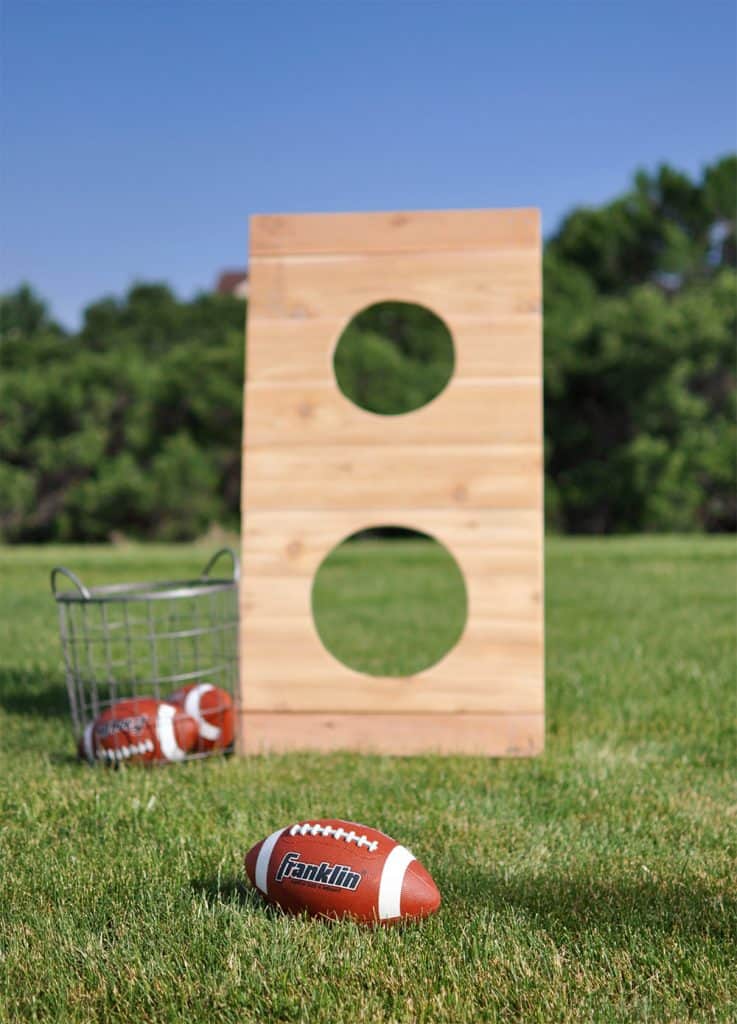
DIY Football Toss Game Tutorial
I decided to use cedar fence boards rather than traditional pine boards so that it will be able to withstand the elements without any additional painting or staining, plus cedar is a gorgeous wood by itself!
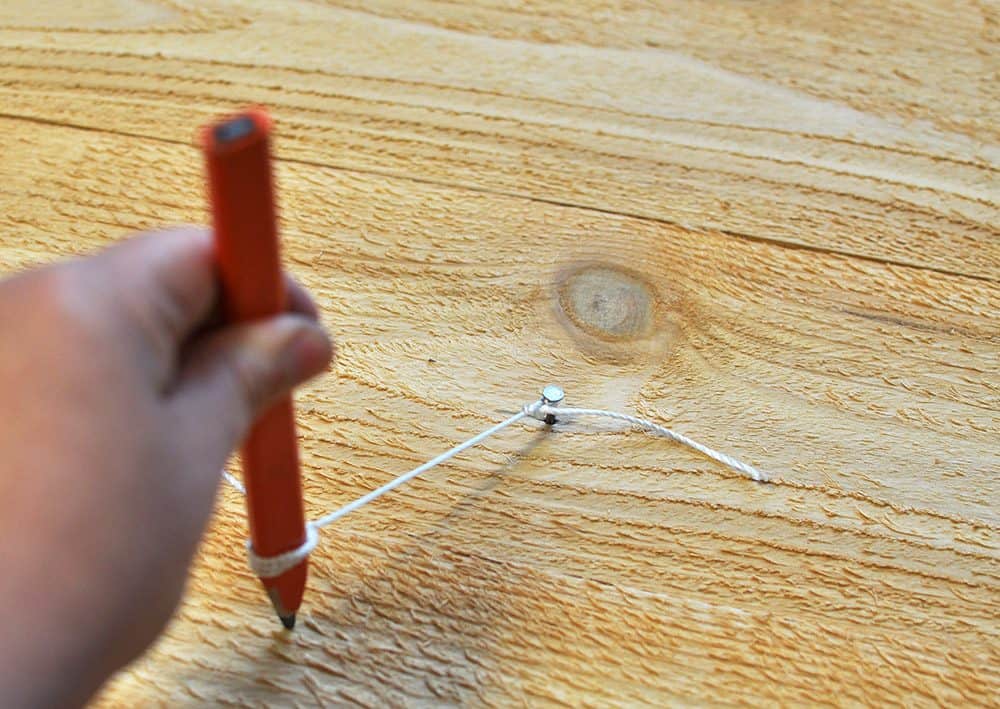
1. Lay out the 5 ½" boards and prepare to mark your circles. Find the center of the board and measure down 9" from the top board. Hammer one nail into this point to act as your pivot point. Tie a string around this nail, and the pencil. The distance between the nail and the pencil should be 4" which will create an 8" circle. Draw a circle around the pivot point.
Repeat this process by measuring 9" up from the bottom board, except this time the distance between the nail and the pencil should be 6" which will create a 12" circle.
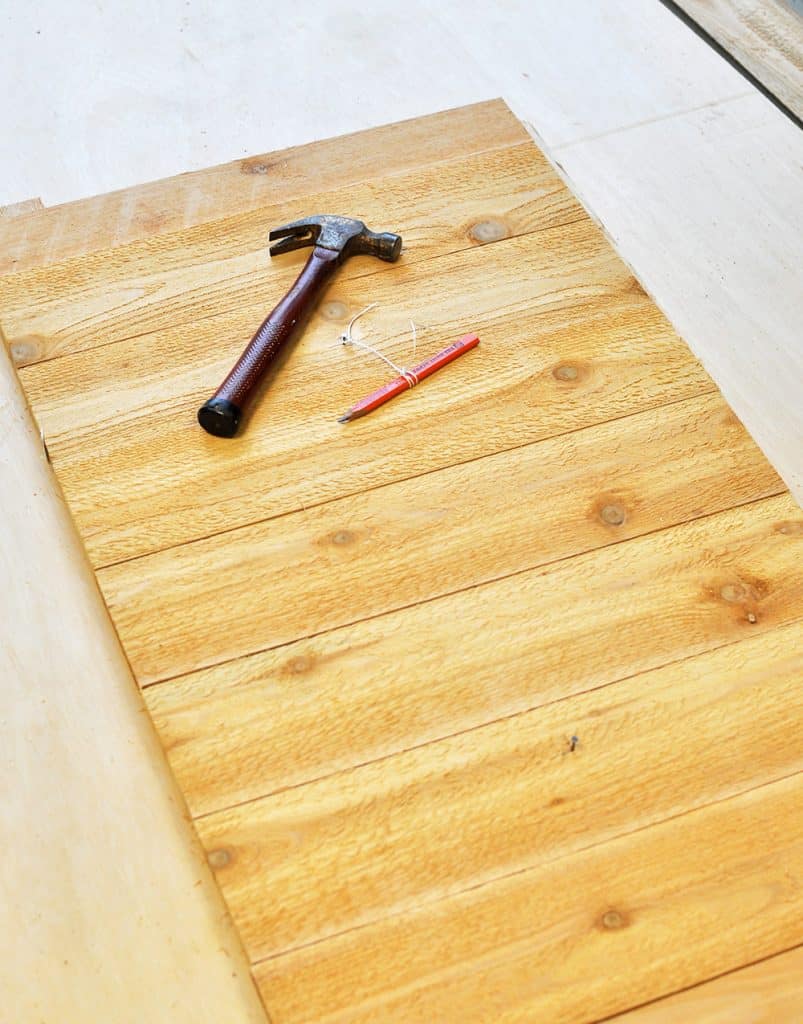
Once you have both circles traced it's time to drill pocket holes into your boards, making sure to stay outside the circles.
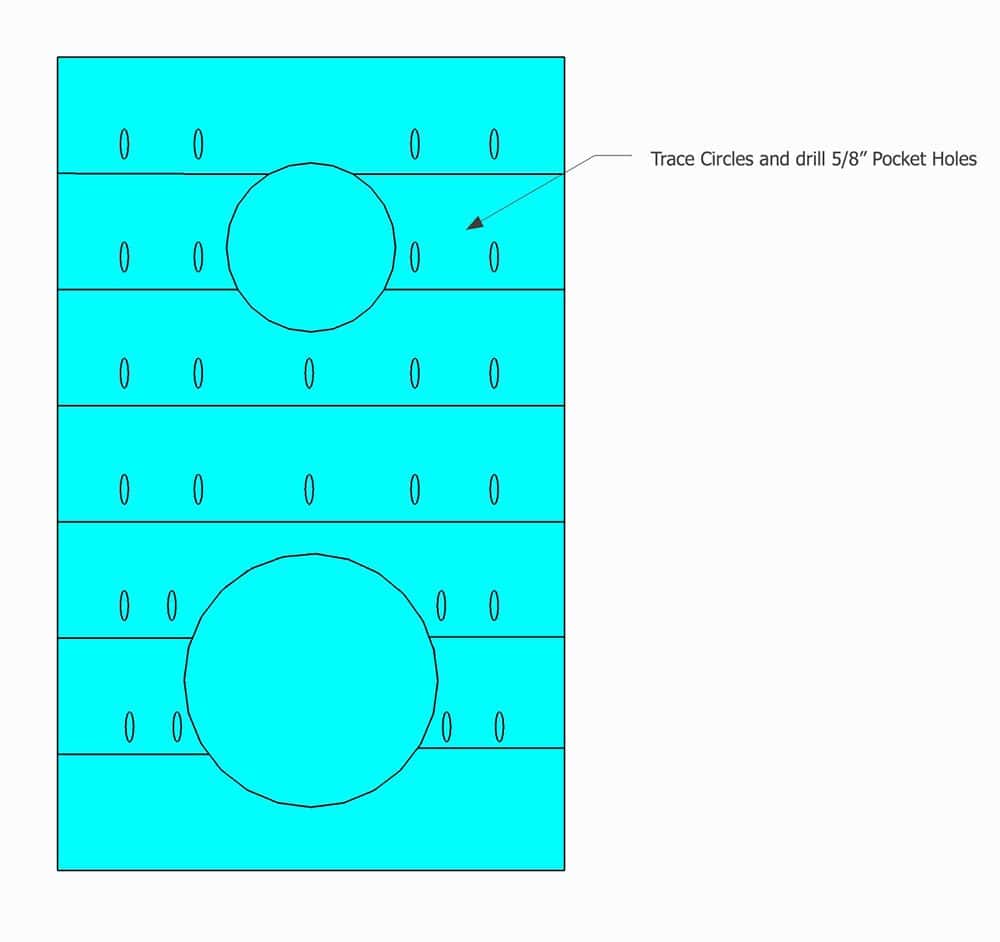
Attach the boards using 1" Pocket Hole Screws and wood glue. Let the glue dry.
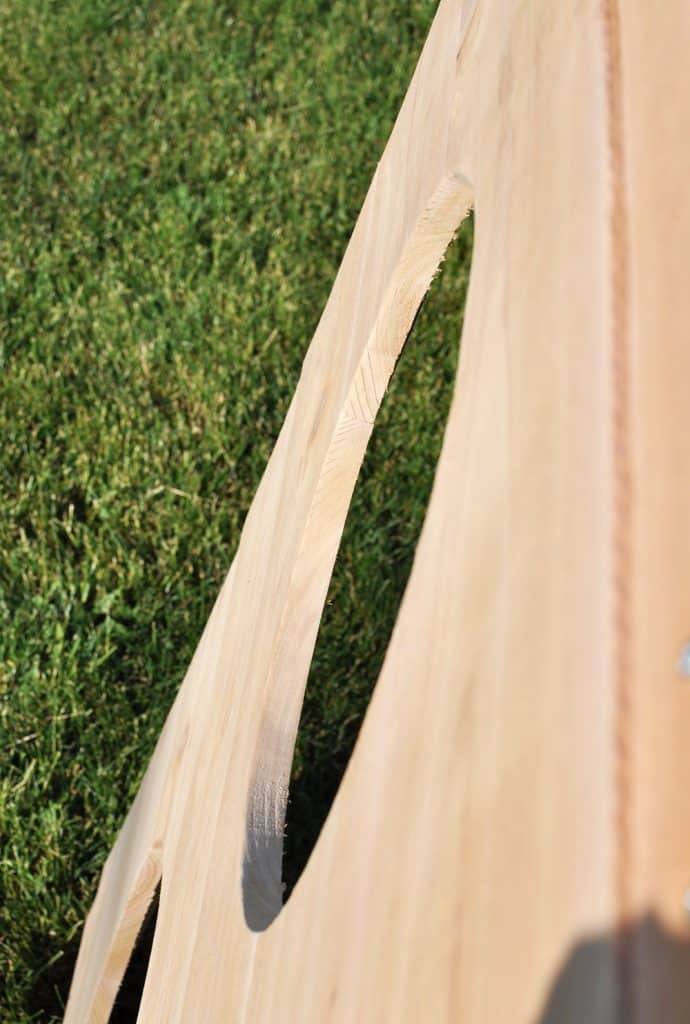
2. Now it's time to cut out the holes. Place your newly created board onto a well supported surface with nothing below the circles (to allow for the jig saw blade). Using a drill and drill bit, drill a hole on the inside edge of the circle that is big enough for a jig saw blade to go through. Using a jig saw, cut out the circles.

3. Build 2 frames using the 3 ½" cedar boards as follows.

4. Add the front panel we created using the 5 ½" boards and cut out holes in between the 3 ½" boards and attach with wood glue and 1" finish nails using the Ryobi Brad Nailer.

5. Now lay both the front frame and the rear frame face down with the tops of each touching and install the narrow utility hinges.


6. Now it's time to sand this down. Cedar fence boards are pretty rough, so starting with a low grit sandpaper, begin sanding your football toss slowly increasing the grit until you are working with a very fine piece of sandpaper.
7. Enjoy!

Not only do you get to see how I built this Football Toss, you can also check out some of my blogging friends versions too! Take a look through the links below!
Confessions of a Serial Do It Yourself Blog
Michael
This looks pretty doable and I think it would be fun for nerf guns and other balls as well. About how long did it take to make would you say? A solid day?