This post may contain affiliate links. For more information, please see our disclosure policy.
Master the art of layering vinyl for stunning sticker decals. Learn how with our step-by-step tutorial! If you make a purchase using any affiliate links below, we may earn a commission.
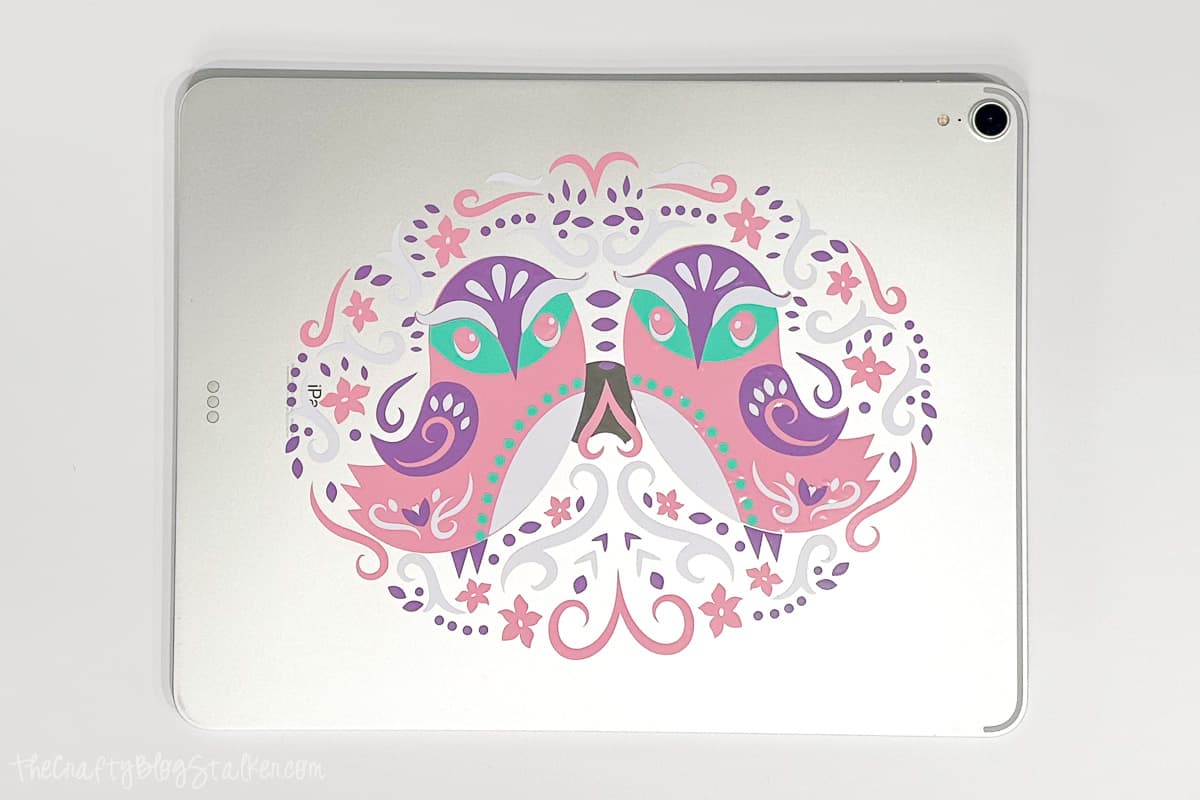
Have you ever had trouble layering a vinyl design?
Perhaps you've experienced frustration with messy and uneven results.
Fear not - with the right tools and techniques, perfect layering is achievable.
In this post, I'll share the easiest way to create stunning and professional-looking vinyl decals.
From understanding the types of vinyl to cutting and layering, we'll guide you step-by-step through the process.
So let's dive in and discover the art of perfectly layered vinyl sticker decals with Cricut for iPad.
Understanding the Different Types of Vinyl and Transfer Tape
Before we dive into the steps for creating perfectly layered vinyl sticker decals, it's important to understand the different types of vinyl. This knowledge will not only help you choose the right materials for your projects, but it will also ensure that your designs come out looking flawless.
There are two main types of vinyl used for crafting.
Adhesive craft vinyl is what you'll use for creating stickers and decals that you can stick onto surfaces like walls, cups, and laptops.
Heat transfer vinyl, also known as iron-on vinyl, is best for designs that need to be applied to fabric, such as t-shirts and tote bags. This type of vinyl doesn't stick unless heat has been applied with a heat press or other heat source.
Within those two main categories, there are also different finishes of vinyl to consider. Glossy vinyl has a shiny, reflective finish, while matte vinyl has a more subdued, non-reflective finish. There are also specialty finishes like holographic, glitter, and metallic.
In most instances, permanent adhesive vinyl is glossy, and removable vinyl is matte. Although this isn't always the case, so make sure to pay attention to the product packaging.
Understanding the different types of vinyl will help you choose the right materials for your project. It's important to note that not all vinyl brands are created equal, so it's worth experimenting with different options to find what works best for you.
Supply List:
- Layered Bird Design in CDS
- Cricut Cutting Machine
- Permanent Vinyl
- White
- Pink
- Purple
- Turquoise
- StandardGrip Cutting Mat
- Weeding Tool
- Transfer Tape
- Scraper Tool
- Parchment Paper
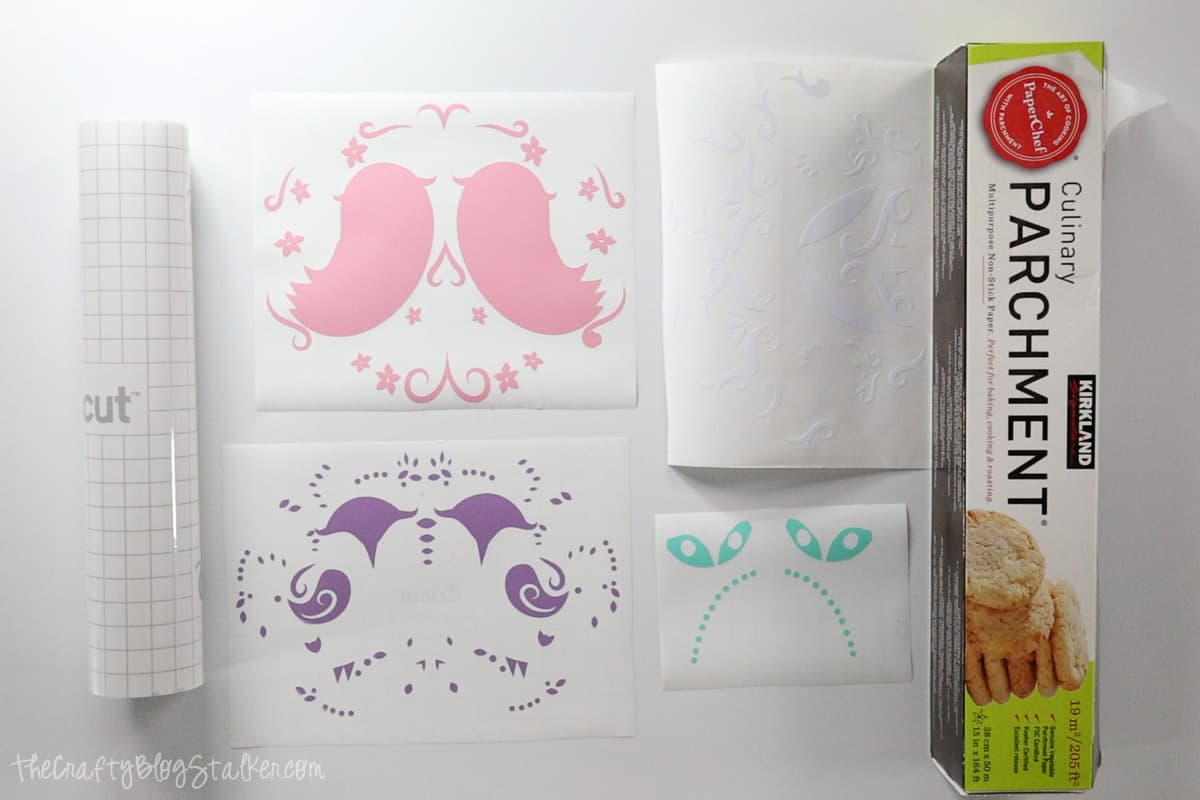
I used a Cricut Maker 3 to cut the layers of this design, but you can also use any Cricut Explore Air. The Cricut Joy will also work as long as you don't need your design to be wider than 6 inches.
Craft Video Tutorial:
Like videos? I have a video tutorial for you! Subscribe to my YouTube Channel so you don't miss any future videos!
Preparing Your Design in Cricut Design Space
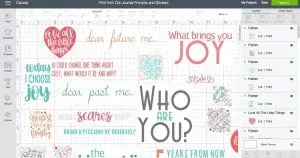
To ensure the perfect layering of vinyl sticker decals with your Cricut, it's important to prepare your design in Cricut Design Space. This software allows you to create, upload, and manipulate designs that can be cut with precision by your Cricut machine.
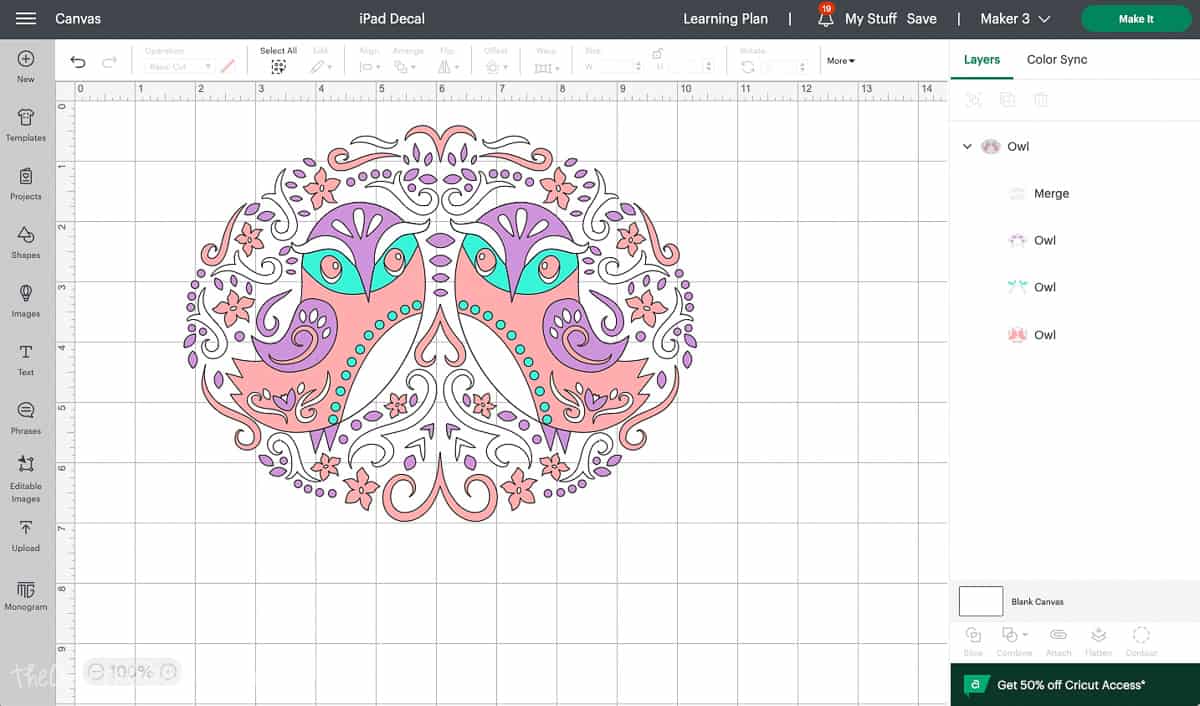
When resizing the design, make sure all layers are selected, and size the design as needed. If not all layers are selected then the layers won't perfectly fit together.
Cutting and Weeding Your Vinyl Layers
It is time to start cutting and weeding your vinyl layers. This can be a tedious process, but it's crucial to ensure that each layer of your design appears precisely as you intended.
Lay a piece of vinyl onto the StandardGrip cutting mat. Following the prompts in Cricut Design Space, load the vinyl into your Cricut machine and click "Go" to start the cutting process.
Once your vinyl has been cut, it's time to weed out the excess vinyl. Take your time and use a weeding tool to carefully remove the negative space around your design. Be gentle and precise to avoid damaging any of those intricate vinyl pieces.
Layering Your Vinyl Decal with Ease
The next step requires patience and focus, but the end result will be a beautifully layered decal.
Start by cutting a piece of transfer tape that is a bit larger than your design, and cut a piece of parchment paper the same size.
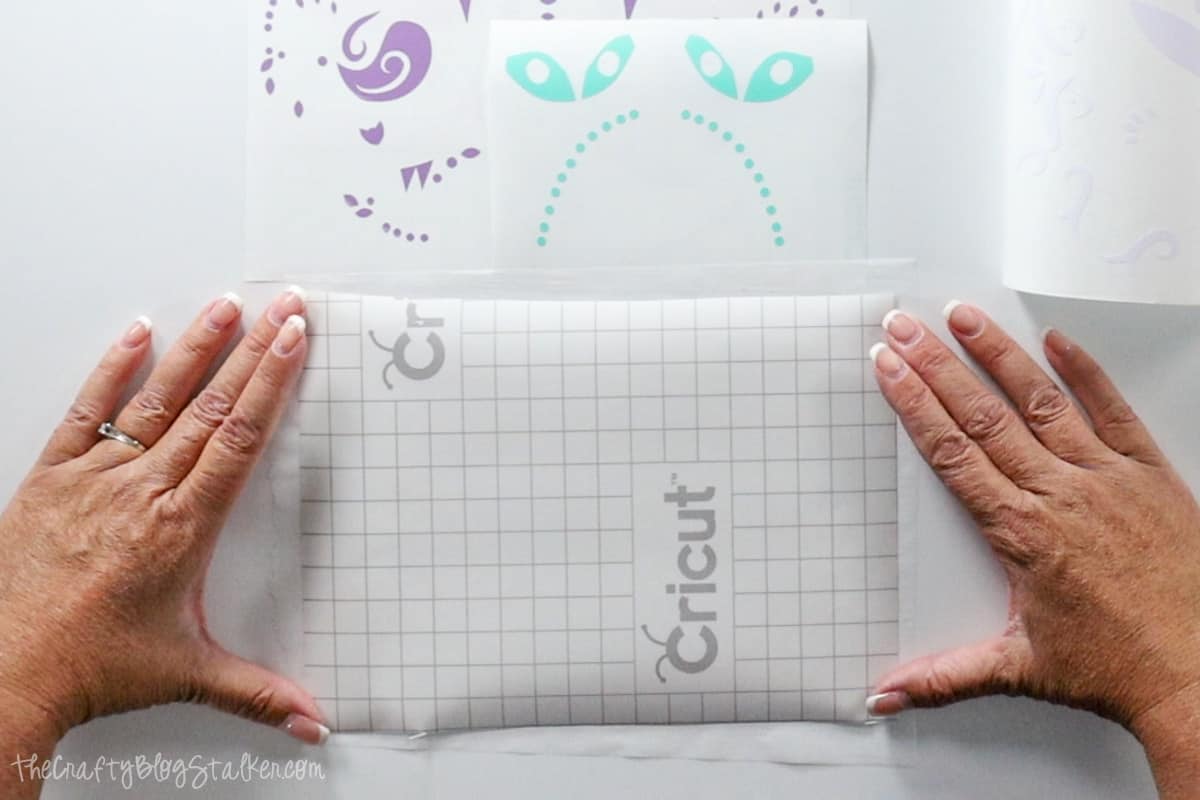
The parchment paper is going to act as our barrier sheet and keep the layers of vinyl from sticking before we are ready for it too.
With this layering technique, we are going to start with the top layer and move down, so you'll need to know which is layer 1, layer 2, and so on.
Layer 1:
Peel back the backing paper to the transfer tape, and roll the transfer tape onto the top layer of the design.
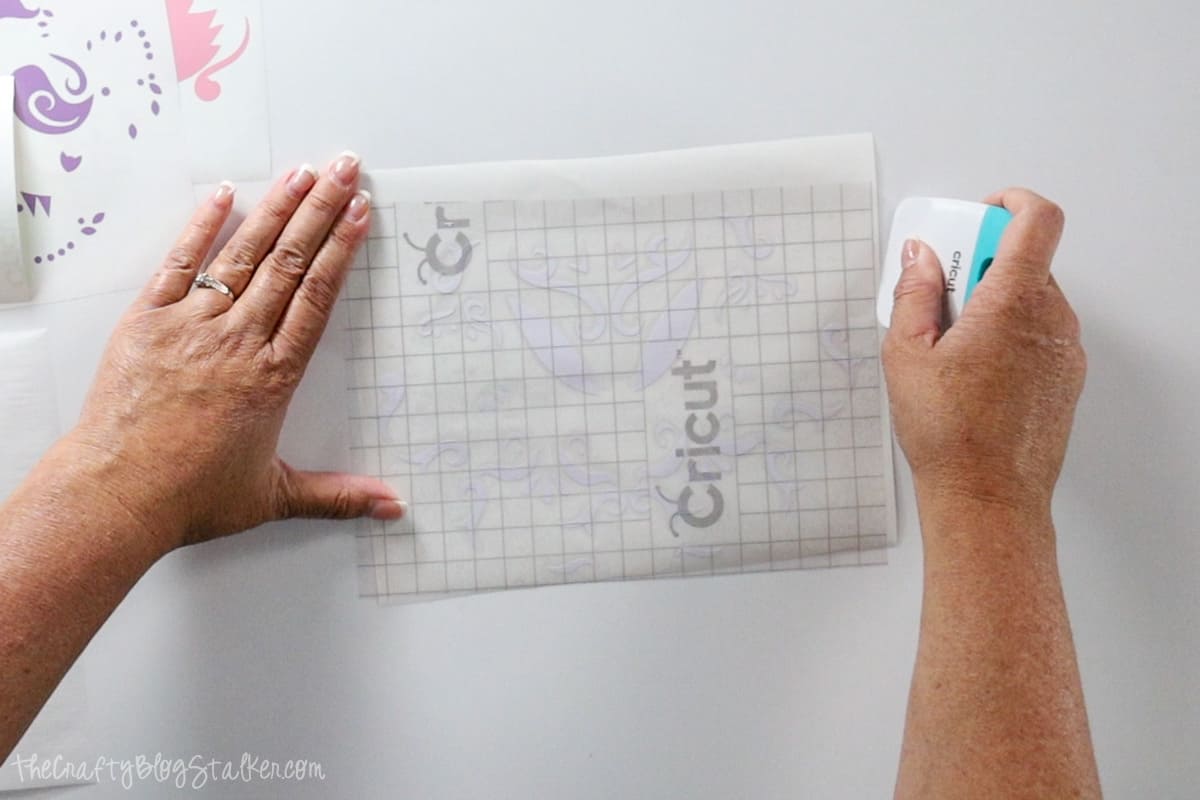
Scrape over the top of the transfer tape with the scraping tool, then turn the decal over and press along the back side.
Remove the vinyl paper backing from the first layer.
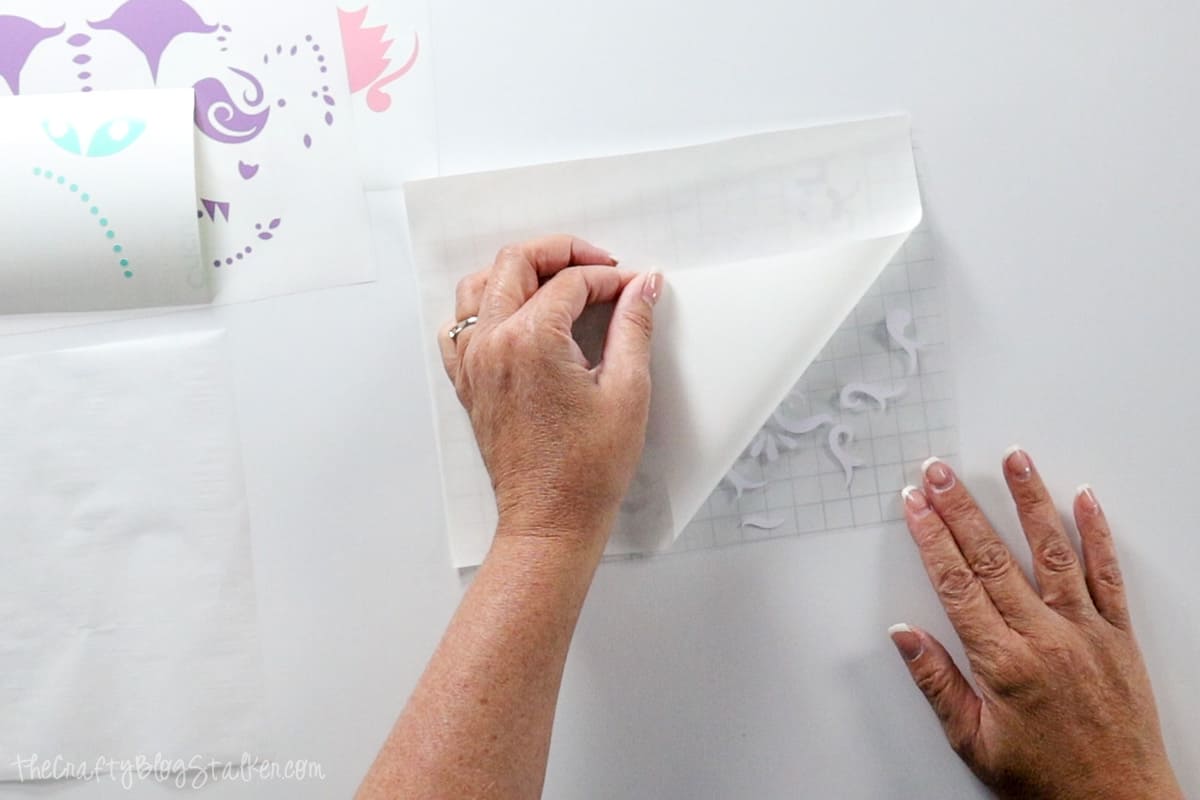
Layer 2:
Cover the sticky side of the decal with the piece of parchment paper, and place on top of layer 2.
The parchment paper lets you move the design around so you can find that perfect placement.
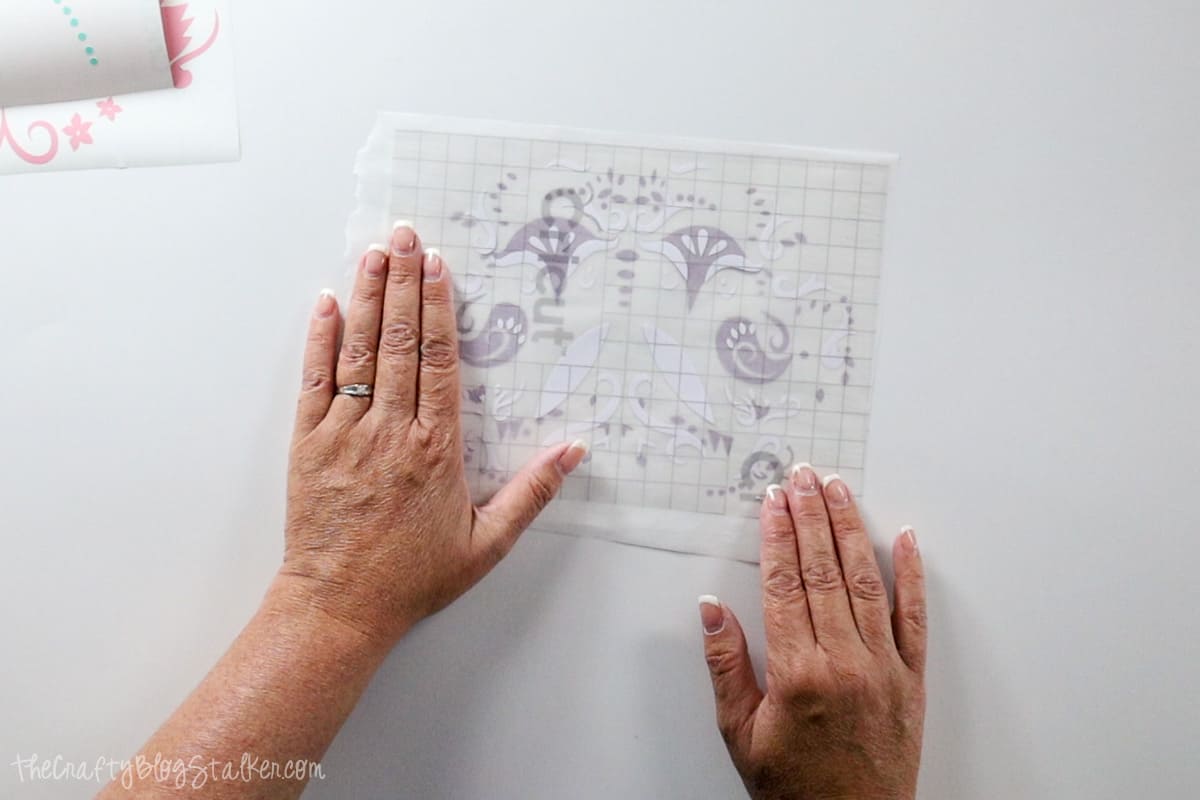
Turn the decal face down so the parchment paper is on top.
Lift up the parchment paper and move it down the decal so just a small portion of the top is not covered.
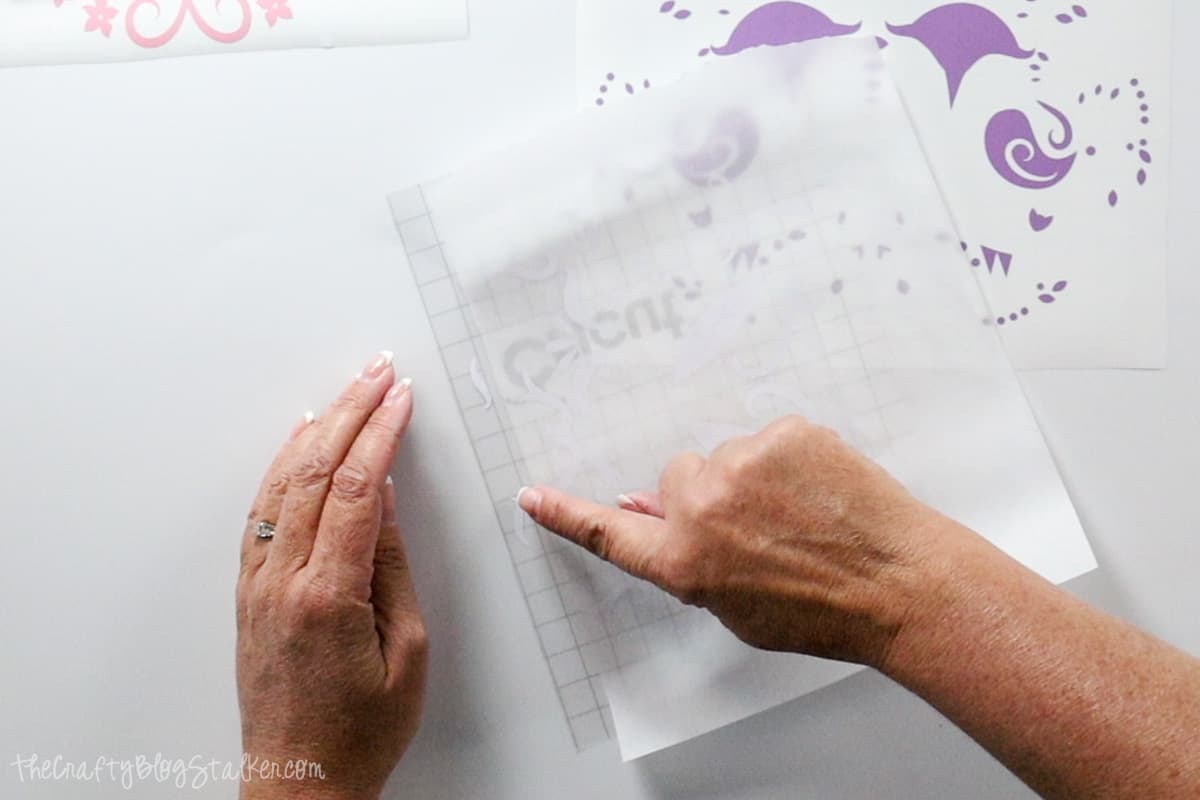
Turn the stack over so the parchment barrier is on the bottom, and again, place the decal on top of layer 2 and align the layers.
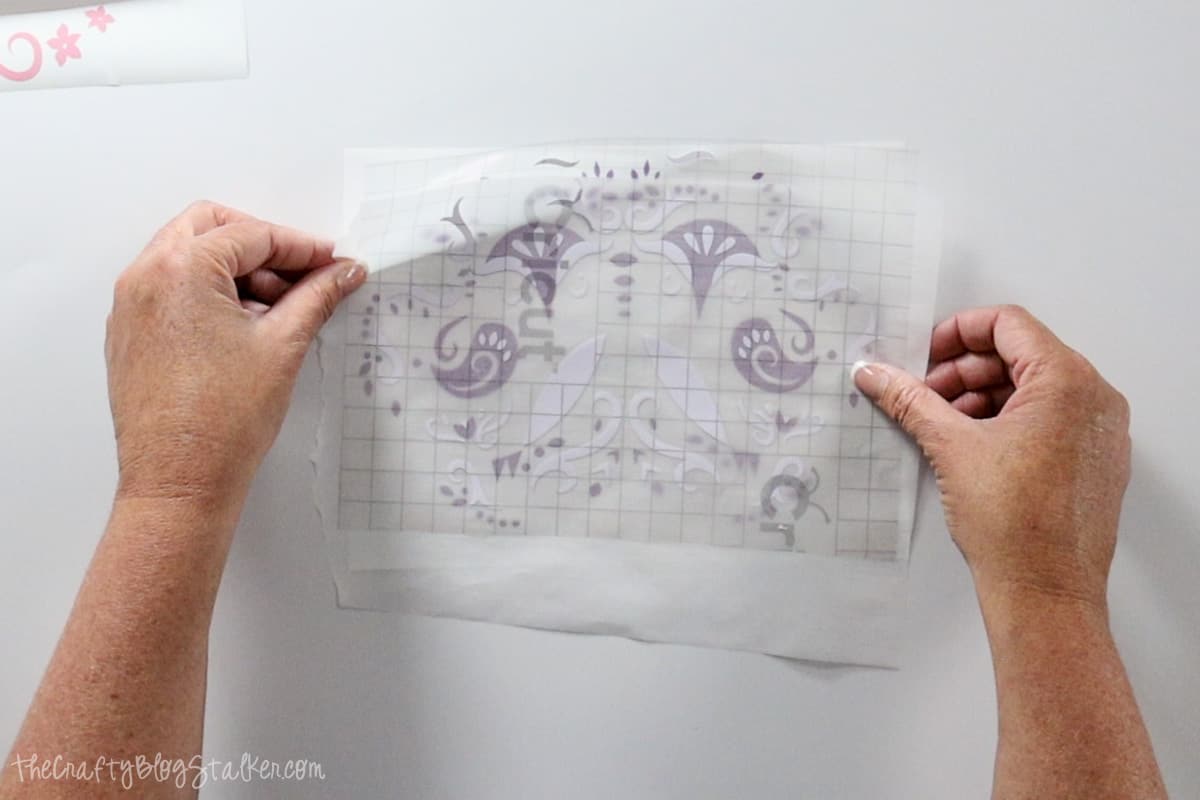
Once in place, press down along the exposed area, and adhere layer 1 to layer 2.
Lift up layer one, remove the parchment paper, and roll the decal onto the second layer.
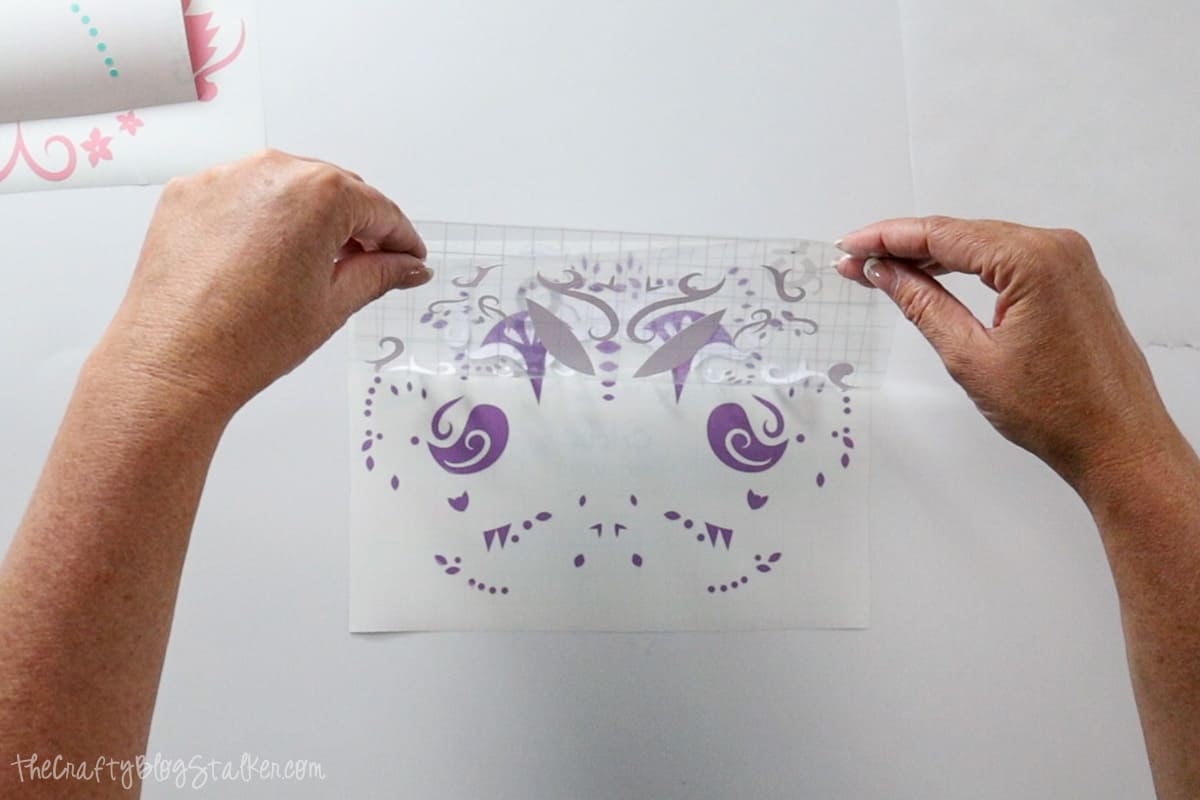
Remove the vinyl paper backing.
Layer 3:
Repeat the process for layer 3.
Place the parchment paper on the back of the decal leaving a top portion exposed.
Place the decal on top of layer 3 and find the perfect placement.
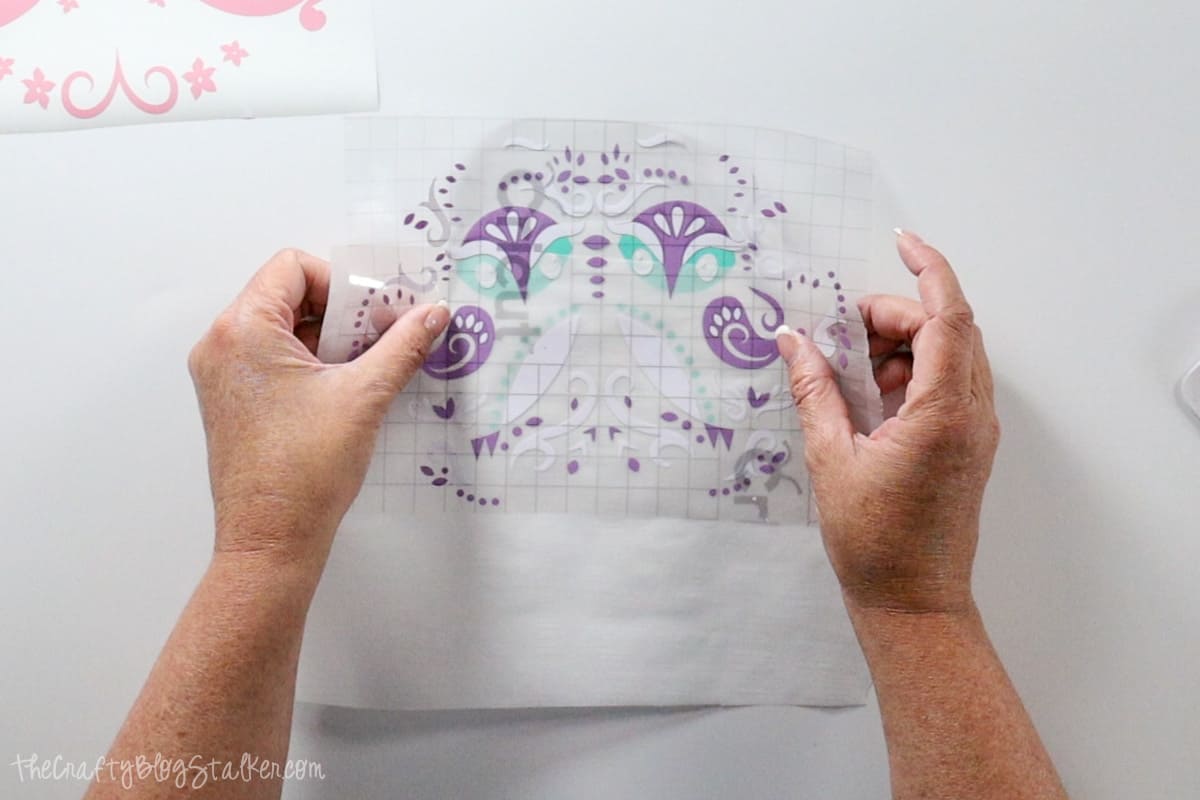
Once in place, press down along the exposed area, and adhere the decal to layer 3.
Lift up the decal, remove the parchment paper, and roll the decal onto layer 3.
Remove the vinyl paper backing.
Layer 4:
Place the parchment paper on the back of the decal leaving a top portion exposed.
Place the decal on top of layer 3 and find the perfect placement.
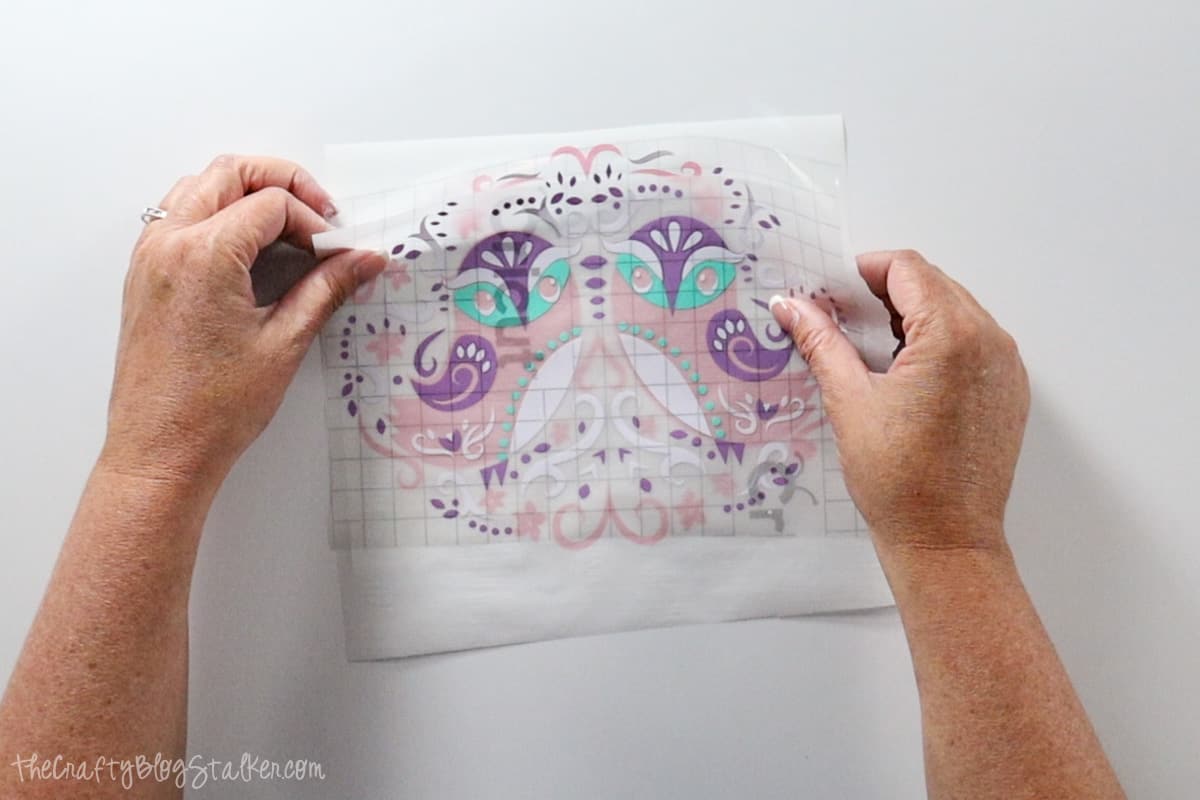
Once in place, press down along the exposed area, and adhere the decal to layer 4.
Lift up the decal, remove the parchment paper, and roll the decal onto the bottom layer.
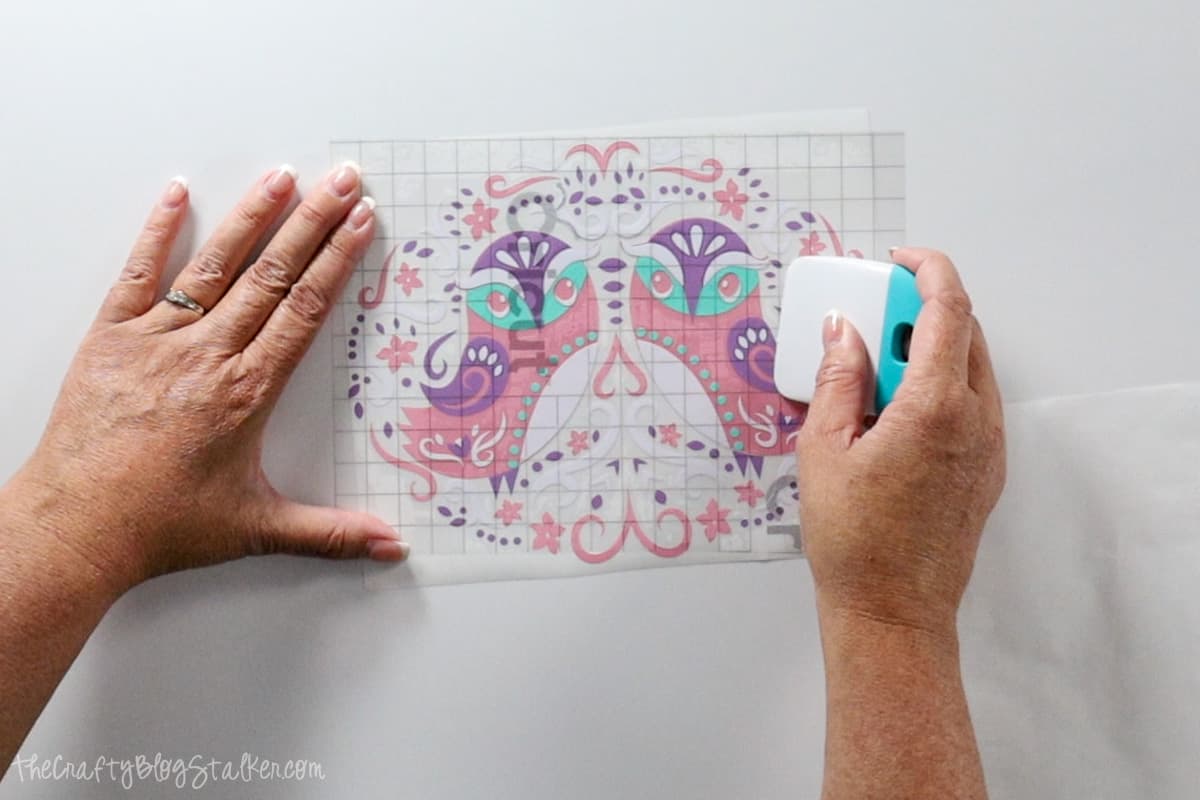
Remove the vinyl paper backing, and the entire design will be layered together
You can keep repeating the steps for the number of colors and or layers your design has. My layered vinyl decal only had 4 layers.
Applying Your Vinyl Decal
Once all of the different layers are securely adhered, carefully place your decal onto your desired surface.
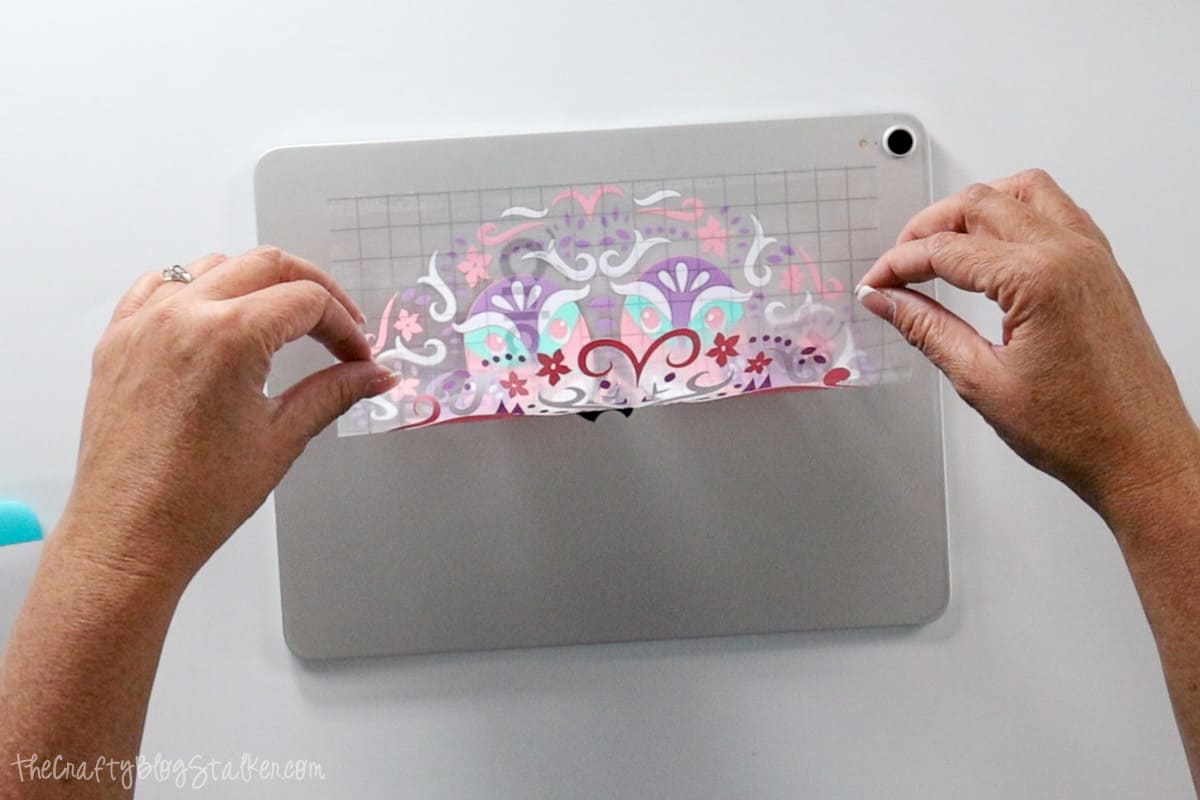
Carefully use a scraper tool to smooth out any air bubbles or wrinkles, and peel back the transfer tape.
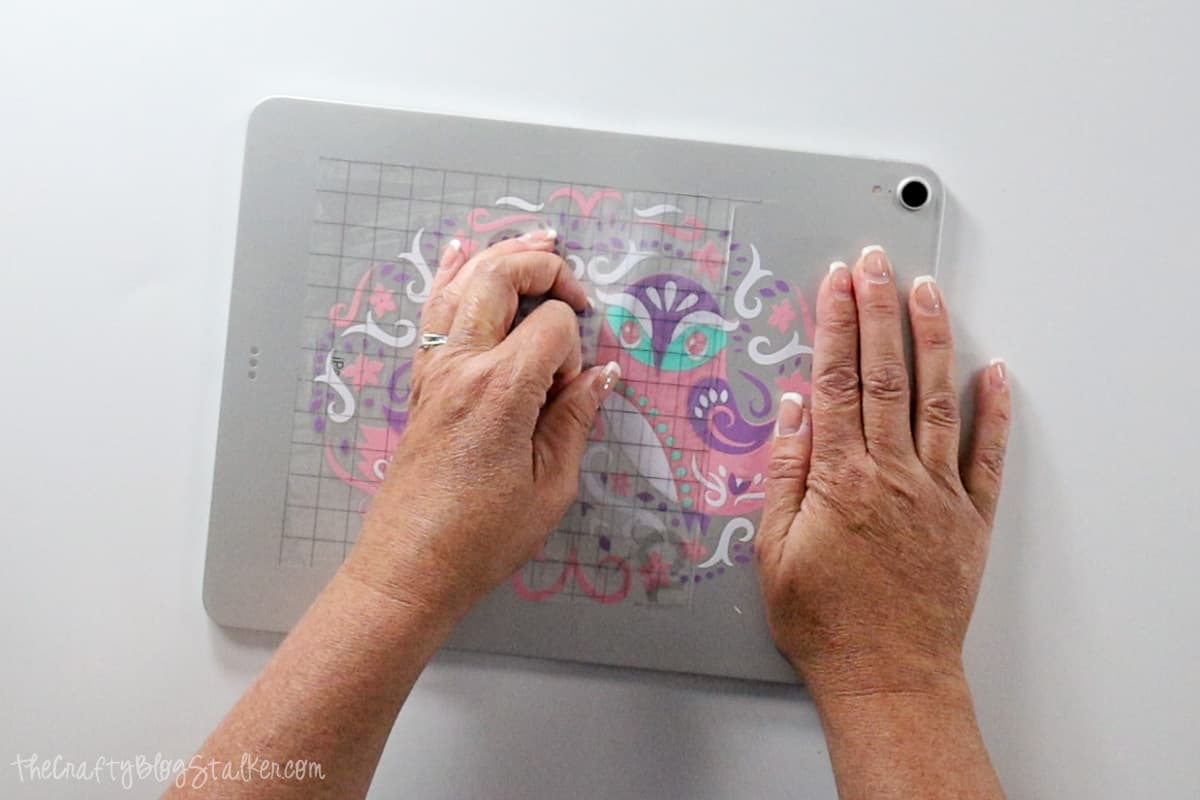
I love this vinyl decal design, and the finished product looks so great on my iPad! Aren't all of those colors of vinyl so pretty together?

Creating perfectly layered vinyl sticker decals with your Cricut is no longer a daunting task.
With a solid understanding of the different types of vinyl, preparation, and cutting, and careful layering techniques you can easily create professional-looking decals that will impress everyone.
So go ahead, experiment with different colors and designs, and have fun with the process. Don't let fear hold you back from unleashing your inner artist and creating something beautiful.
Our Crafting Essentials:
- The Cricut Cutting Machine is easily our favorite crafting tool. We use it in so many of our tutorials!
- These MakerX Crafting Tools are perfect for keeping in the craft room and are always ready when needed!
- This Fiskars Paper Trimmer is easy to use and cuts nicely without frayed edges.
- These Scotch Precision Scissors cut like a dream, and you get multiple pairs in a pack!



diana
That's very cute! Thanks for sharing.
Thrifty Crafty Girl
I love that! Isn't the Silhouette THE BEST THING EVER? That owl is too cute!
I'm follower number 350!
Lori Whitlock
Very cute, Katie! That's a really fun idea! I may have to do this, too... once I get an ipad : )
Lindsey Cazac
Hi! I'm your newest follower and co-host of this month's blog hop. Thanks so much for joining in on the fun 🙂 I'm looking forward to getting you know you better!
What a cute idea!
Laura @ cookiecrumbsandsawdust.blogspot
That's a fun idea. And owls are so in right now.
I'm visiting from Our Delightful Home linky party. I hope that you can stop by my blog as well. 🙂
Thanks for sharing,
Laura
SWEET YARNS
What a cutie... Love Owls. They are such an intriguing specie.
Mandy @ Sugar Bee Crafts
Thanks for linking to Take-A-Look Tuesday - you were featured today!!
--Mandy
and also, super fun to meet you at SNAP
Lisa @ Flour Me With Love
I love this, it is too cute! Thanks so much for sharing at Mix it up Monday 🙂
DebbieDoesCreations
This is just one more reason why I need a Cameo. Thanks so much for sharing at Toot Your Horn Tuesday 🙂
Rachel
Too cute! Thanks for sharing at Terrific Tuesdays.
Rachel
adventuresofadiymom.blogspot.com
Michelles Tasty Creations
This is so cute! I wish I had a Silhouette. I love the Owl.
Michelle
Terry
What an adorable solution to your problem. I love owls too. Thanks for sharing at our party this week.
Melanie @ bear rabbit bear
How cute!! Thanks for linking to Things I've Done Thursday!
Summer @ Summer Scraps
Adorable! I was pretty jealous of you and your Ipad and Snap Conference - I really need to get me one and decorate it all cute like you have.
Jenny @ The NY Melrose Family
I love the decal. Both purple and owls are favorites of mine. We just got an iPad. Do you blog on it? I had to get a keyboard because it was driving me crazy. Also, how do you edit your photoes with it? Sorry. Very new to this technology. Thanks so much for sharing at Whimsy Wednesdays.
Katie Adams
I am so glad that you like the decal. It was a lot of fun to make and I really like how it turned out. I love my iPad and I will write draft blog posts (I have the keyboard as well) but I don't add the pictures to my posts from iPad. I will finish my posts on my pc and add the pictures there. I wish I had an awesome answer to your question, but I keep all my pictures on my pc so it is easier for me to do that there.
Webby Wonder
I love this idea!!
Very nice outcome, like a pro!
Martina
http://www.webbywonder.com
Maria Elena
What a beautiful idea! I have a new weekly link party which is live now and I would love if you stop by and link up this wonderful post! Hope to see you there! Hugs, Maria
Marie bloominghomestead
That is so cute! I love how it turned out. Such a fun idea. Thanks for sharing!
Mary Beth
This is darling!
Christine
OOOOO thanks for the tip!!!
Katie Adams
You are so welcome!!!