This post may contain affiliate links. For more information, please see our disclosure policy.
Save money with this Show Me the Money piggy bank tutorial! Use our free SVG file to make your own. Perfect for a fun and functional craft project.

Saving money has never been more fun with our Show Me the Money Piggy Bank Tutorial!
In this easy and enjoyable DIY project, you'll learn how to create a charming piggy bank using a free Show Me the Money SVG file.
Perfect for all ages, this step-by-step guide will help you craft a unique and functional coin bank that adds a touch of personality to your savings.
Let's get started and turn your savings into a creative adventure!
Jump to:
AD: Shop Cricut.com
Craft Video Tutorial:
Like videos? I have a video tutorial for you! Subscribe to my YouTube Channel so you don't miss any future videos!
Supply List:
Some supplies were provided at no cost. Links may lead to similar products if the exact ones are unavailable.
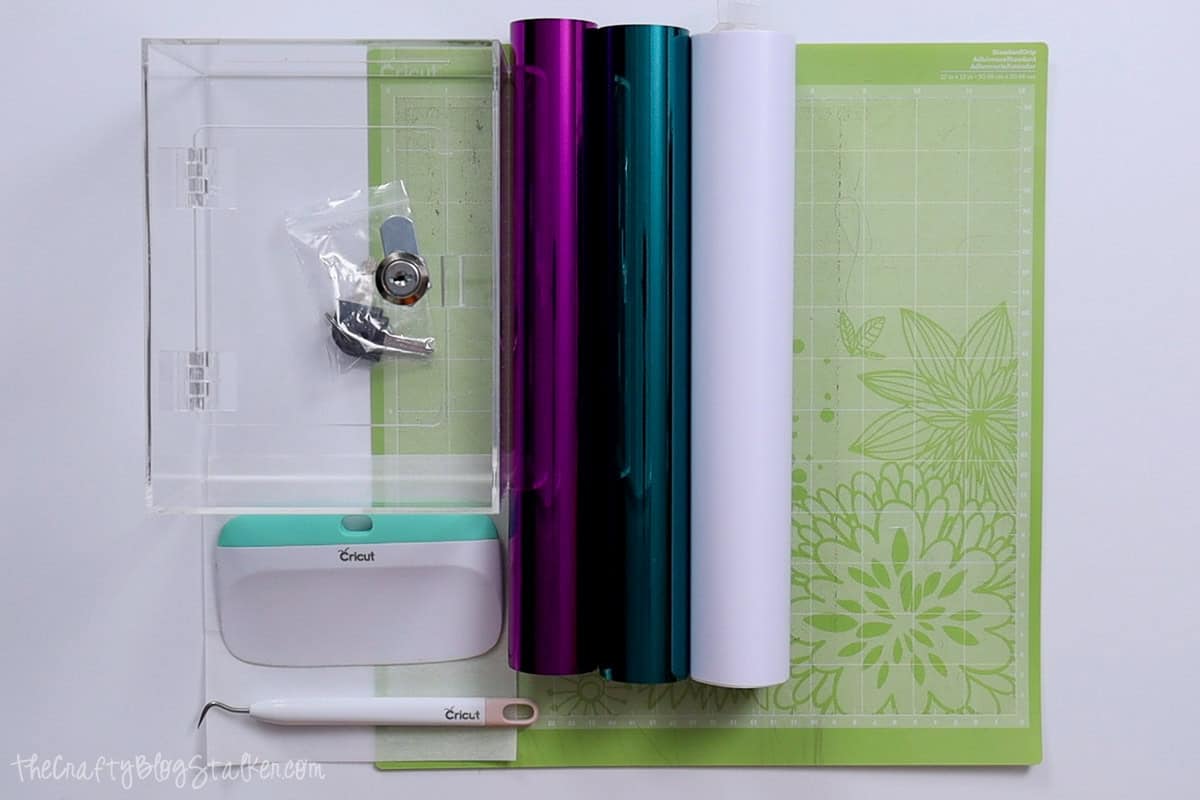
- Acrylic Coin Bank
- Show Me The Money SVG
- Cricut Cutting Machine
- 3 Vinyl Colors
- Weeding Tool
- Scraper Tool
- Transfer Tape
- Parchment Paper
- BrightPad (optional)
Grab the Free SVG:
This digital media is for Personal Use Only - You cannot redistribute.

Cricut Design Space:
For the following steps, I'll be using Cricut Design Space.
If you use Silhouette Studio or a different design software, your steps may be different than mine.
To start, upload the SVG into Cricut Design Space and add it to your Canvas.
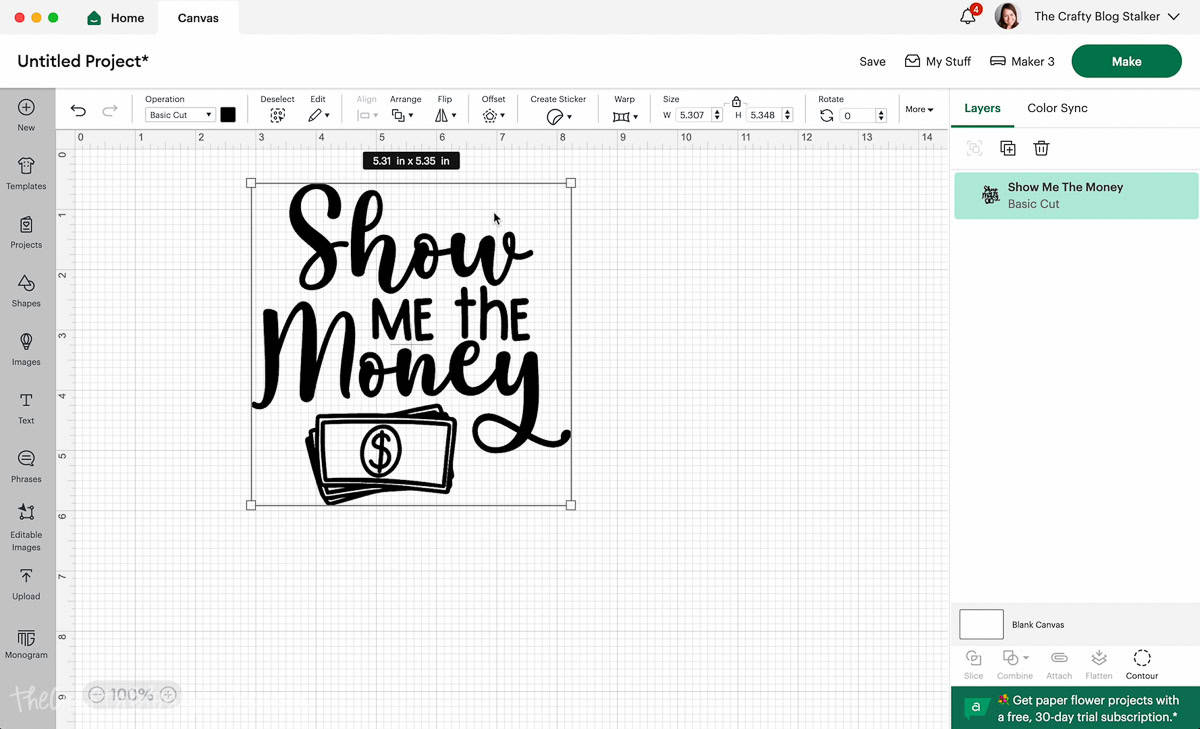
The design is ready to cut as is, but let's change it so there are three different layers.
First, I am going to add an offset. Highlight the design, click on Offset, and adjust the slider. I went with .167 inches.
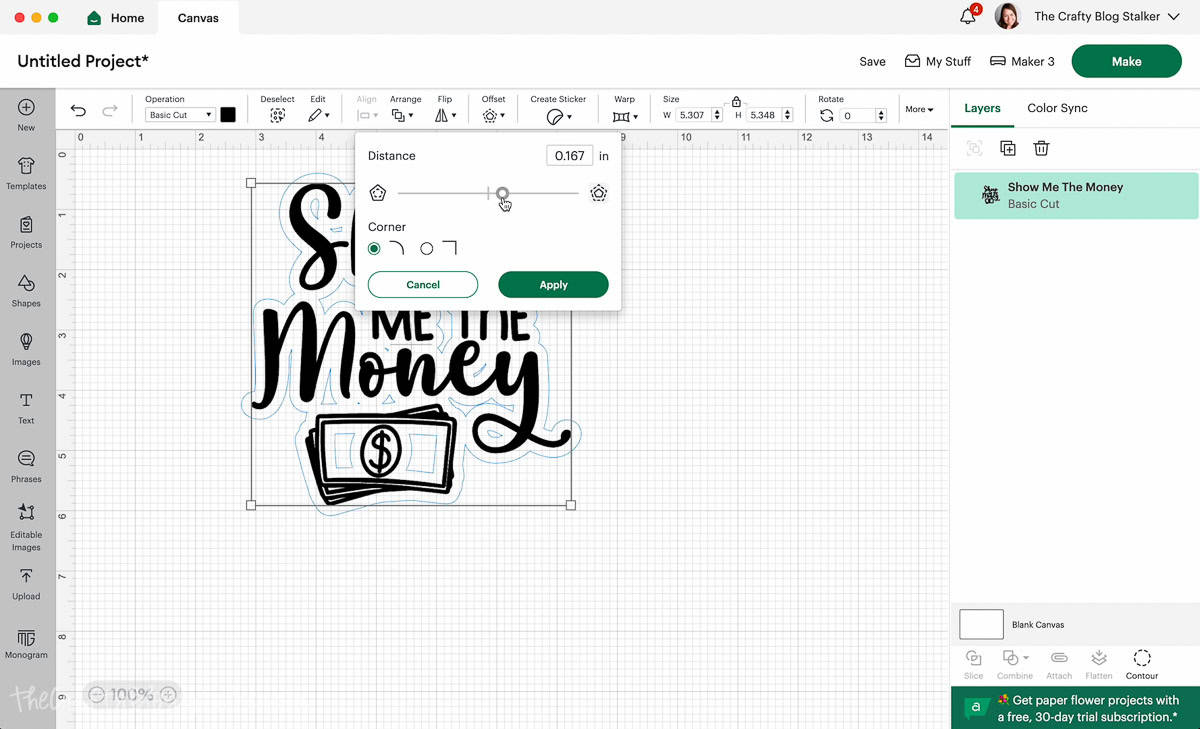
Click on Apply, and the offset layer will be added to the layers panel.
To hide the holes, highlight the offset layer and select Contour. Then select the holes to hide those shapes.
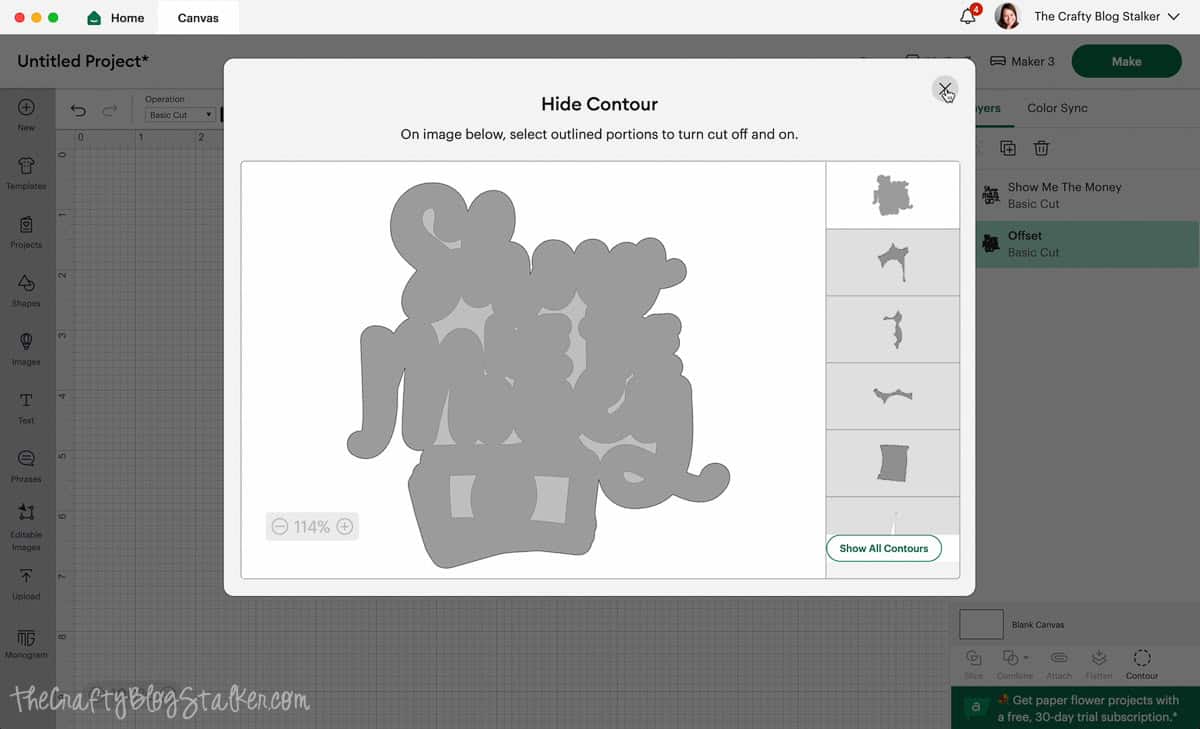
Duplicate the original design, so now there are two - Show Me The Money.
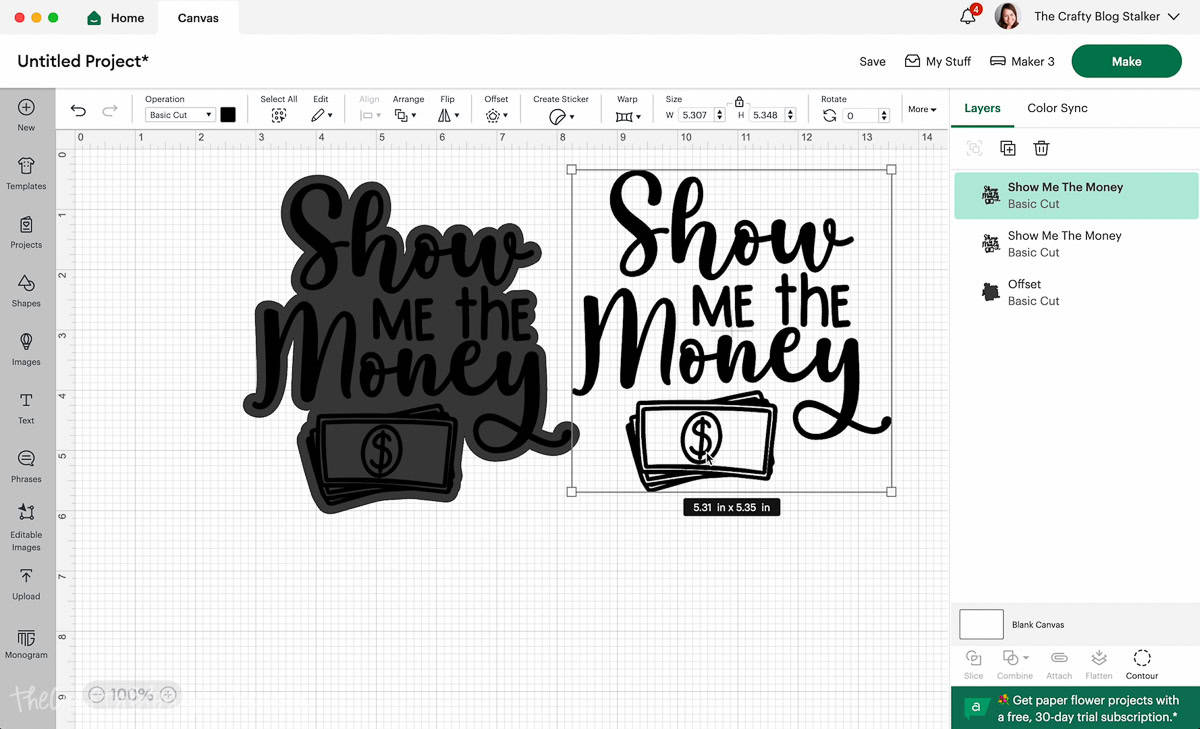
Highlight one of the designs, select Contour, and again hide parts of the design. For this first one hide "me the" and the bills.
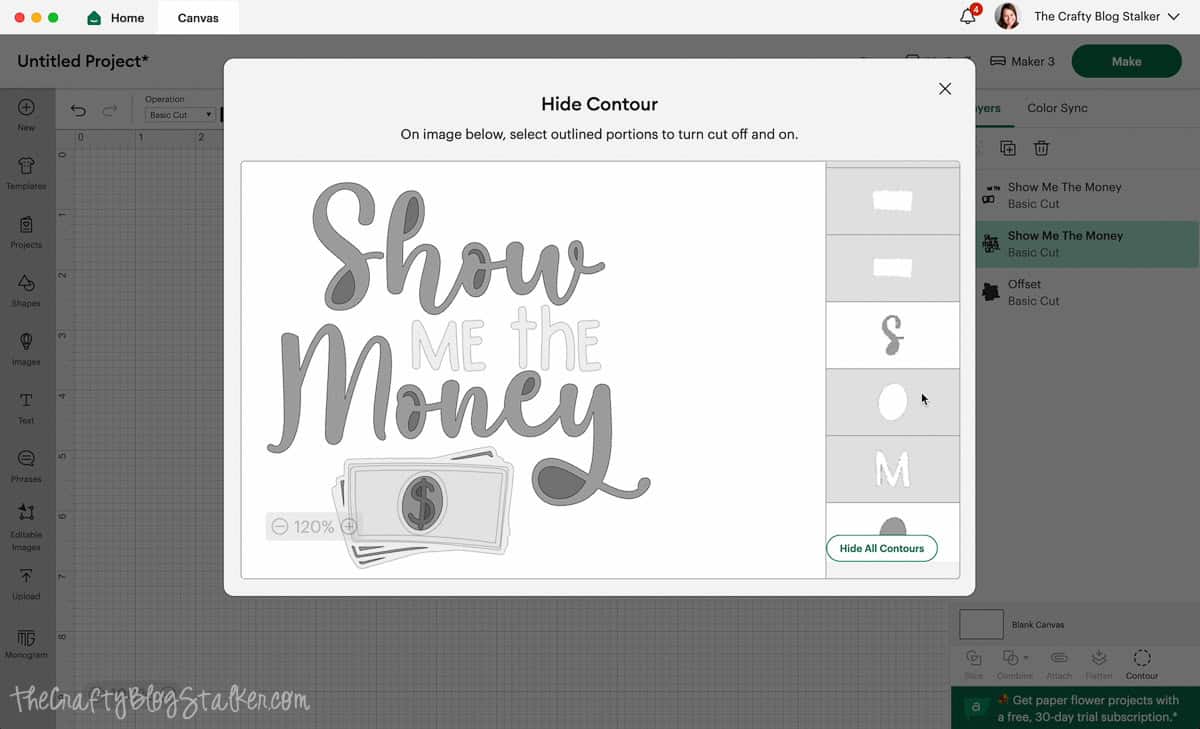
On the second design, hide the "Show" and "Money".
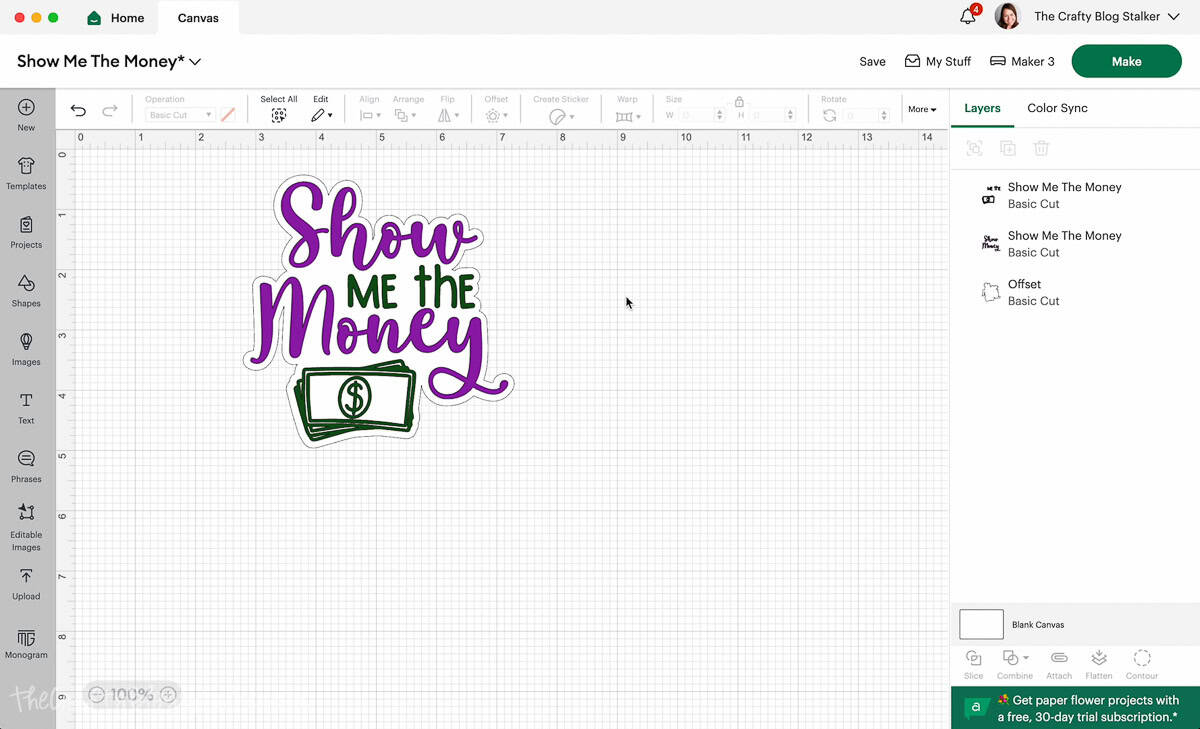
Change the color of layers to any color you would like, I am going with purple, green, and a white offset.
Bring the second design over to the original, and the design is ready to cut.
Cut the Design:
In Cricut Design space, select Make, and then Continue.
Next, I select my materials. I am using foil vinyl for two of my layers, and white premium for the offset layer.
Remove the protective sheet from the StandardGrip Mat, and apply the first cut layer onto the cutting mat. CDS tells me the order of the layers cut, so I follow that.
Load the first mat into the Cricut, and when the start button blinks, press it to begin the cut.
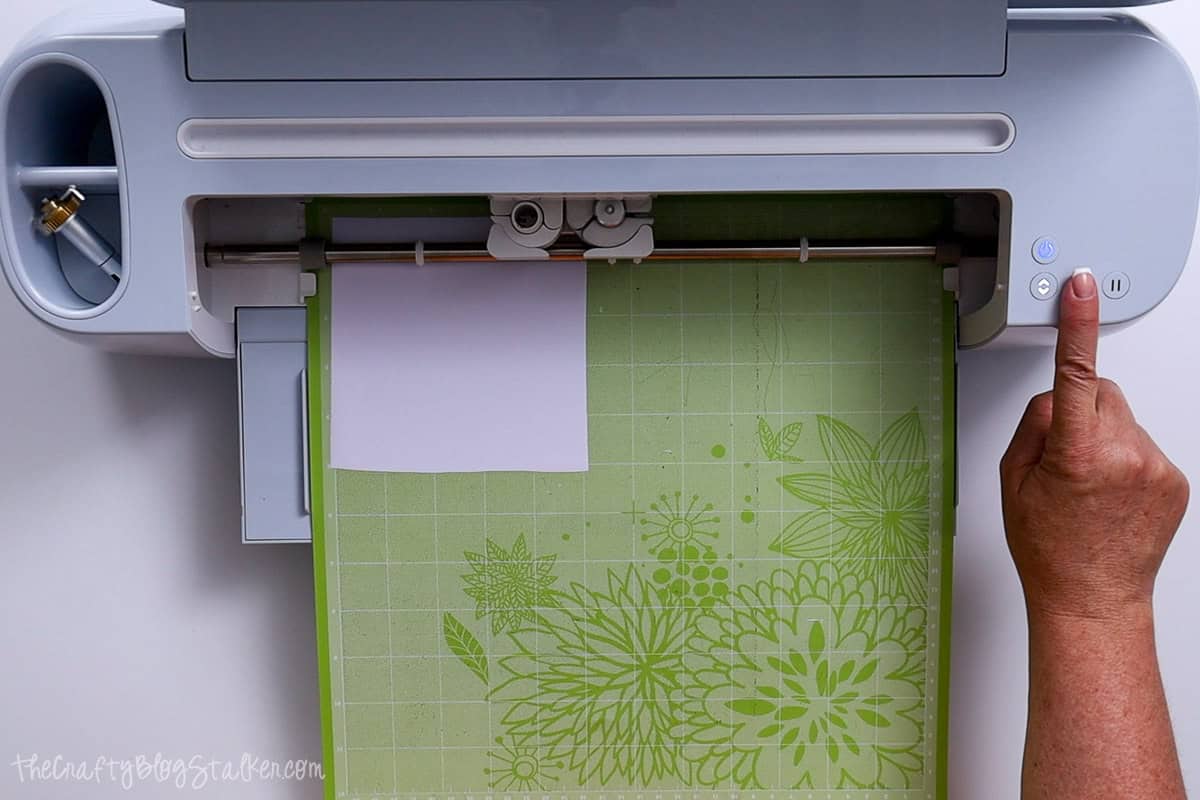
When the cut is finished, unload the mat, and prepare the next color until all layers are cut.
Weed all three layers, removing the excess from the cut designs.
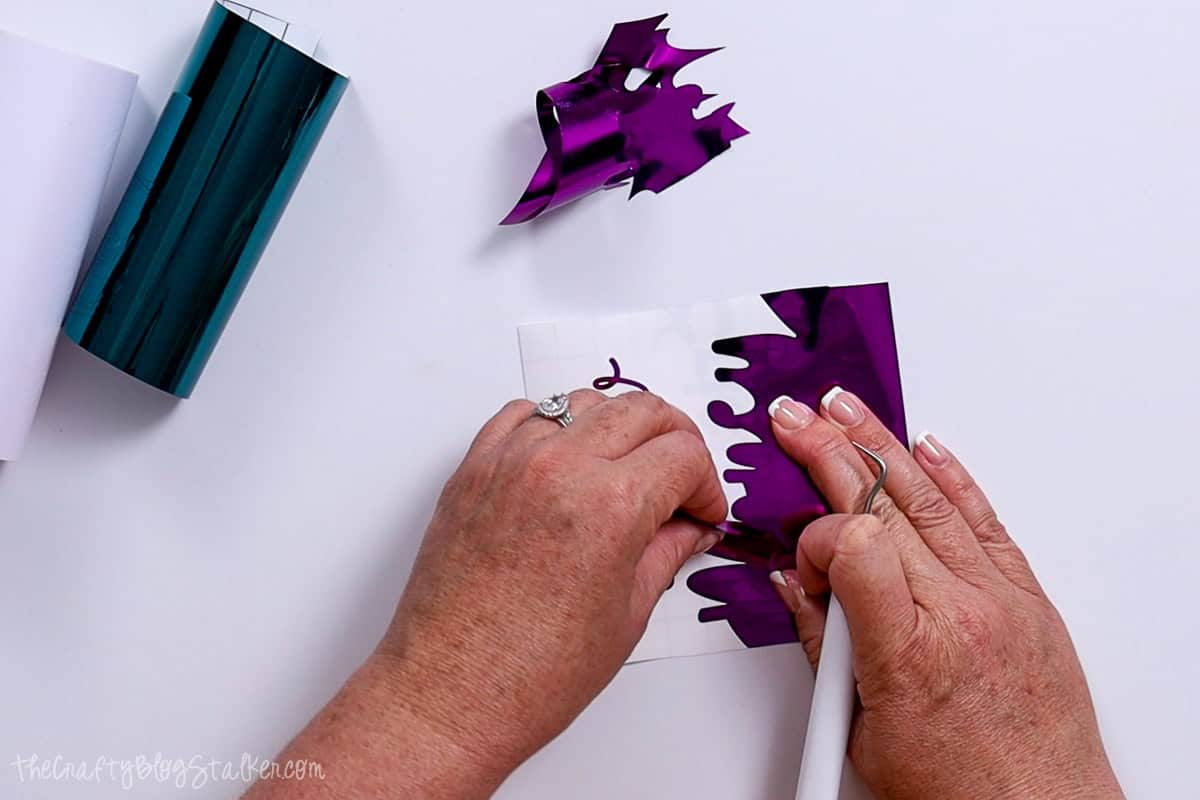
Layer the Vinyl:
When layering vinyl, it is usually best to go from the top layer to the bottom layer. That is what I meant to do here but I got ahead of myself and did the layering in a weird order. But it still worked just fine.
Cut a piece of parchment paper that is slightly larger than the whole design, and cut a piece of Transfer Tape that is about the same size.
Place the transfer tape on top of the Show Money layer.
Go over the front and back with a scraper tool to secure the vinyl to the transfer tape.
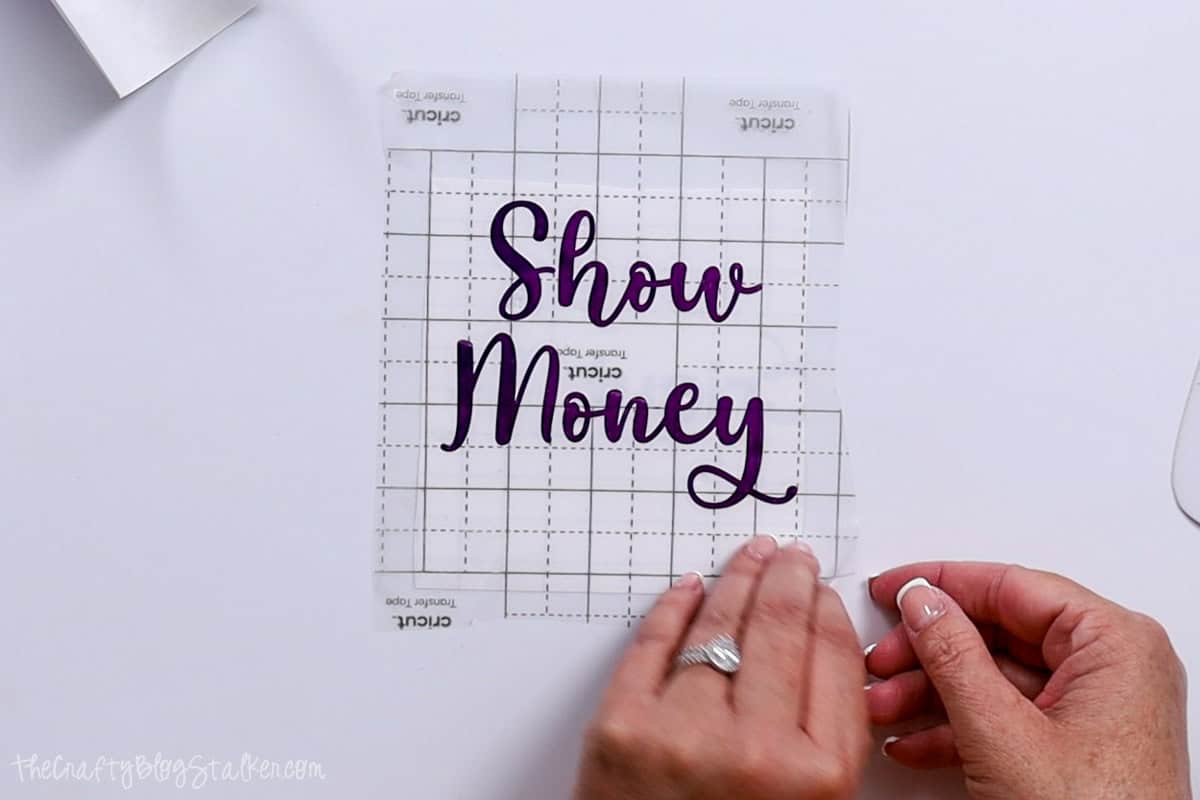
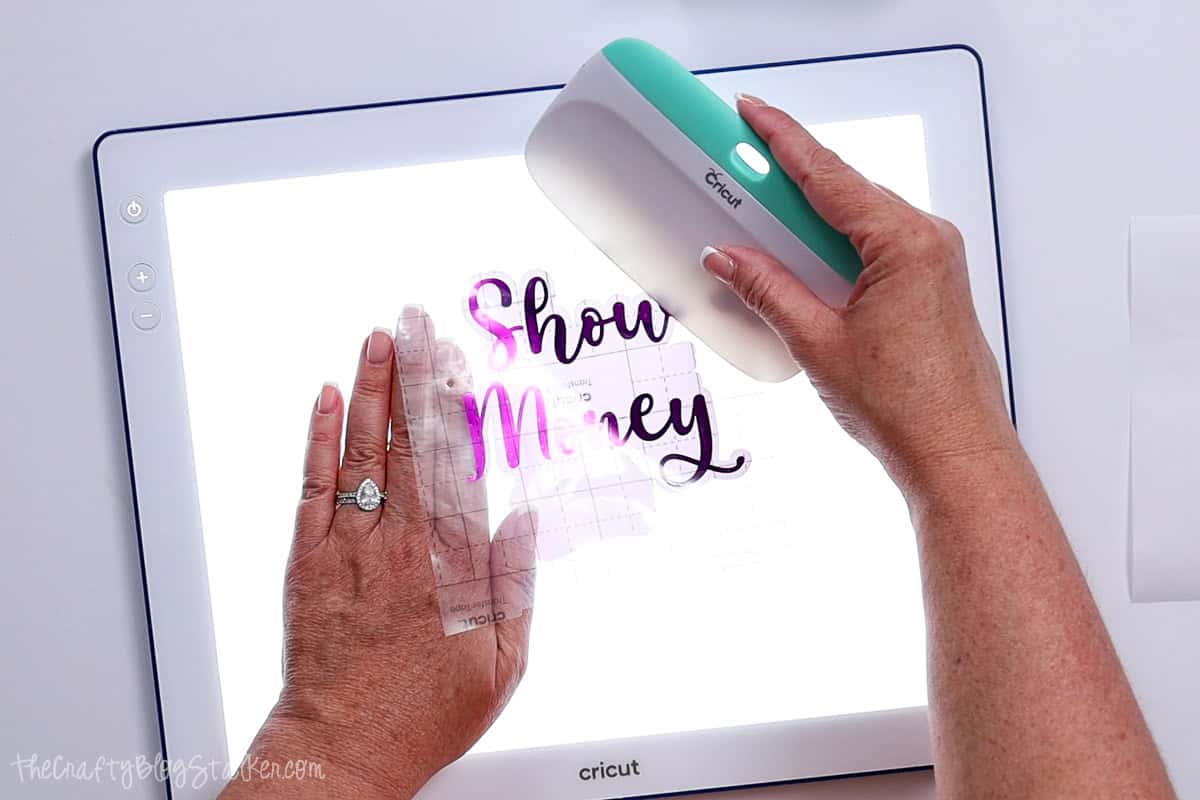
Grab the BrightPad, or use a light table, and layer the offset base piece, with the parchment paper square on top.
Place the Show Money layer on top of the parchment paper and move the design around until it is perfectly centered over the base.
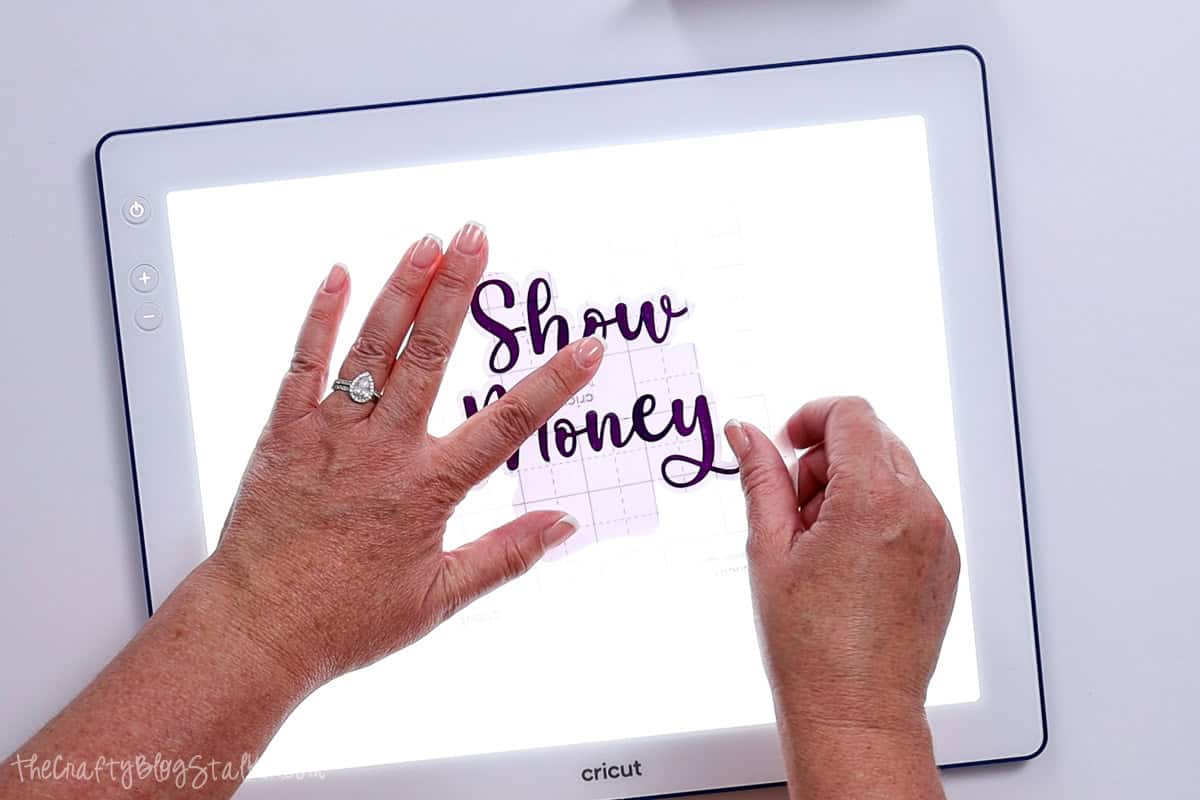
When the placement has been found, press an edge of the transfer tape to the BrightPad, carefully pull the parchment paper out, and roll the vinyl down into place on top of the offset layer.
Go over the layers with a scraper tool, front and back, to secure the vinyl to the transfer tape.
Apply on Coin Bank:
Even though I don't have all of the layers together, I will place the design onto the acrylic coin bank (I told you I did things in a weird order). 😂
Remove the backing sheet from the layered pieces and place the parchment paper underneath.
The parchment paper makes it possible to move the design without it sticking where I don't want it to.
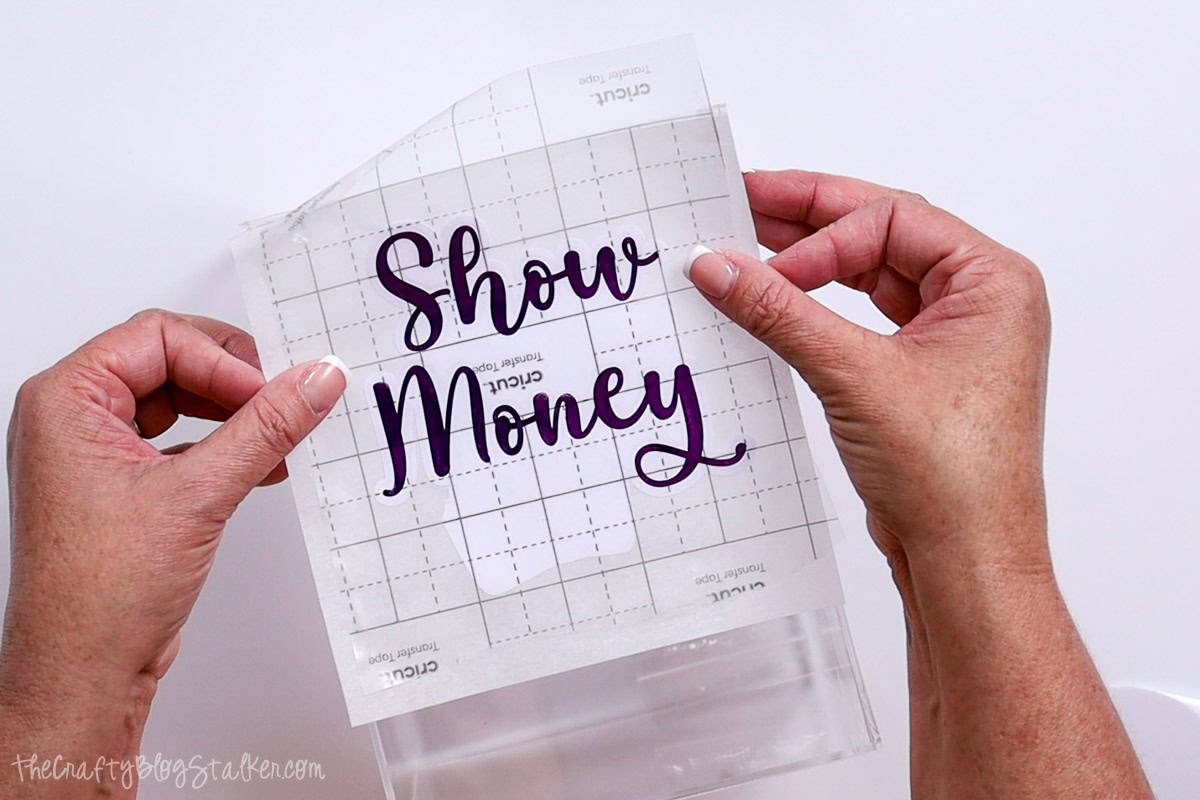
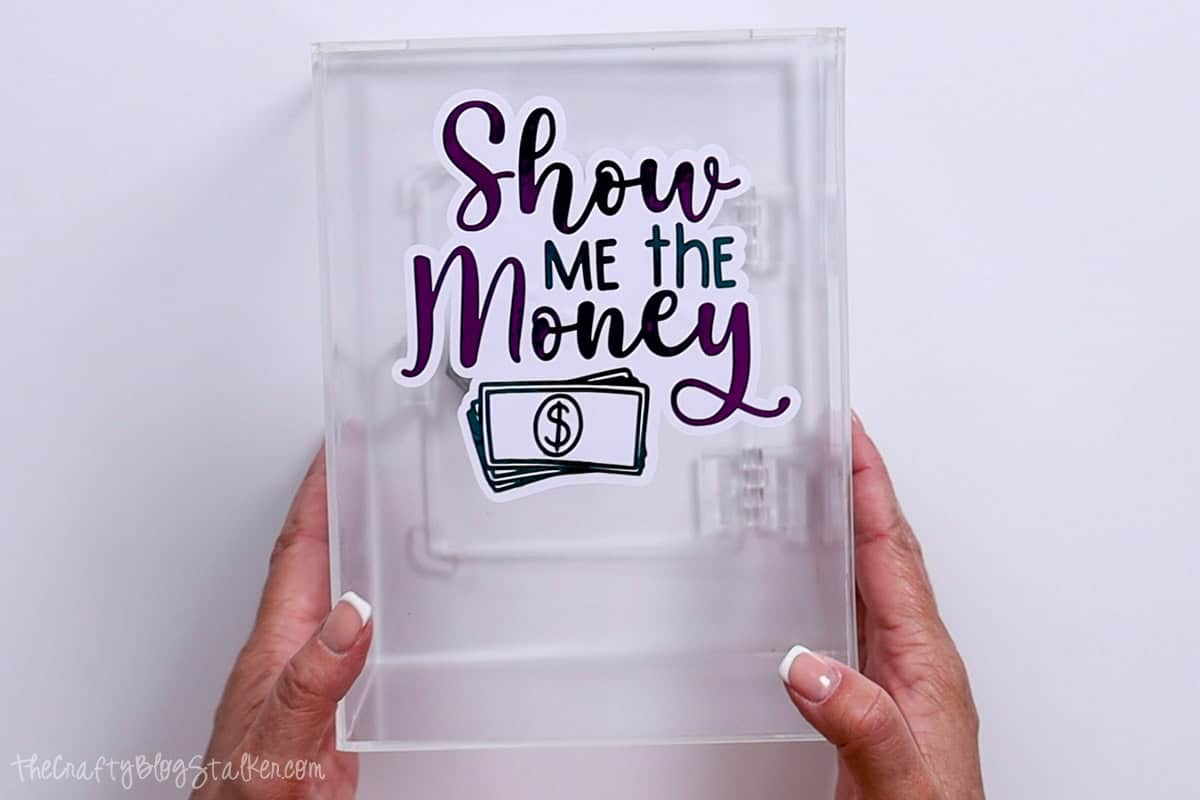
Once I found the perfect placement, I stuck the top part of the transfer tape to the coin bank, slid the parchment paper out, and pressed the vinyl design onto the bank.
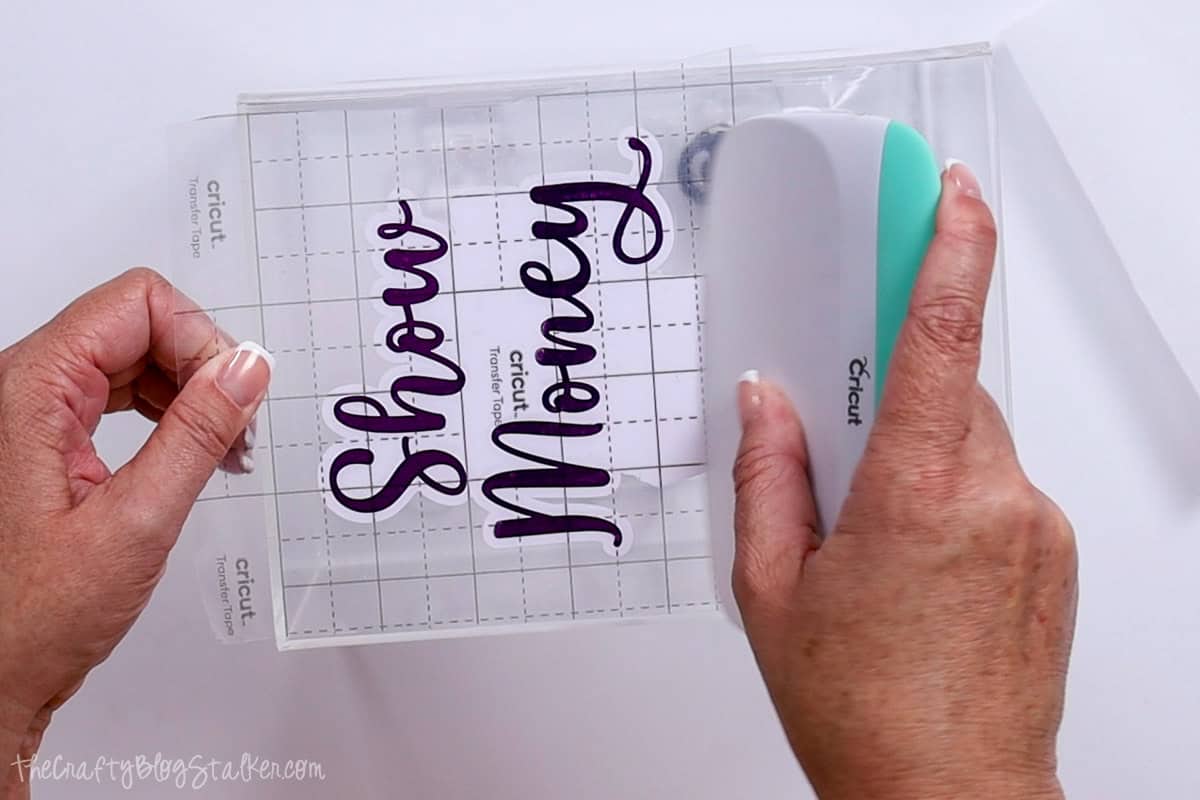
Peel back the transfer tape, but I will use it again so I don't throw it away.
Last, I layer the third piece that I forgot about earlier.
Place the piece of transfer tape on top of the last part of the design, and scrape over the front and back.
Remove the backing sheet, and place the parchment paper underneath.
Place the coin bank on top of the BrightPad, and find the placement of the last layer by moving it around.
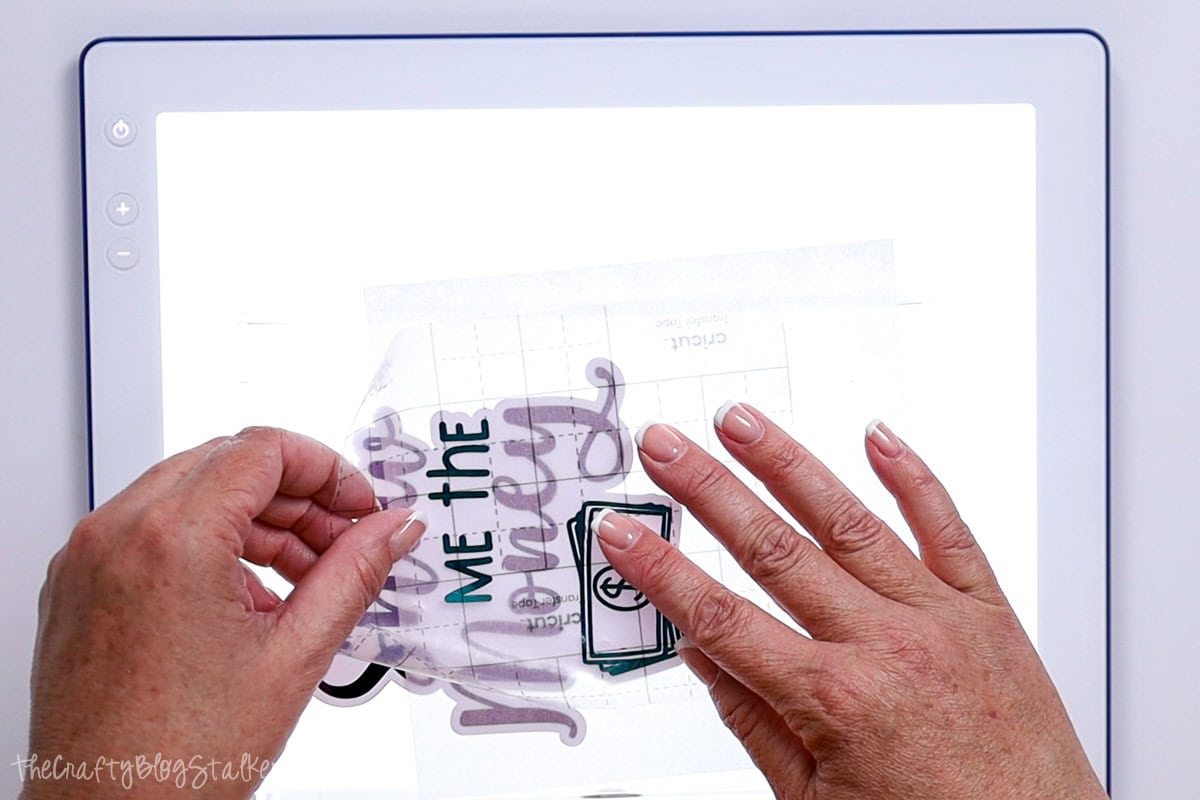
Secure an edge of transfer tape, slide out the parchment paper, and press the third layer into place.
Now the coin bank is completely finished! Whew, I did it! Even though messed up the order.
Variations
This piggy bank also makes a great gift especially when prefilled!
- Graduation Gift
- Wedding Gift
- Birthday Gift
You could also easily personalize this piggy bank to make it even more heartfelt!
Printable Tutorial - Piggy Bank
Materials
- Acrylic Coin Bank
- Show Me The Money SVG
- Cricut Cutting Machine
- 3 Vinyl Colors
- Transfer Tape
- Parchment Paper
- Weeding Tool
- Scraper Tool
- BrightPad
Instructions
Cricut Design Space:
- Upload the SVG into Cricut Design Space and add it to your Canvas.
- The design is ready to cut as is, but let's change it so there are three different layers.
- First, I am going to add an offset. Highlight the design, click on Offset, and adjust the slider. I went with .167 inches.
- Click on Apply, and the offset layer will be added to the layers panel.
- To hide the holes, highlight the offset layer and select Contour. Then select the holes to hide those shapes.
- Duplicate the original design, so now there are two - Show Me The Money.
- Highlight one of the designs, select Contour, and again hide parts of the design. For this first one hide "me the" and the bills.
- On the second design, hide the "Show" and "Money".
- Change the color of layers to any color you would like, I am going with purple, green, and a white offset.
- Bring the second design over to the original, and the design is ready to cut.
Cut the Design:
- In Cricut Design space, select Make, and then Continue.
- Select materials.
- Remove the protective sheet from the StandardGrip Mat, and apply the first cut layer onto the cutting mat. CDS tells me the order of the layers cut, so I follow that.
- Load the first mat into the Cricut, and when the start button blinks, press it to begin the cut.
- When the cut is finished, unload the mat, and prepare the next color of vinyl until all layers are cut.
- Weed all three layers, removing the excess from the cut designs.
Layer the Vinyl:
- Cut a piece of parchment paper that is slightly larger than the whole design, and cut a piece of Transfer Tape that is about the same size.
- Place the transfer tape on top of the Show Money layer.
- Go over the front and back with a scraper tool to secure the vinyl to the transfer tape.
- Grab the BrightPad, or use a light table, and layer the offset base piece, with the parchment paper square on top.
- Place the Show Money layer on top of the parchment paper and move the design around until it is perfectly centered over the base.
- When the placement has been found, press an edge of the transfer tape to the BrightPad, carefully pull the parchment paper out, and roll the vinyl down into place on top of the offset layer.
- Go over the layers with a scraper tool, front and back, to secure the vinyl to the transfer tape.
Apply on Coin Bank:
- Remove the backing sheet from the layered pieces and place the parchment paper underneath.
- The parchment paper makes it possible to move the design without it sticking where I don't want it to.
- Once I found the perfect placement, I stuck the top part of the transfer tape to the coin bank, slid the parchment paper out, and pressed the vinyl design onto the bank.
- Peel back the transfer tape, but I will use it again so I don't throw it away.
- Last, I layer the third piece that I forgot about earlier.
- Place the piece of transfer tape on top of the last part of the design, and scrape over the front and back.
- Remove the backing sheet, and place the parchment paper underneath.
- Place the coin bank on top of the BrightPad, and find the placement of the last layer by moving it around.
- Secure an edge of transfer tape, slide out the parchment paper, and press the third layer into place.
Our Crafting Essentials:
- The Cricut Cutting Machine is easily our favorite crafting tool. We use it in so many of our tutorials!
- These MakerX Crafting Tools are perfect for keeping in the craft room and are always ready when needed!
- This Fiskars Paper Trimmer is easy to use and cuts nicely without frayed edges.
- These Scotch Precision Scissors cut like a dream, and you get multiple pairs in a pack!


Leave a Reply