

Learn how to paint a picture frame with a distressed look. Simple steps for a stylish, vintage touch. Trust me, you'll love it!
Do you like to make home decor for your home? There is something about making it yourself so it perfectly matches your own personality and style. I love it!
Recently, I was given a bunch of frames from work. They are really nice frames but have the company logo on them.
I love my job but that doesn't necessarily mean I want it plastered all over my house.
So I found a fun way to paint the frames and create beautiful decor for my home.
Jump to:
Supply List:
Some supplies were gifted at no cost. When exact item are unavailable online, links may point to comparable products.
- Frames
- Brown Acrylic Paint
- White Acrylic Paint
- Grocery Bag
- Sandpaper
- Vinyl
- Cricut Cutting Machine
- Patterned Paper
This technique can also be used to paint distressed furniture, but I recommend painting something small to get the hang of it before moving on to a larger piece.
Any colors can be used, although I recommend a darker color for the base and a lighter color for the top coat.
Distressing Instructions:
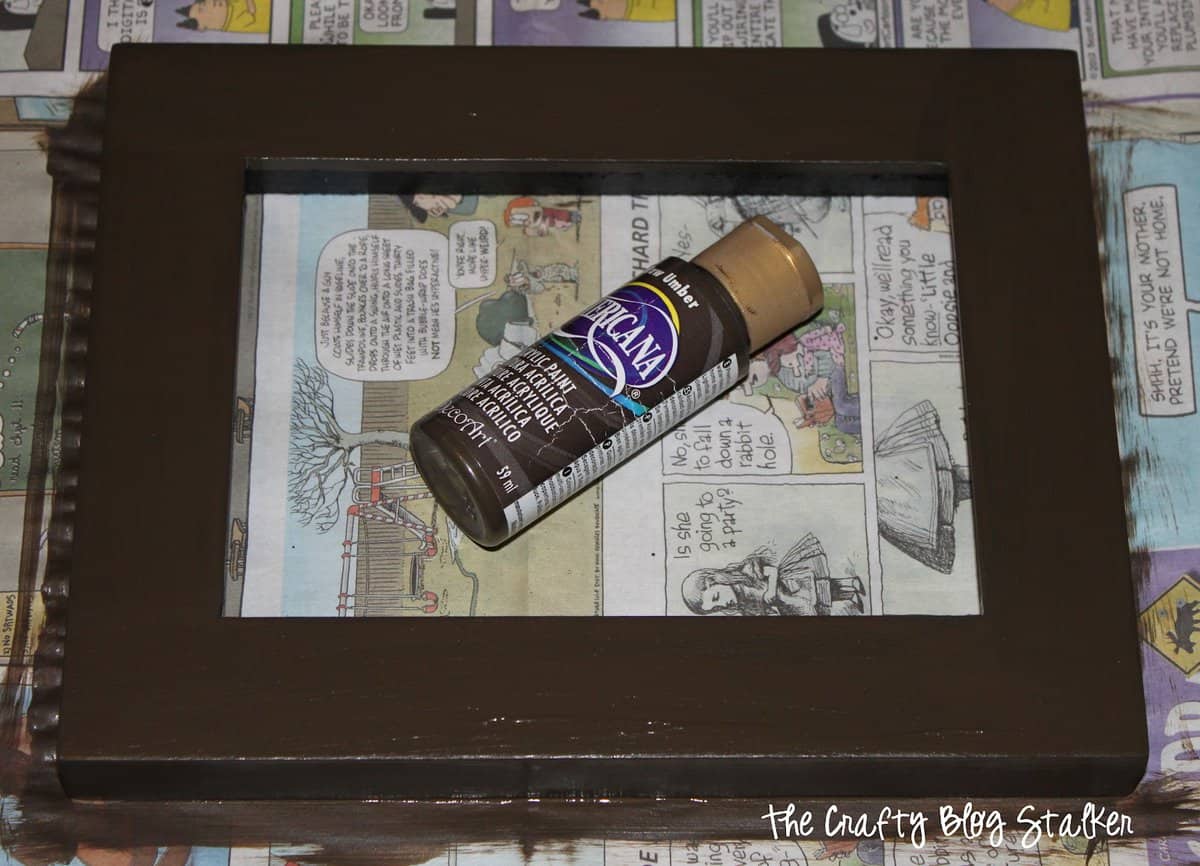
Remove the glass and back from the frame.
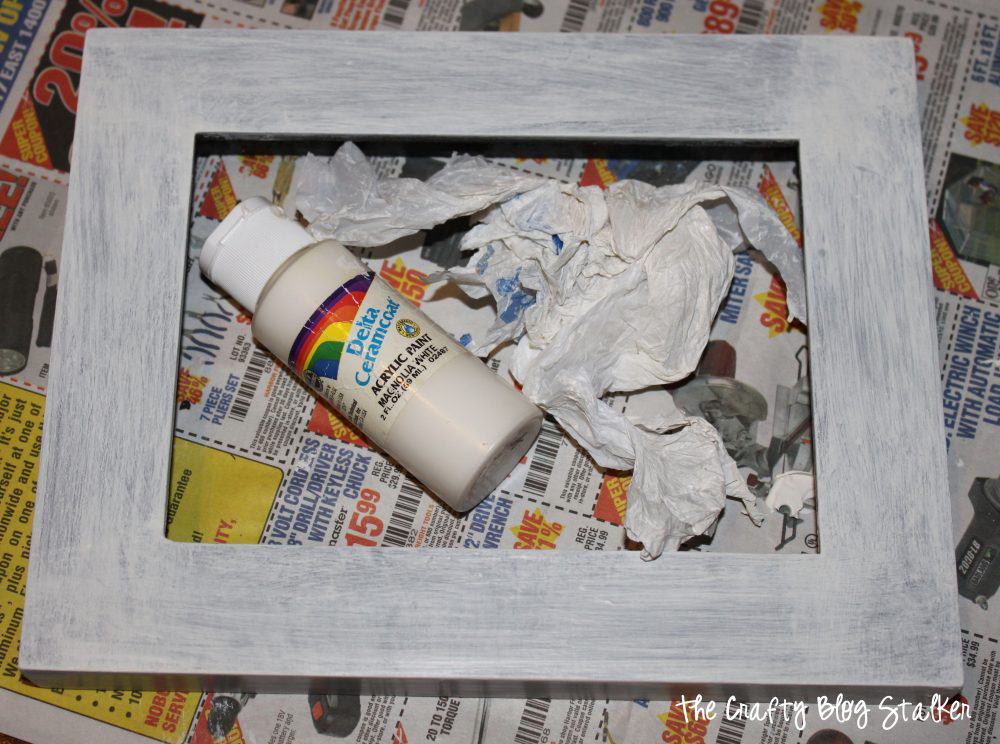
Paint a base coat over the entire frame to cover the original finish.
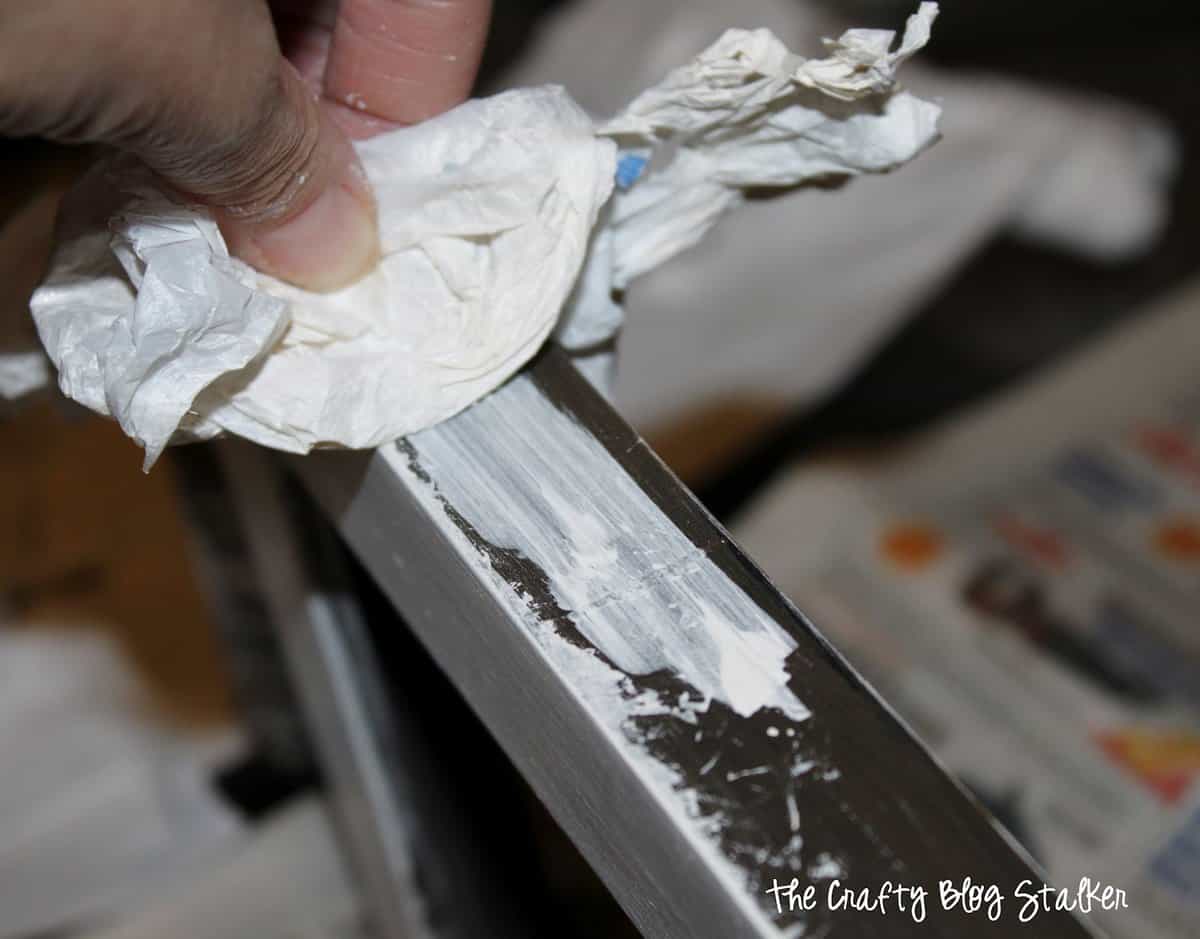
My trick to distressing is to use a plastic shopping bag to paint the top coat onto the frame
Cut a grocery bag into 4 pieces, and scrunch the plastic.
Dip the scrunched plastic into the paint and then wipe the paint onto the frame.
Using the bag as the paintbrush gives the look of scratches when applied.
For the best results, apply many thinner coats, so the piece has many layers with visible strokes.
After the frame has been painted with the grocery bag, grab a sanding block and do a bit of light sanding to rough up the paint a little more.
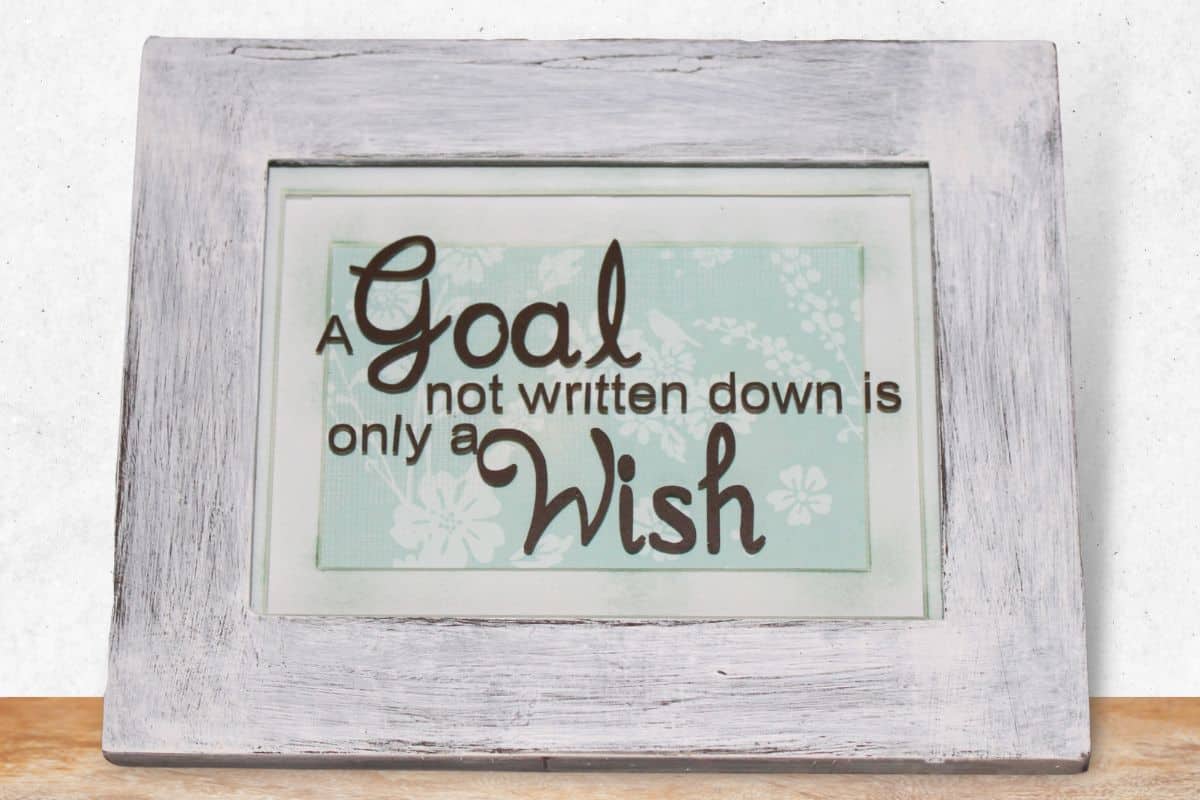
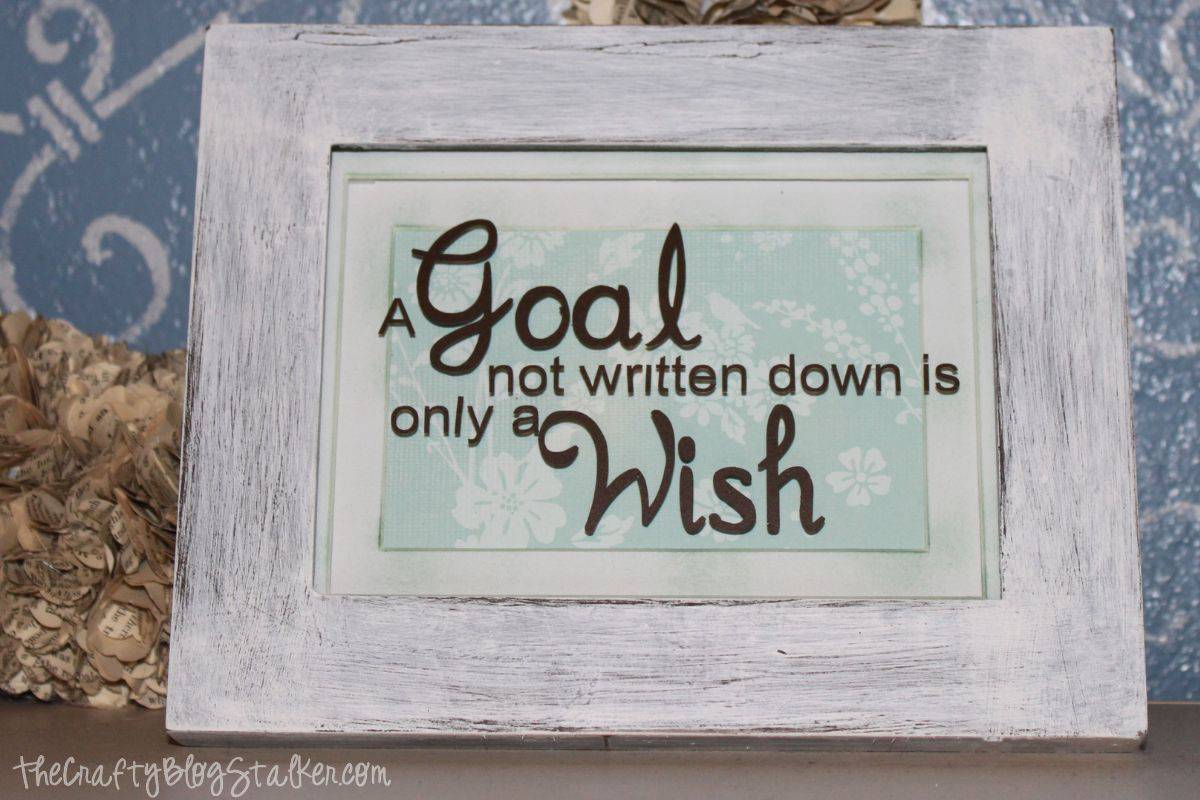
Add an Inspirational Quote:
This step is completely optional, but since this is how I used the frame, I thought I would share.
Use a Cricut to cut an inspirational quote out of adhesive vinyl.
I used the quote, a goal not written down is only a wish.
Apply the quote on the glass piece of the frame.

Add a rectangle of cute patterned paper to the back of the frame and reassemble the frame.
The finished frame is cute and it was so easy to make!
Now I have a new inspirational piece for my office, that matches my style.
Frequently Asked Questions:
You can make the paint look weathered and old by not doing a bad job painting the project. Miss spots, show the brush strokes, and sand unevenly to give an even more distressed look.
If you don't have any grocery bags, you could use a garbage bag, a dry crunchy towel, or even steel wool. You want a material that the paint won't soak into and will give harsh lines while painting with it.
Keep a paper towel handy to wipe up excess paint after each stroke.
By design, a paintbrush applies paint smoothly which is not the final result we are going for.
Yes, you can use any paint to upcycle a picture frame. The distressed look comes from how it is applied.
When sealing, I recommend a polyurethane sealant with a matte finish.
The best part of using a sealant on furniture is the piece will look old for a long time! Yeah, it's a little ironic.
Crafting Essentials
- The Cricut Cutting Machine is easily my favorite crafting tool. We use it in so many of our tutorials!
- These MakerX Crafting Tools are perfect for keeping in the craft room and are always ready when needed!
- This Fiskars Paper Trimmer is easy to use and cuts nicely without frayed edges.
- These Scotch Precision Scissors cut like a dream, and you get multiple pairs in a pack!
Tonii
Not only is the frame adorable but I LOVE the quote! Thanks for sharing it...it may be one of my new favorites!
Our Delightful Home
This is such a great idea.
Lisa @ Flour Me With Love
I love that! Thanks so much for sharing at Mix it up Monday 🙂
Kelly @ Here Comes the Sun
I love the quote and the frame! Thanks for sharing at Fabulous Friday!
Kadie
How cleaver! I really love that quote. I need to plaster it all over my house! Thanks for sharing with us at Link It Up Thursday.
Rachel
Great quote, the framed turned out great too. Thanks for sharing at Terrific Tuesdays.Rachel
Pam
Cute frame and great quote! Looks great.
stacey gibbon
LOVE LOVE LOVE! And the quote is so true (I live & breathe the quote pretty much, since I write everything down)
Marilyn Clark
What a great quote...love how you distressed it!
Countrified Hicks
What a great job!
Mary Beth
What an awesome quote and I love how you finished the frame.
Thanks so much for linking up to Project Inspire{d}!
Hugs, Mary Beth
Kayla Janachovsky
Super cute idea. Thanks for linking up to The DIY'ers!
Natalie B.
Wonderful thanks so much for sharing!
Thanks for linking on Tutorial Thursdays.
x
Natalie
Kara @ Petals to Picots
I love the look of your frame! And such a great quote too 🙂
Lindsay @Artsy-Fartsy Mama
The frame looks great, and I love the quote! Great job! Thanks for linking up at Artsy Corner, always love seeing what you come up with 🙂
Preeti
A wise quote! Congrats for getting featured on petalstopicots!