

Acrylic ornaments are perfect for your Christmas tree, holiday mantel, or as gifts! Learn how to make keepsake ornaments that will last for years to come.
I know I've said it before, but I love making handmade Christmas Ornaments!
Pulling out the homemade ornaments from years past always brings on a feeling of nostalgia and happy memories. It is my favorite part of decorating the Christmas tree.
In this ornament tutorial, I will share how to make acrylic ornaments that last from year to year.
Plus, a free SVG! That always makes any time of year brighter.
Craft Tutorial Video
If videos are your thing, you're in luck-I've got a full tutorial ready for you!
Subscribe to my YouTube channel and stay inspired with every new project.
Why use UV Resin?
We have all seen those beautiful handmade ornaments with the vinyl on the front and the paint on the back.
They really are pretty, and so easy to personalize.
But what happens a couple of years after they are made?
With all of those trips in and out of the storage box, they get scratched and start to lose pieces from the original vinyl.
It breaks my heart when I have to throw a keepsake ornament away.
With the technique I am going to show you below, your acrylic ornaments will be much more sturdy and will live through each storage season.
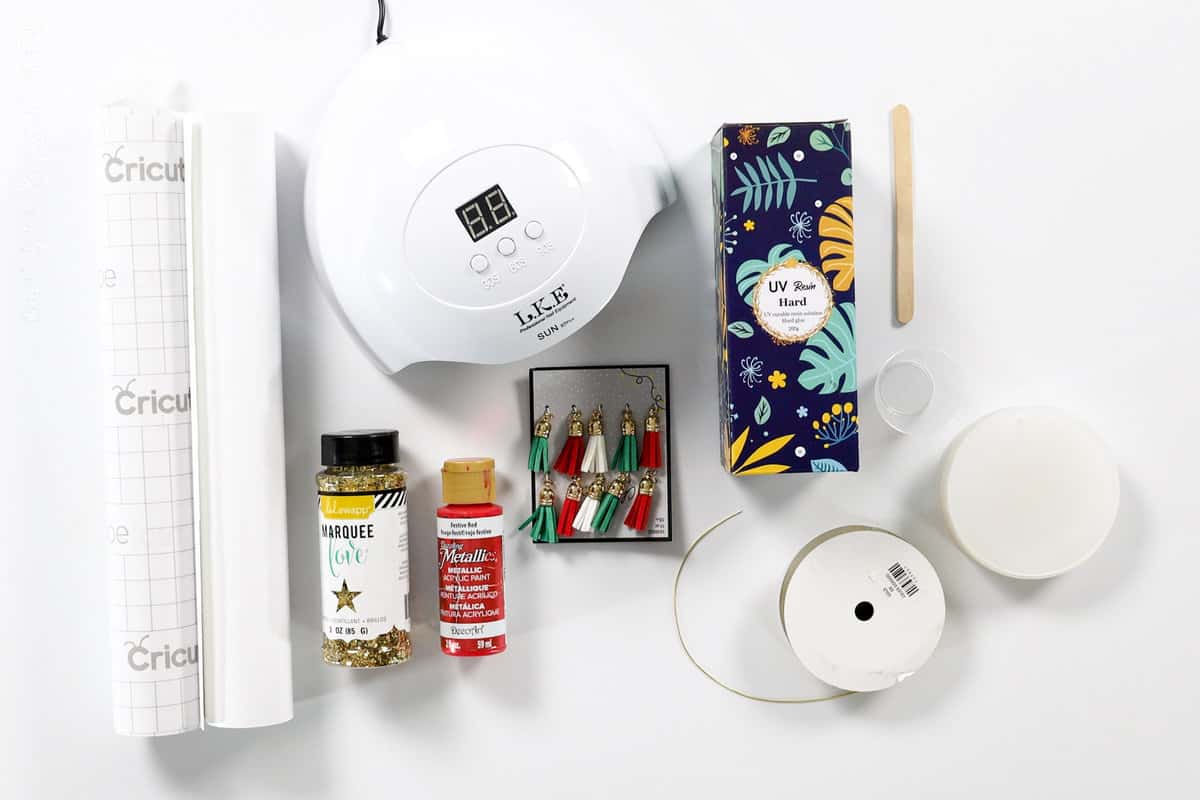
Supplies You'll Need to Create this Project:
- Free Christmas Sayings SVG Bundle
- 3.5-inch Acrylic Ornaments
- Cricut
- White Vinyl
- Transfer Tape
- Weeding Tools
- Scraper Tool
- Paint or Glitter
- Paint Brush
- UV Resin
- UV Nail Light
- Resin Measuring Cup
- Craft Stick
- Ribbon or Cord
- Charms (optional)
Grab the Free SVG:
You can make these ornaments with any type of vinyl design, or personalization.
If you are not sure what to use, feel free to grab my Christmas Sayings Bundle.

Cut the Design:
Upload the design into Cricut Design Space or create your own.
Size the design so it has a diameter of 3-inches.
Before you cut, make sure that you mirror the design.
Follow the prompts in Cricut Design Space and cut your design out of permanent vinyl.
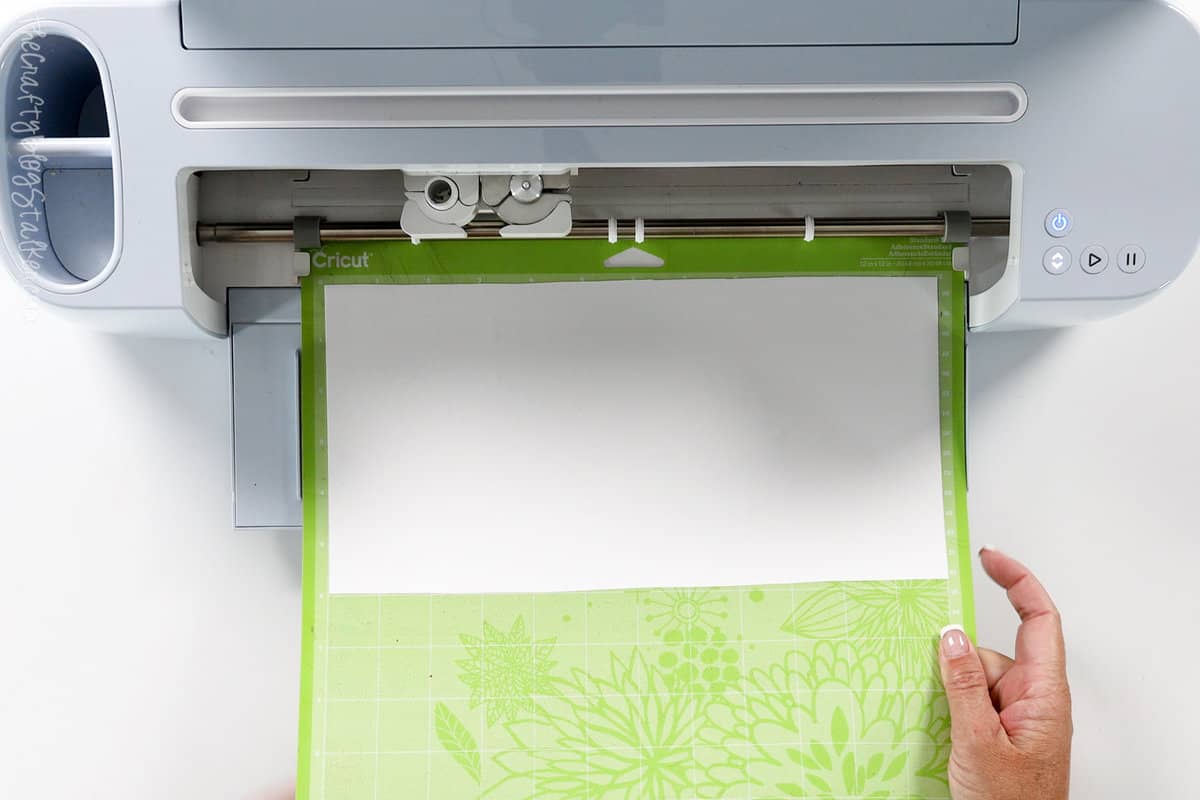
Weed the design with your weeding tools.
If you cut more than one, you can also cut the different designs apart with a pair of scissors.
Apply the Vinyl:
The acrylic ornaments come with a protective sheet on the front and on the back. Make sure that you remove them before applying the vinyl.
If you need, weeding tools can help get that liner started to peel.
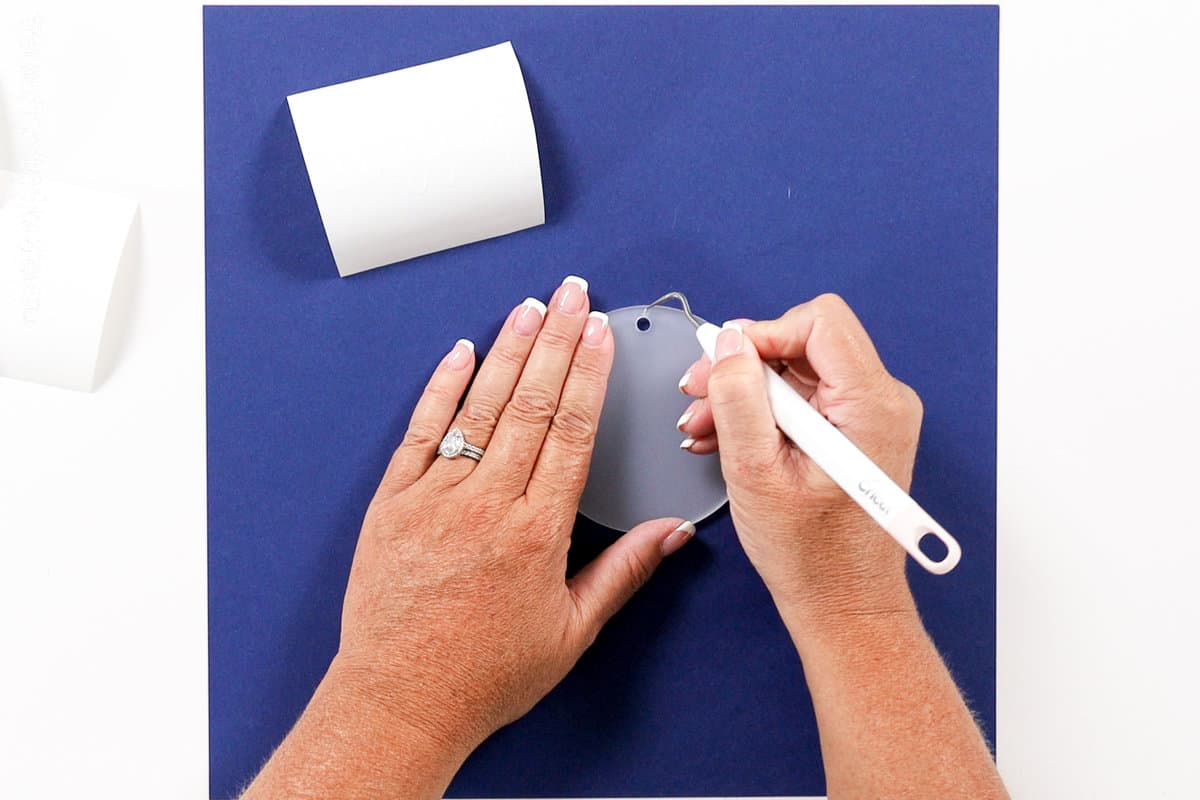
Cut a square of transfer tape slightly larger than the vinyl design.
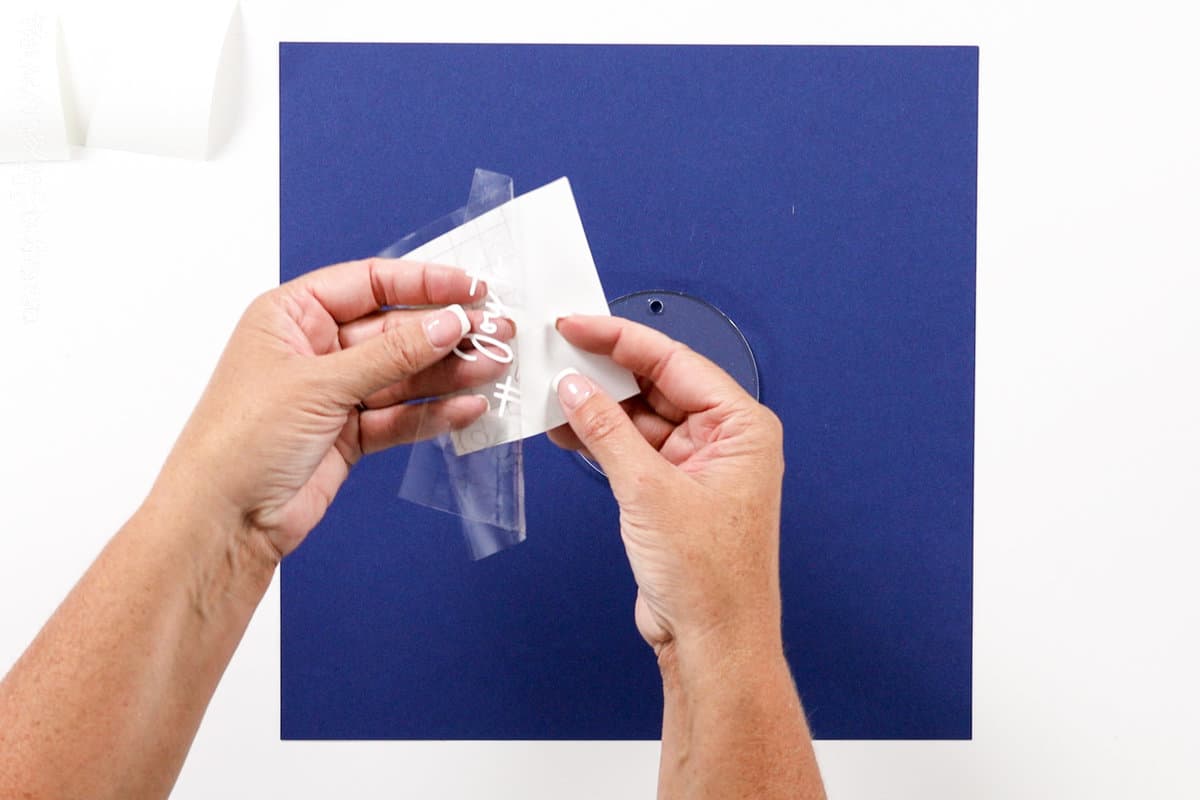
Peel back and remove the back liner of the transfer tape.
Roll the transfer tape onto the vinyl design and go over it with the scraper tool.
Peel back the vinyl liner so the design is stuck to the transfer tape.
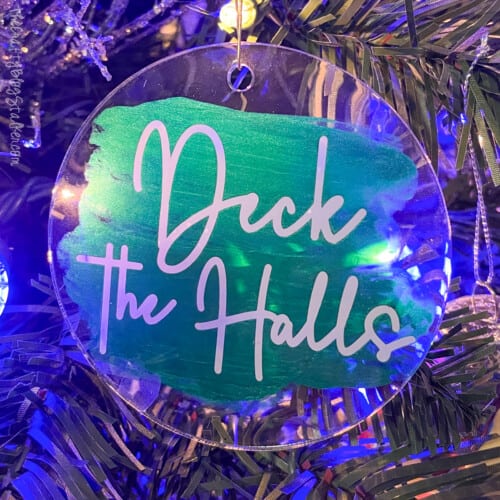
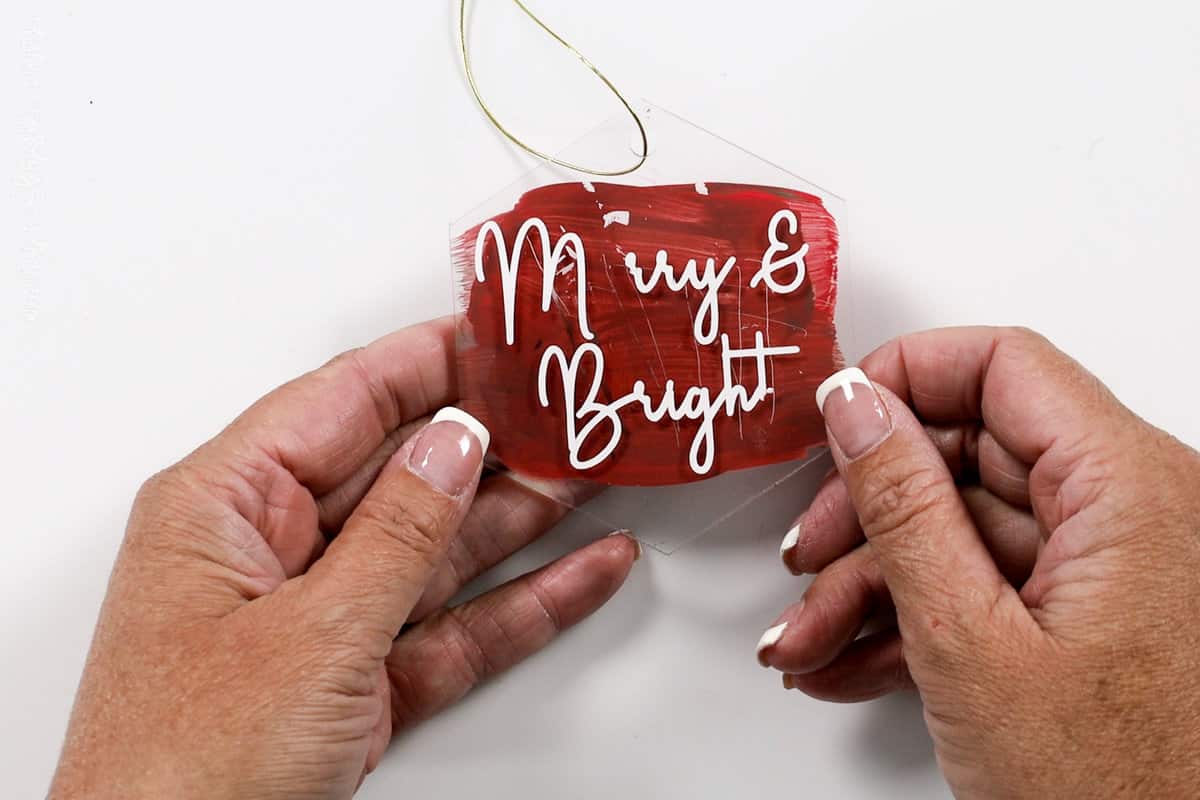
Center the vinyl design onto the acrylic ornament and press it into place.
When you remove the transfer tape make sure the design sticks to the ornament and releases from the transfer tape.
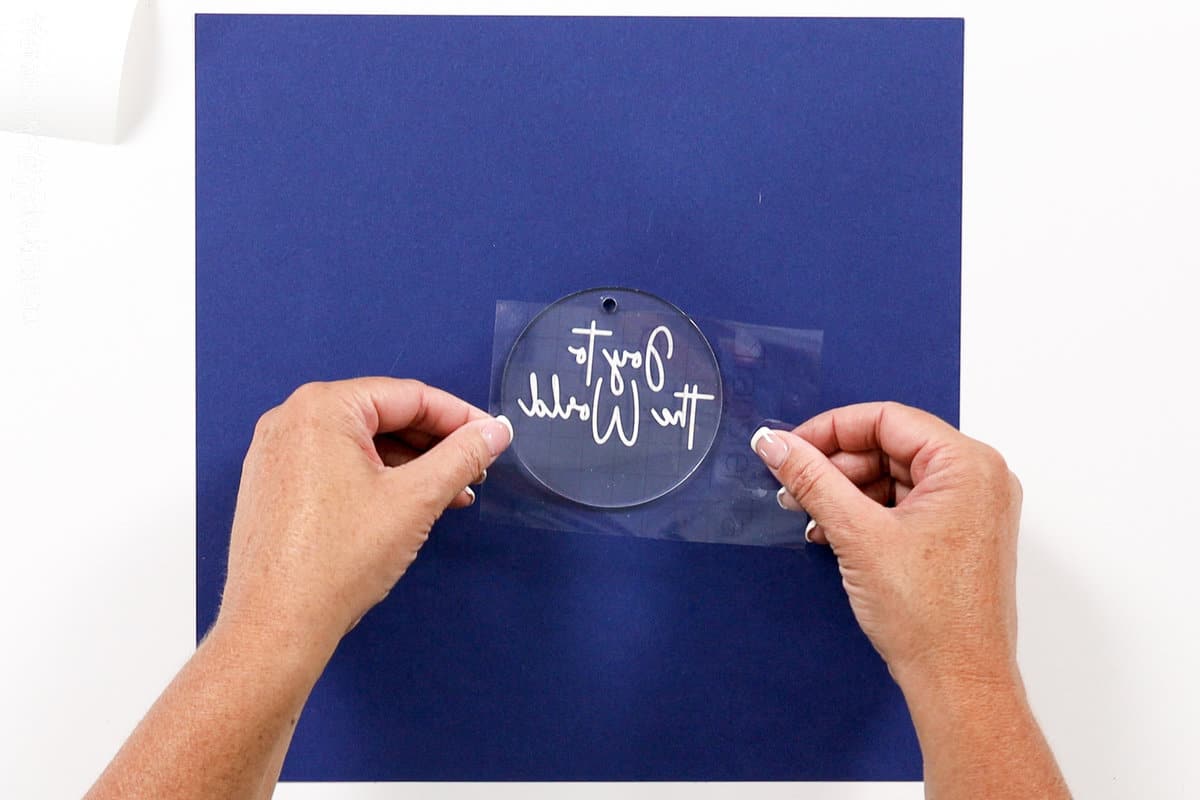
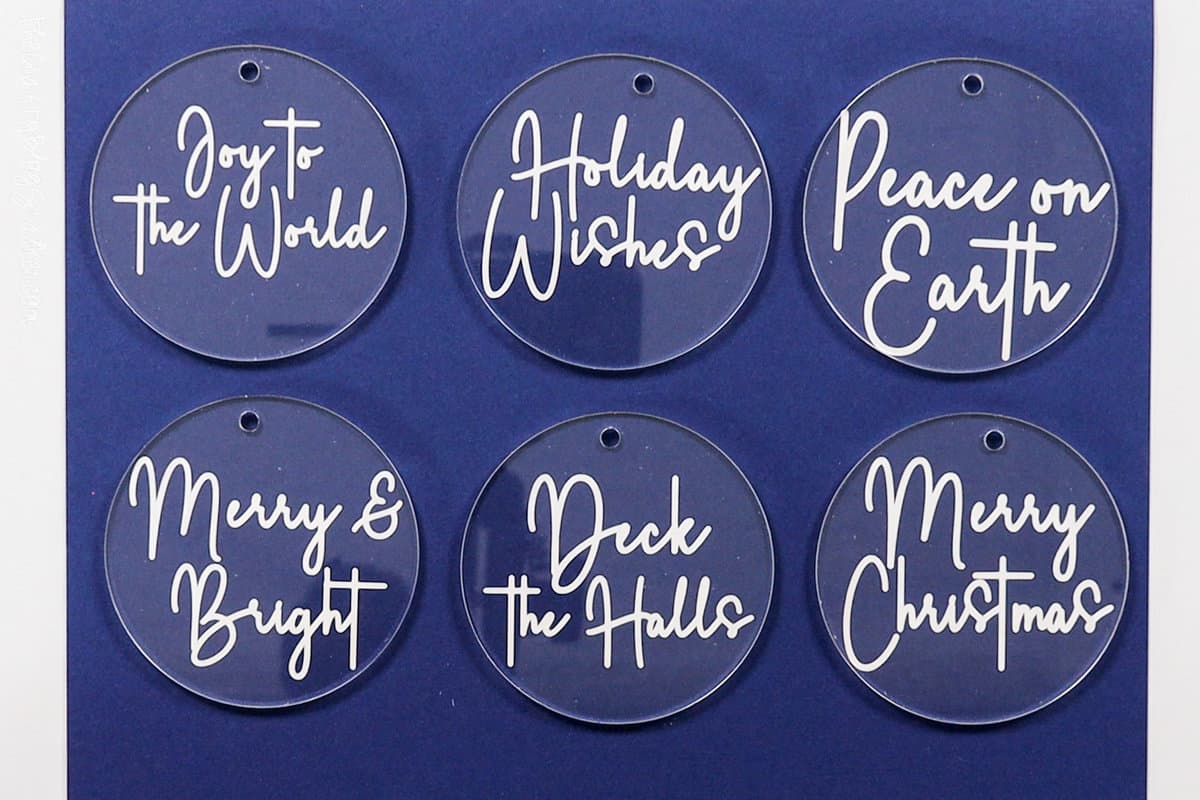
When you turn the ornament over you can correctly read the design since we mirrored the cut.
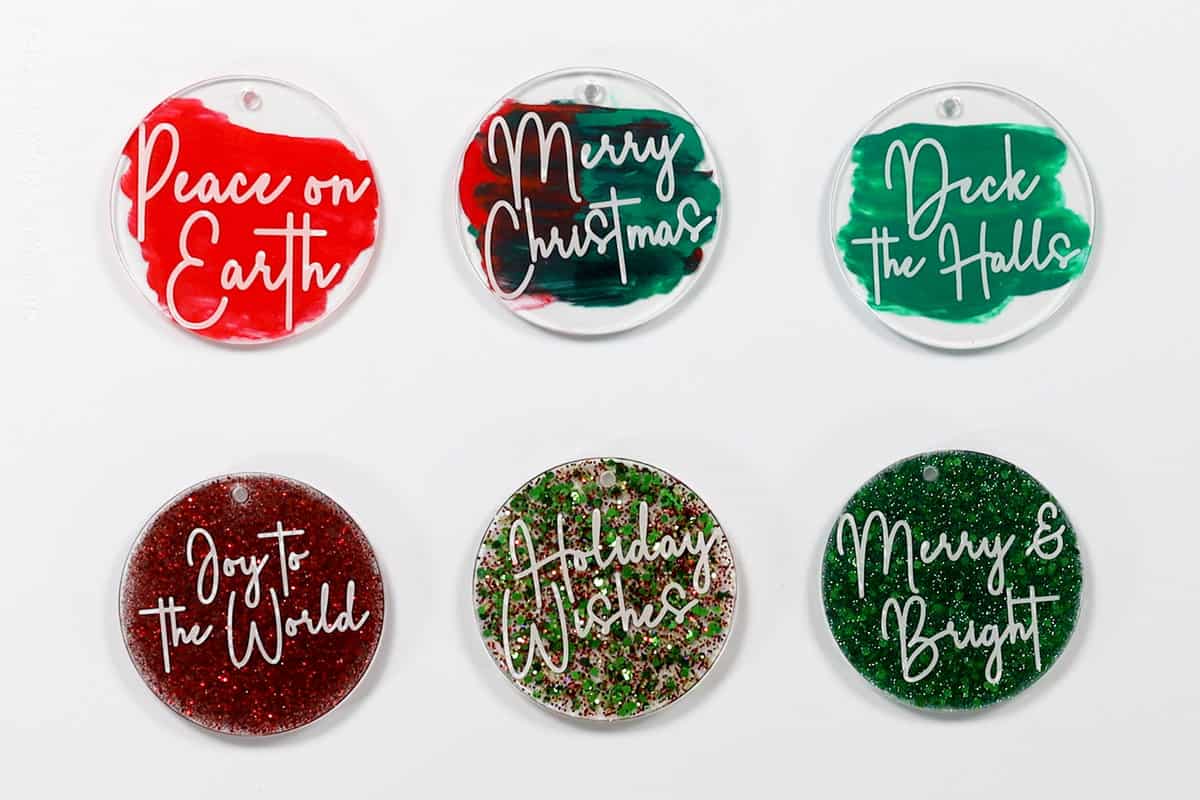
Here are all 6 of my Christmas saying designs on an ornament.
Next, we are going to mix it up. I will share 2 different ways to finish the ornaments. Pick your favorite or do a combination of both!
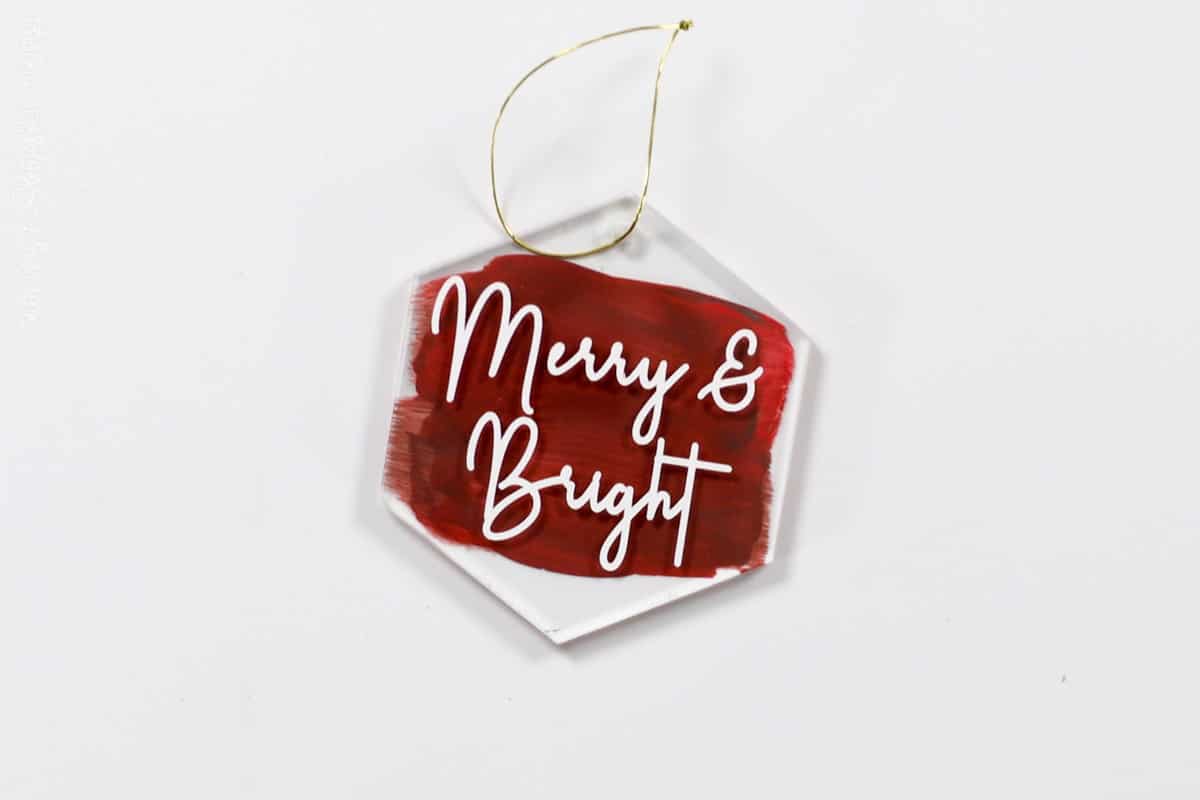
Painted Ornaments:
Turn the ornament face down and apply some dots of paint.
With a paintbrush, paint the back of the ornament so the paint covers where the design is.
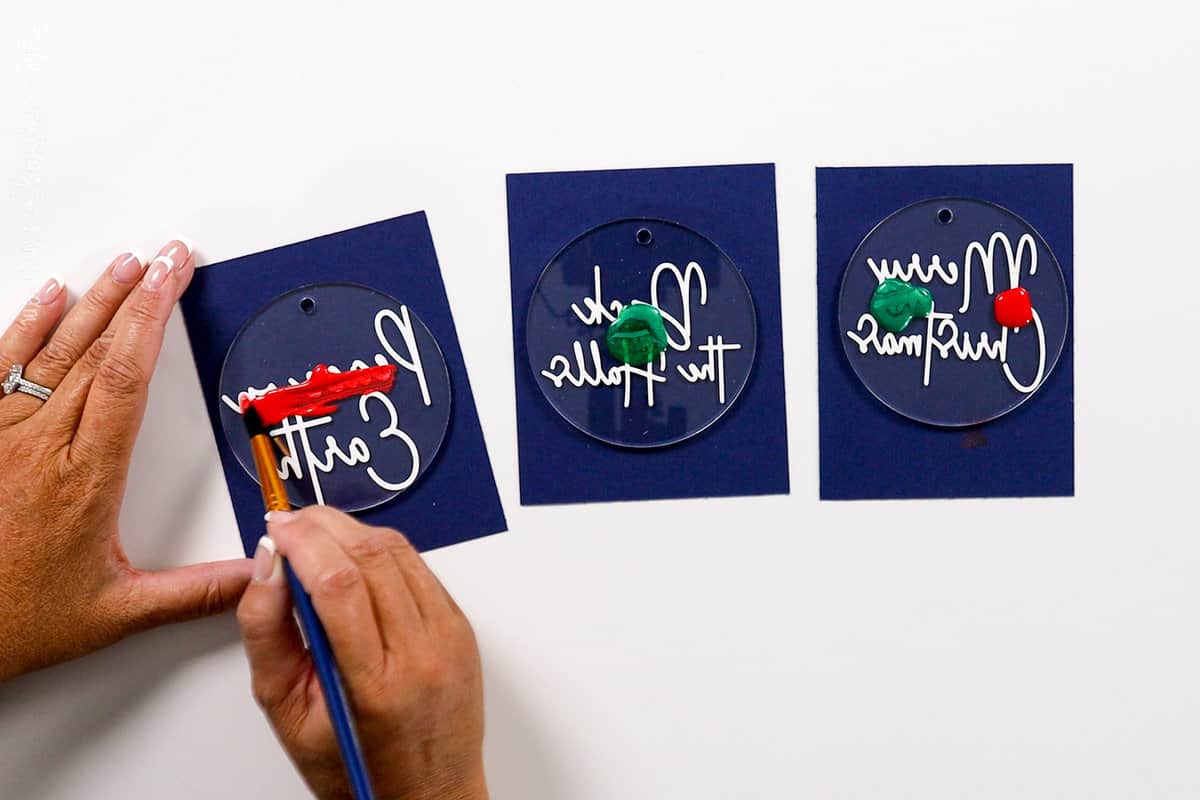
Let dry.
Once the paint is completely dry, squeeze a little bit of the UV resin onto the back of the ornament.
Start with just a little because you can always add more if you need, but it's harder to take some away.
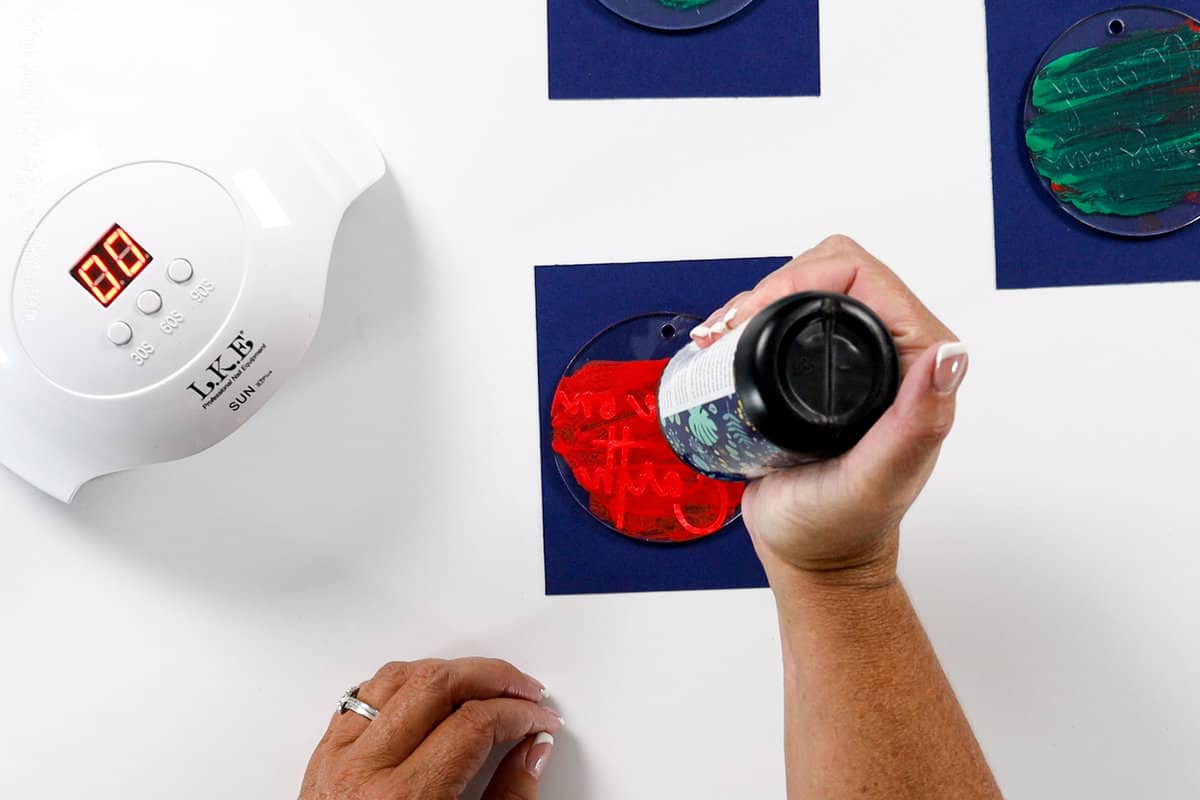
Use a craft stick to move the resin right up to the edge of the entire back of the ornament, covering it completely.
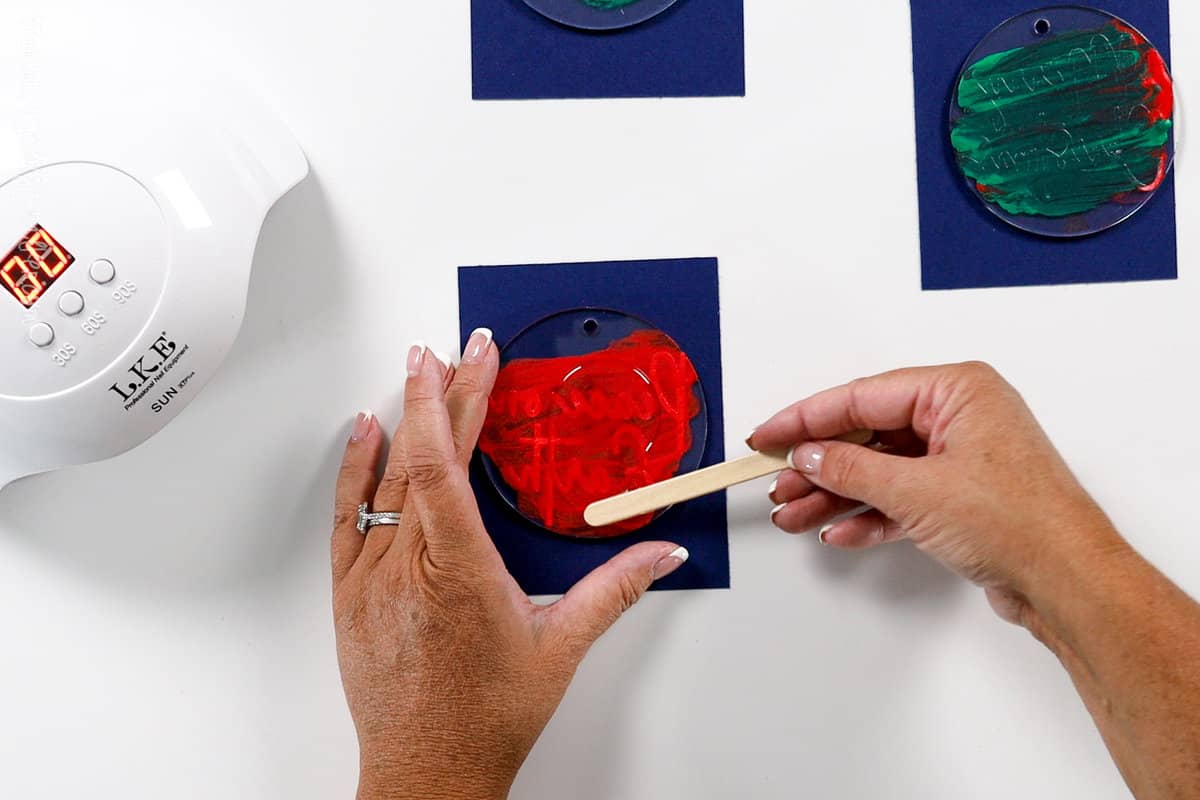
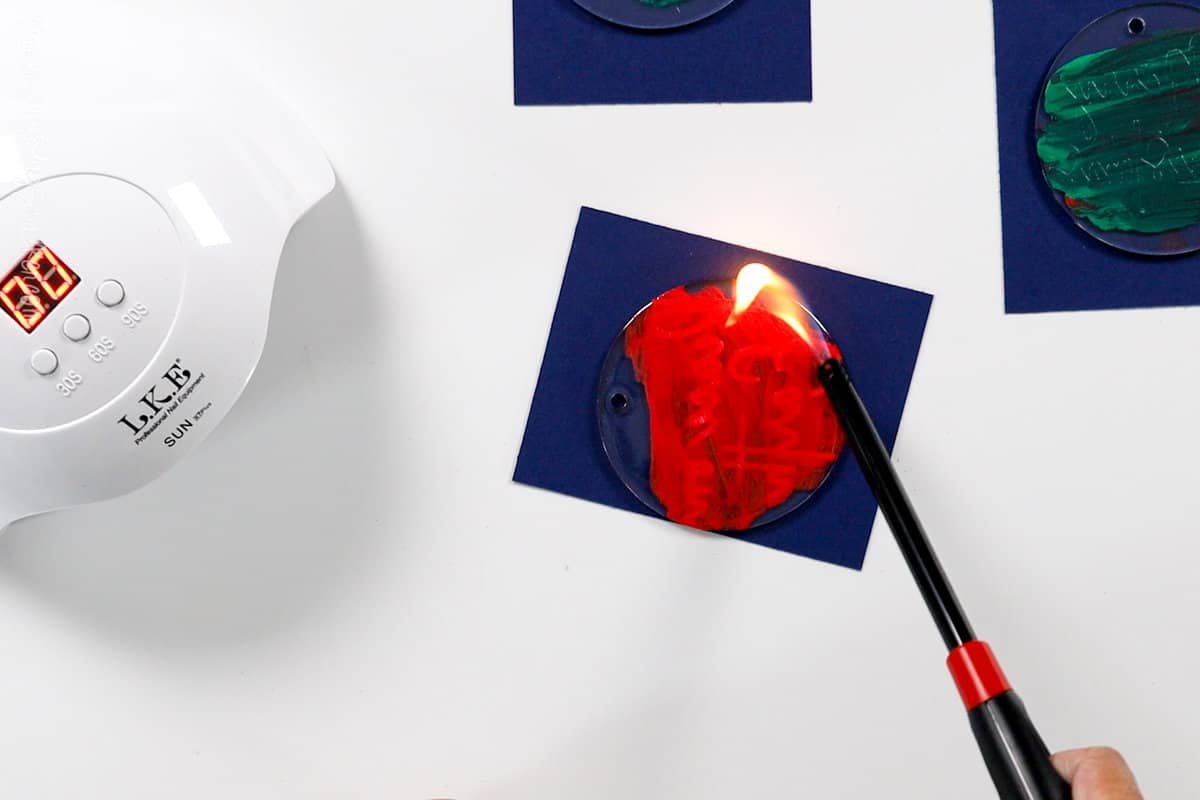
Go over the back with a lit lighter. This will pop any air bubbles.
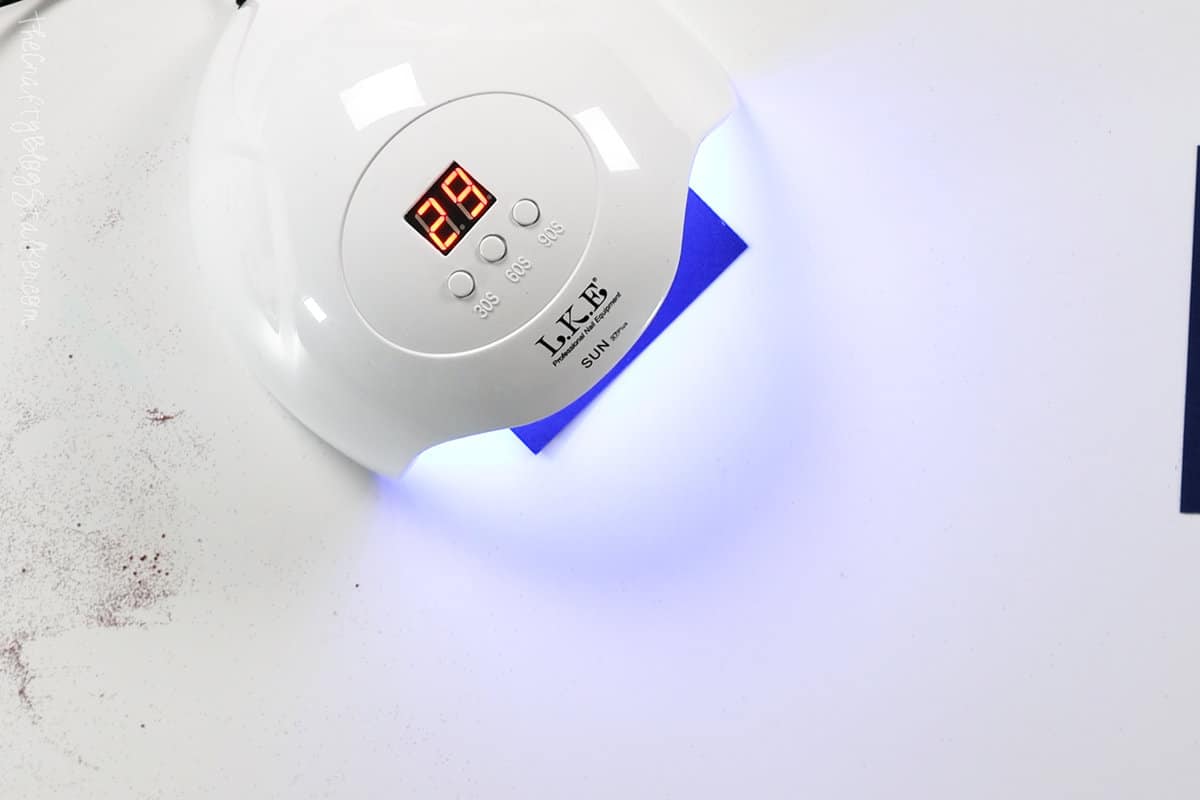
Place under the UV nail light for 90 seconds. When the timer is up, rotate the ornament 25º and cure it for another 90 seconds. Then repeat one more time so you have a total of 270 seconds or 4 and a half minutes.
If the back still feels tacky then the resin isn't cured all of the way through. Repeat until it is no longer tacky.
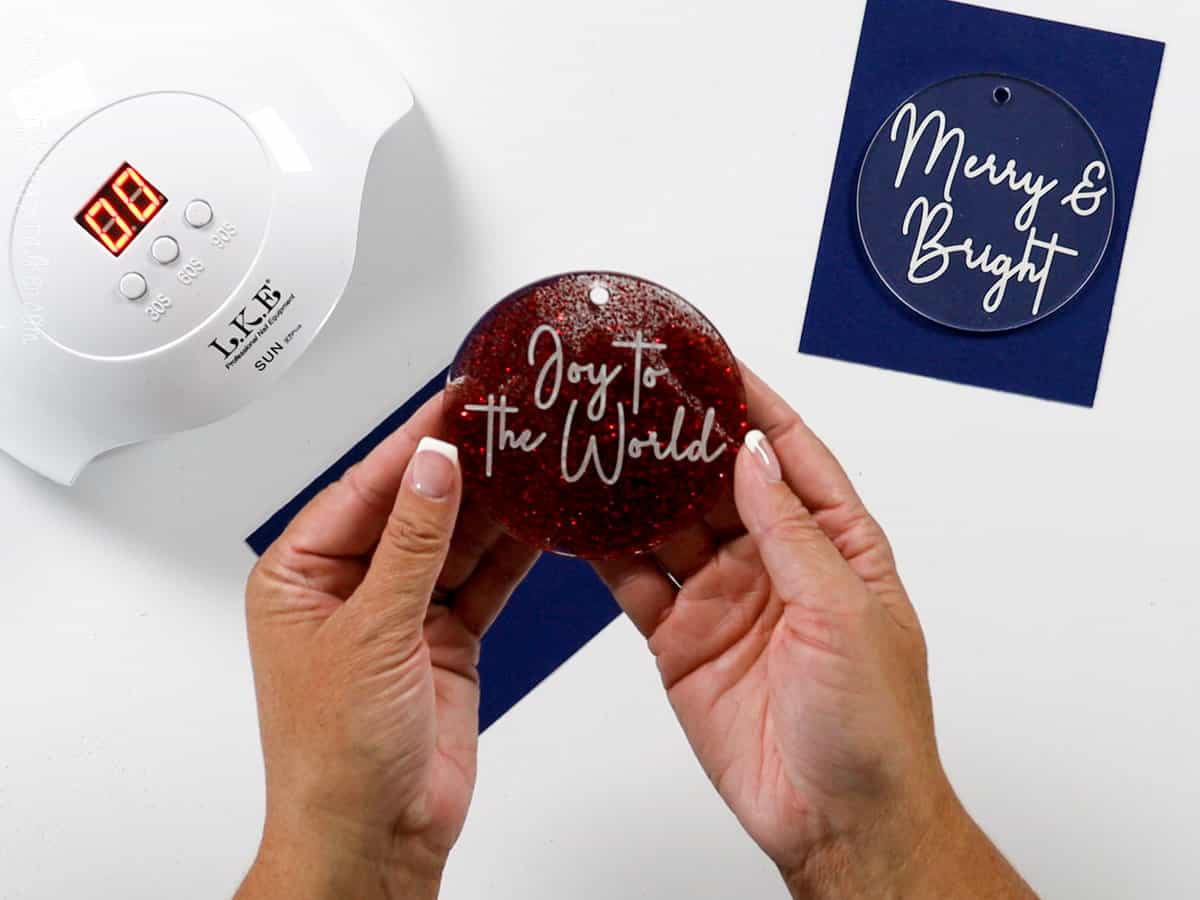
Glittered Ornaments:
Place the ornament face down.
Measure 10ML of UV Resin into a little measuring cup.
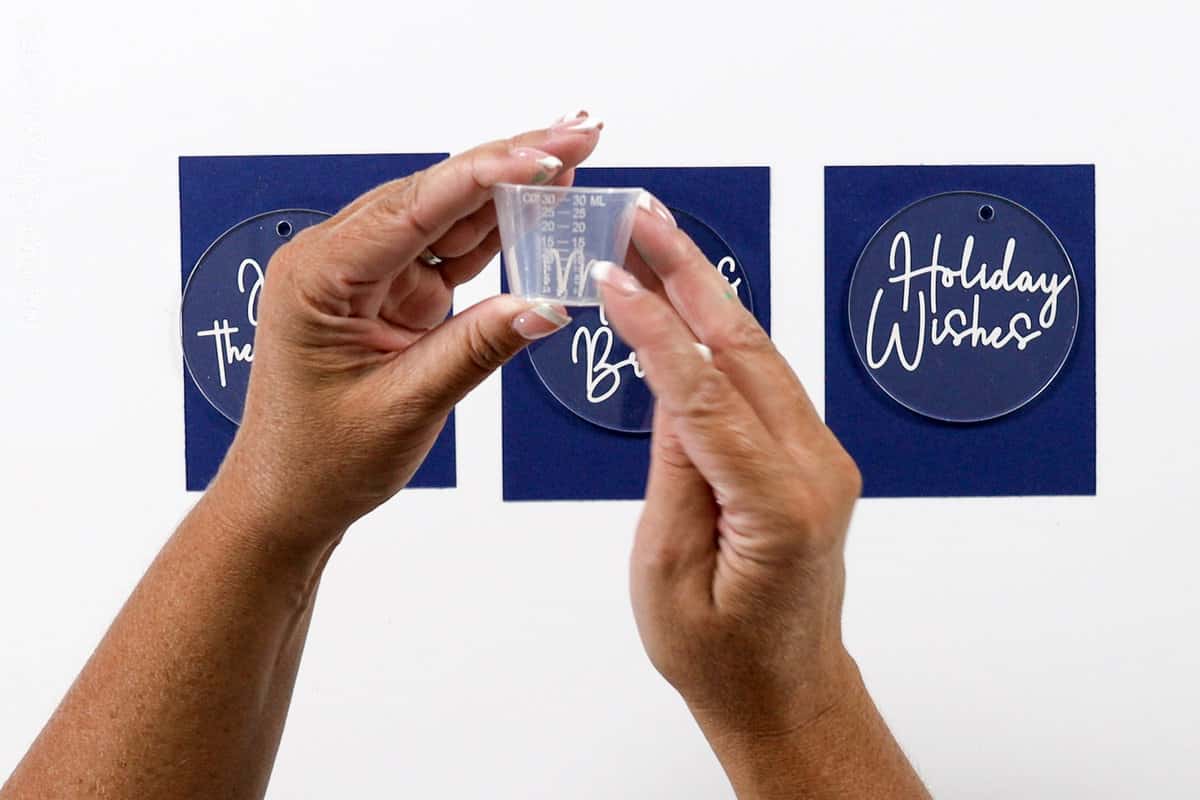
Add your mixture of glitter to the cup. I like to use different shades and different sizes. There is no exact measurement for this. Just keep adding and stirring until you like the ratio of glitter to resin.
Carefully pour the resin onto the back of the ornament.
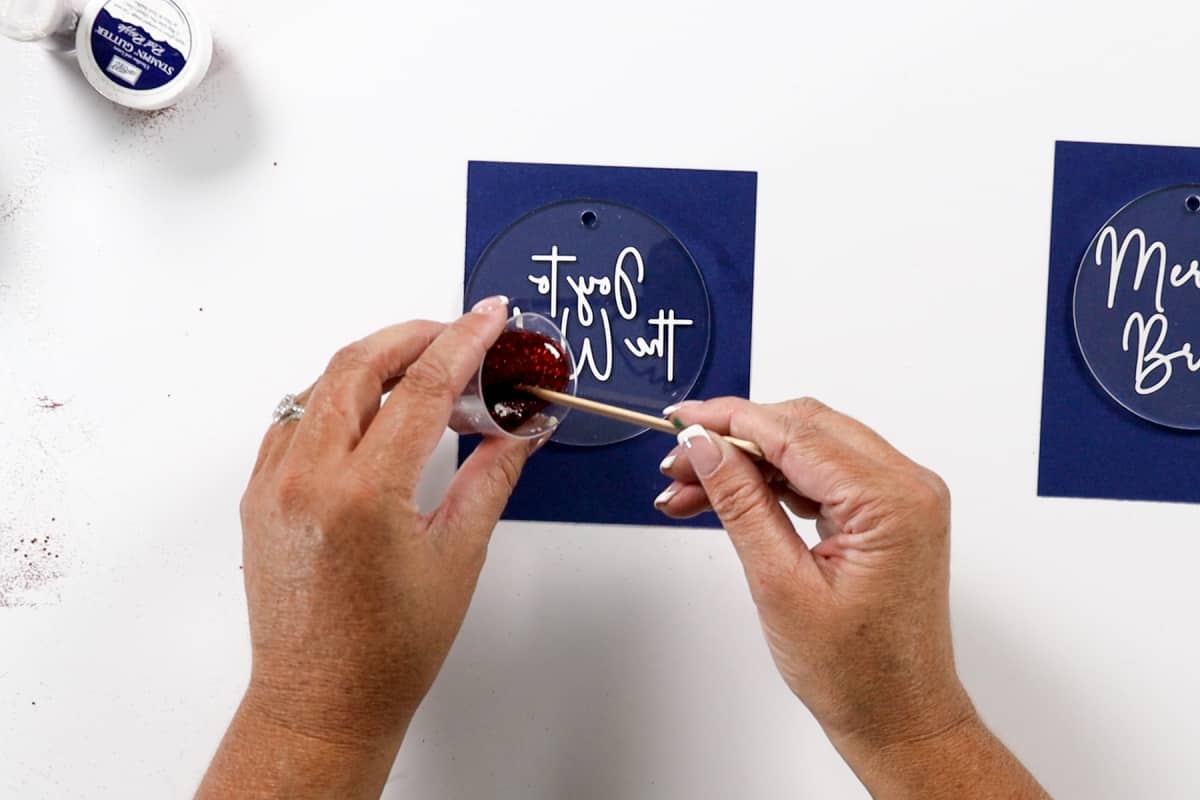
Use a craft stick to move the glittered resin all over the back of the ornament, right up to the edges.

Place the ornament under the UV nail light for 90 seconds. When the timer is up, rotate the ornament 25º and cure it for another 90 seconds. Then repeat one more time so you have a total of 270 seconds or 4 and a half minutes.
Here are all 6 of the finished ornaments using different techniques.
Add the Hanger:
To finish the ornament cut a length of ribbon or cord to 7 inches.
Thread through the hole in the ornament, and if you would like, this is when you would string your charm onto the ribbon/cord as well.
Tie in a knot and your ornament is ready to hang!
The UV resin on the back of the ornament keeps everything nice and secure so you don't have to worry about scratches and losing pieces of your vinyl, while the front of the ornament is nice and smooth.

Crafting Essentials
- The Cricut Cutting Machine is easily my favorite crafting tool. We use it in so many of our tutorials!
- These MakerX Crafting Tools are perfect for keeping in the craft room and are always ready when needed!
- This Fiskars Paper Trimmer is easy to use and cuts nicely without frayed edges.
- These Scotch Precision Scissors cut like a dream, and you get multiple pairs in a pack!