

Have you seen the foil trend? Foil is that bit of shimmer that seems to be on everything from home decor to thank-you cards. I personally have been loving the trend. Foil can be found in all sorts of colors but the most popular is definitely gold.
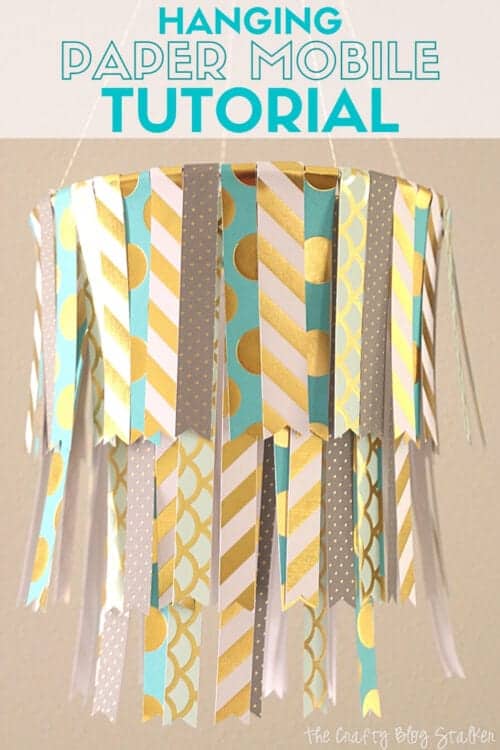
I recently found a paper stack of foiled patterned sheets and I fell in love! But seriously, I have so much paper that you could easily accuse me of being a paper hoarder.
That is when I thought up this Hanging Paper Mobile. I would be able to use lots of different sheets AND it would be super fun to make. DONE! Into the cart it went.
Hanging Paper Mobile Tutorial Video
Like videos? I do have a video tutorial if you would prefer to watch the tutorial. Please subscribe to my YouTube Channel so you don't miss out on any future video tutorials!
Supplies Used to Make a Hanging Paper Mobile
Items linked below may go to similar items when exact items couldn't be found online. Links are affiliate so when you purchase, I will get a small kickback to help fund the next tutorial!
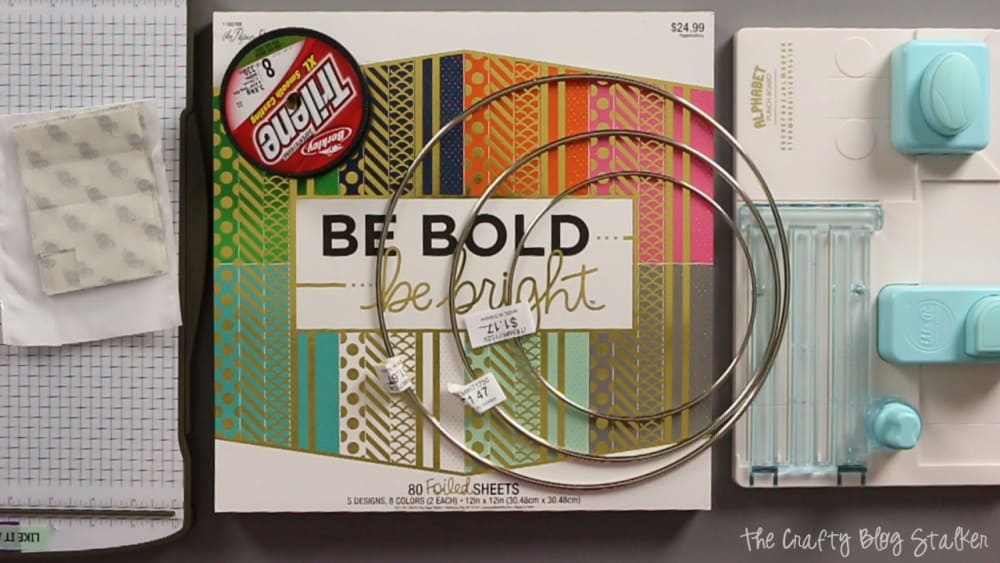
- Foiled Patterned Paper (12x12)
- 6-inch Ring
- 8-inch Ring
- 10-inch Ring
- Paper Trimmer
- Alphabet Punch Board
- Glue Dots
- Baker's Twine
How to Make a Hanging Paper Mobile
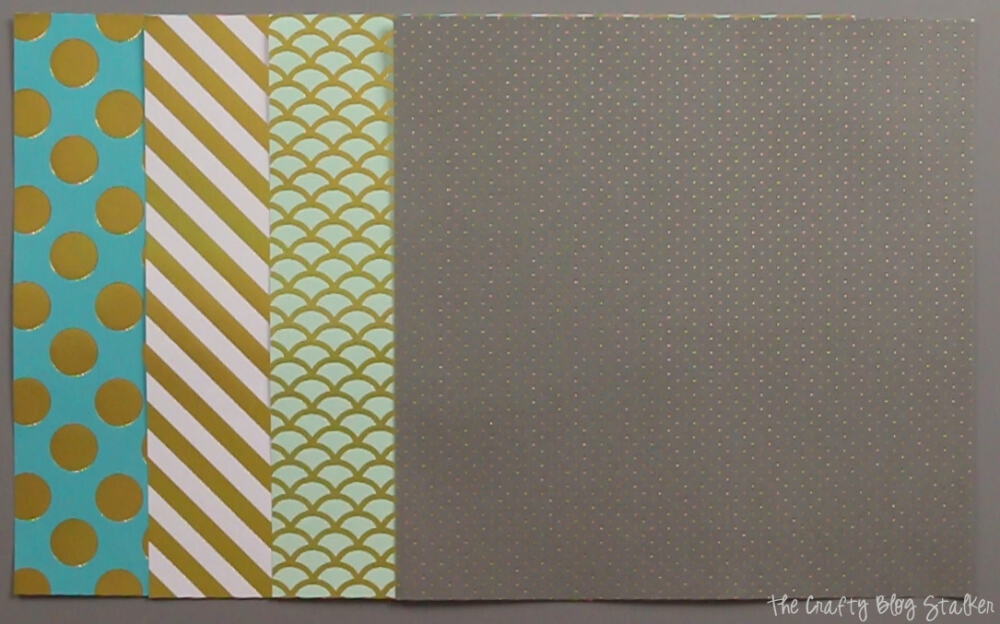
Begin by selecting 4 sheets out of the foiled paper stack. Each sheet is a different color with a different pattern, but any paper could easily be used for this mobile. I actually ended up using about 1 ½ of each pattern and color.
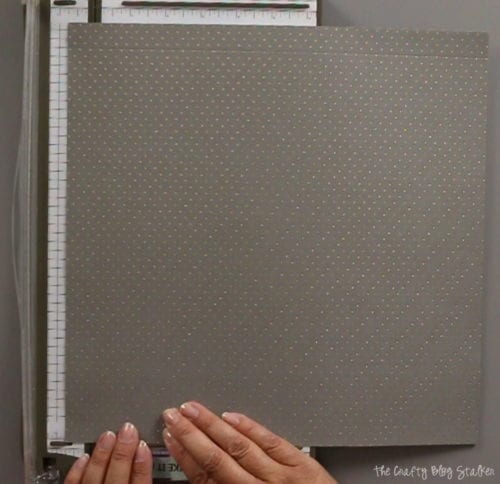
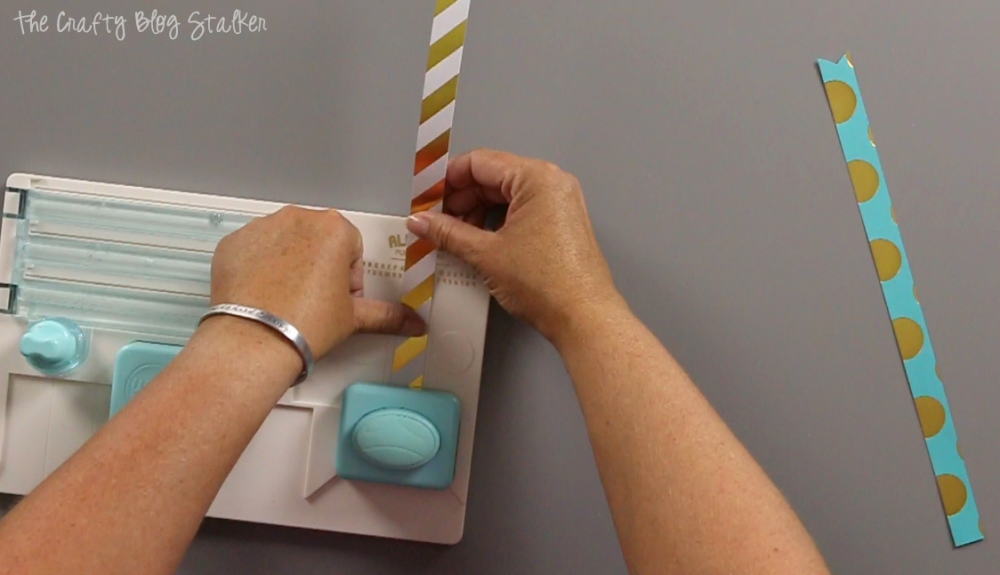
Using a paper trimmer, score a line at the ¾-inch mark. Turn the paper so the scoreline is at the top and cut strips ¾-inch wide. Do this to all sheets of paper selected.
After all of the ¾-inch strips are cut flag the ends. Make sure to flag the side that IS NOT scored. The Alphabet Punch Board has a flagging punch that is perfect for this project.
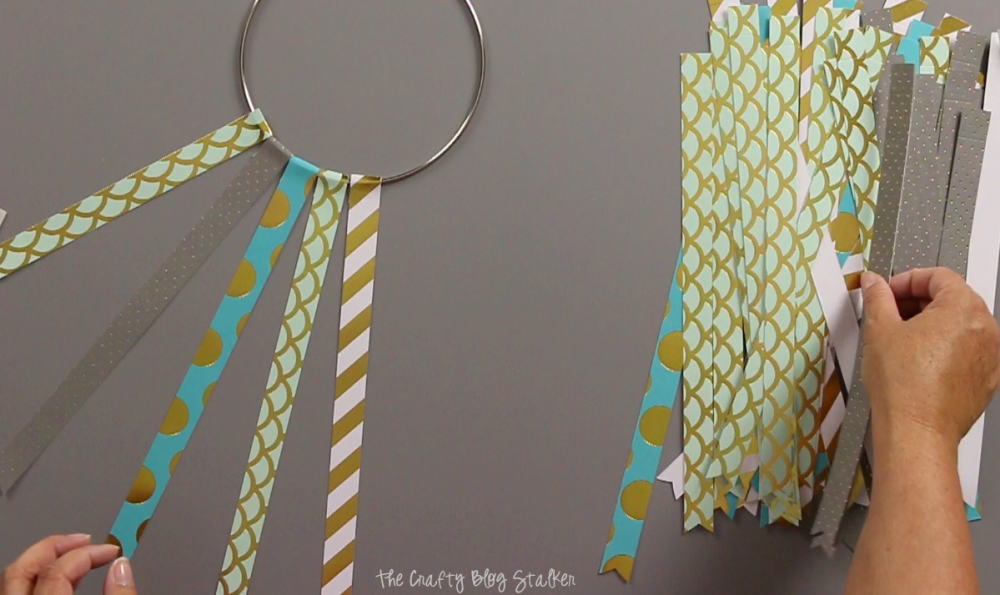
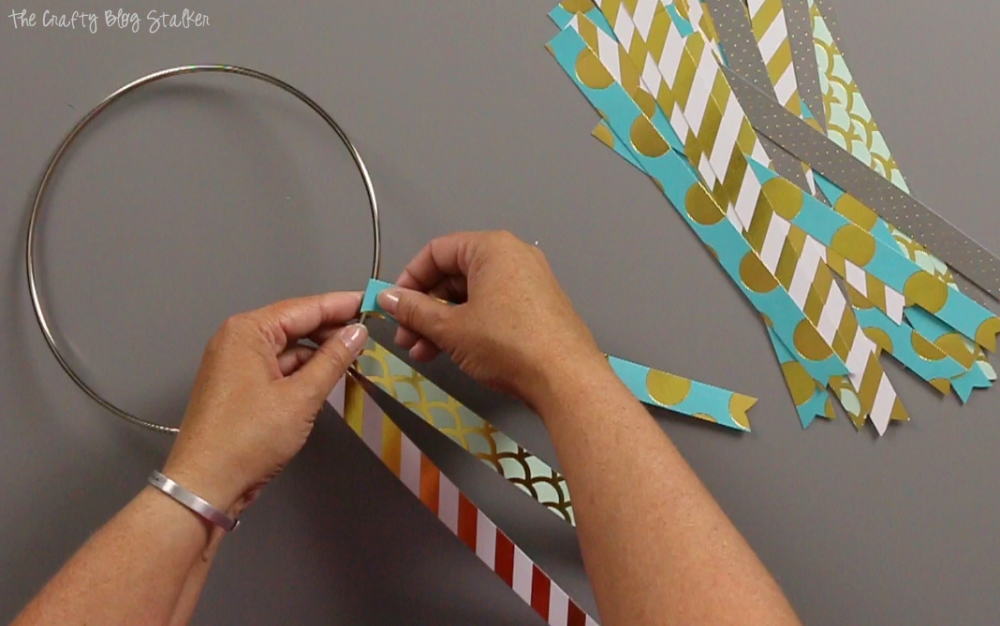
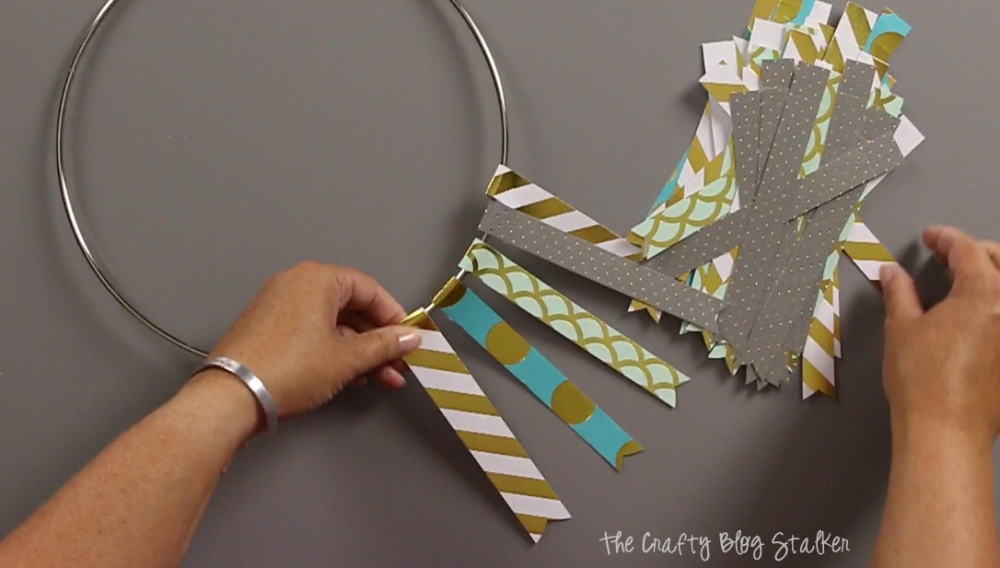
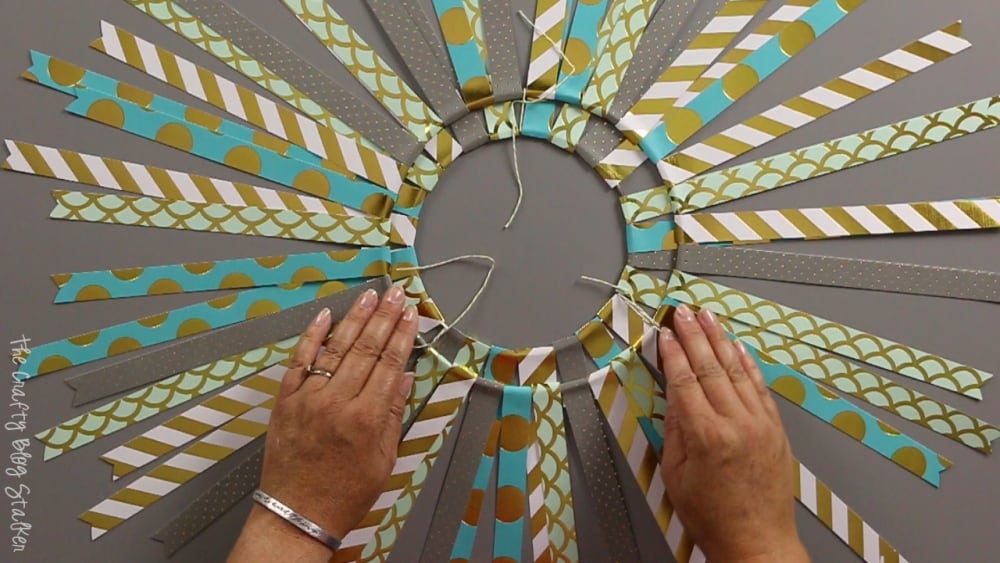
The reason for scoring the edge of the paper is now every strip has a perfect fold line. Fold down the top tab from each strip. Use a glue dot and wrap that folded edge around the ring. Make sure the glue dot is stuck to the paper, not to the ring.
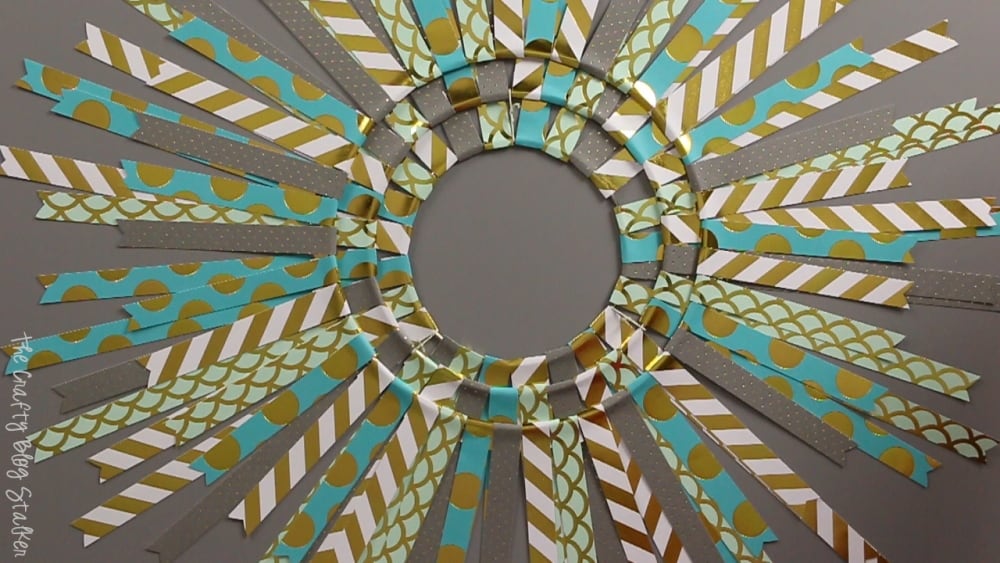
Start with the smallest, 6-inch ring, and attach the 12-inch long flags.
Trim the remaining strips of paper to 9 inches and score at the ¾-inch mark. Repeat the steps above and attach the strips to the medium, 8-inch ring.
Trim the remaining strips of paper to 6 inches and score at the ¾-inch mark. Repeat the steps above and attach the strips to the large, 10-inch ring. At this point, I had to cut more strips of paper from the full sheets.
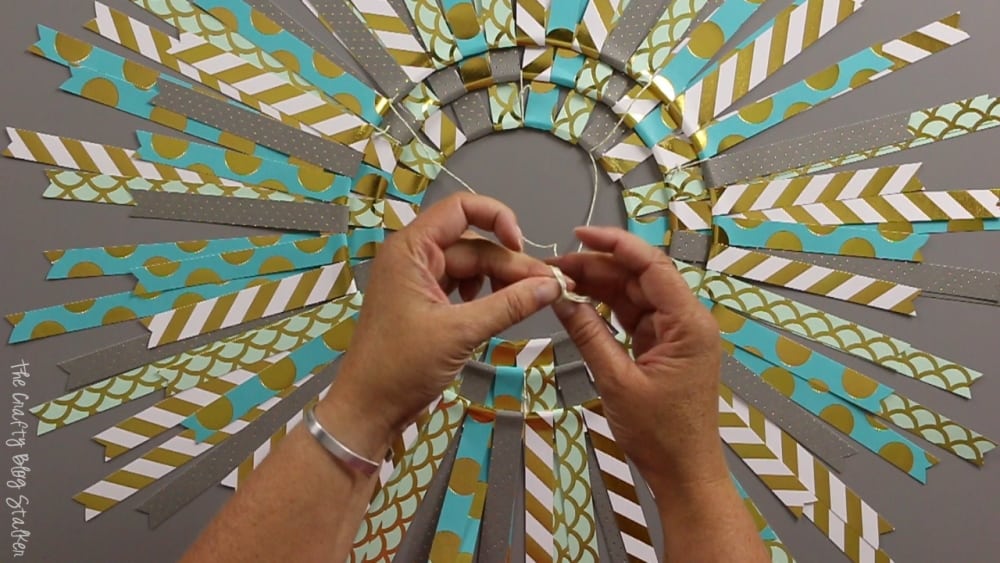
When all of the rings are filled with strips it is time to assemble the mobile. Start by layer the 8-inch ring on top of the 6-inch ring with all of the strips of paper pointing out. With a piece of twine tie the two rings together in three different spots, and then trim the excess twine.
Then layer the largest, 10-inch ring on top. Tie the larger ring to the middle ring in three different spots, again trimming off the excess twine.
To create the hanger for the mobile, cut 4 strands of twine that are the same size. My pieces were about 15 inches long. Tie each strand onto the large ring in spots that would be in the four corners of a square. Bring each strand together and tie the 4 strands together in a simple knot.
All that is left is to find that perfect spot to hang it!
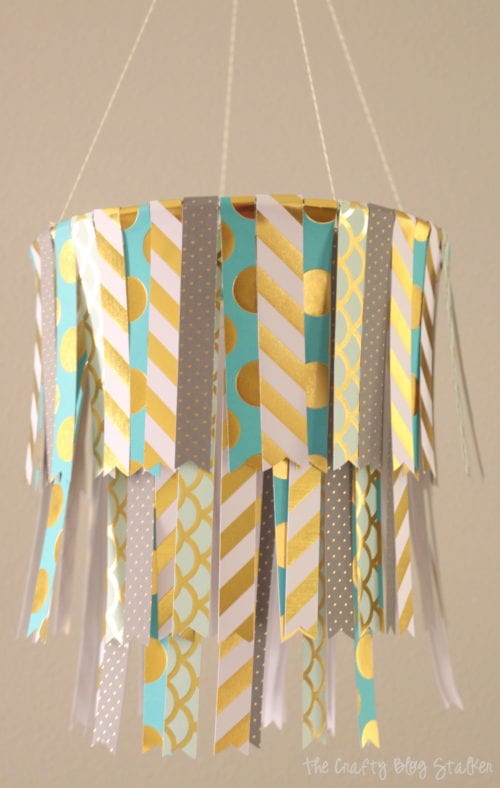
This would make a great baby mobile or party decor. My daughter loves it because blue is her favorite color so we hung it in her room. It really is great for a kid's room of any age. Plus, I was able to use my new favorite foiled paper! CHECK✓
Where will you hang your Hanging Paper Mobile? What colors or patterns will you choose?
Crafting Essentials
- The Cricut Cutting Machine is easily my favorite crafting tool. We use it in so many of our tutorials!
- These MakerX Crafting Tools are perfect for keeping in the craft room and are always ready when needed!
- This Fiskars Paper Trimmer is easy to use and cuts nicely without frayed edges.
- These Scotch Precision Scissors cut like a dream, and you get multiple pairs in a pack!
Edye
What a sweet and pretty DIY! Perfect for a nursery 🙂
Blessings,
Edye
Katie
Thanks Edye! I think so too. My daughter put this in her room right above her bed and she is 13 🙂 so it's good for a baby of any age!
Marsha
Cute project. Thanks for sharing it on DIY-Crush this week.
Katie
Thank you Marsha. It was really a lot of fun to create!
Ashleigh
Simple and easy are exactly my policies when it comes to decor. This is such a fun and creative idea. Great job!
You've been chosen to be featured on the next Peace, Love, Link Up! Grab a button and I'll see you Friday at 6 for more sharing fun! : )
Katie
Thank you Ashleigh, I am so glad that you like it! And thanks for the feature! I'm running over right now to see.