

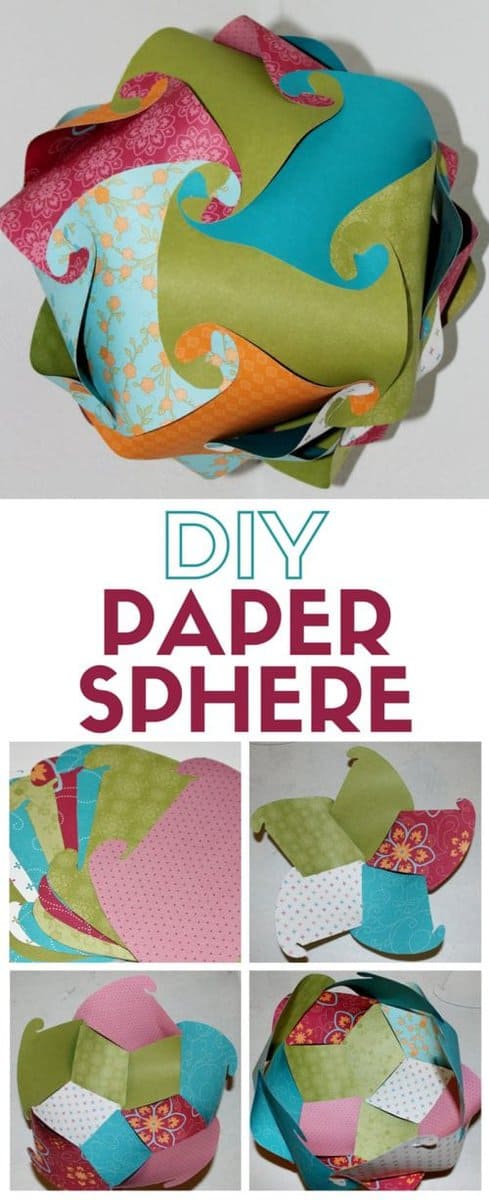
Make a Paper Sphere! Fun party decorations or beautiful home decor. An easy DIY craft tutorial idea perfect for any theme or event.
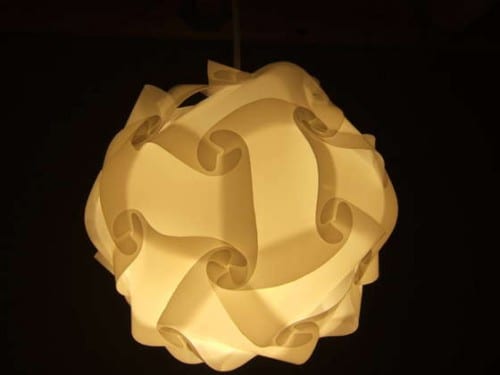
Have you seen these Paper Spheres? I saw one at a woman's show and thought it was absolutely amazing. It was made out of plastic, not paper and was real lamp - how cool is that?! But the price tag was a little steep at $100 and decided I could easily make my own... right?
While searching Pinterest for a project tutorial, I found this one and became super excited to get started.
I found a tutorial on Instructables but had a hard time opening their template. I found PDF template that I could open, so this tutorial came by combining the two.
Supplies Used: Some links may be too similar items when exact items couldn't be found online.
How to Make a Paper Sphere
Print out the template and trace onto chipboard so you have a sturdy pattern piece that can easily be traced over and over again.
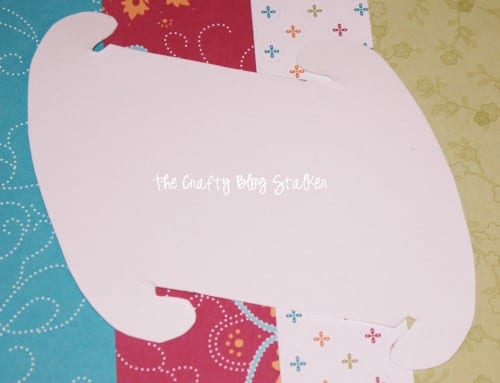
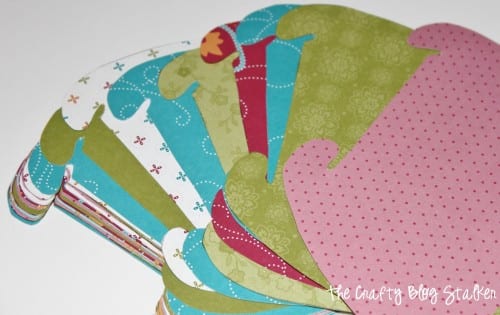
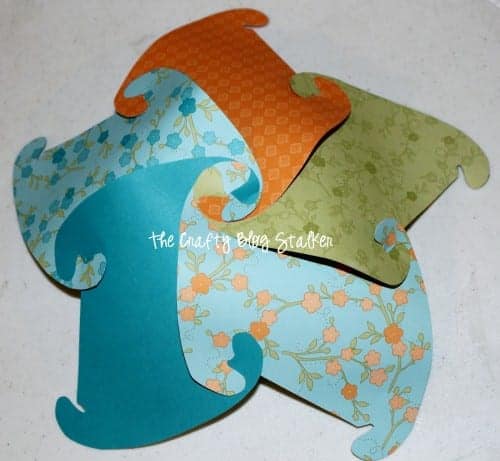
Trace and cut out 25 shapes out of the pattern scrapbook paper.
I immediately started trying to assemble and it really is like a great big jigsaw puzzle. I tried for about an hour and was getting very, VERY frustrated because I couldn't get it to work and I thought I was following the tutorial, but it still wasn't working. I finally had to get up and walk away, or I was going to loose it.
I let it sit for a couple of days and then sat down to try again. It still took me a while to figure it out, but I got it! YAY! So while Instructable's tutorial is great I am going to add a couple of tidbits so hopefully, you won't get as frustrated as I did.
Just a warning: This is a difficult project. I will try to answer questions where I can, but it really just takes playing with it and figuring out how it all goes together.
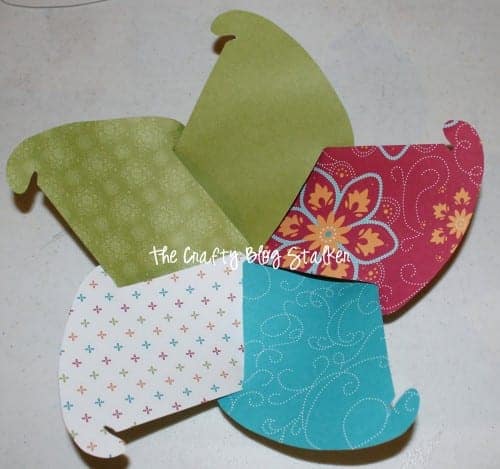
Following the tutorial, make your base. (I actually made two bases and then connected them together instead of building from the bottom up).
This is the same piece turned over.
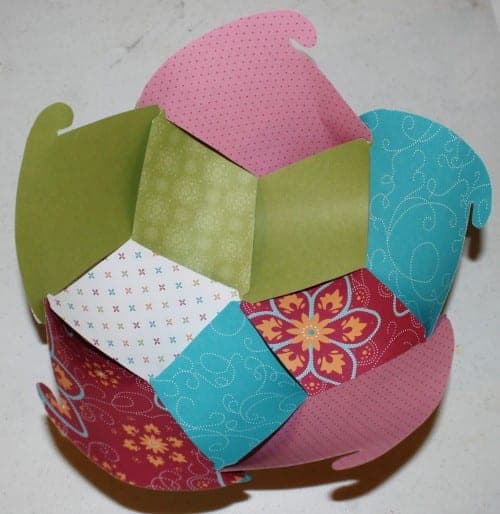
Holding the base on your lap, put the next row on the base. Do that to both bases.
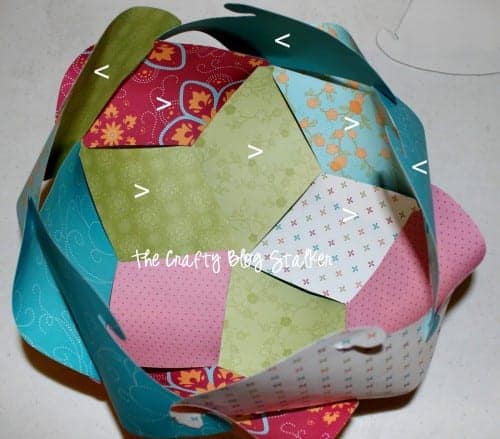
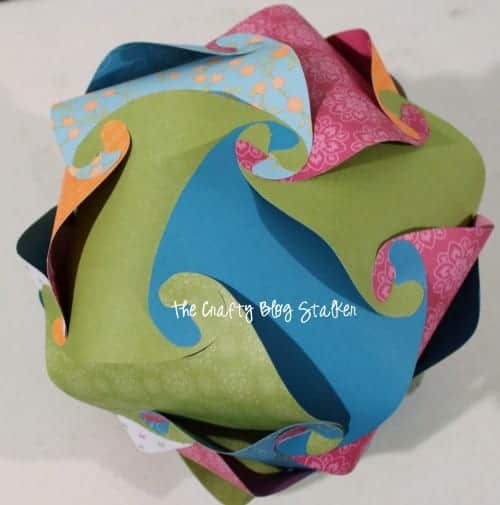
What the sphere looks like looking in.
Now, this is where it gets a really confusing. If you look at the pieces you will see that each side of the piece slopes in a different direction. For the first several steps, assemble all the pieces going the same way. The next row you are going to want to turn the pieces over so they slope in the opposite direction and assemble the next row. In the next picture, I tried to show you the direction of the pieces by using these signs < > as the direction of the piece. Only do this to one base because this is the center row.
Put the 2 bases together, connect the tabs, and you have a sphere!
Hang with a piece of ribbon or fishing line.
This project was a doozy for me, BUT after all of the time I spent being completely ticked off at this project I was so glad that I figured it out!
I hung it the corner of our family room where the kid's computer sits. There is something so satisfying about finishing something that gave you such a hard time. It makes you appreciate it even more!
Where would you hang a paper sphere? Leave a comment below to share.
Summer @ Summer Scraps
Glad you stuck with it because it looks really cool - and extremely difficult! Great job!
Claire @ a little something in the meantime . . .
Wow, this looks like it would be SO hard to assemble! The finished product is amazing though so good for you for sticking with it to the bitter end!
Liz
Looks complicated, but very beautiful! Liz
Michelles Tasty Creations
Wow, this is Amazing! So glad it worked out. I probably wouldn't have gone back but so glad you did. Thanks so much for linking up to Creative Thursday this week. I can’t wait to see what you link up next week. Have a great day.
Michelle
Adrianne at Happy Hour Projects
I have seen these as lamps... I didn't realize it was DIY-able, but now I'd like to give it a try!! Thanks for the share!
Terry
I've never seen these before but how cool is that!! Yours turned out great with all of those pretty colourful papers. Thanks for sharing at our party this week.
Connie
Hi Katie: I'm Connie at http://hotflashncraftn.blogspot.com/, a new GFC friend. I would love it if you stop over and be mine too.
This is so cool, honestly just by looking at it, I had no idea it was paper. Very cool, thanks for sharing.
Debra Kapellakis
BRAVO! You encourage me!
Kara at Petals to Picots
This is so cool! Thanks for sharing at my party! Have a great weekend 🙂
Sass - aka - Kathy
I love it! Will have to give it a try - I love a challenge!
Rachel
This looks complicated, but sooo cool! Thanks for sharing at Terrific Tuesdays.Rachel
Jenny @ The NY Melrose Family
I love it! The colors you chose are so fun. I have to check the tutorial to totally understand. Thanks so much for sharing at Whimsy Wednesdays.
Holly Legare
Very cool!
Holly
Lisa @ Flour Me With Love
This is so neat...thanks so much for sharing at Mix it up Monday 🙂
Erin @ Chronic Christian Crafter
This is very interesting and intricate. Just the patience and technique alone! Thanks so much for sharing with us @ Toot Your Horn Tuesdays. Looking forward to what you link up next!
Erin
Printabelle
Love it! I'd love for you to add it on my link party! Thanks!
Vix
That's gorgeous! I've a heap of vintage wallpaper offcuts dying for a project! Thanks for sharing.x
Pam Klimper
Very cool project! Glad you figured it out!
Kim Vealey
This is cool...don't know if I can handle it, though...my OCD says YES!!, my patience says NO!!, pinning just in case.
Stopping by from Serendipity & Spice!
Ana Lopes
Amazing!
Have a wonderful week!
Hugs from Portugal,
Ana Love Craft
BeBetsy
Really cool. Come by and share your links on our parties! Check them out on BeBetsy.com
Thanks, love what you do! ~ Sharon and Denise
Marie bloominghomestead
Oh wow, this is totally cool and blows my mind a little bit. I am going to have to try this with my son. 🙂
Janine LaTulippe
This is beautiful! It would look cool hanging in a kids room too. I wonder if you could make really big ones? This is a stupid question, but where do I get chip board? Is it like plastic paper? Thanks for sharing! Pinned.
Katie Adams
Chipboard is basically lighter cardboard. It is like th back piece of a notebook or a lot of times it is part of packaging like if you buy a pack of scrapbook paper. You can purchase sheets at most craft stores or you can just look around. You might have some lying around and not even realize it.
Katie Adams
Thank you for sharing how you made it work for you!
Nikkie
Where did you buy the plastic
Katie
Nikkie - I didn't make mine out of plastic, I made mine out of paper. The plastic one was my inspiration.
Mari
That's amazing - thank you so much for this tutorial. I'm def gonna try it 🙂
Katie
You totally should Mari! It looks awesome when finished. Thanks for stopping by.
Theresa Sundstrom
This was a great project! Took me a bit to figure out connecting everything, but totally worth it. I made one using the template at 50%, out of card stock that I plan on turning into a fancy topiary. I also made one at 25% out of sturdy construction paper, looks like a large Christmas ornament. I'm going to try shrinking it a little more to see if I can make it the size for ornaments that I like, and use them as gifts. Cool project, good instructions. Thanks!!
Katie
Thank you, Theresa! A smaller ornament would be so cute!!!