

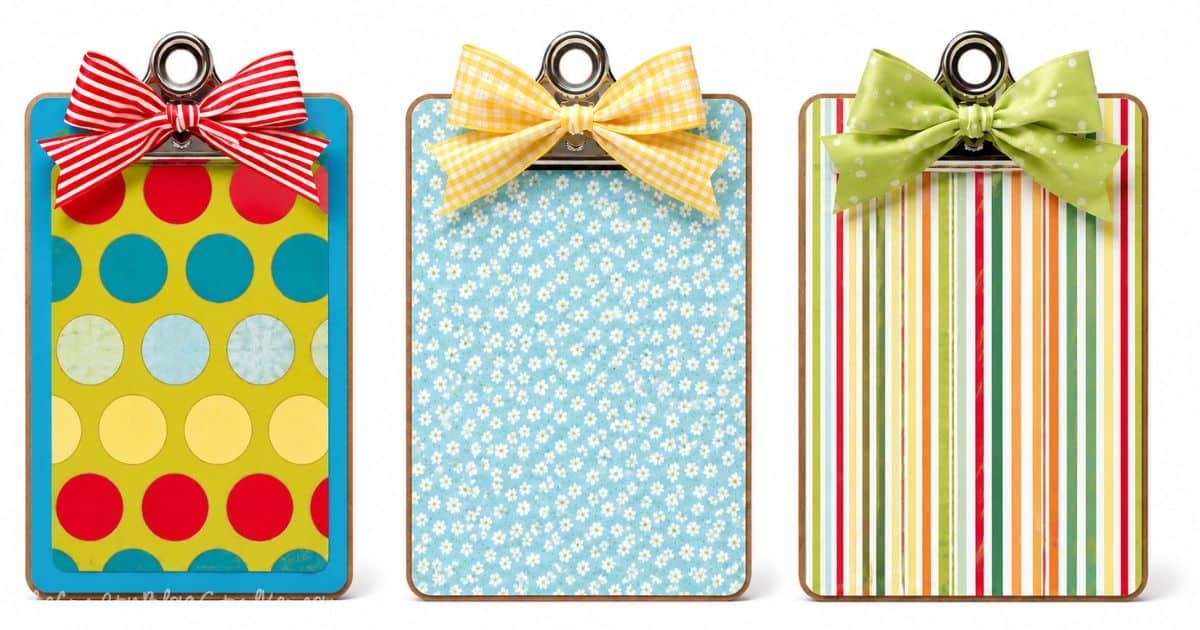
Make a decorative standing clipboard with this easy DIY tutorial. It's a fun way to display photos, notes, recipes, and seasonal decor.
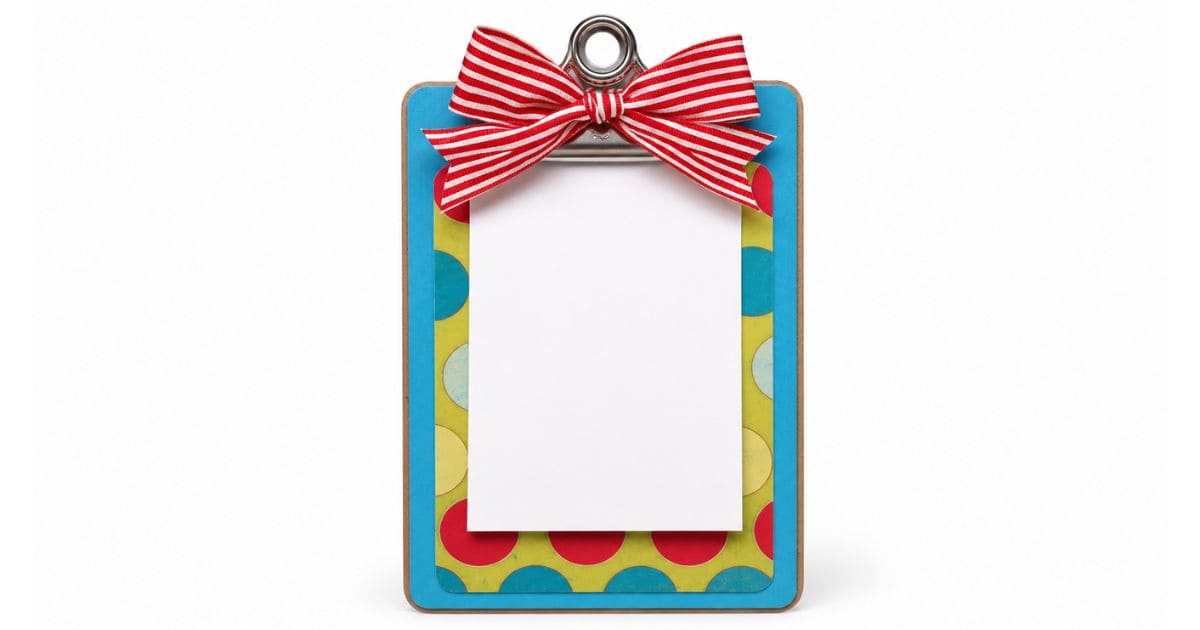
I originally made these standing clipboards as roomie gifts for a blogging conference, and they were such a hit that I couldn't wait to make more.
They're one of those projects that look polished but come together with just a few simple supplies.
You can easily customize each clipboard with different papers, colors, ribbons, or vinyl to match any season or decorating style.
Whether you use yours to display a favorite photo, a recipe, or your weekly to-do list, it's a project that's both beautiful and practical.
Skill Level: Beginner
Estimated Cost: $10-$15
Total Time: 30 Minutes
Supply List
Some links may lead to similar items when the exact item is unavailable.
Choosing Your Clipboard
Any standard 6 x 9-inch clipboard will work for this project. Before decorating, check that the surface is clean and free of stickers, scratches, or any obvious defects that could show through your paper.
If you're making several clipboards as gifts, look for unfinished wood clipboards or inexpensive hardboard clipboards with the same dimensions. This makes measuring and cutting much easier.
Prepare the Clipboard
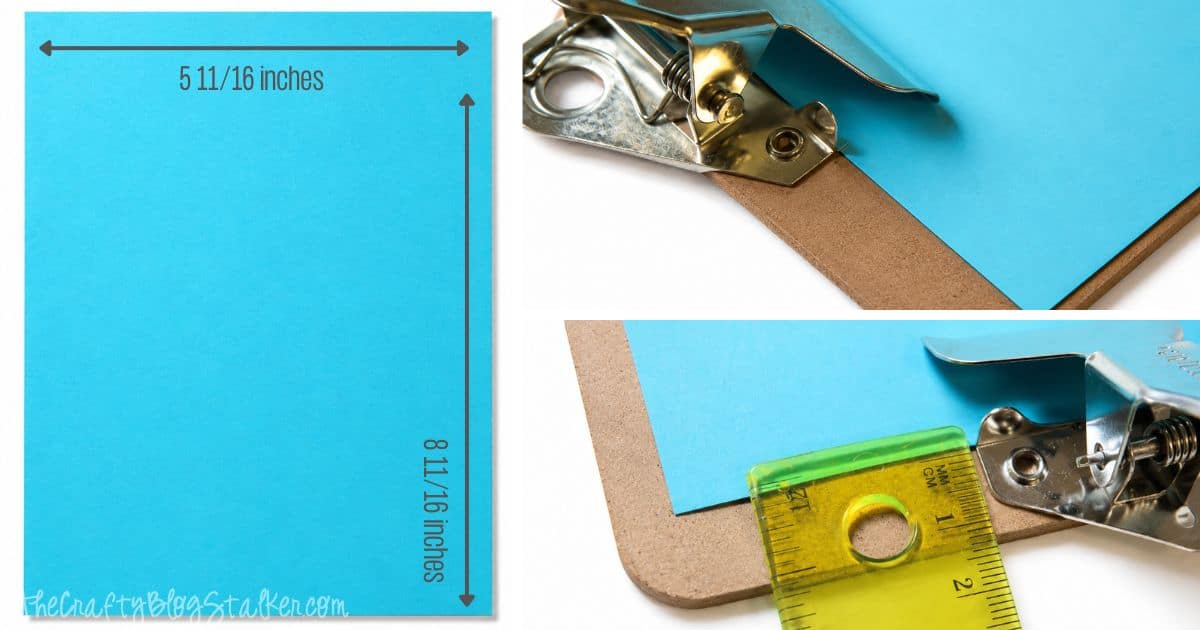
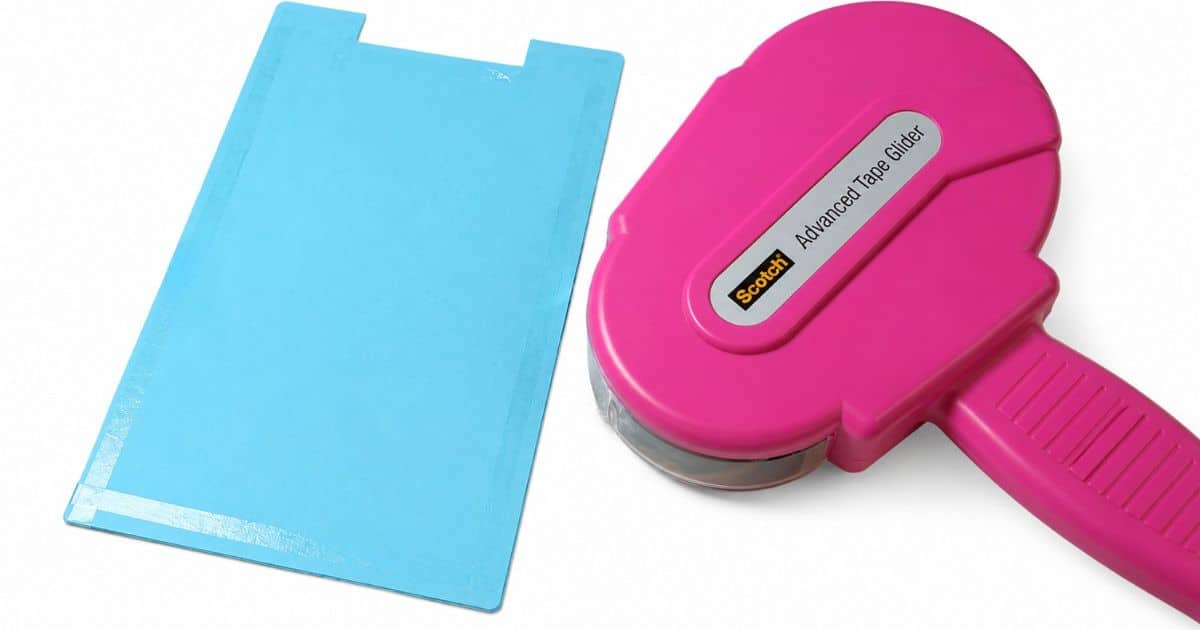
Begin by cutting the solid cardstock to 5 11/16 x 8 11/16 inches.
Slide the cardstock underneath the metal clip and use a pencil to mark where the metal bracket sits.
Measure how far the bracket extends onto the clipboard so you know exactly how deep to cut the notch.
Carefully trim away the marked section and test the fit.
It's much easier to remove a tiny bit more paper than to cut away too much, so make small adjustments until the cardstock fits neatly around the clip.
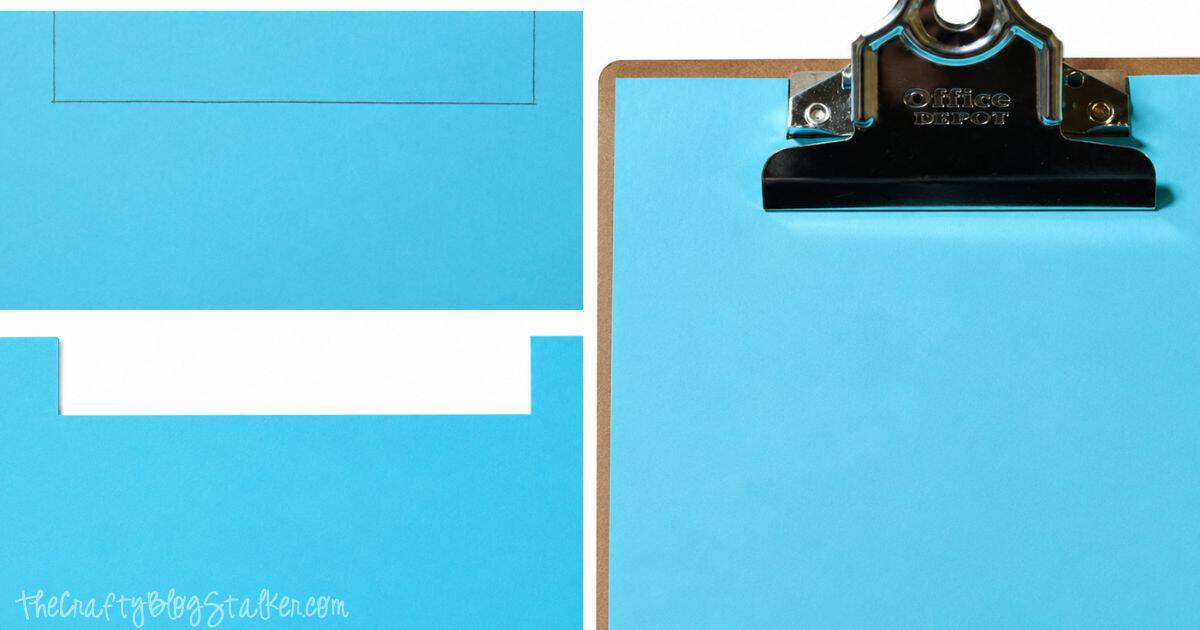
Once you're happy with the fit, use a corner rounder punch on all four corners.
This small detail helps the paper follow the rounded corners of the clipboard for a more finished look.
Apply adhesive evenly across the back of the cardstock, slide it into place beneath the clip, and smooth it down to remove any air bubbles.
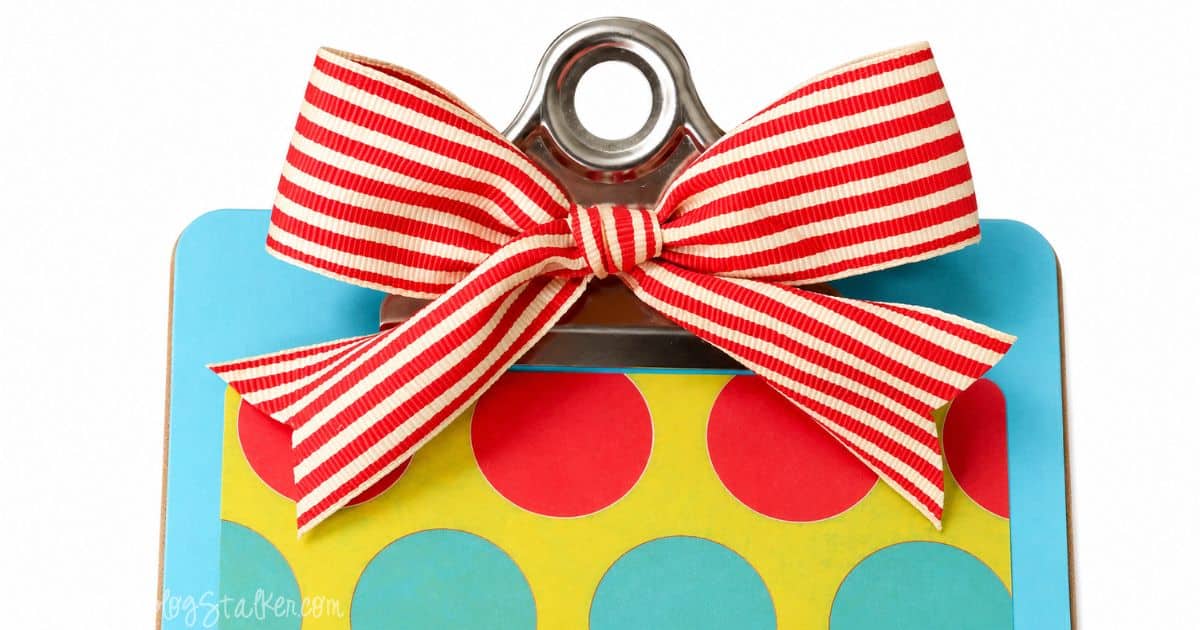
Add the Decorative Paper
Cut the patterned paper to 5 x 7 inches and round the corners just as you did with the cardstock.
Center the patterned paper on top of the cardstock and adhere it securely. Layering the papers creates a decorative border that gives the standing clipboard a polished, professional appearance.
This is where you can really make the project your own. Try seasonal papers, scrapbook collections, family photos, or even adhesive vinyl to match your home decor.

Make the Ribbon Bow
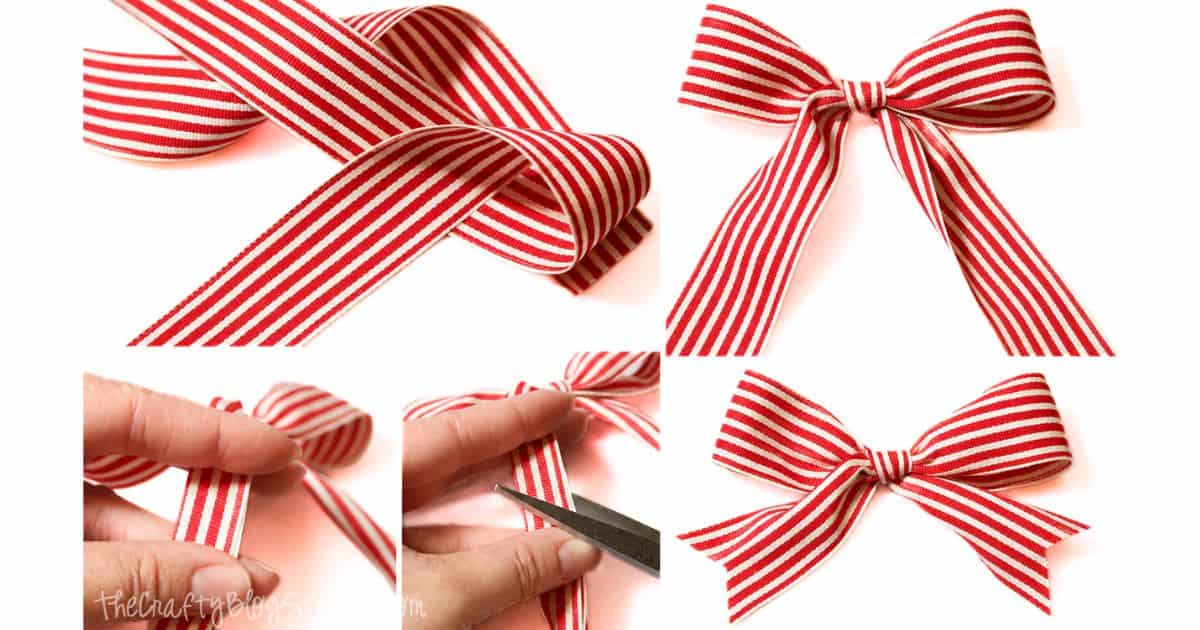
A simple ribbon bow adds the perfect finishing touch.
Tie a bow using your favorite ribbon. I like using wider ribbon because it holds its shape nicely.
To create neat ribbon tails, fold each tail in half lengthwise and cut diagonally toward the folded edge. This creates the classic "V" shape that instantly makes the bow look finished.
Attach the completed bow to the front of the clipboard with a small amount of hot glue.
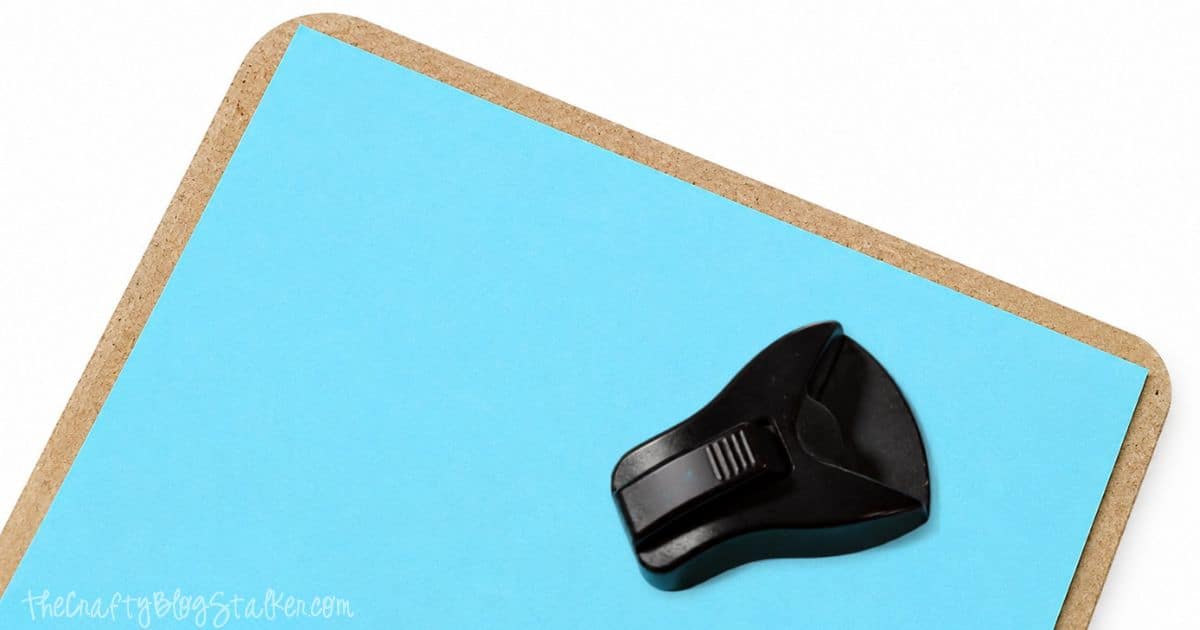
Turn It Into a Standing Clipboard
Here's the little trick that transforms this project from an ordinary clipboard into a decorative display.
Remove the easel backing from an inexpensive picture frame and hot glue it to the back of the clipboard. Allow the glue to cool completely before standing it upright.
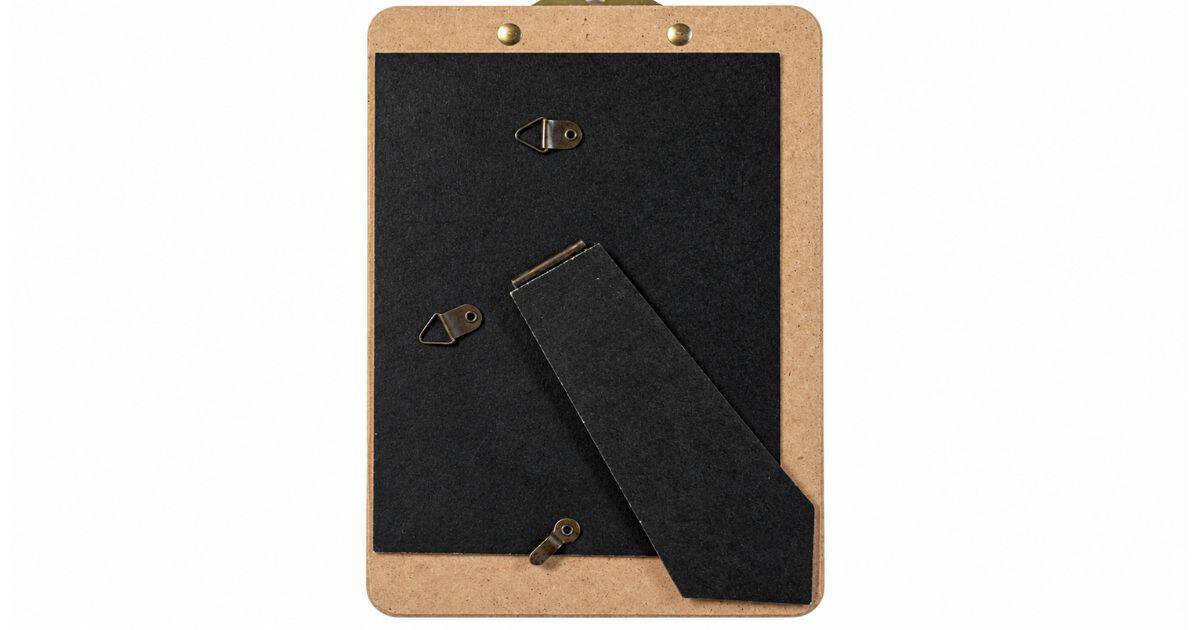
The easel creates a sturdy base, making the clipboard perfect for displaying recipes in the kitchen, family photos, inspirational quotes, notes, or seasonal decorations on a shelf or desk.
Decorating Ideas
Once you've made your first standing clipboard, it's hard to stop at just one.
These make thoughtful handmade gifts for teachers, coworkers, neighbors, and friends.
They're also fun to decorate for different holidays, giving you an easy way to change up your decor throughout the year by simply swapping the paper and ribbon.
Frequently Asked Questions
Yes. Simply measure your clipboard and adjust the cardstock and patterned paper to fit.
A strong double-sided adhesive or permanent glue runner works well for attaching the paper. Use hot glue to secure the ribbon and the easel back.
Absolutely! Painting the clipboard before adding the paper is a great way to coordinate the edges with your design.
Yes! Adhesive vinyl works beautifully and lets you personalize your standing clipboard with names, monograms, or seasonal designs.
They're perfect for photos, recipes, grocery lists, inspirational quotes, calendars, menus, artwork, or holiday printables.
Need Help With This Project?
Click a button below to ask AI what other materials I can use instead of scrapbook paper.
More Handmade Gifts
Handmade gifts are some of my favorites because they're thoughtful, personal, and fun to customize. Here are more DIY gift ideas to inspire your next project.


Hi, I'm Katie!
I'm so glad you're here. Want to make something fabulous? I'm here to help!
Summer Rumsey
Katie I just love the clipboard I received from you! My daughter has been trying to steal it from me - so I think I need to make her one. Thanks for the tutorial!
Angie Church
love this so super cute believe will be able to adapt this idea to a fall wedding we will be having
Brooke
So, so cute! I have a thing for clipboards, especially cute ones. Thanks so much for sharing. Happy Monday!
Pam Klimper
Hi! New follower via Manic Monday! Love this clipboard idea! : )
Diane Piwowarczyk
A DOR A BLE!
Artsy VaVa
I love this project! I'll definitely make it. Pinning.
Jill
Clever idea! I'll be pinning it!
Marie bloominghomestead
This is a great idea, and would make a great gift. I am pinning this right now. 🙂
Lynda
Pure genius! I have some crown paper....so I am off to find the back of a stand up frame...lol. I LOVE YOUR BACK TO TOP BOTTOM!!!! I would ask for directions....but I have challenges with blog stuff....I'll just dream for now.
Rachael @ Travel Parent Eat
What a good idea, I will have to make one for recipes!
Marti
That's a super cute idea! 🙂 Thanks for sharing it with us! Pinned to the party board. 🙂