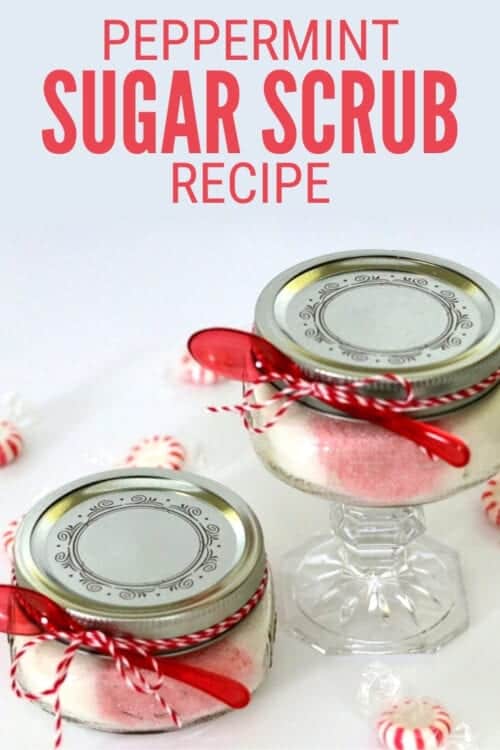
Learn how to make Peppermint Sugar Scrub Recipe for the perfect handmade gift. Below is the step-by-step tutorial and video!
Do you love to give handmade gifts during the holidays?
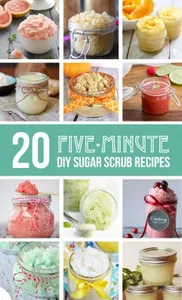
This Sugar Scrub Recipe is amazing and perfect to give to friends, neighbors, coworkers, teachers, and really just about anybody!
This sugar scrub exfoliates and leaves your skin super soft and moisturized and it smells oh-so yummy.
Craft Tutorial Video:
Supplies You'll Need to Make This Craft:
This post contains affiliate links.
One batch of this recipe makes two cups of sugar scrub.
- 2 Cups white sugar
- ¼ Cup Coconut Oil
- 10 Drops Peppermint Essential Oil
- 2 Drops Red Food Coloring
To package the scrub I used
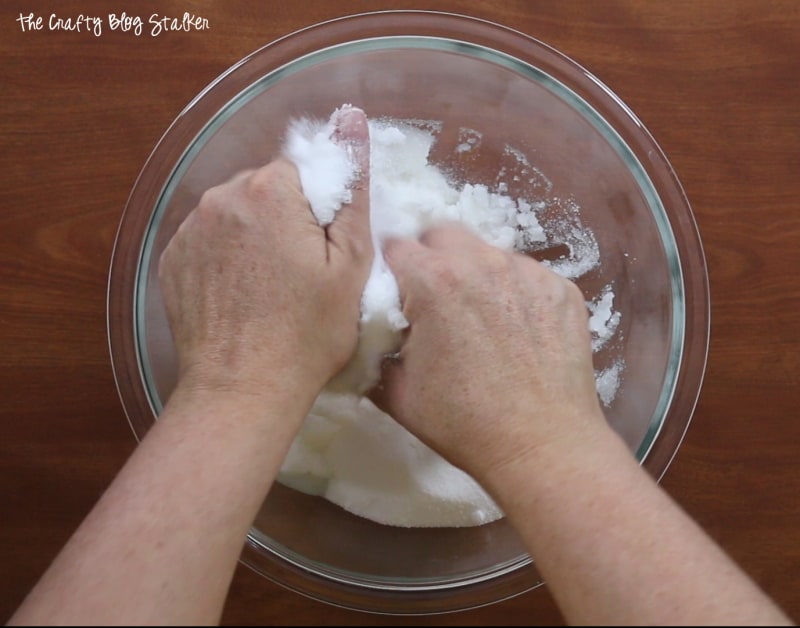
How to Make Sugar Scrub:
Combine sugar and coconut oil in a medium-size bowl. I prefer to do the mixing with my hands.
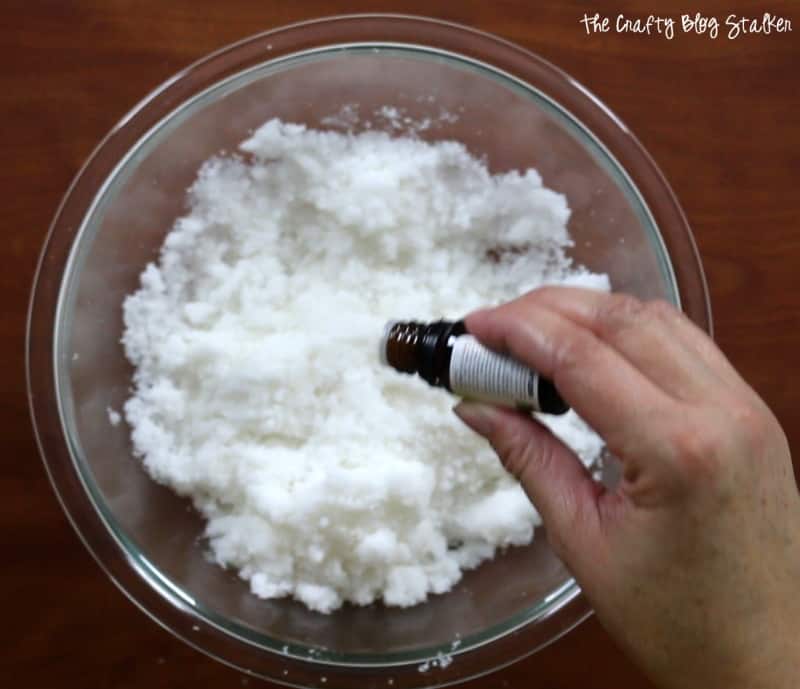
Add the 10 drops of Peppermint Essential Oil, and mix again.
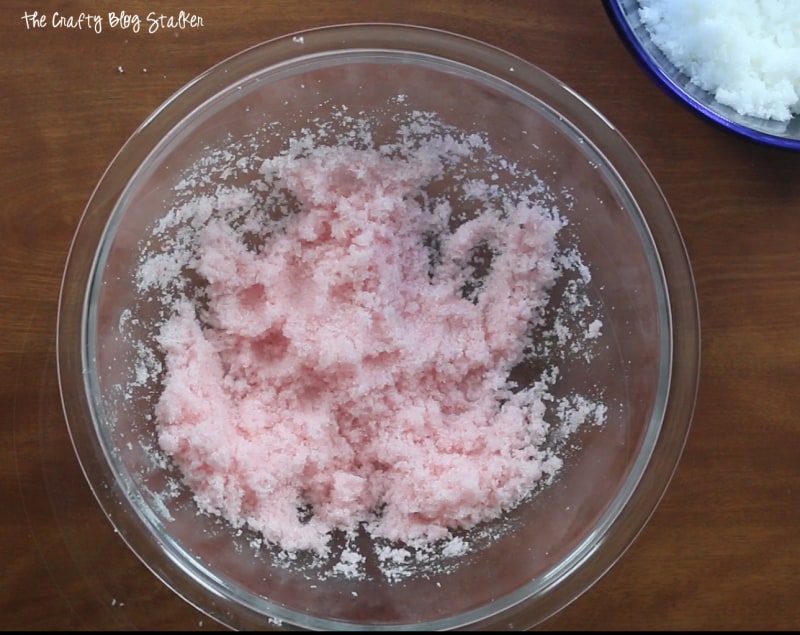
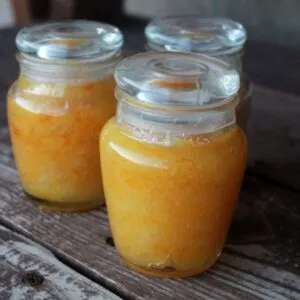
The scrub is done at this point, but I am going to create a fun red and white design in my jars to make it look like a peppermint candy. I will need red and white sugar scrub so pour half of the mixture into another bowl.
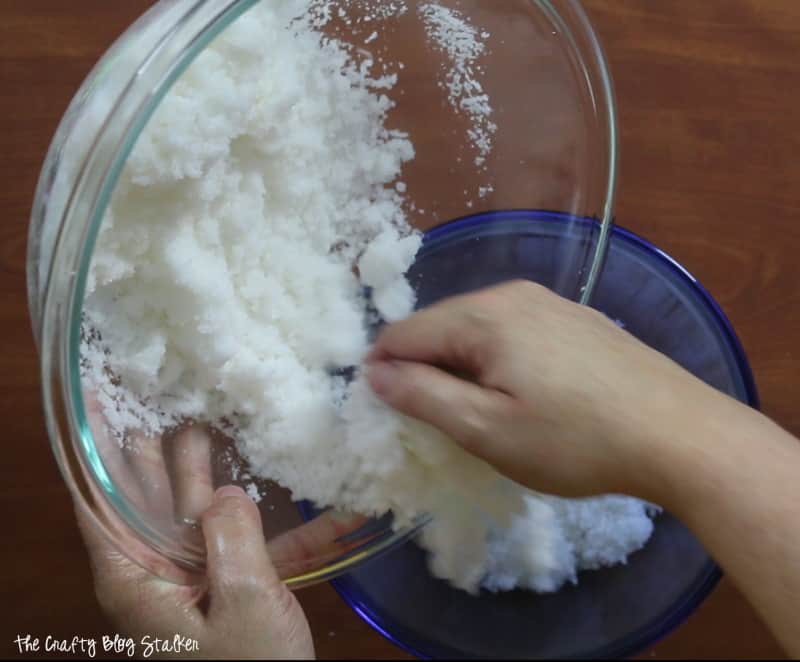
Add two drops of red food coloring to one of the bowls and mix well.
Creating the Peppermint Twist in the Jar:
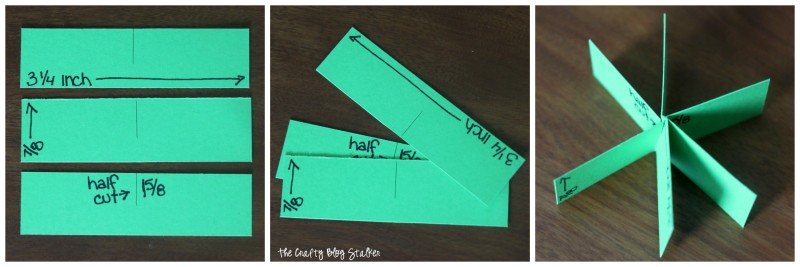
To get the cool peppermint look in the jars, create a paper mold that will act as the inner walls to keep the colors separate.
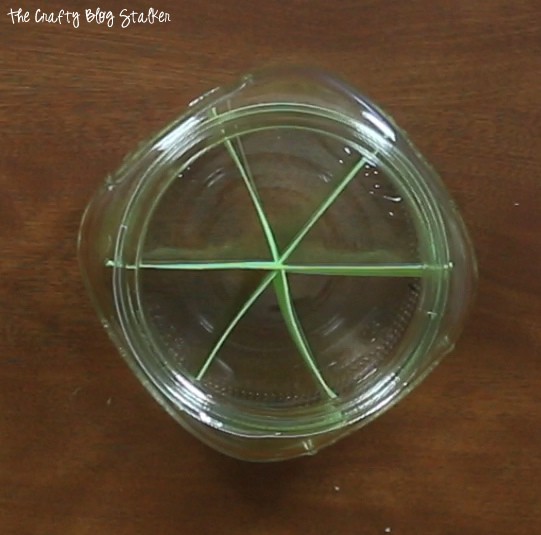
This template is made to fit inside the Ball Half Pint Jars. If you are using a different container you will need to adjust the measurements to fit inside your container.
Cut three strips of paper that measure 3 ¼-inch by ⅞-inch. At the middle point (1 ⅝-inch) of all of the strips, you will need to cut halfway through the strip. Slide the strips together using the slit in the paper to slide over the slits in the other papers. Your finished piece should look like an asterisk.
When the template is inside the jar the strips of paper should all be touching the sides of the jar in all directions.
With a spoon carefully start adding the sugar scrub to every other compartment. Make sure every section is full. Use the spoon to pack down the scrub as you are filling the jars.
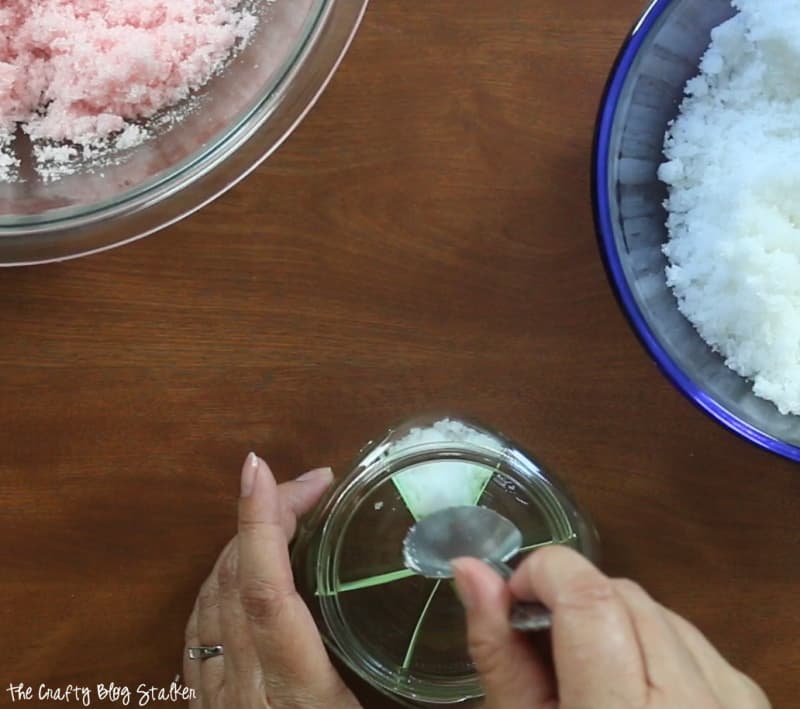
When the white sections are full begin filling the empty sections with the red sugar scrub.
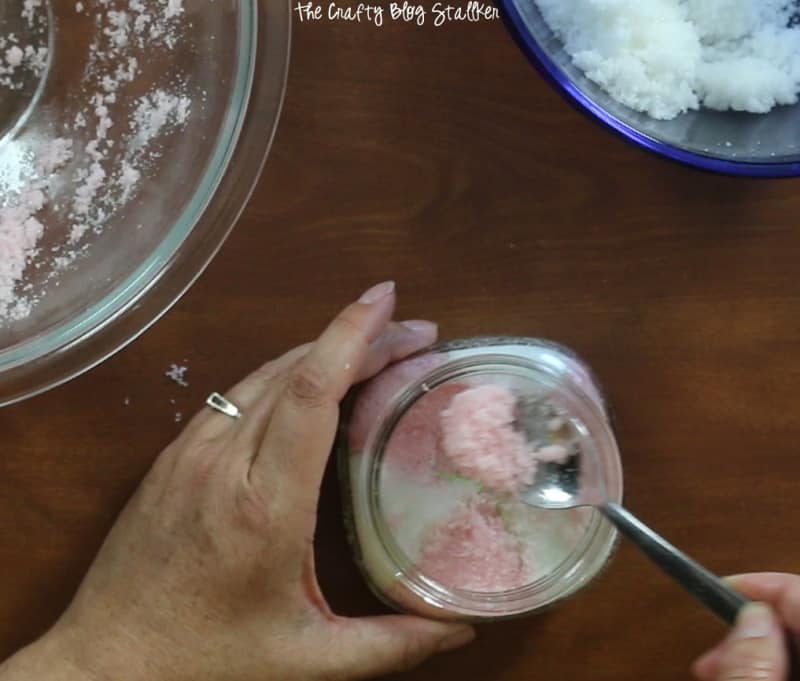
When all of the compartments are full then it is time to remove the paper. This is a little tricky but don't worry, if you squish some of the colors together you can fix it with a spoon, pushing the colors back into their right spot.
Removing the Paper Strips:
I found it easiest to insert a pair of scissors into the very center and snip the papers at their intersection and then remove one piece of paper at a time.
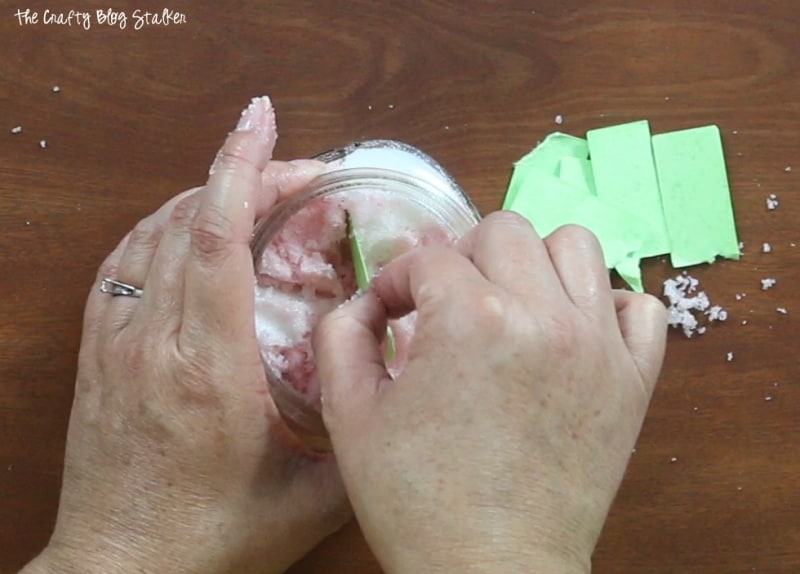
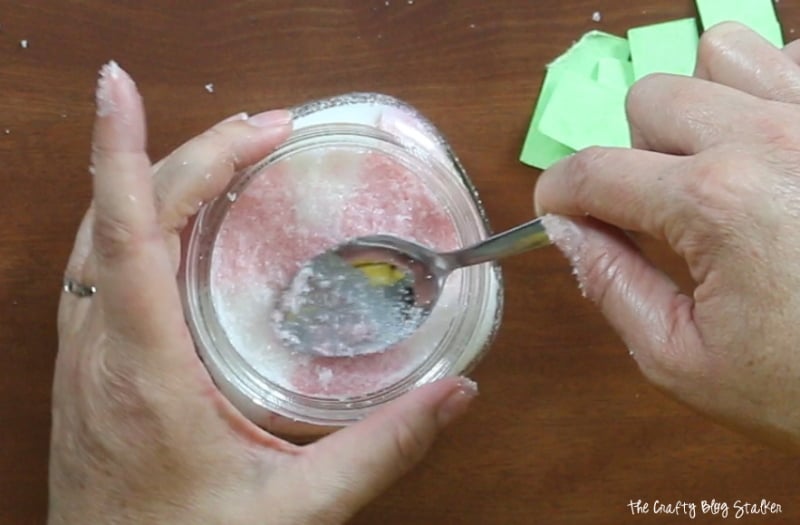
When the papers have been removed push the colors back into place with a spoon.
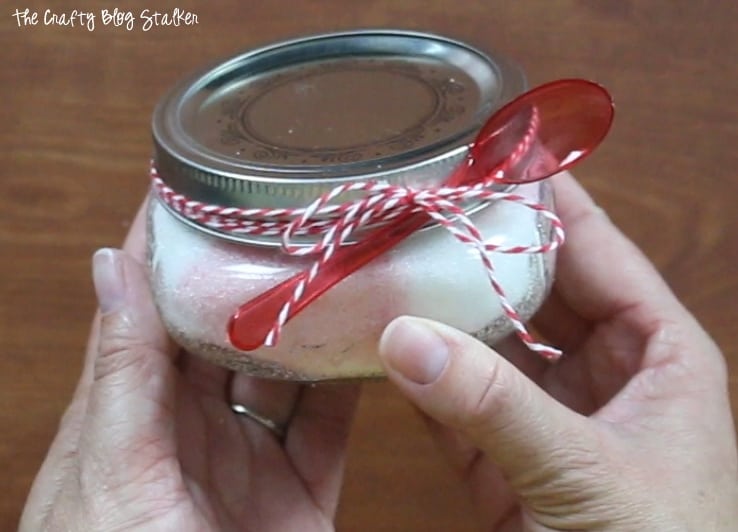
Tie some twine around the lid and tuck a cocktail spoon into the twine and you are done. So cute!
You can even see the peppermint pattern on the bottom of the jar.

My girls and I actually made 24 of these jars to give away as gifts. It took a couple of hours, but we had a lot of fun doing it.
The question we have been asked the most is "How did you get that pattern in the jar?"
Doing that pattern takes a little bit of extra time but it definitely adds the "wow" to the gift.
When you make this Sugar Scrub Recipe share a photo! We'd love to see what you made!
Our Crafting Essentials:
- The Cricut Cutting Machine is easily our favorite crafting tool. We use it in so many of our tutorials!
- These MakerX Crafting Tools are perfect for keeping in the craft room and are always ready when needed!
- This Fiskars Paper Trimmer is easy to use and cuts nicely without frayed edges.
- These Scotch Precision Scissors cut like a dream, and you get multiple pairs in a pack!
Recommended Posts

Katie Adams
Creator at The Crafty Blog Stalker
- DIY Stackable Bracelets
- 30 Fun St. Patrick's Day Crafts for Kids
- How to Make the Best Homemade Foot Soak Recipe
- Paper Strip Hearts with Easy Instructions
- 32 Inexpensive Neighbor Christmas Gift Ideas from Pinterest
- How to Apply Glitter to Nails
- How to Tie-Dye Shoes with Sharpie Markers
- How to Make a DIY Hologram at Home with a Cell Phone
- How to Make Coconut Oil Lotion
- 20 of the Best Painted Rock Art Ideas, You Can Do!
- Summer Printable Search and Find Pictures
- 30 Fun Spring Break Crafts
Mila
These homemade scrubs smell amazing and they make your skin so soft ( which proves that homemade is the best! 🙂 Peppermint sounds so refreshing...
Sarah @ Pretty Simple Ideas
I'm really into scrubs now! And I love the design you made in it. I wouldn't have thought of that.
Dina Visser
Thanks for a great idea!
BONNIE
Where do you get liquid coconut oil?
Katie
I found it at Walmart, but I bet it would be at your local supermarket too. It was in the baking isle.
Kathariane
can you use coconut oil that comes in a solid?
Katie
Hi Kathariane! Yes, in fact, that coconut oil I used comes as a solid.
Denise/DIY Crush
Not only so useful but oh so beautiful to look at! I pinned all your entries! Thank you so much for sharing at my craft party on Thursday! Would love to see your newest posts this week, which starts at 7pm EST.
Jenny
I'm making Peppermint Vanilla sugar scrubs for gifts this year, and I love the pattern you've made inside the jars - what a great idea! thanks for sharing!
Katie
Thank you, Jenny! The pattern inside the jar is the icing on the cake. I had so many ask how I did that! Shhhh - you know the secret!
Jessica
Love how you got the colors in to make it mimic a peppermint candy! So creative. Thanks for sharing at our Tips & Tricks Link Party.
Katie
Thank you Jessica! I think the detail is what makes this so fun to give!
Pamela
awesome idea, thanks for sharing
Katie
Thank you Pamela!
Antonella | White House Crafts
Cute gift idea! Thank you for sharing with us. #thecraftycorner
Katie
Thank you Antonella! It was a fun project and I am so glad that you like it!
Grandmas House DIY
What a wonderful gift (or I might need to just make it for myself!) Thank you for sharing with us at the To Grandma's house we go party last week, you will be featured in the next party starting tomorrow morning! Hope to see you there!
Katie
I am so glad that you like it! You should totally make some for yourself too if you're making some as a gift. It's a gift to you from you! 🙂
Kathy clark
Can this be used as a lip scrub?
Katie
Yes, it can be! Great thought ❤️
CHRISTINE ROPPEL
Does this need refrigeration? Will this mold? How to store and how long does it last?
Katie
Store in an air-tight container at room temperature. A homemade sugar scrub will last at least one to two months in an airtight container.