

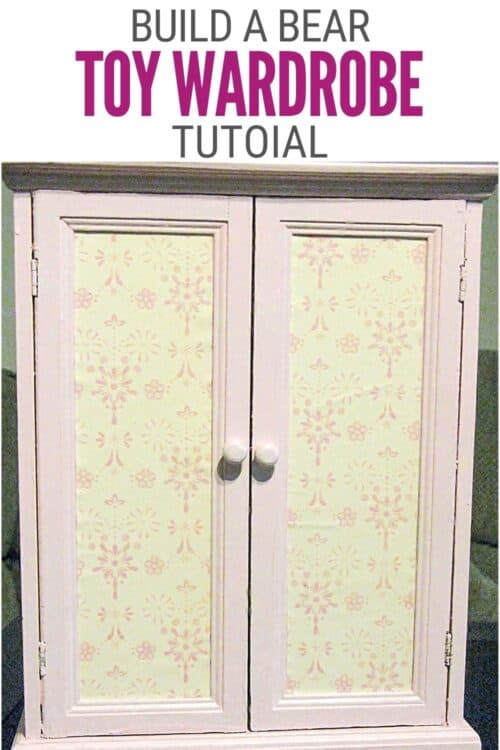
Refinish a jewelry box into a Toy Wardrobe for Teddy Bear clothes! A step-by-step tutorial for a Build A Bear Wardrobe.
My Daughter LOVES her Build A Bear!
For her birthday, everything that was on her wish list was for her bear, Sara. I think Sara has more clothes and accessories than I do!
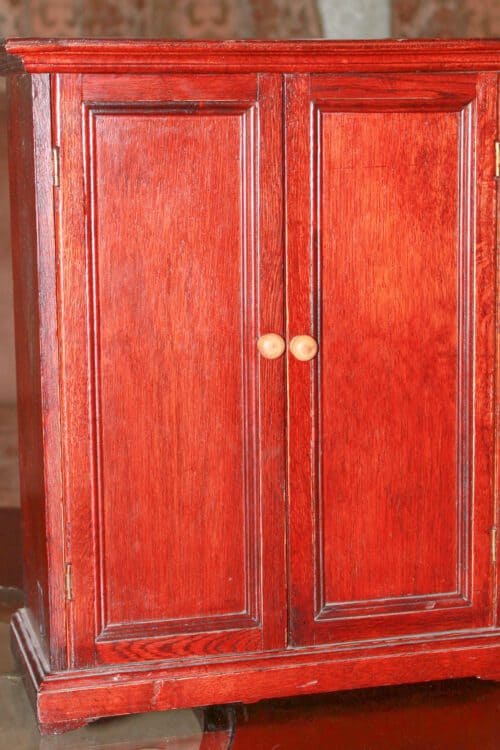
The other day I was at a yard sale and found this wood jewelry box for $2. To me, it looked like a mini wardrobe.
The ideas started whirling around in my head of all the possibilities. This would make a perfect little wardrobe for Sara, the Build a Bear!
More Craft Tutorials:
Since we love to craft, we have lots of crafting tutorials we want to share with you. Like this Window Decal Sticker, this Beaded Spider, and this Monogram Letters for Wall Decor.
Be sure to look around the blog for more fun craft tutorials!
Supplies You'll Need to Create this Project:
This post contains affiliate links.
- Wood Jewelry Box
- Acrylic Paint
- Sponge Brush
- Mod Podge
- Pattern Paper
- Screw Hooks
- Sand Paper Or Dremel Sander
Craft Tutorial:
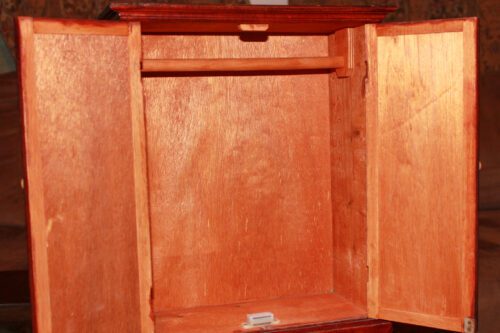
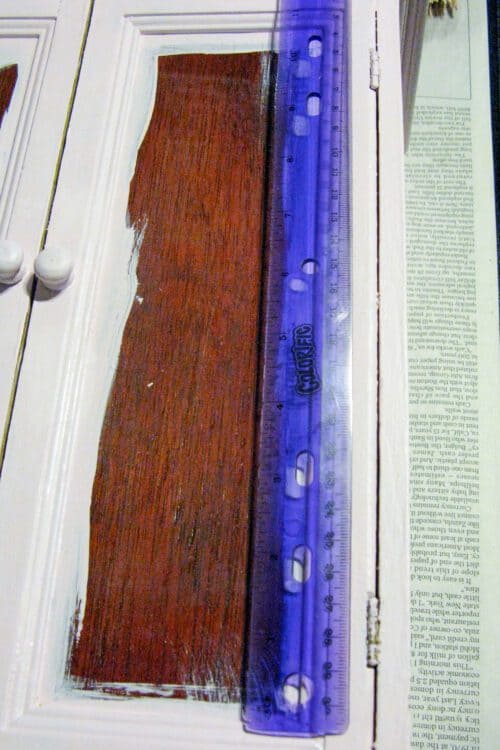
First, the rod at the top of the box had to be removed.
Using a hand saw I made a cut through the center of the rod and it came out easy peasy.
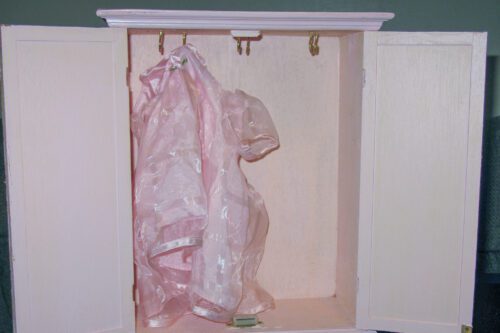
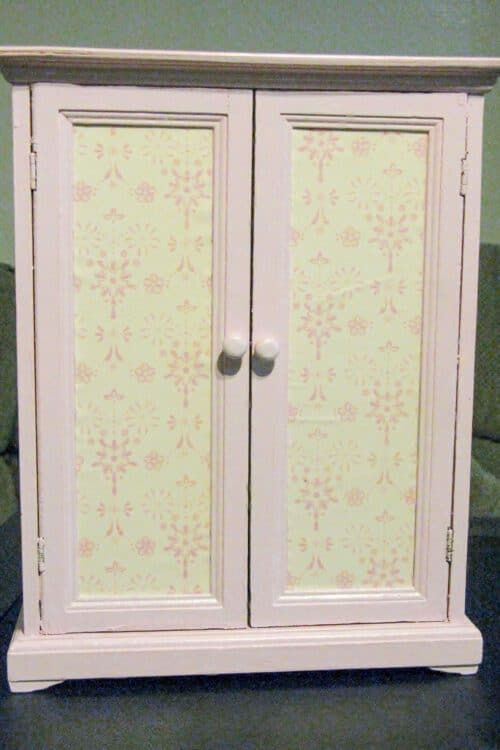
My daughter loves pink, so that is the color that the wardrobe was painted, inside and out. I did 2 coats and so far so good!
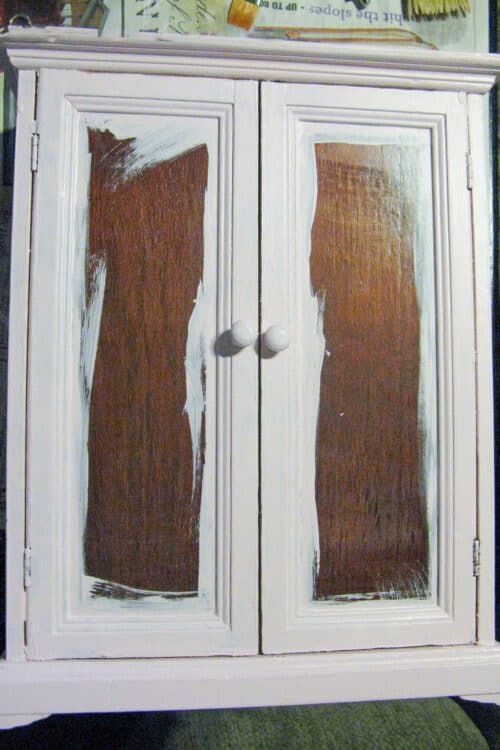
I didn't paint the center of the doors because that is where the patterned paper is going to go.
Once the paint dried, the doors were sticking a little bit so my hubby took his Dremel

Then I measured the inside of each door panel so I could cut the patterned scrapbook paper to fit.
I stuck the paper to the wood doors using Modge Podge
To apply, paint a layer of the mod podge onto the wood door. Lay the paper on top, then apply another layer of mod podge on top.
I think I used too much because the paper did wrinkle a little bit, but it wasn't enough to take it out and start over. Plus at this point, it was about 10 PM and her party was the next day.
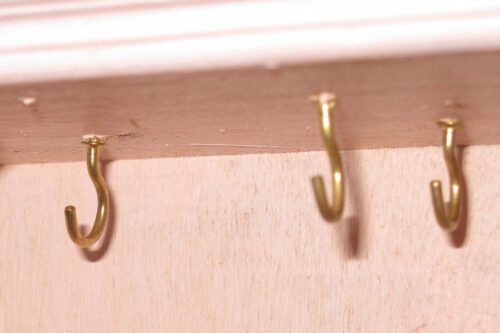
Since we took out the rod, we put in some screw hooks so she would have something to hang the clothes on.
One thing you can't see in the pictures is the clear coat. This was the last step.
It turned out great and both my daughter AND Sara love it!
Crafting Essentials
- The Cricut Cutting Machine is easily my favorite crafting tool. We use it in so many of our tutorials!
- These MakerX Crafting Tools are perfect for keeping in the craft room and are always ready when needed!
- This Fiskars Paper Trimmer is easy to use and cuts nicely without frayed edges.
- These Scotch Precision Scissors cut like a dream, and you get multiple pairs in a pack!
Amber @ Quilted Euphoria
I have noimated you for an award. Come check it out!
Nicole
How dolling! 😉 I'm putting this in my mental file for when my dd(10 mo.) gets bigger.
Marilyn
How awesome.. I love it...I'm following ya officially from Motivate Me Monday At Keeping It Simple.. Lovely blog you have here.Can't wait to read more.. Hope you can stop by & visit me sometime / follow back.. TY So much.. Have a great week.Marilyn
Bethany @ A Fish Who Likes Flowers
Very cute! It's nice when you can find alternative uses for things. thanks for sharing
Terri @ A Creative Princess
What a great idea!! Jordyn (my granddaughter) loves American Girl dolls and I get her one every Christmas. This is perfect for her!
Jennifer
What a smart way to make a little doll clothes wardrobe...I recently gave my daughter a bunch of home sewn doll clothes for her birthday, but I had my husband build a wardrobe. It's on my blog if you want to see it. This way would have been so simple! Love how it turned out. Good job!