

This is a sponsored post written by me on behalf of Cricut. All opinions are 100% mine.
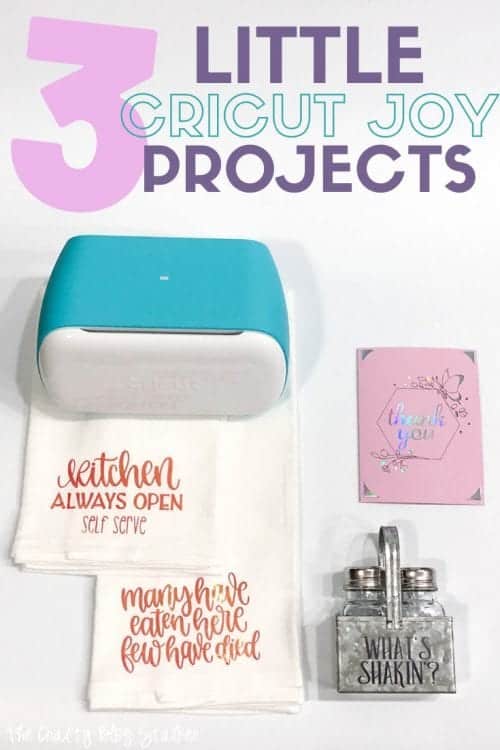
Introducing the new Cricut Joy with 3 simple project ideas you can complete in 15 minutes or less! Complete step-by-step tutorials below!
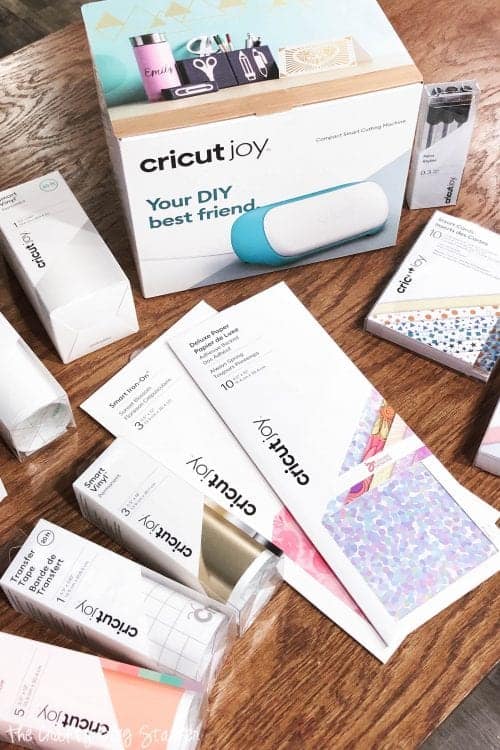
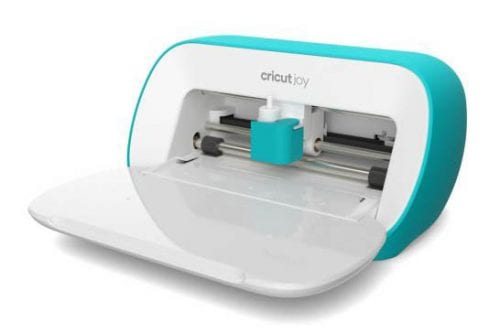
Have you seen the new Cricut Joy? It really is a LITTLE bundle of Joy and it can do so much!
When I received my Cricut Joy I was so excited that I opened it up and began making cute little things!
Since this machine is so small, there is no excuse to not get crafty. No craft room required! Plug it and place it on your living room coffee table or bedside table and get cutting!
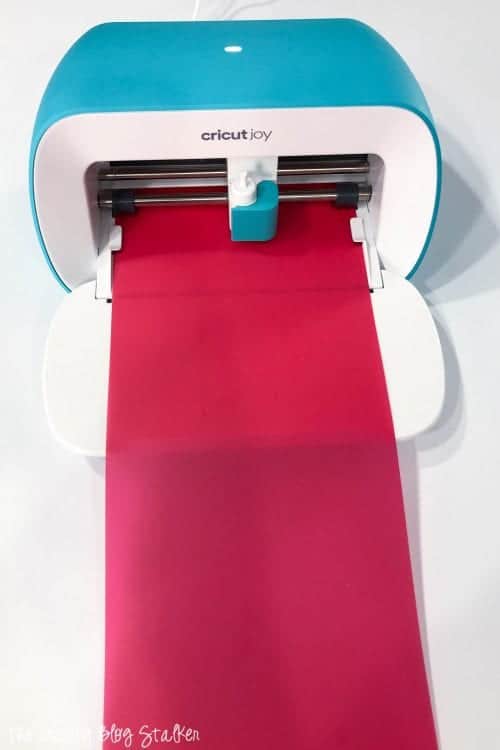
You can also cut without a mat and up to 20 feet long with a repeatable pattern! How cool is that?
Below are some of the first 3 projects I made with my Cricut Joy, and you can easily make them too!
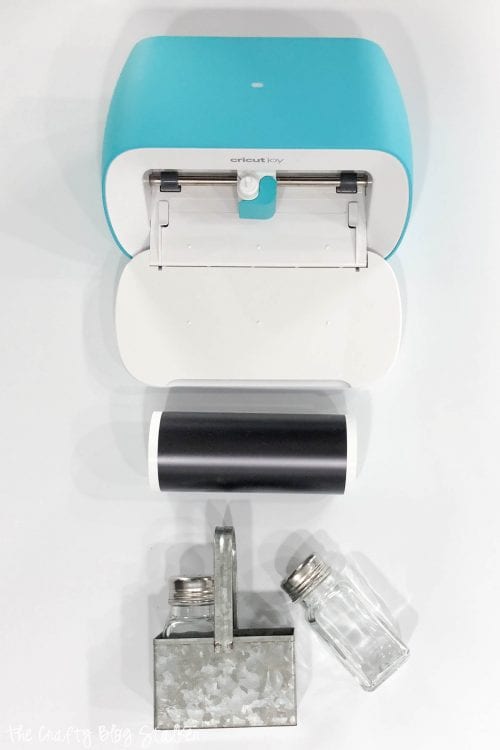
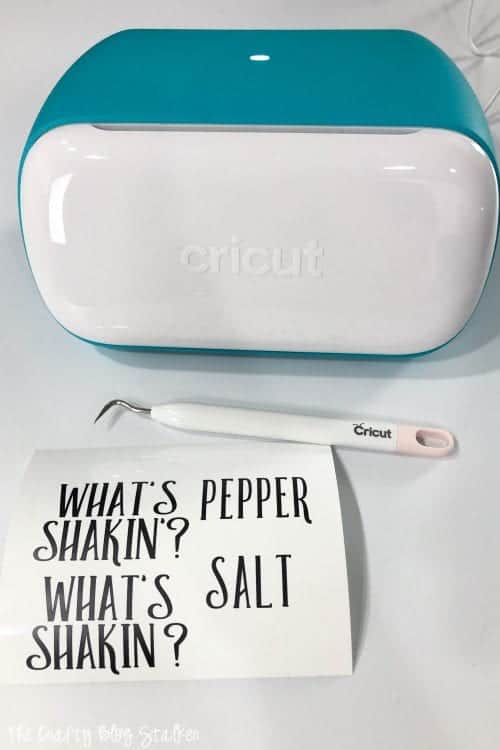
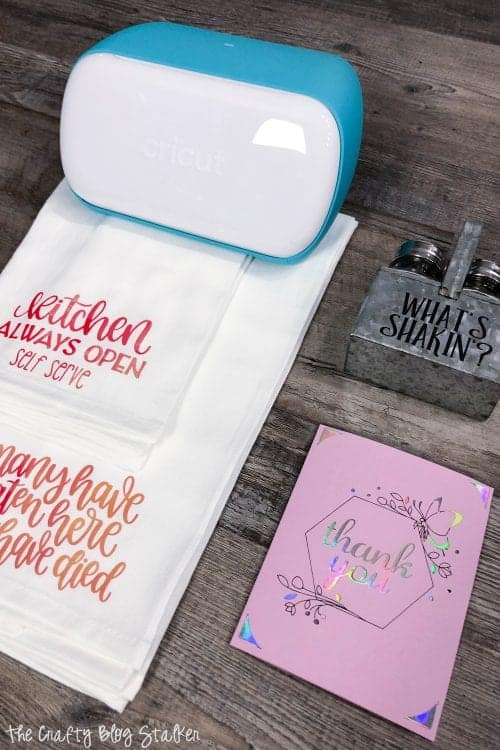
Supplies Used to Make What's Shakin'? Salt and Pepper Shakers
Items linked below may go to similar items when exact items couldn't be found online. Links are affiliates so when you purchase, I will get a small kickback to help fund the next tutorial!
- Cricut Joy
- What's Shakin'? Cricut Design Space
- Smart Vinyl
- Transfer Tape
- Weeding Tool
- Salt and Pepper Shaker Caddy
How to Make What's Shakin'? Salt and Pepper Shakers
Open the "What's Shakin'?" Canvas in Cricut Design Space.
This design is sized to fit my Salt and Pepper Shaker Caddy so you may want to adjust the sizing. select "Customize" to change the sizing or select "Make It" to cut as is.
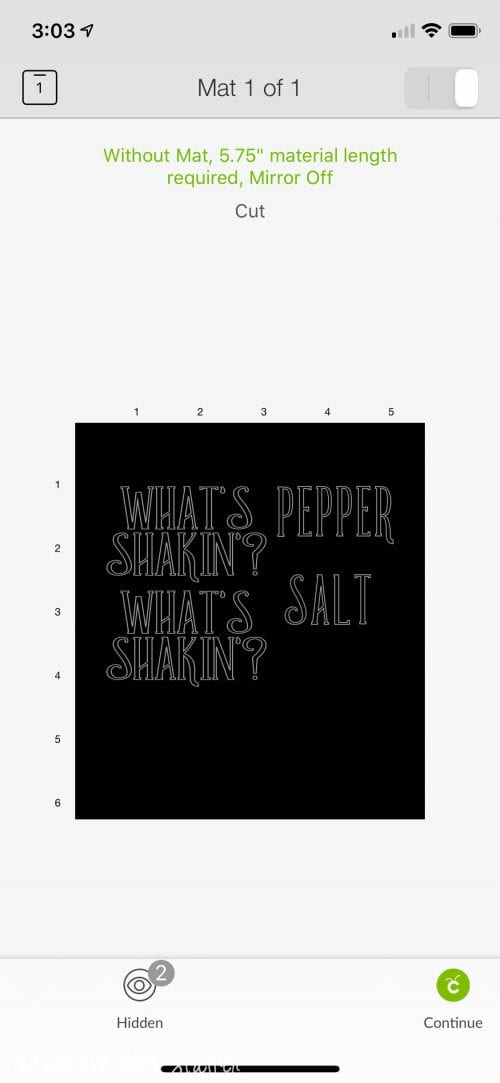
Follow the prompts in Cricut Design Space and load the Smart Vinyl into the machine. No mat is needed, how cool is that!?
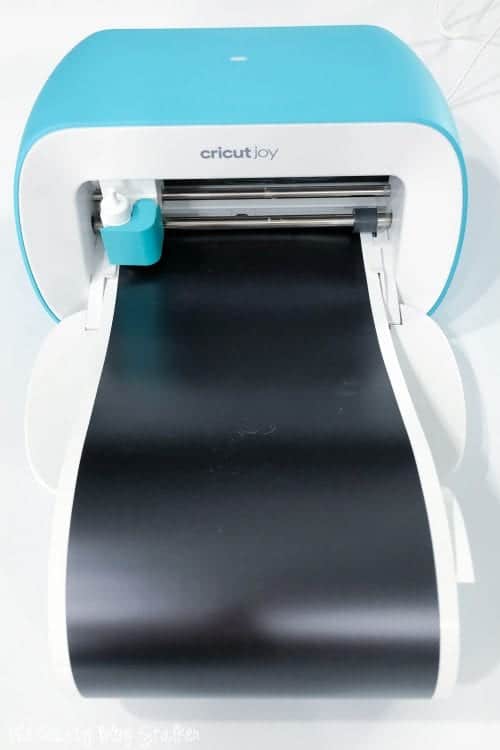
Once cut, unload the vinyl in Cricut Design Space. There are no buttons on this machine so everything is done through the app.
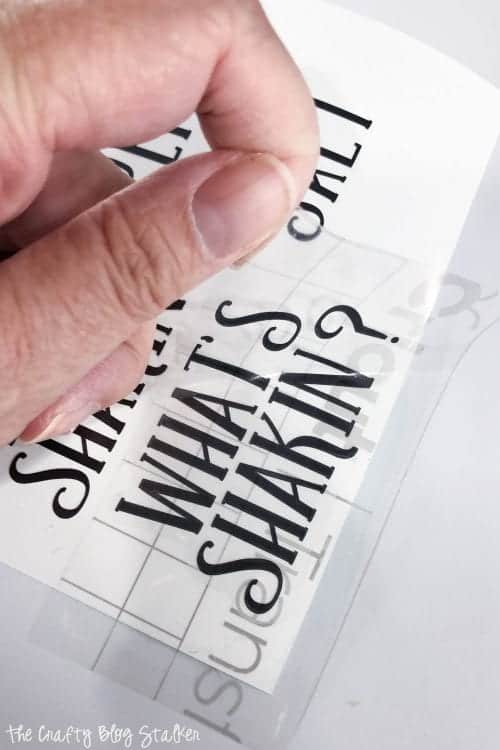
Weed the design with a weeding tool.
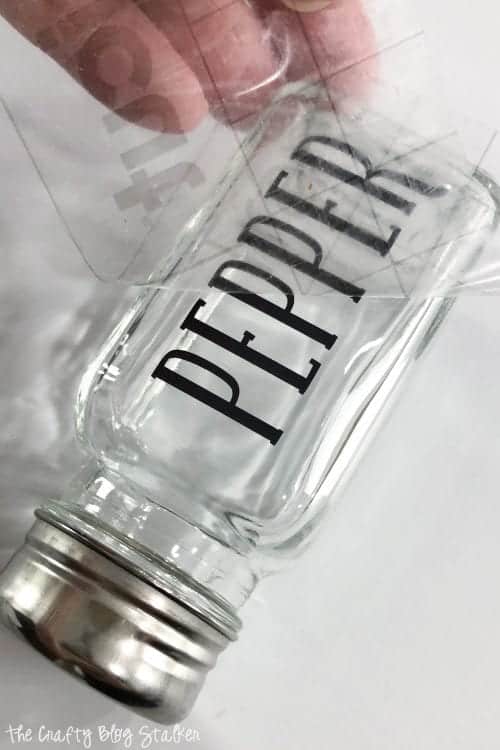
Transfer the vinyl design to the salt and pepper shakers using Transfer Taper.
Apply the Transfer Tape over the top of the vinyl to lift it off the backing sheet.
Apply the design to the caddy and press it into place with the scraper tool. Lift up the Transfer Taper and make sure this time that the vinyl design sticks to the project.
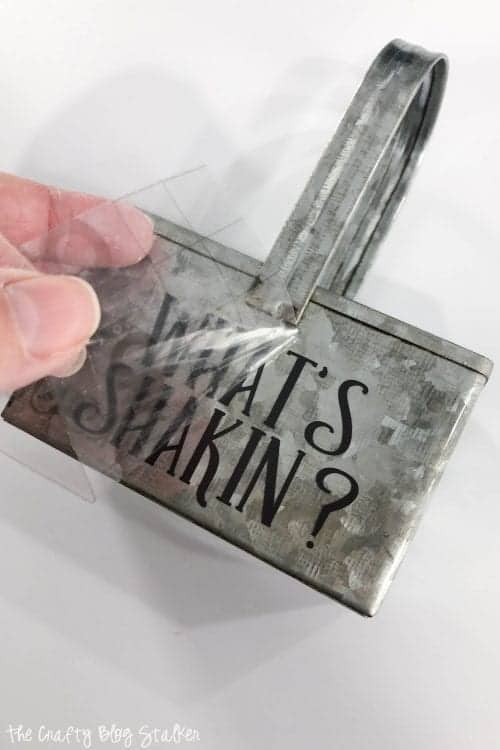
Repeat the process above with the Transfer Tape to apply the vinyl to the salt and pepper shakers.
The first project is done! Wasn't that easy, and super quick too!
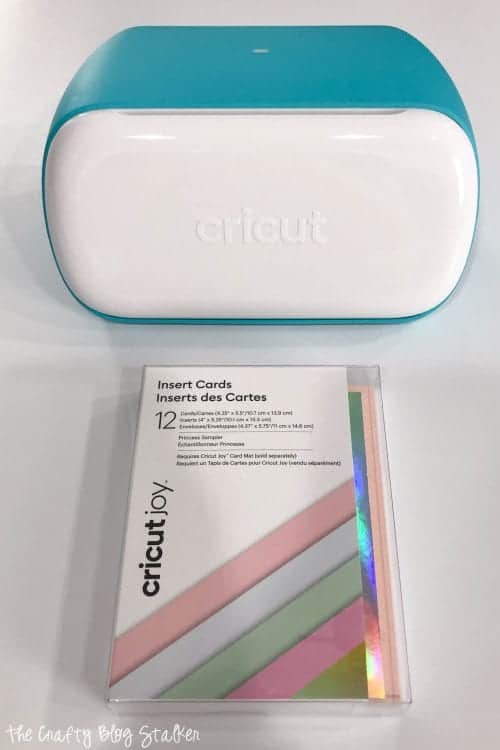
Supplies Used to Make Thank You Floral Card
- Cricut Joy
- Thank You Floral Card Cricut Design Space Project
- Insert Cards - Princess Sampler
- Cricut Joy Card Mat
- Cricut Joy Fine Tip Pens
- Weeding Tool
How to Make a Thank You Floral Card
Open the "Thank You Floral Card" Canvas in Cricut Design Space.
Select "Make It" to send the design to your Cricut Joy, and follow the prompts. First, it says to load the pen into the clamp because it will draw before it cuts.
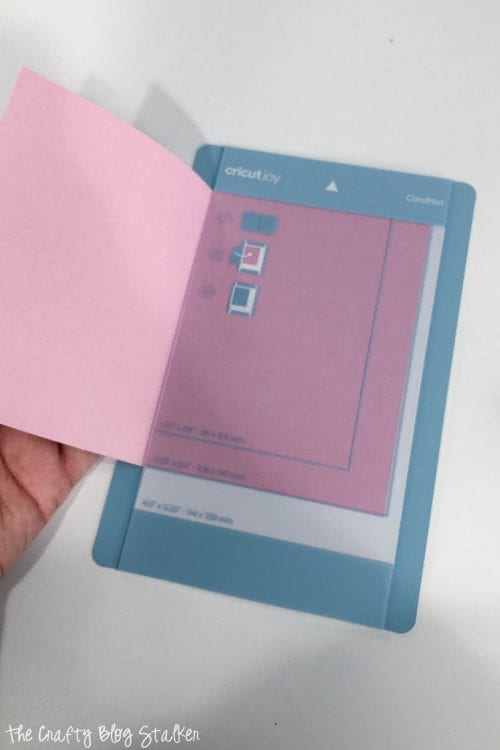
Slide the blank card into the card mat with the bottom flap of the card going behind the clear part of the mat. The mat provides a guide on where to place the card on the mat depending on its size.
Follow the prompts to load the mat and begin drawing the design.
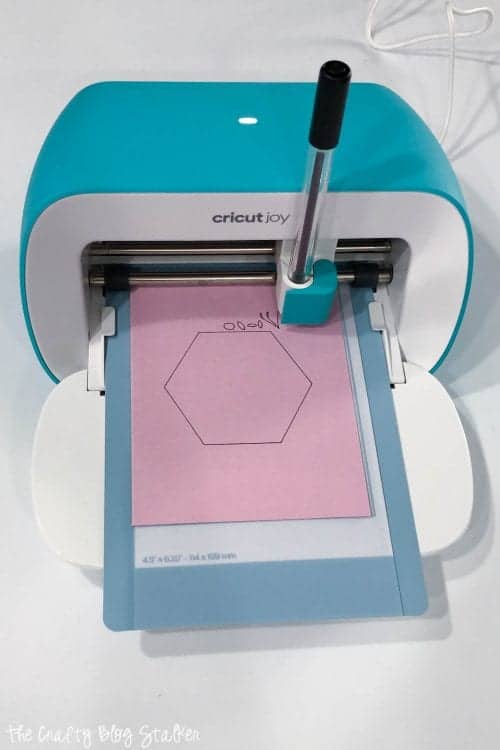
The Cricut Design Space App will tell you when it has finished drawing and to replace the pen with the cutting blade.

Remove the card from the mat and use a weeding tool to get out any of the cut pieces that didn't fall out on their own.
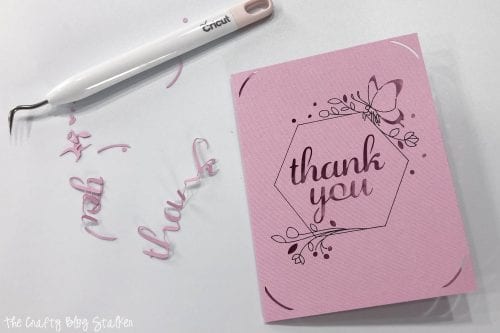
Slide an insert into the card from the inside so the corners are sticking out through the front.
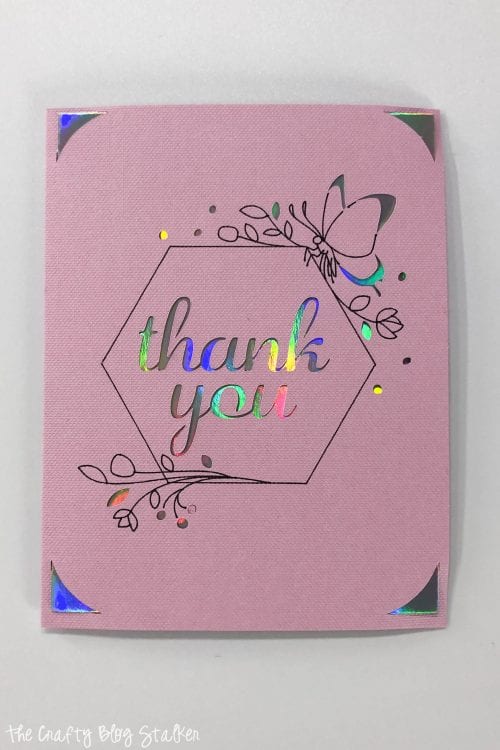
And you are finished! Another easy and super cute project!
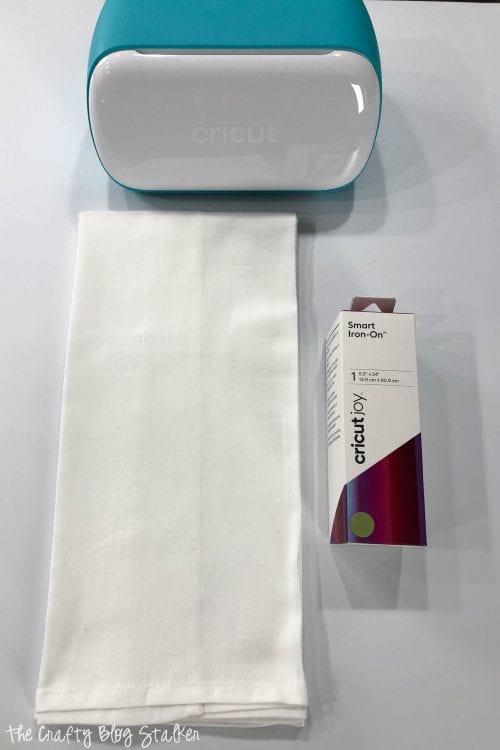
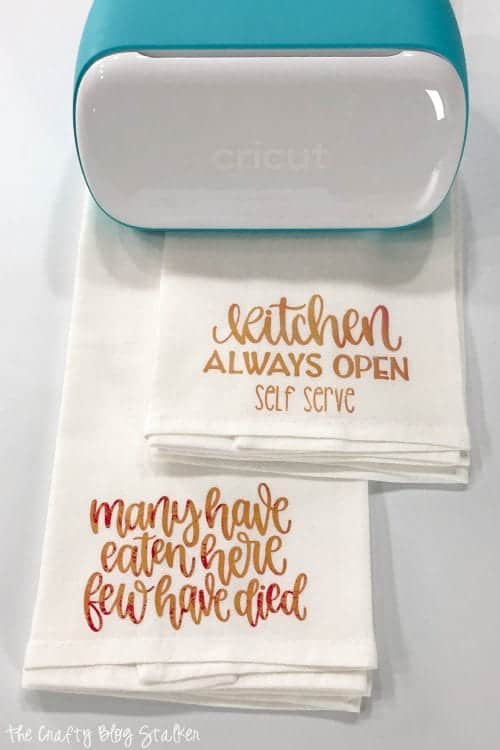
Supplies Used to Make Kitchen Tea Towels
- Cricut Joy
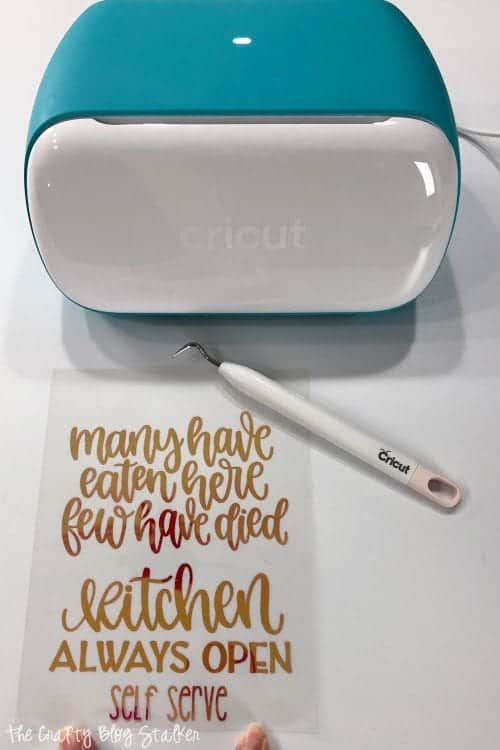
- Kitchen Tea Towels Cricut Design Space
- Smart Iron-On Holographic Dahlia
- Weeding Tool
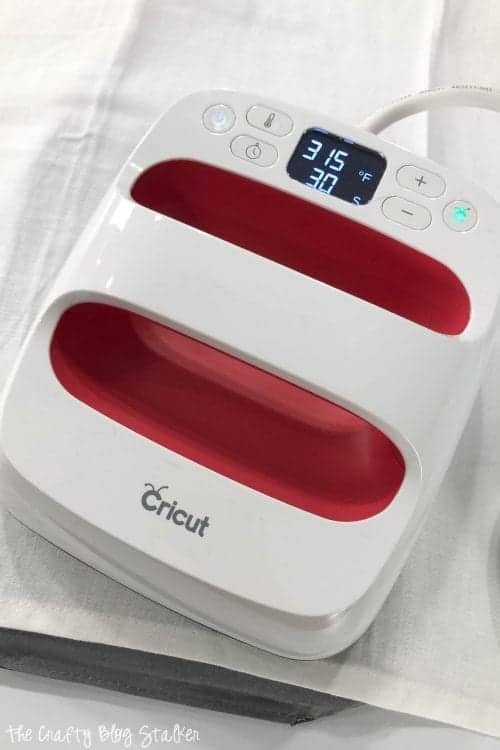
- EasyPress
- Tea Towels
How to Make Kitchen Tea Towels
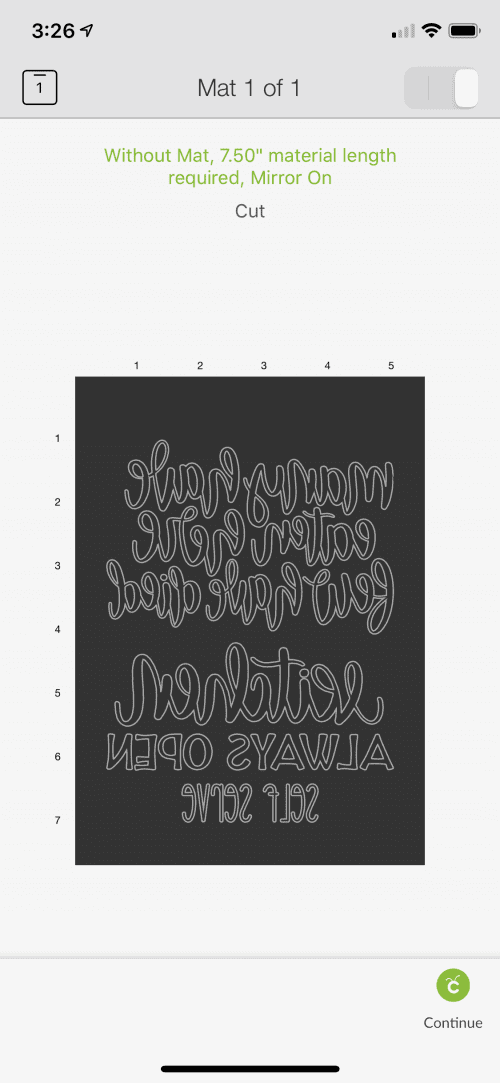
Open the "Kitchen Tea Towels" Canvas in Cricut Design Space.
This design is sized so each statement is 4.5" wide, the same width that can be cut with the Cricut Joy.
Select "Customize" to change the sizing or select "Make It" to cut as is.
Since we are using iron-on, make sure to mirror the cut.
Follow the prompts in Cricut Design Space and load the Smart Iron-on into the machine with the shiny side down.
Once cut, weed the iron-on using a weeding tool.
Preheat the EasyPress 2 to 315 degrees with a timer of 30 seconds.
All fabrics and iron-on materials have different settings so if you are using something different than I am, you can go to the Cricut EasyPress Heating Guide to see if your settings should be different.
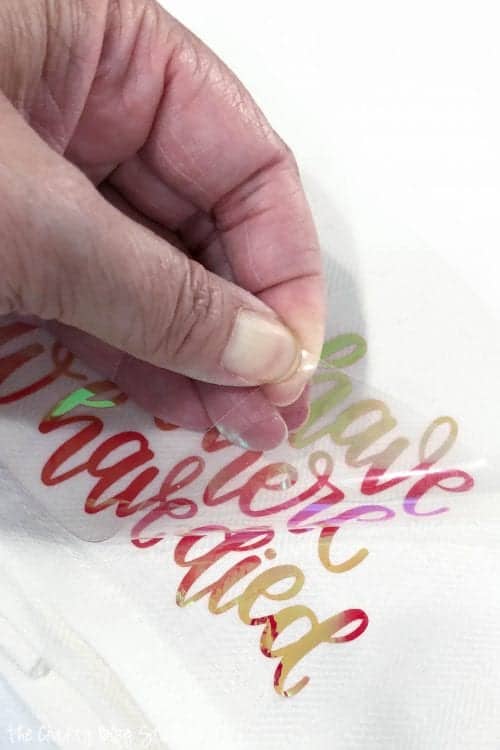
Preheat the towel for 5 seconds, then lay the iron-on design onto the towel and apply the heat.
Allow the iron-on vinyl to cool completely before peeling back the carrier sheet.
Another project done!
Didn't they all turn out so cute? And they took barely any time at all! The Cricut Joy is my new favorite for those quick and easy projects.
Which Cricut Joy project is your favorite? Share and leave a comment below!
Want to learn more about the possibilities of Cricut Joy?
Crafting Essentials
- The Cricut Cutting Machine is easily my favorite crafting tool. We use it in so many of our tutorials!
- These MakerX Crafting Tools are perfect for keeping in the craft room and are always ready when needed!
- This Fiskars Paper Trimmer is easy to use and cuts nicely without frayed edges.
- These Scotch Precision Scissors cut like a dream, and you get multiple pairs in a pack!