

Make a Cooking Measurement Conversion Chart with Cricut for your kitchen. A handy DIY chart that keeps cups, tablespoons, and teaspoons easy to read.
Have you ever been in the middle of a recipe and suddenly needed to double it… only to realize you can't remember how many teaspoons are in a tablespoon?
That happened to me more times than I'd like to admit. I kept grabbing my phone to check simple measurement conversions while cooking, which usually left my screen covered in messy fingers.
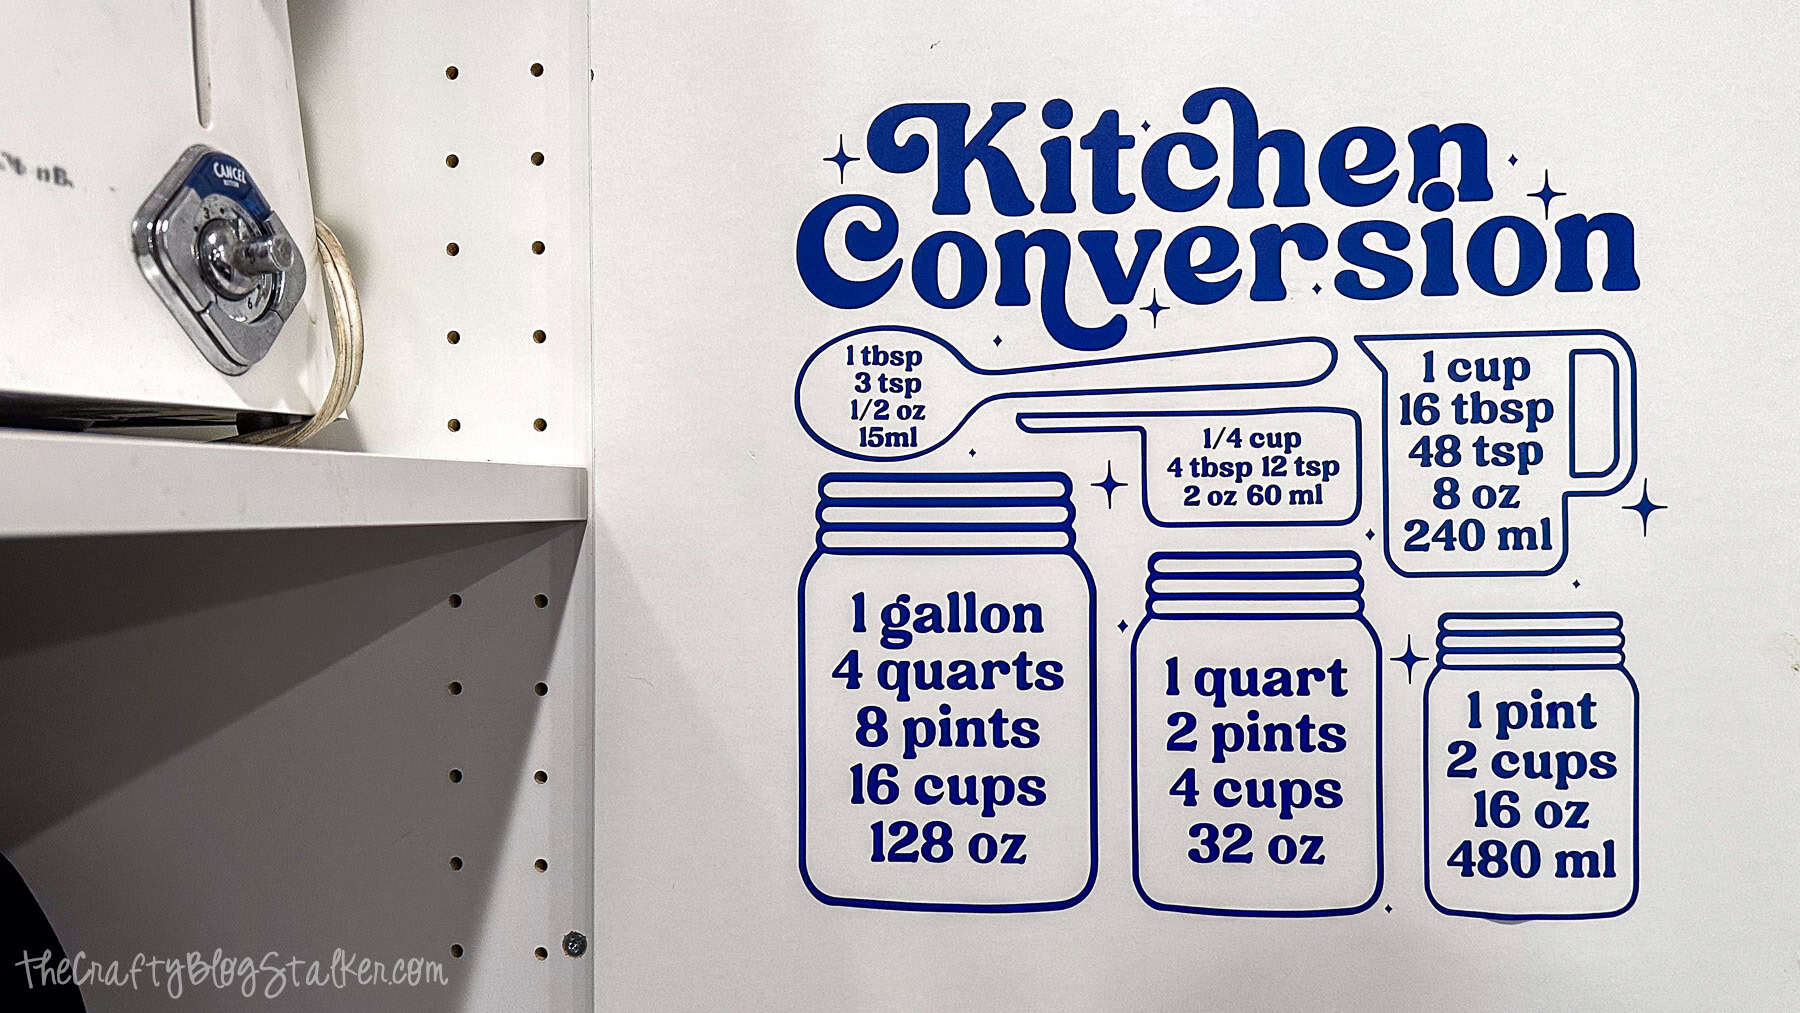
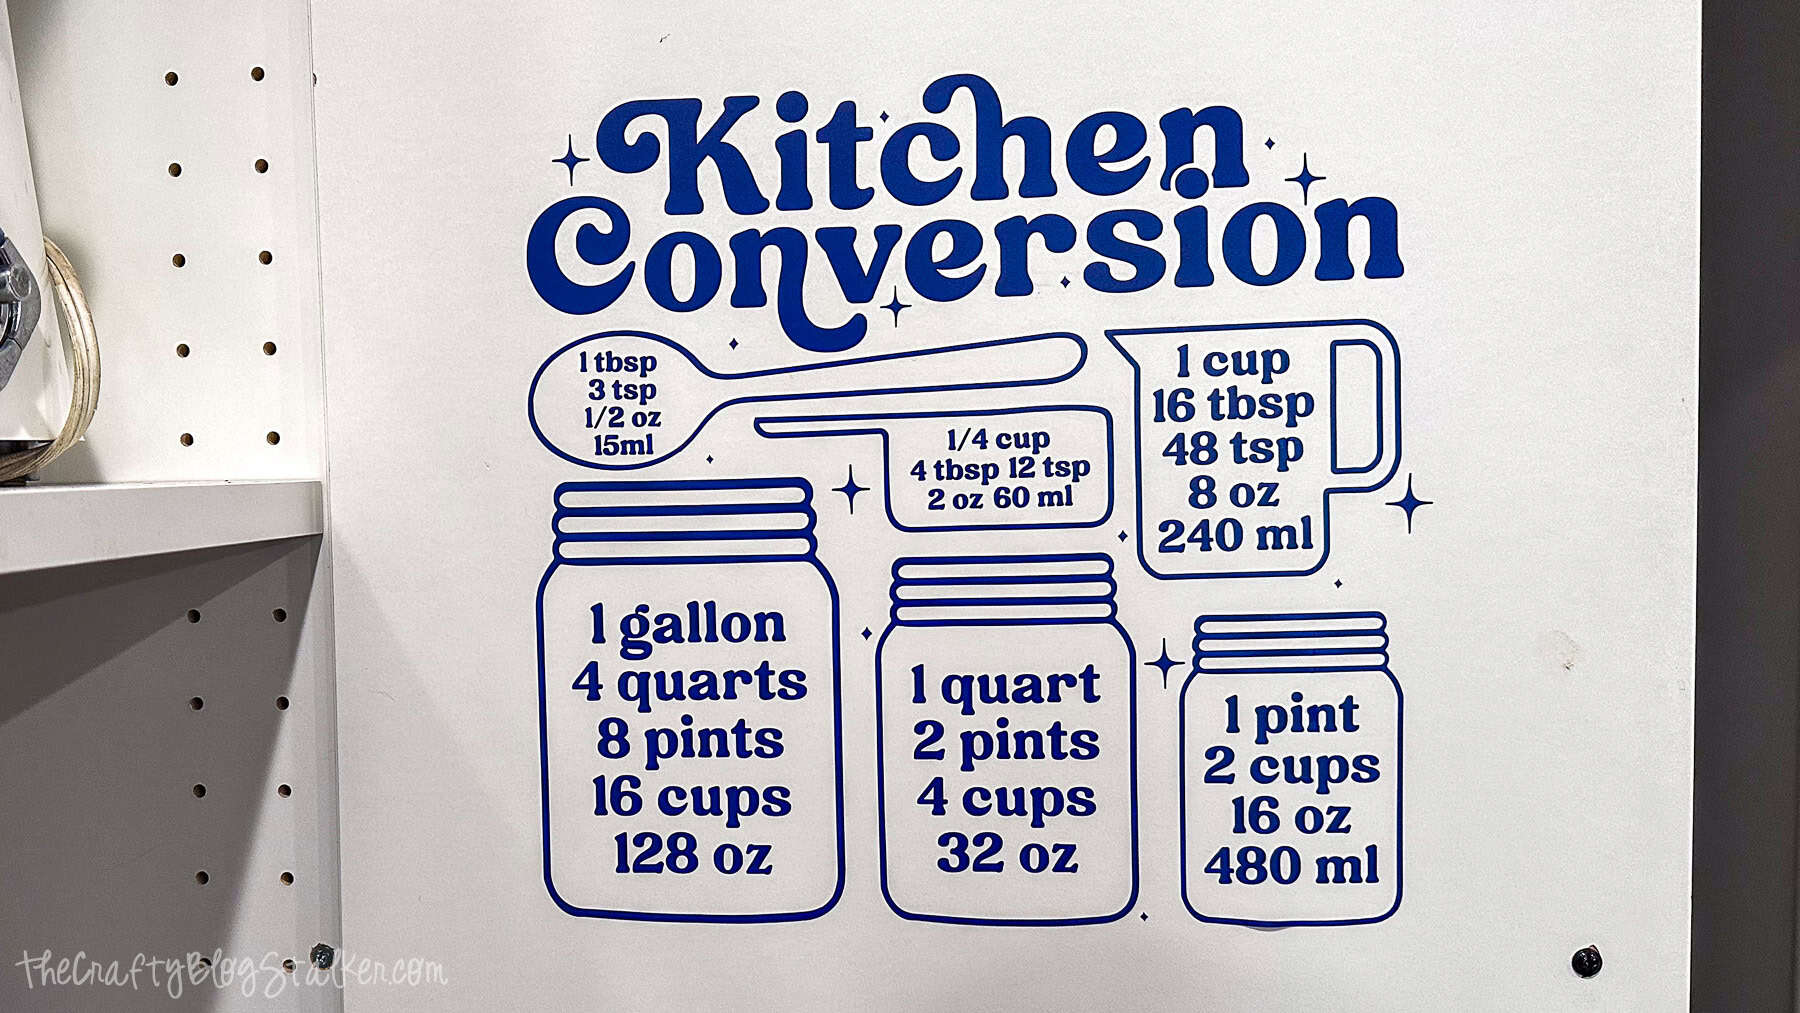
So I finally made a quick cooking measurement conversion chart with my Cricut machine and stuck it inside a cabinet door. Now the common kitchen measurements are right there whenever I need them.
It's one of those small kitchen helpers that ends up getting used all the time, especially if you cook from recipes that bounce between the metric system and standard measurements.
Jump to:
Skill Level: Beginner
Total Time: 20 minutes
Supply List
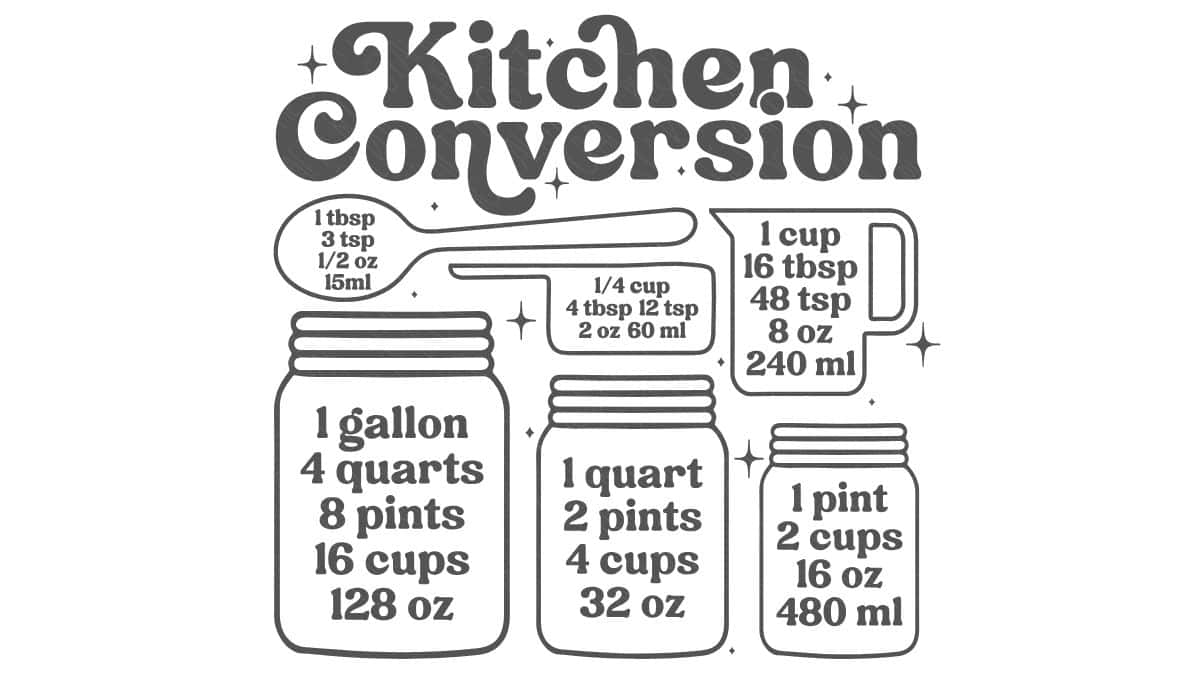
Grab the Retro Kitchen Conversion SVG
Use the Retro Kitchen Conversion SVG to create the chart with your Cricut machine.
Measure Your Space
Before cutting anything, decide where you want the cooking measurement chart to live.
I chose the inside of a cabinet door, so it's easy to see while I'm cooking, but hidden when the cabinet is closed.
Take a quick measurement of the space to determine how large to make the decal.

My cabinet door has quite a bit of room, so I sized the design as large as possible to make the numbers easy to read.
Cricut Design Space
I used Cricut Design Space for this project. If you're using another cutting program, your screen may look a little different, but the steps are similar.
Start by uploading the SVG file into Cricut Design Space.
Add the design to your canvas, then resize it based on the measurements you took earlier.
Once the size looks right, click Make.
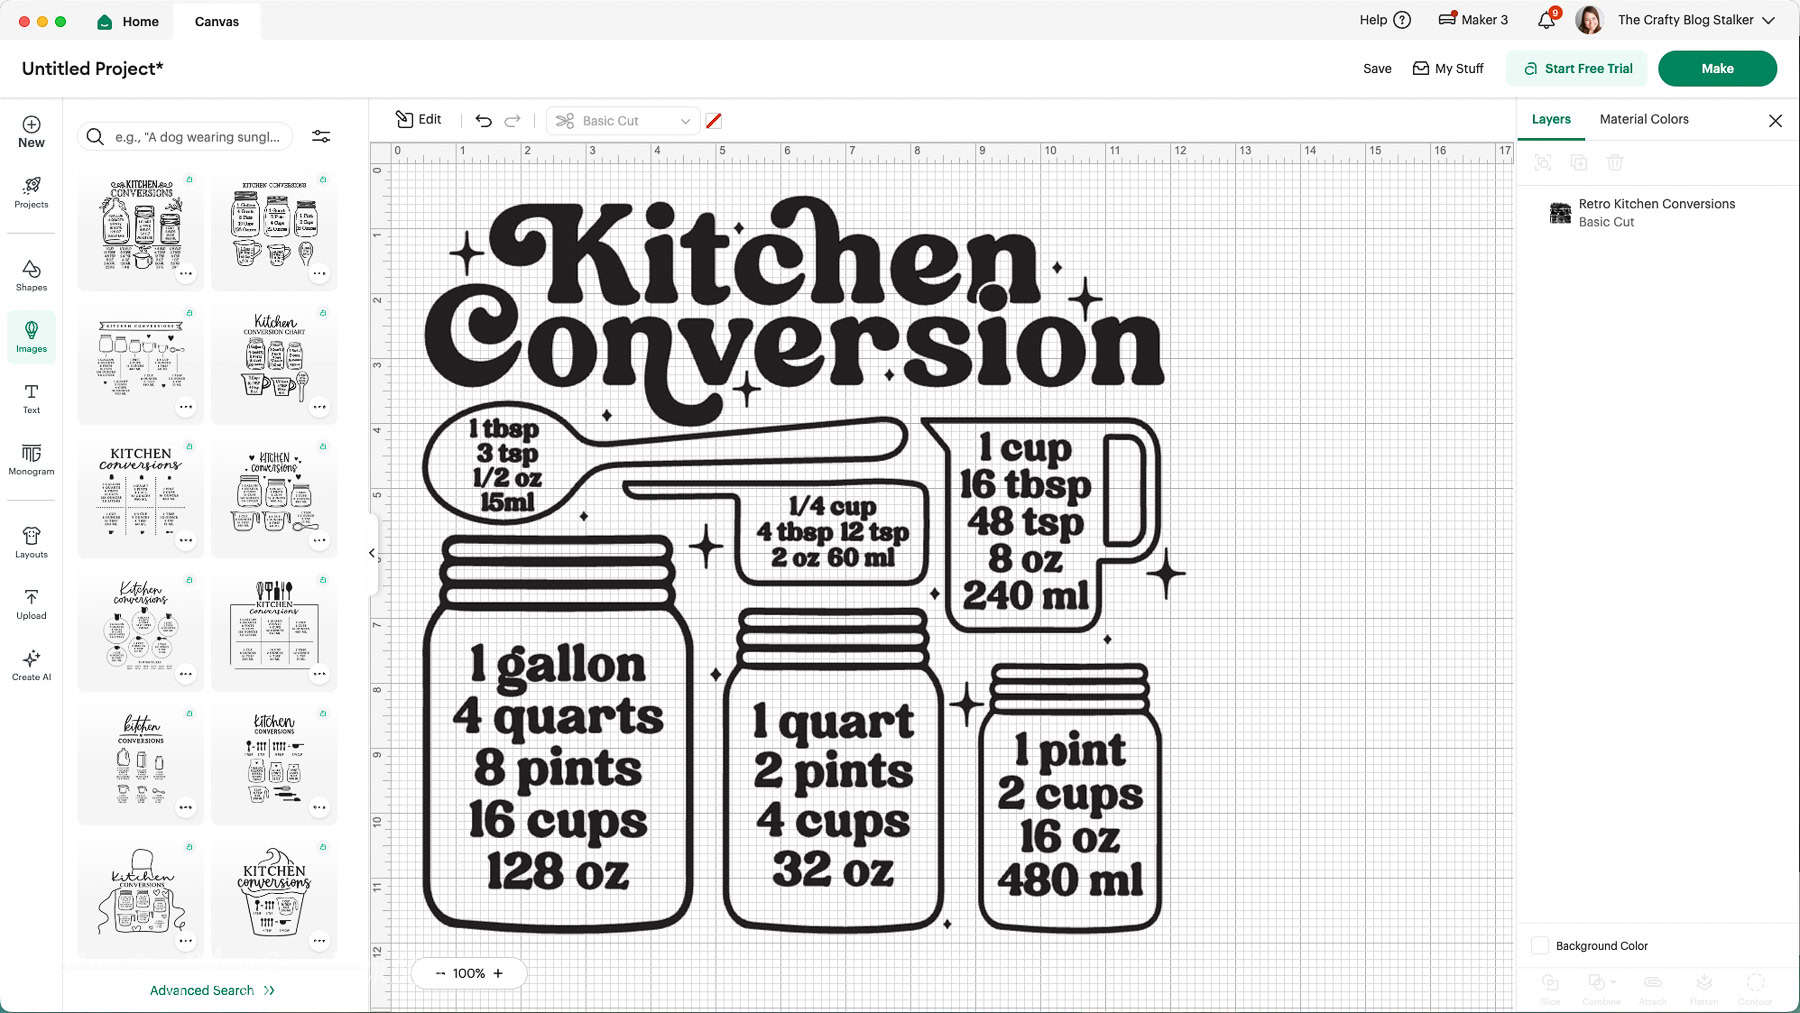
On the mat preview screen, double-check that everything looks correct, then click Next.
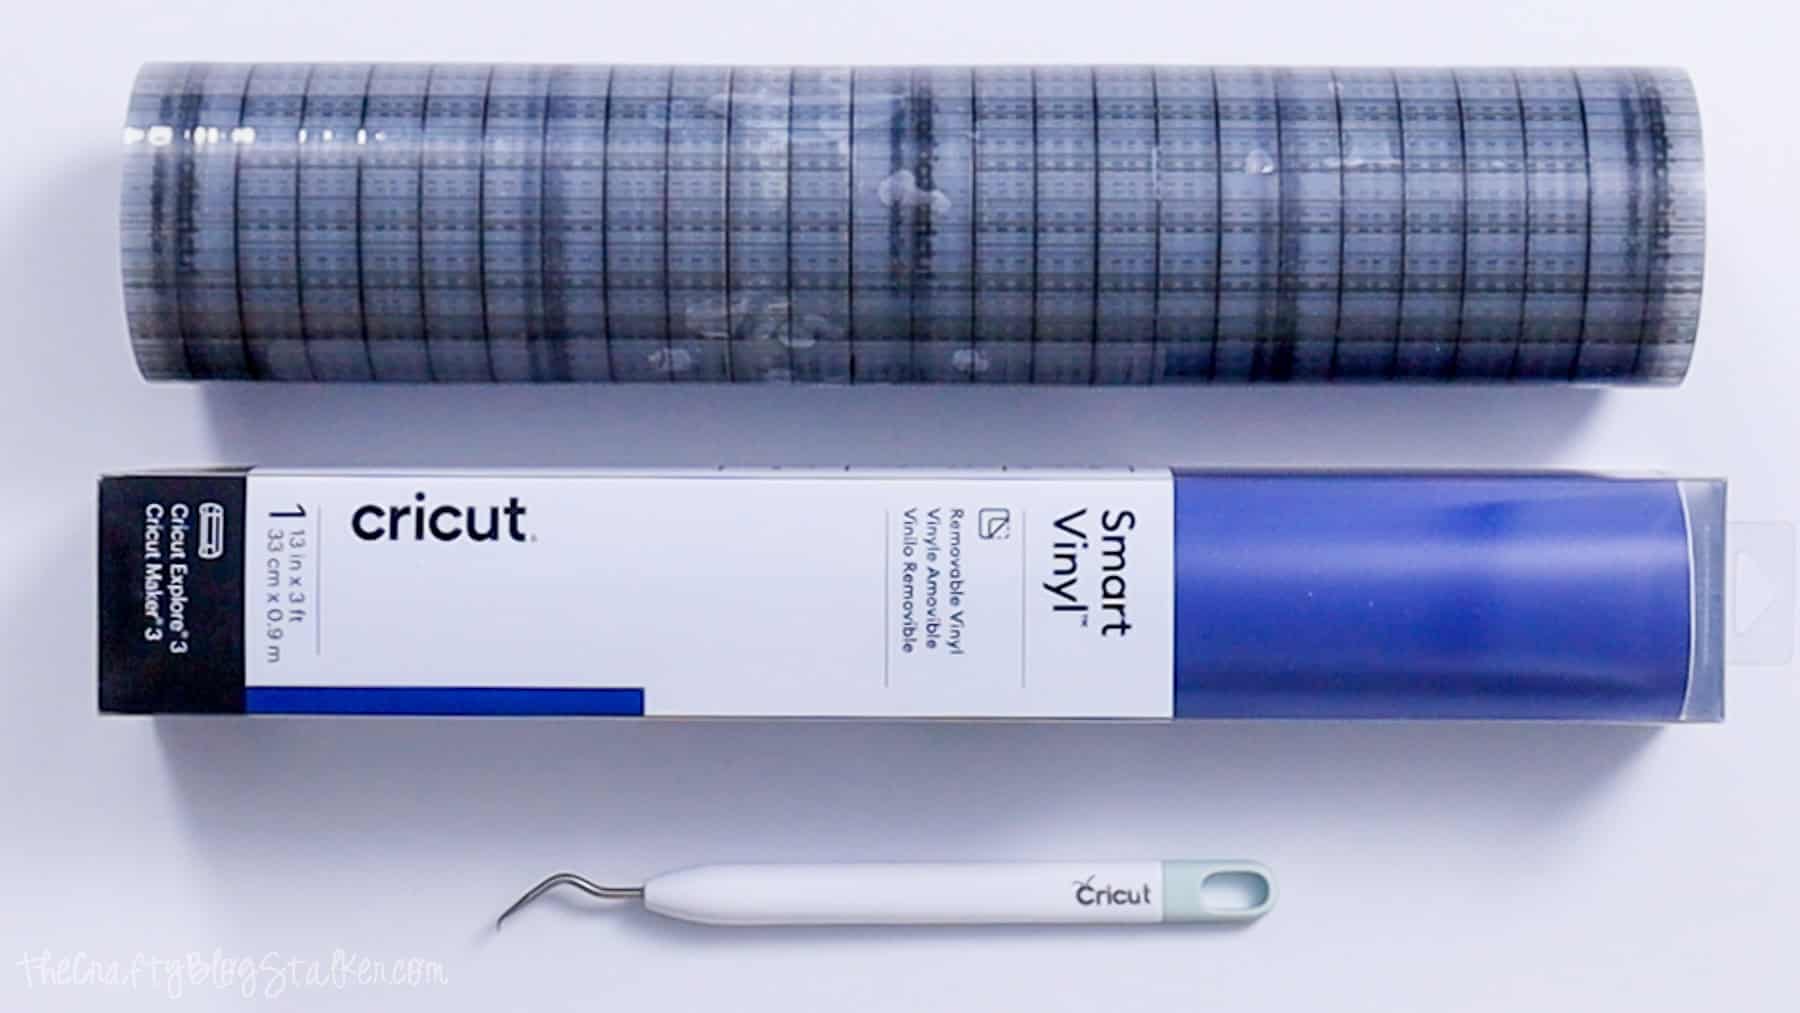
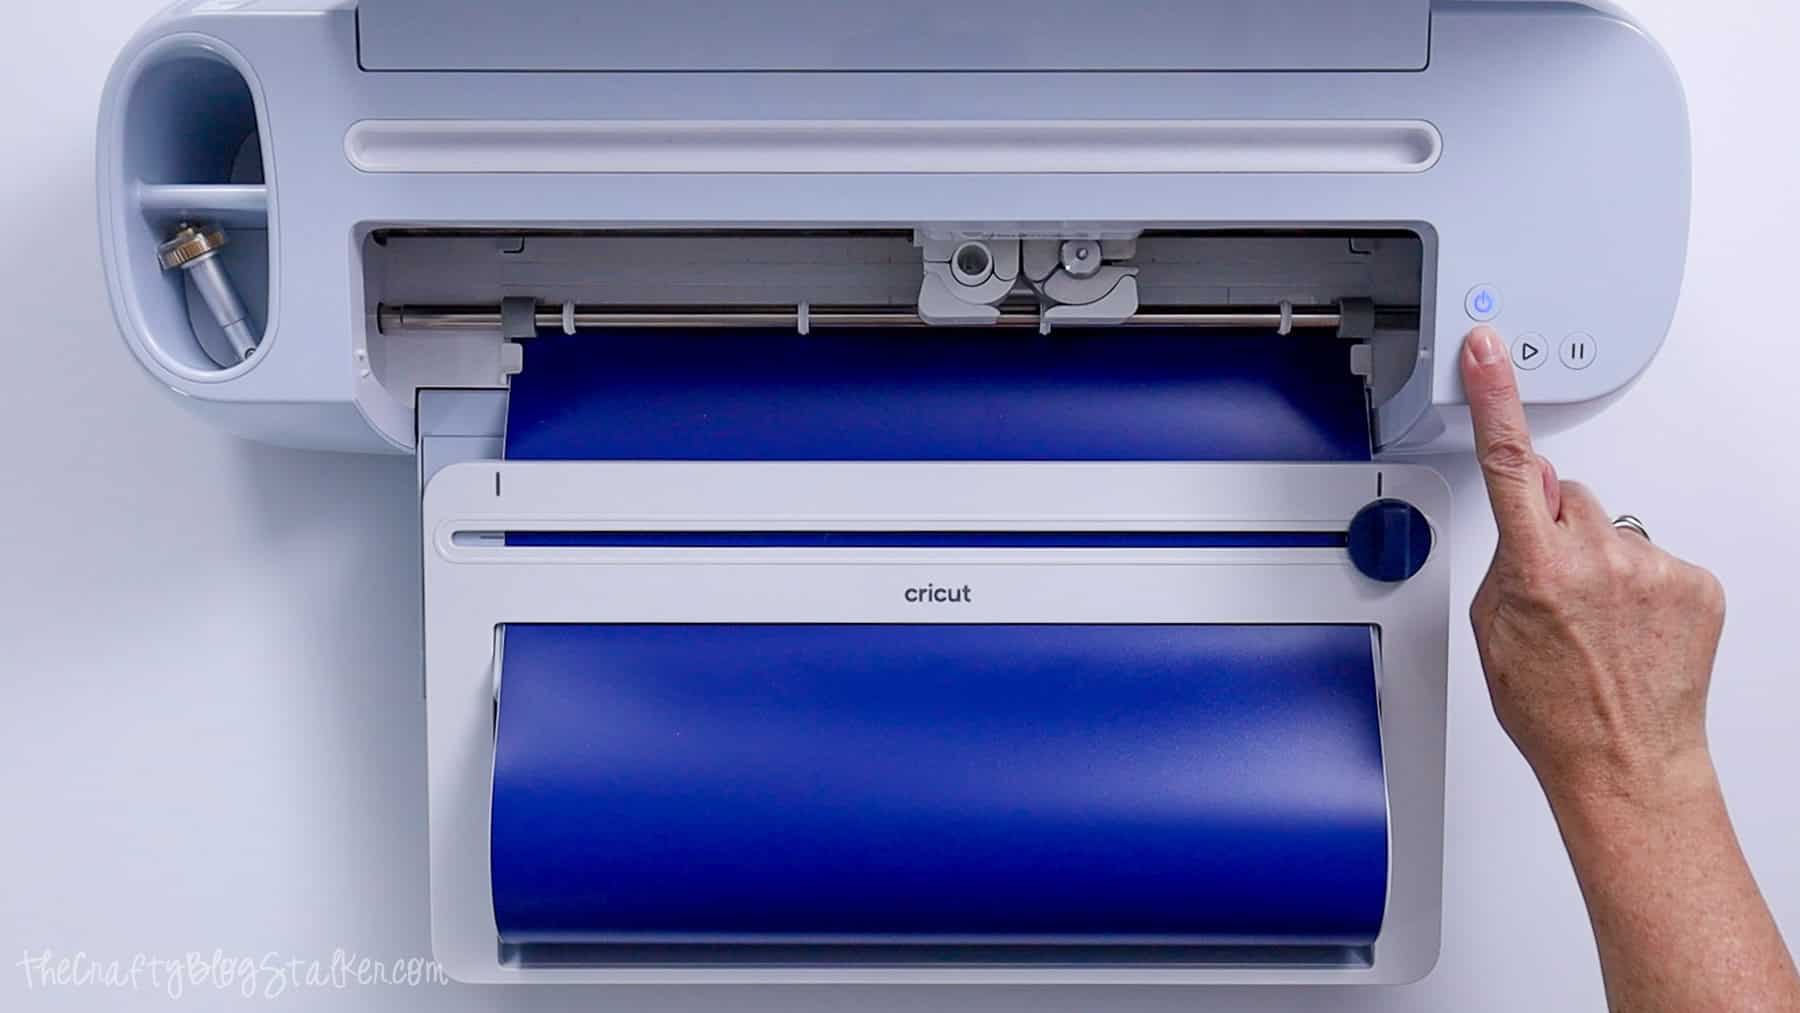
Select adhesive vinyl as your material, load the mat into your Cricut machine, and start the cut.
Prepare the Vinyl Decal
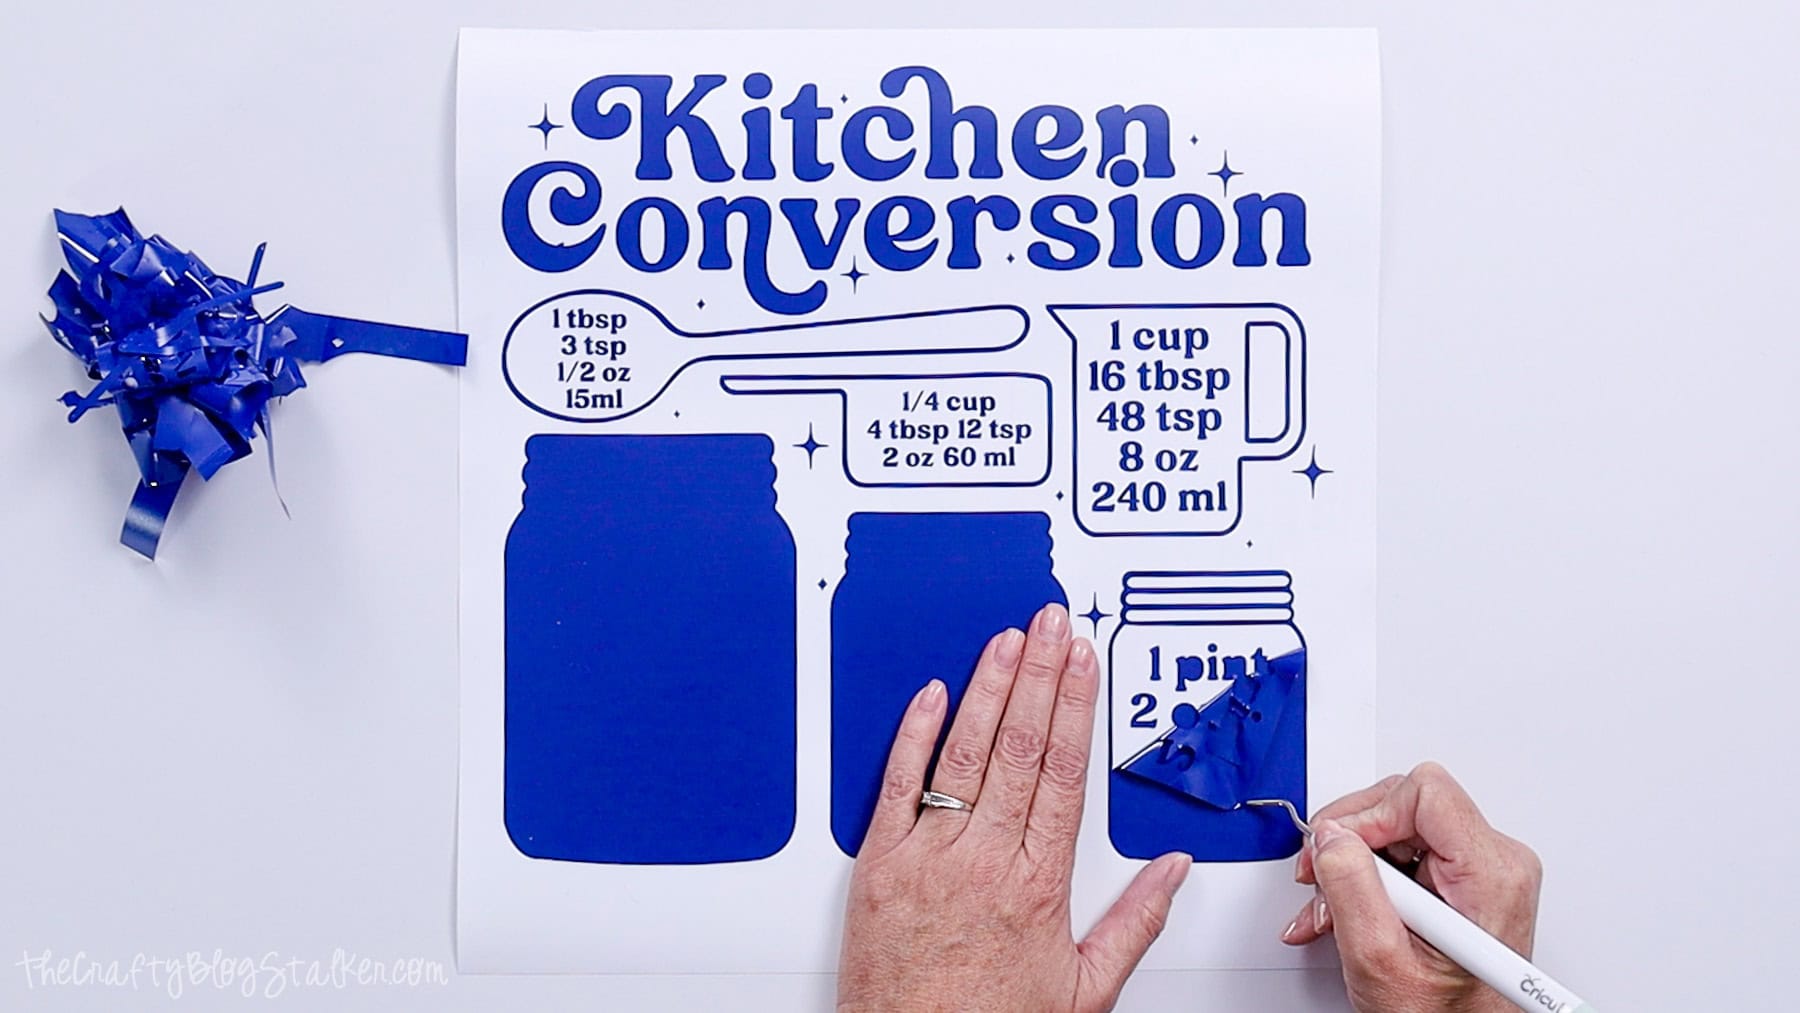
After the Cricut finishes cutting, it's time to weed the design.
Use a weeding tool to remove the extra vinyl around the design. I like to start at one corner and slowly peel away the background.
Next, remove the small inner pieces from the letters and numbers in the chart.
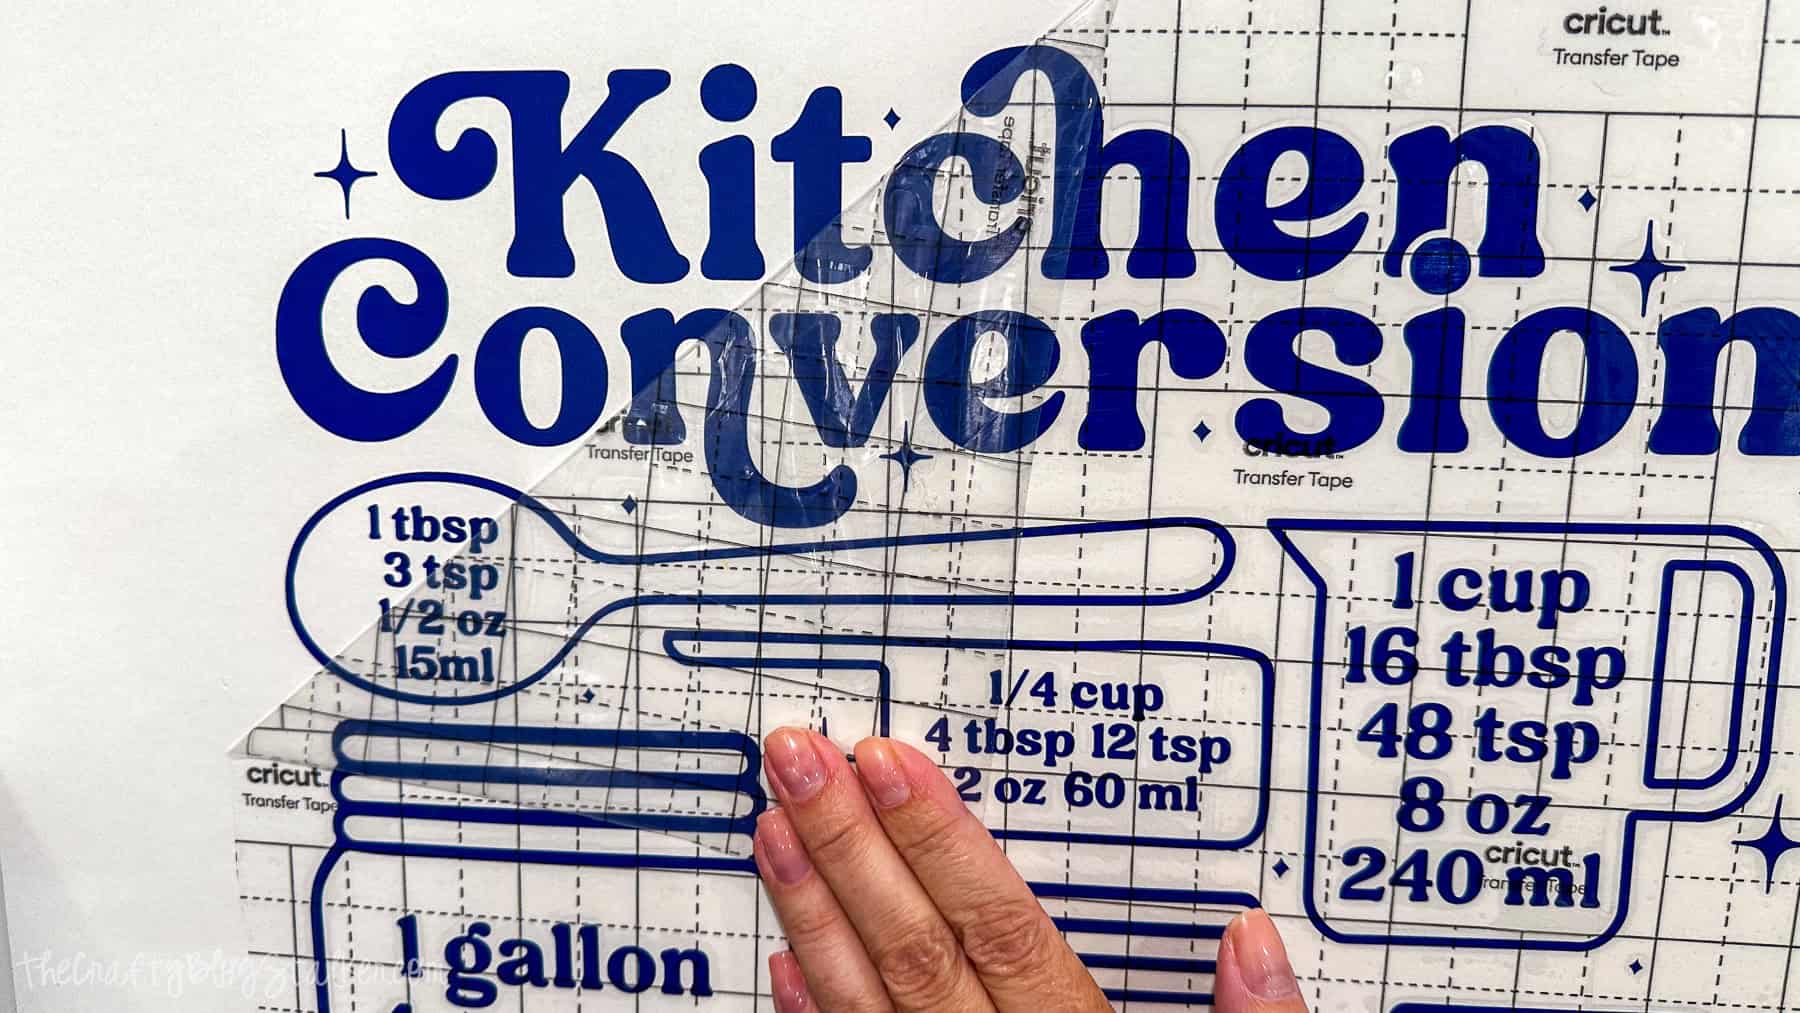
Cut a piece of transfer tape that is slightly larger than your design.
Lay the transfer tape over the vinyl decal and use a scraper tool to press it down firmly.
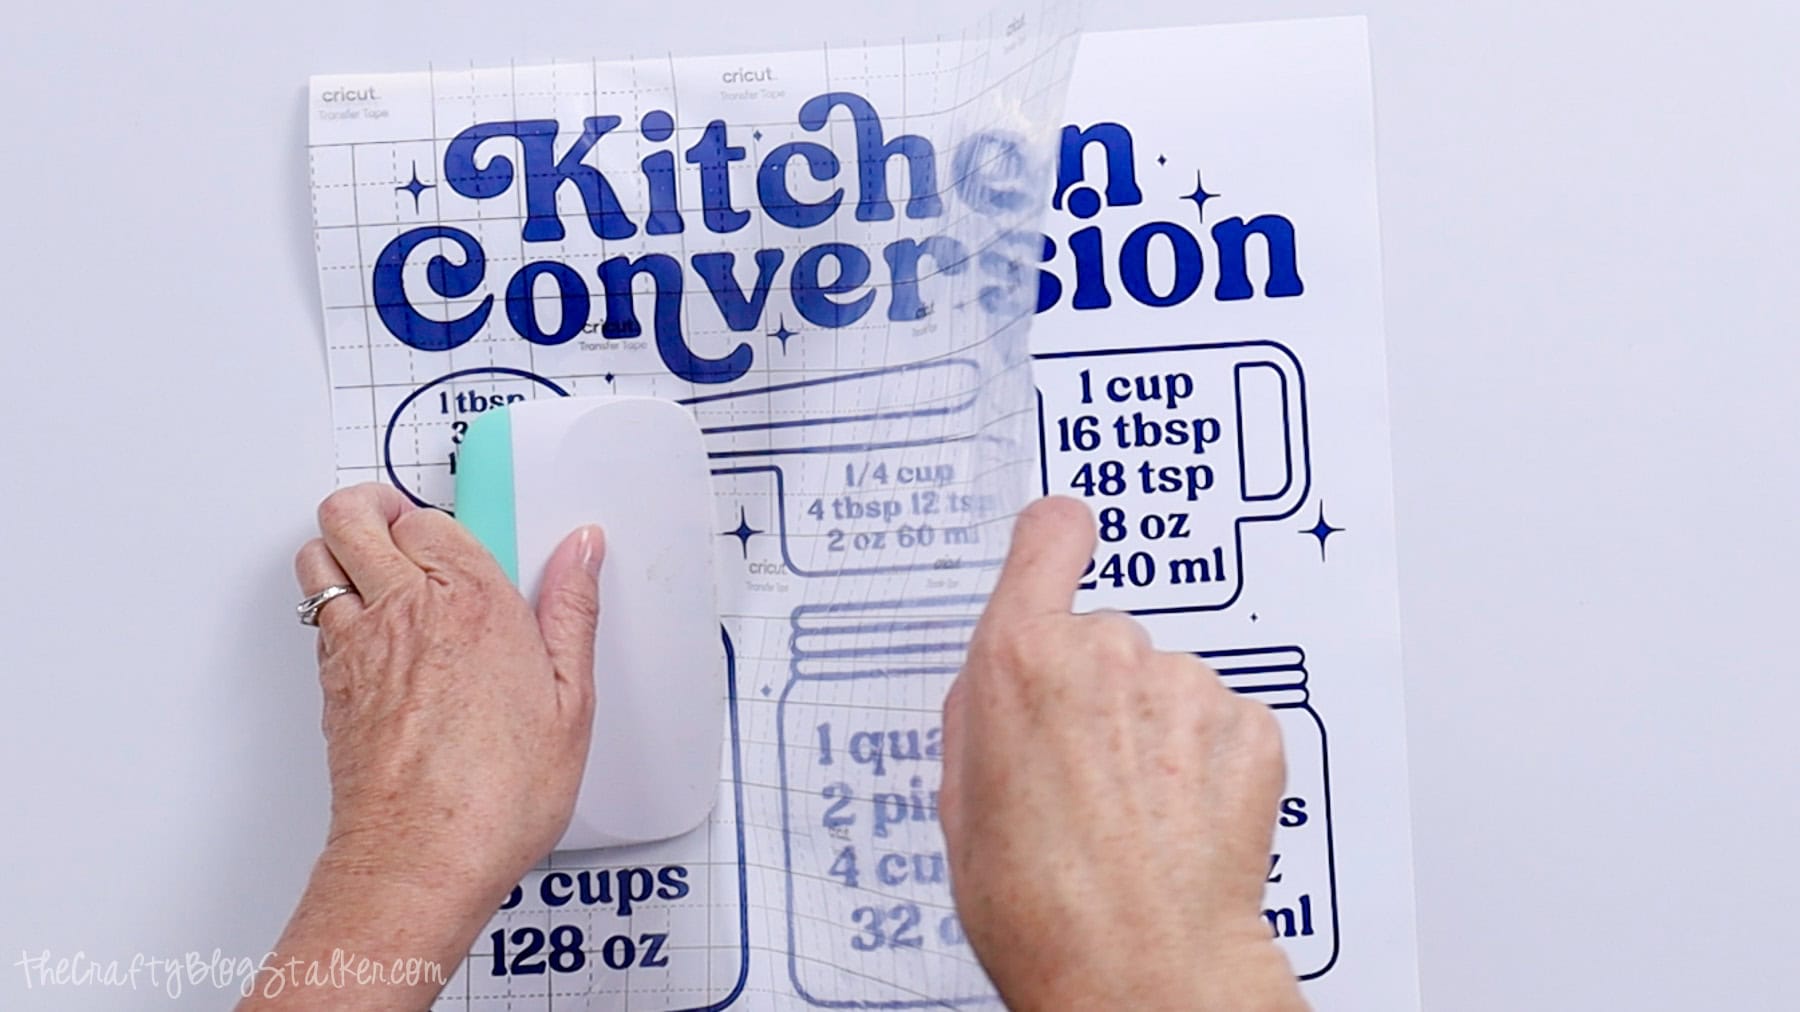
Tip: If any small pieces stay behind, flip the design over and gently burnish the back. That usually helps them lift with the transfer tape.
Apply the Vinyl Decal
Before applying the decal, clean the surface well. I like using a little isopropyl alcohol because it removes grease and dries quickly.
Peel back a small section of the paper liner to position the decal where you want it.
If you want to be extra precise, you can use a level to make sure it's straight. I used the bottom of the letters as my guide since my transfer tape wasn't perfectly lined up.

Starting on one side, slowly pull the paper liner away while smoothing the vinyl onto the cabinet door with a scraper tool.
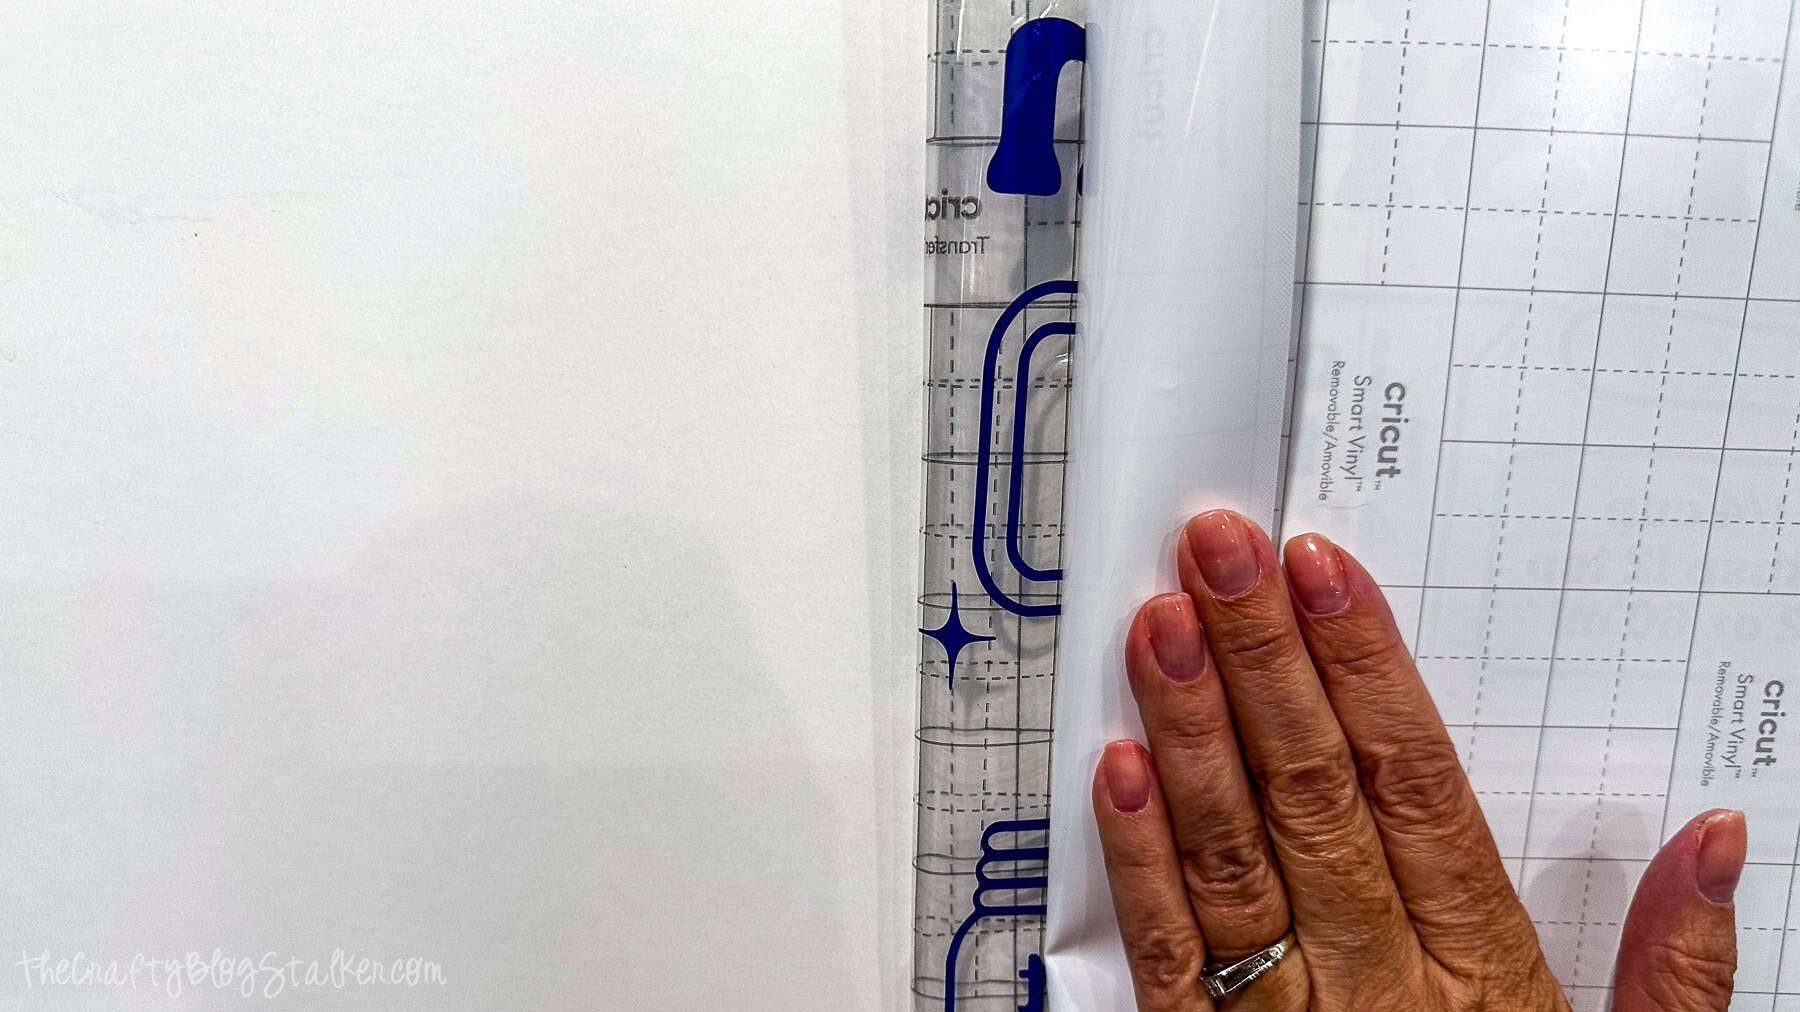
Work gradually so the decal sticks to the surface instead of staying on the liner.
Once the entire design is in place, go over it again with the scraper tool to help everything adhere.
Then carefully peel the transfer tape away, starting from one corner and pulling it straight back. Watch closely to make sure all parts of the decal stay on the cabinet, not on the tape.
And that's it!
Now you have a super handy cooking measurement chart right in your kitchen.
It's perfect for quick ingredient conversions when you're working with tablespoons, teaspoons, grams, or other recipe measurements.
More Cricut Kitchen DIYs
If you enjoy making helpful kitchen projects with your Cricut machine, there are lots of other fun crafts to try, too. Here are a few more ideas you might like.

Hi, I'm Katie!
I'm so glad you're here. Want to make something fabulous? I'm here to help!
Amanda Chittenden
What a great idea! Love it...
Katie
Thank you Amanda!
Terry Ann
I found your directions on rock painting a house. It turned out great. Do you have more like that?
Katie
Thanks Terry! I have a post with lots of different Rock Painting ideas. You can find it here: https://thecraftyblogstalker.com/20-best-painted-rock-art-ideas/
Sue
Don’t have a Cricut machine, can you do your projects without one?
Katie Adams
Hi Sue, the projects that use an SVG file to make the project, do require a a cutting machine of some sort. Like a Silhouette, Brother, or Cricut.