

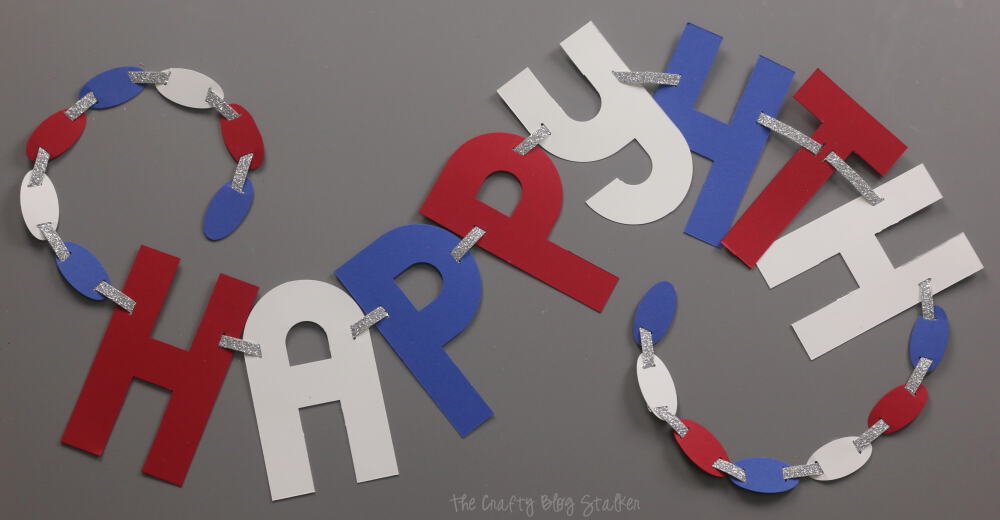
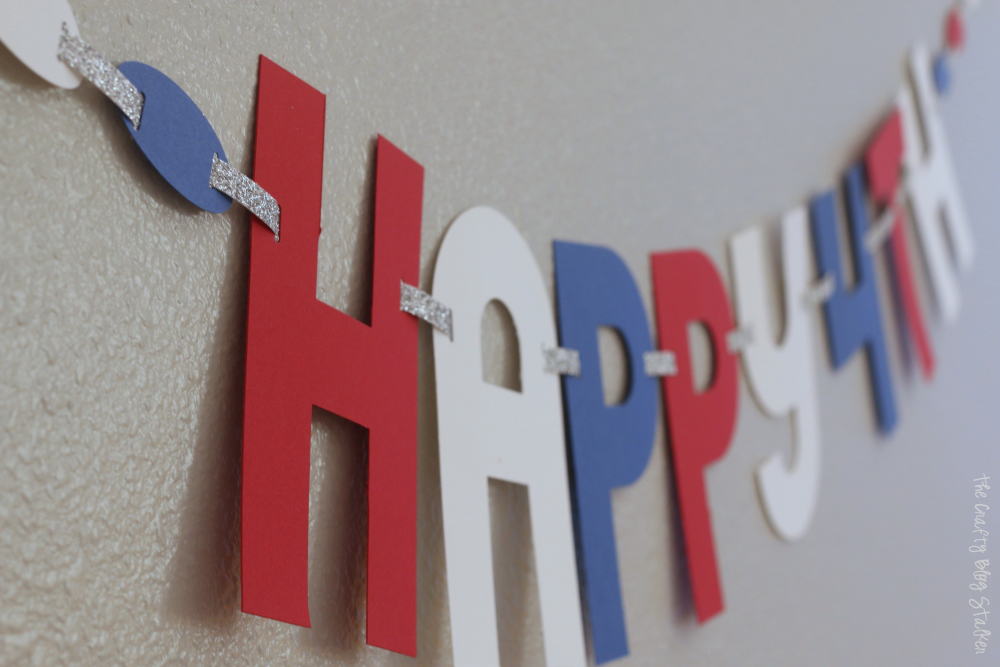
Using the alphabet punch board, make a stunning 4th of July banner. Punch out letters from colorful cardstock, and hang to show your American pride!
With Independence Day just around the corner, it's the perfect time to ignite your creative spirit and add a festive touch to your celebration of America.
Today, I'll guide you through creating an easy Happy 4th of July banner using the Alphabet Punch Board.
Get ready to punch out letters on cardstock in Fourth of July colors to bring your patriotic vision to life.
It's time to roll up our sleeves, unleash our creativity, and embark on this exciting, crafty journey together.
Craft Tutorial Video
If videos are your thing, you're in luck-I've got a full tutorial ready for you!
Subscribe to my YouTube channel and stay inspired with every new project.
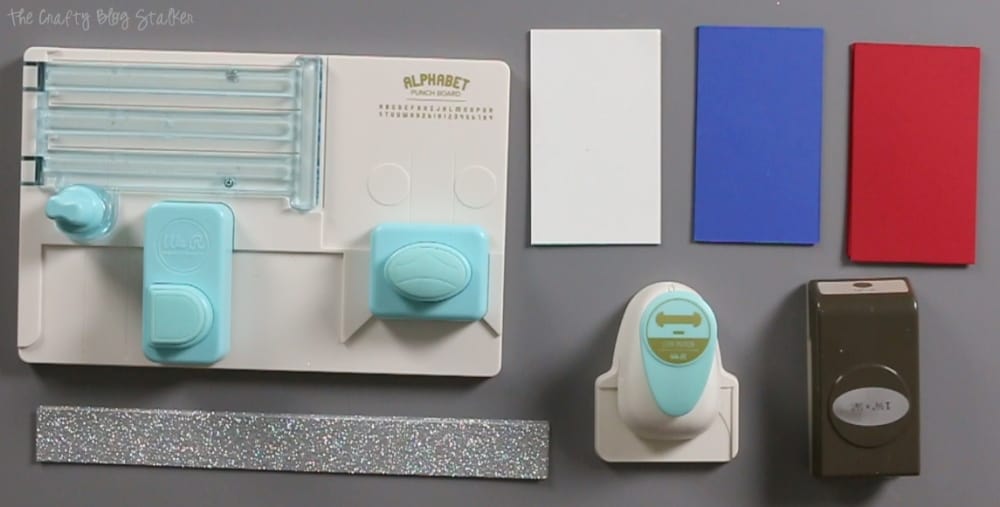
Supplies You'll Need to Make This Craft:
This banner can easily be customized for any celebration. Think birthdays, baby showers, Christmas... the possibilities are endless!
Alphabet Punch Board from We R Makers:
If you are new to the Alphabet Punch Board, this is seriously one of the coolest tools! You can cut all 26 letters of the alphabet, numbers 0 through 9, plus an exclamation point (!) and an ampersand (&)!
All pieces start out with a rectangle of cardstock that measures 3 x 5 inches, then with a couple punches or a swipe with the blade, you have a finished letter or number. So cool!
The punch board comes with a handy dandy little manual to help you make all of the pieces so there is no guessing involved.
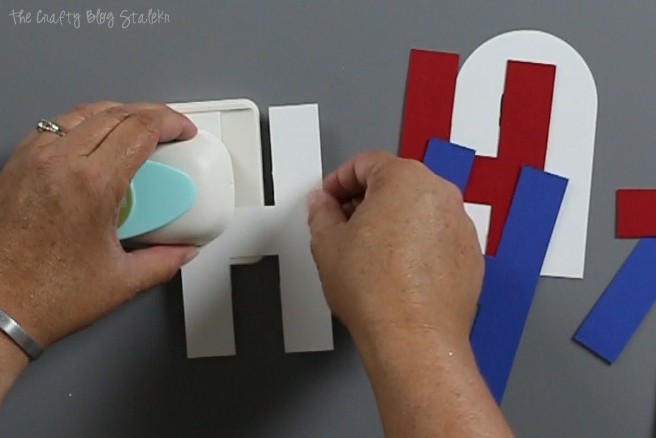
Cut Letters:
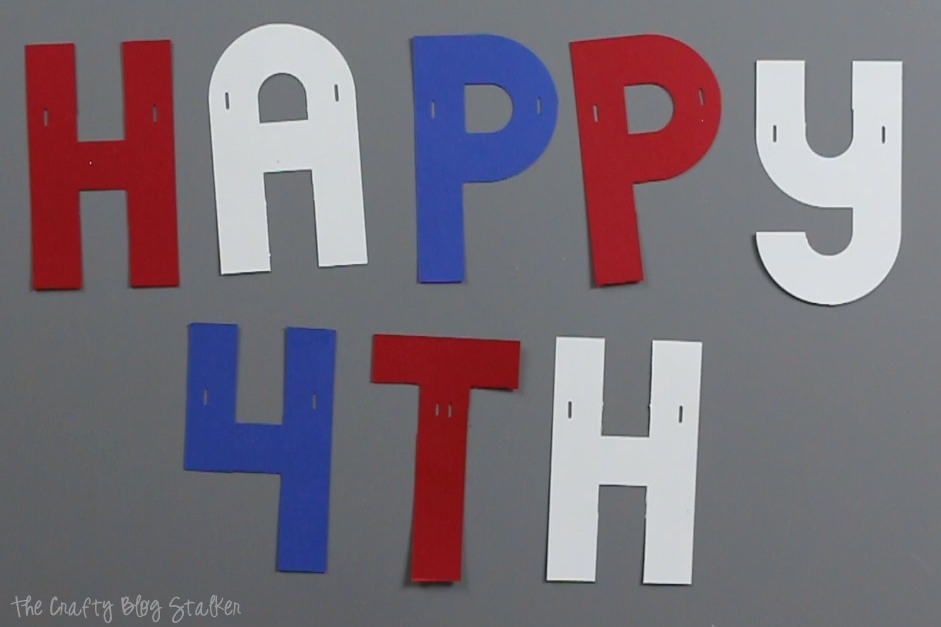
My banner today is going to say "Happy 4th", how easy is that?
I am not going to show how to cut each letter because all you need to do is follow the easy step-by-step directions in the booklet.
Each letter takes less than 1 minute to cut.
Just remember to start each letter with a rectangle of cardstock that measures 3 x 5 inches, and repeat the color pattern red, white then blue.

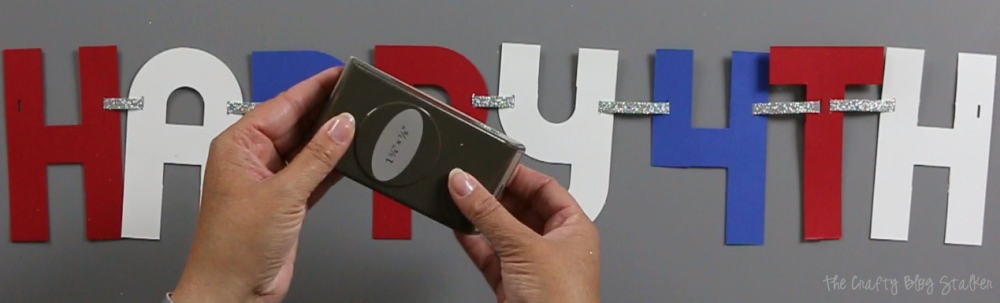
Link Punch:
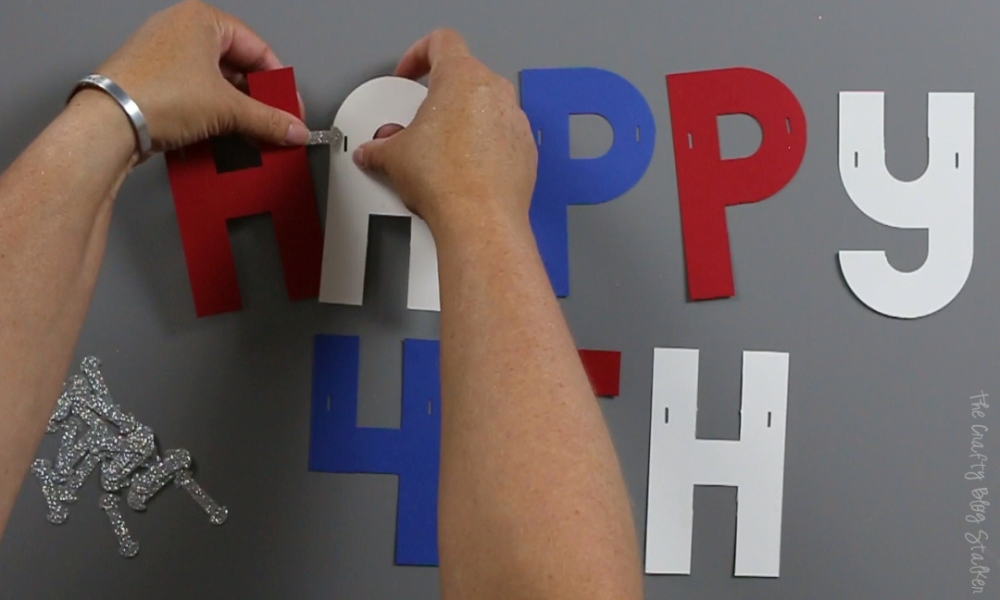
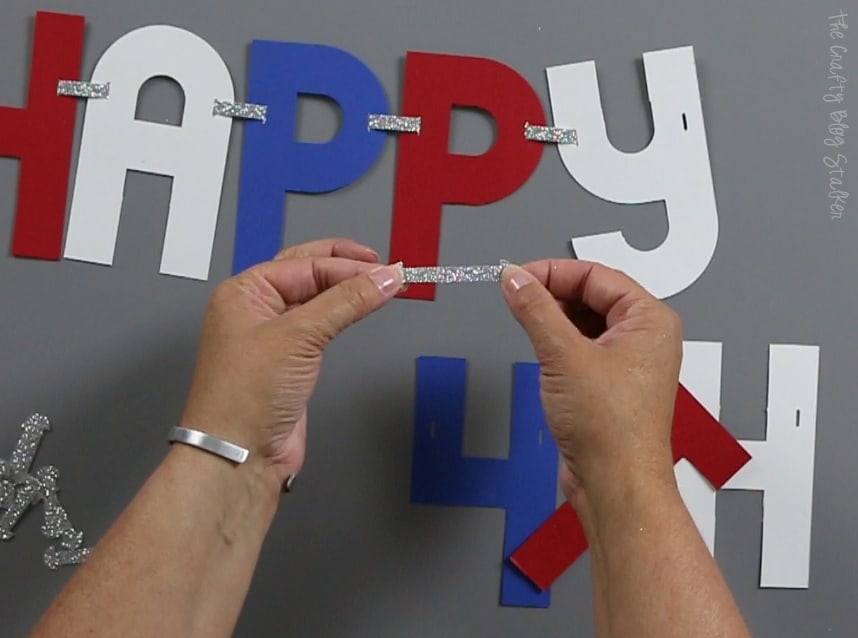
To connect all of the letters use the link punch and punch out a bunch of links out of silver glitter paper.
Since it's the 4th, a little sparkle fits the patriotic theme perfectly.
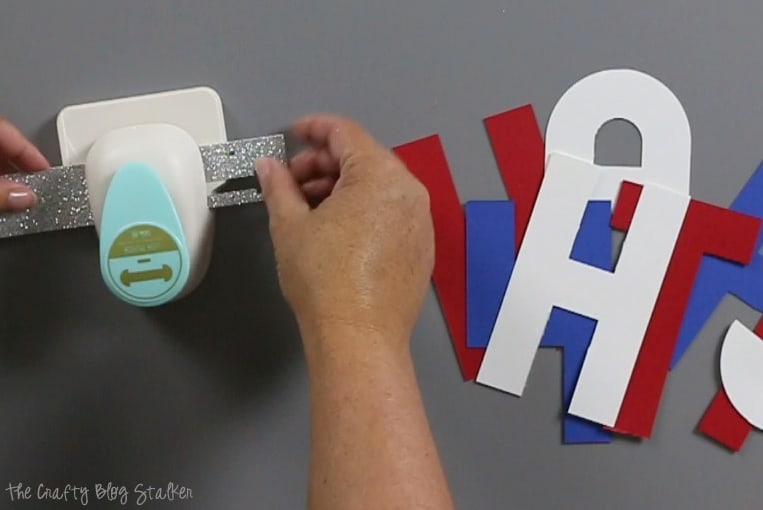
The link punch also punches the holes that the links go into and has a guide so you can perfectly place those holes.
Punch link holes on the left and right of each letter too.
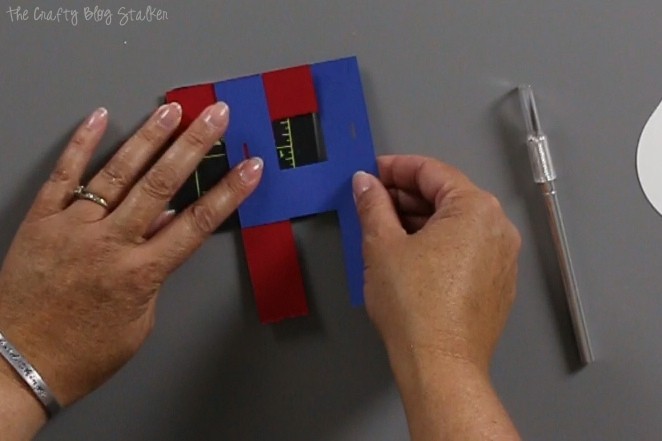
The letter T is a little bit different because of the shape of the letter. For the T, I used the number 4 as a guide and cut my own holes using a craft knife.
It's a simple fix and only takes a couple extra minutes.
All of the letters have their holes punched for the links, and you can see the banner is coming together really pretty quickly.
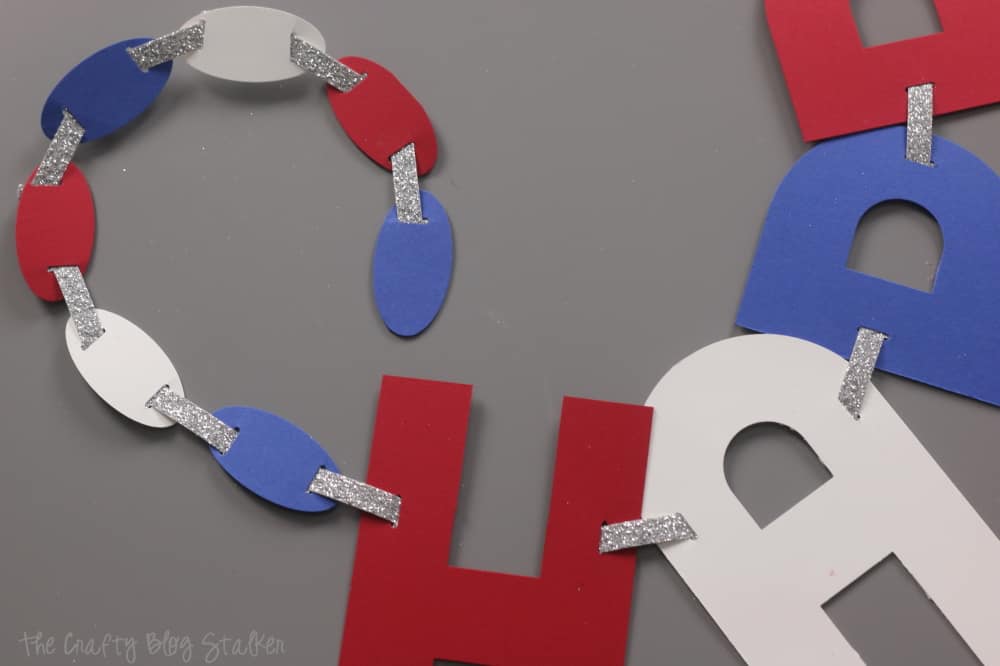
Assembling with Links:
Next, connect the letters with the glitter links we punched earlier.
They are a tight fit so be careful not to tear them, but once they are inserted they are very secure.
I wanted a little extra space between the two words. To create the extra space, cut the ends off of two links.
A glue dot adheres one to the other, giving you a longer link. Another easy fix.
Double links are also needed to attach the letter T on both sides. This will keep the regular spacing between the letters on both sides of the T.
Hanging the Banner:
To hang the banner you can string twine or ribbon through the holes on each end of the banner, BUT I really like the link look so I am going to carry that throughout the banner, even the ends.
To do that, use a small oval punch and punch out several ovals out of the red, white, and blue cardstock.
Use the link punch to make holes on each end of the ovals.
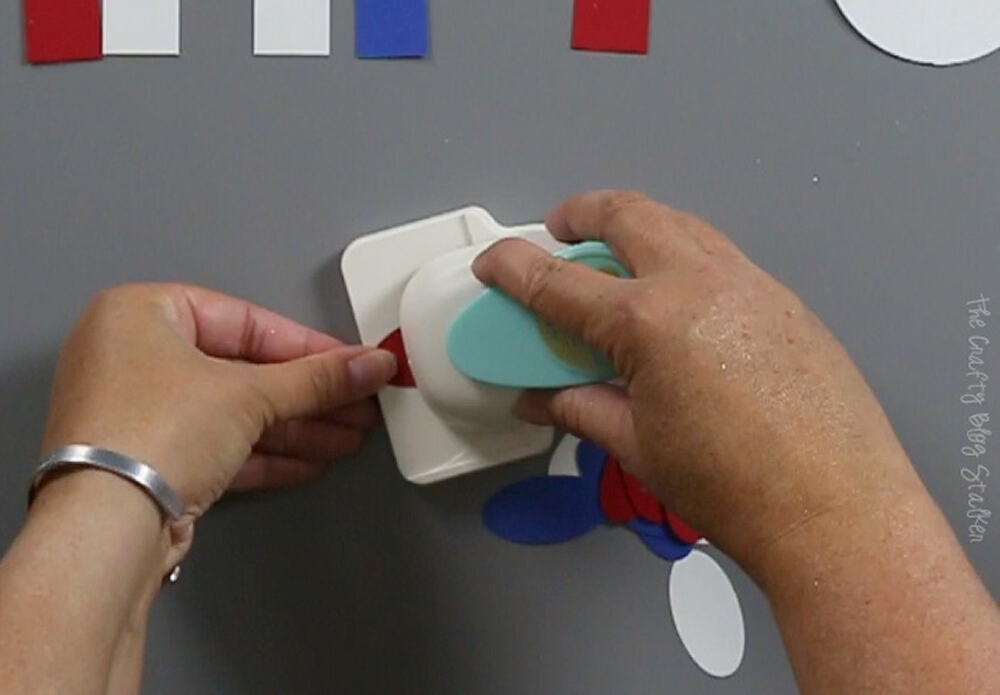
Then use those same glitter links to attach all of the ovals.
I made sure to continue the red, white, and blue color pattern so everything flowed nicely.
The finished banner is super cute, and the whole thing came together so quickly!
My new patriotic decorations look great hanging on my wall!
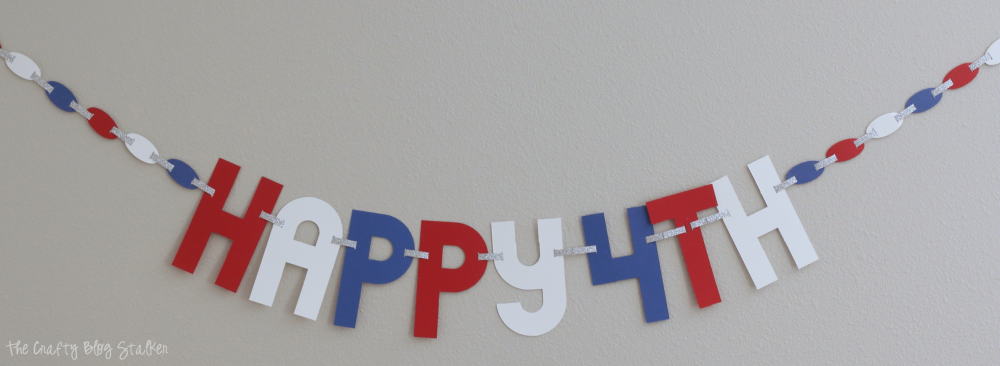
This banner was so easy that I will just toss my July 4th banners in the recycle bin after the celebrations are over and make a new banner next year. Now that's my kind of decorating!
Since these are made out of paper, I don't suggest using these banners outdoors for a long time. But they are great to decorate the front porch for the day.
How do you decorate for the 4th of July?
Crafting Essentials
- The Cricut Cutting Machine is easily my favorite crafting tool. We use it in so many of our tutorials!
- These MakerX Crafting Tools are perfect for keeping in the craft room and are always ready when needed!
- This Fiskars Paper Trimmer is easy to use and cuts nicely without frayed edges.
- These Scotch Precision Scissors cut like a dream, and you get multiple pairs in a pack!
Charlene Asay
Super cute banner. I love anything 4th of July!
Katie
Thank you Charlene, I am so glad that you like my banner!
Victoria @DazzleWhileFrazzled
Very fun banner and very fun tool! Never heard of an Alphabet Punch but it's probably a lot faster than tracing stencils. Visiting from Bewitchin' Projects.
Edye
This is such a cute banner! Thanks for sharing 🙂
Blessings,
Edye
Katie
Thank you Edye, I am so glad that you like it!
Melissa Ruddy
Love this! Will have to try it with my Cricut. Really like the link punch thought looks like it makes things so much easier.
Katie
I am so glad that you like it Melissa! I would love to see what you come up with using the Cricut. That's a great idea!
Tammy
What a sweet banner to help decorate for the 4th! Love it!
Katie
I am so glad you like my Happy 4th Banner, Tammy. It was a lot of fun to make!
kim Purvis
I'm likin this alphabet punch board! Thanks for linking up to Merry Monday! Pinned! Have a great week!
Kim
Katie
Thanks for the Pin, Kim! The Alphabet Punch Board is pretty fun!
crystal
Love this banner, what a festive DIY way to celebrate 🙂 Visiting from #HomeMattersParty
Katie
Thank you Crystal, I am so glad that you like it!