Make an Event Badge Keepsake Frame using the Tolsby Frame from Ikea. Put your event badges on display. An easy DIY craft tutorial idea.
With my day job, I am lucky enough to be a part of several big events every year. I absolutely love these events and they are a big highlight to my job. Each event holds it's own memories of who I met, what I did, and the overall feeling I felt. For the longest time, I have been holding on to my event name badges, but they were hidden away in my drawer so I rarely saw them. I had been wanting to make something to display them but just wasn't sure what to do.
Ikea to the rescue! When I saw the Tolsby frame one day while walking through the store, it hit me, and I knew exactly what to do with those badges. An Event Badge Keepsake Frame. The frames are super cheap, like only a couple dollars, and the project came together super quick and easy.
Here is what the Tolsby frame looks like all packaged up.
Tolsby really only has 3 pieces; the frame, the twist on a stand and the clear inserts that protect your picture. For this project, I used the frame only and did not use the clear inserts.
Here is what the Frame looks like assembled.
It's cute, but I can make it cuter!
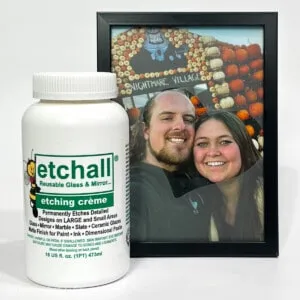
Supplies Used: Some links may be too similar items when exact items couldn't be found online.
![]()
How to Make a Tolsby Event Badge Keepsake Frame
This sheet of Gemz is awesome because the Gems are all attached and can easily be cut into strips or even chunks to work for any project needs.
They are also self-adhesive. So once I cut them to the shape or strip I simply remove the backing and stick to my project. Gemz really are pretty awesome and I have used them on several of my other projects.
Stick the strips of Gemz around the frame.
Super simple. I made sure to line up the corners so it looked well put together.
Now that the frame is all done it is time for the next step, attaching the badges.
I punched two holes in the top of each badge, but they aren't all the same size so I started with the smallest badge. And measured about ¼ inch in from each edge. Thank I used this badge as the pattern and centered it on the other badges, so the holes would be in the same place on all of the badges.
I then used two silver binder rings.
Put the rings through the holes on the badges.
Close the rings over the top bar of the frame, and you're done!
I am so excited to put this on my desk at work. Now I can have all of my event badges where I can see them, and I know I will smile every time I see them.
Because of the rings, it makes it really easy to flip through the different badges and even put a different on top. This frame does work best with vertical badges.
What have you made with the Tolsby Frame? Share and leave a comment below!
Recommended Posts

Katie Adams
Creator at The Crafty Blog Stalker
- 30 Spring Home Decor Crafts for Adults
- St. Patrick's Day Layered Paper Art with Cricut
- 29 DIY Lampshade Ideas to Lighten Up a Room
- 12 Unique Spring Chalk Art Designs You Can Recreate
- 20 DIY Snowman Crafts for Adults
- How to Save Sharpie Art on a Ceramic Plate
- Shaker Snowman Decor with Cricut SnapMat
- 16 Rusty Vintage Spring Crafts for Your Home
- 76 Easy DIY Home Decor Projects
- 20 DIY Ideas to Personalize Your Shadow Box or Shadowbox
- How to Make a Napping Blanket with Iron-on Vinyl and Cricut
- How to Make a Vinyl Mirror Decal Quote with Cricut Explore
Dina @ Kitchen Dreaming
Thank you so much for stopping over at The Weekend Social tonight, we hope to see you next week.
Shirley
This really works well. Thanks for sharing.
Julie
Got to love those Ikea frames - so versatile. This reminded me of WAAAYY back when I used to go to a lot of Soul Music Weekenders and we would get a laminated pass from each of them. If you were super cool you would have a whole bunch of them all hanging round your neck from a lanyard, the more you had the cooler you were!
I guess this is the Crafters version, I think it's a lovely idea instead of just having them in a drawer.
Natasha in Oz
That is a great idea and thanks for the excellent tutorial too. Isn't Ikea the best!
If you have a minute to spare I would be thrilled if you could share your post at this week's Say G'Day Saturday party. It has just started and this would be a great addition.
Best wishes,
Natasha in Oz
Hayley
Found you on the niftythrifty link up. Such a cool project. Thanks for sharing!
Zakkiya hamza
Oh wow! You glammed it up so splendidly! I have the same frame lying around. I will definitely have a try at doing something with it. Thank you for this inspiring post 🙂
Madaline Huntsinger
This is such a cool idea. I use to work at Guess? (hq) and go to all the parties and corporate events - I've never known what to do with the little tags I was given! I'm totally going to try and make this ! (here's to hoping the Ikea here in Italy sells that little frames!)
Linda
Nice work. I love this idea, too. Could be adapted, me thinks. 🙂 Linda at http://www.craftsalamode.com/
Linda
PINNED!
Tauni
Katie, I love that you've saved your name badges. It makes me love you that more more! Also? I didn't know you did Stampin' Up? That's so fun! xoxo
Katie
I save all of my badges, I am kind of a hoarder that way. 🙂 I actually work at the home office of Stampin' Up! it is a great place to work.
Miriam Permut
Hi Katie, so glad I found your independent blog site. I already love you through your "other job" but so cool to see how creative you are on your own, too! Thanks for the great tutorials.