

This post is sponsored by Cricut. All opinions expressed are my own.
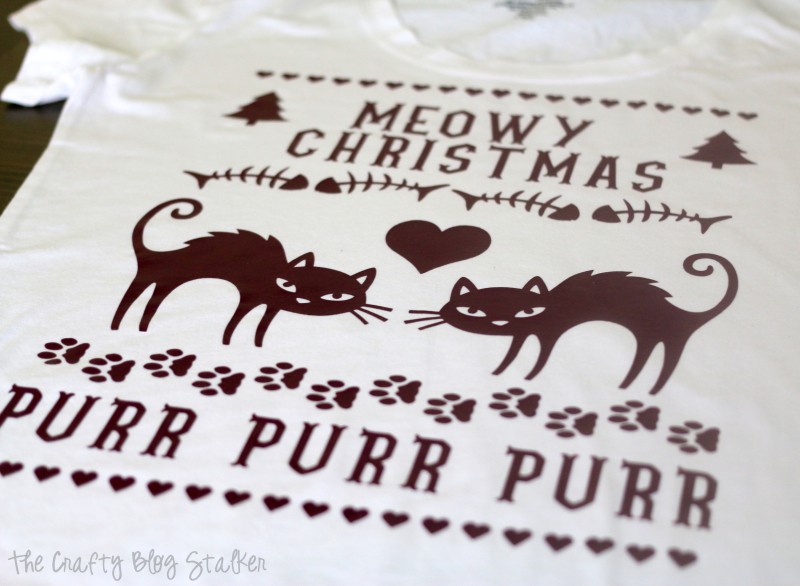
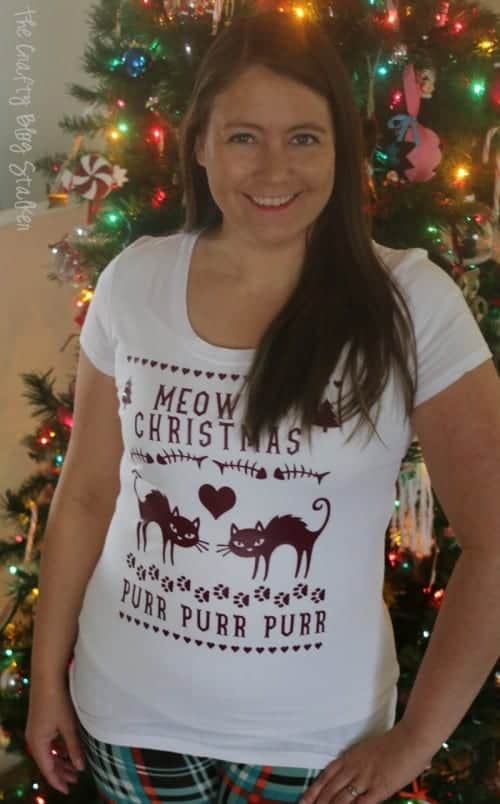
Take a break from decorating the tree and make a killer ugly Christmas sweater shirt. Here is a guide to making the best ugly sweater on the block.
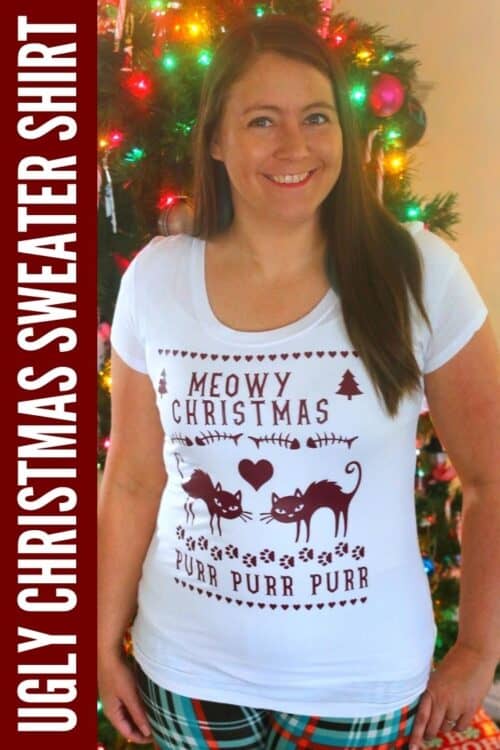
Ugly Christmas sweaters are just a part of the holiday season.
In fact, I am starting to think that all those ugly Christmas sweaters are actually kind of cute!
Okay, not all of them, but some of them are.
My ugly sweater is a shirt, but since it is an iron-on you could put it on whatever type of shirt or sweater you want.
Supplies You'll Need to Create this Project:
- White T-shirt
- Cricut Explore or Maker
- Meowy Christmas Cricut Design Space
- Everyday Iron-on
- Cricut EasyPress
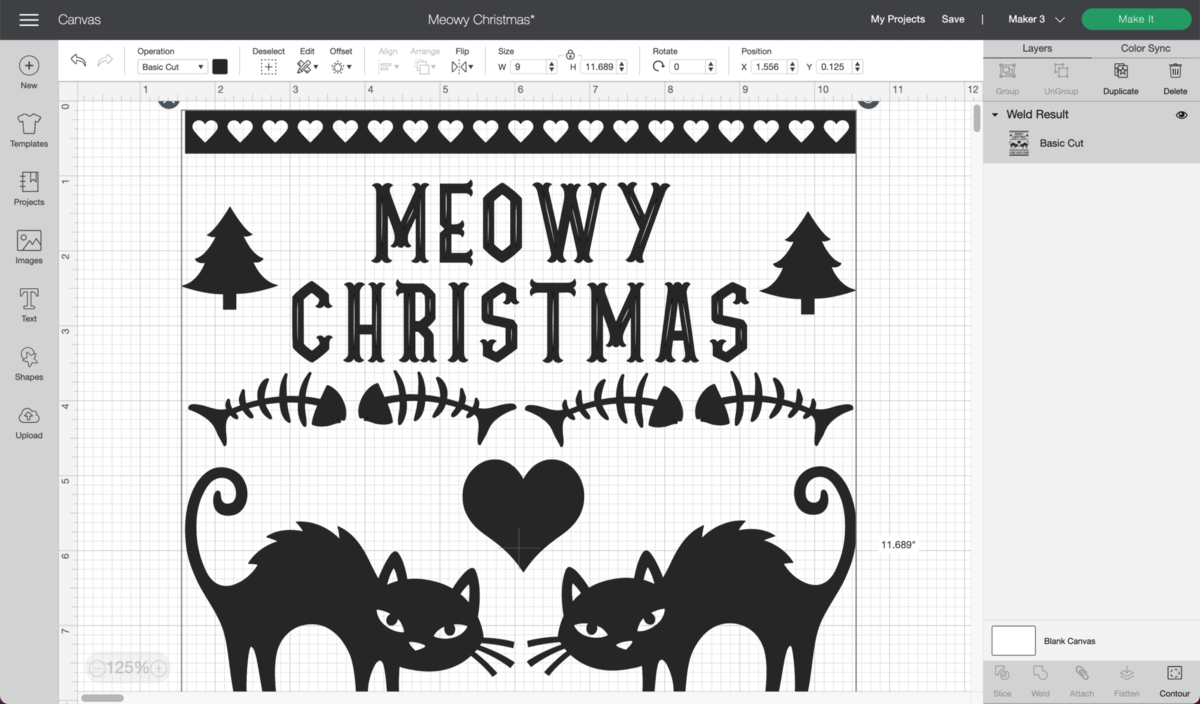
Cut the File in Cricut Design Space:
The file to make this shirt is completely ready to go on Cricut Design Space.
I have a file size with a width of 9 inches. If this size works for you then you can select Make It. If you need to adjust the sizing, select Customize.
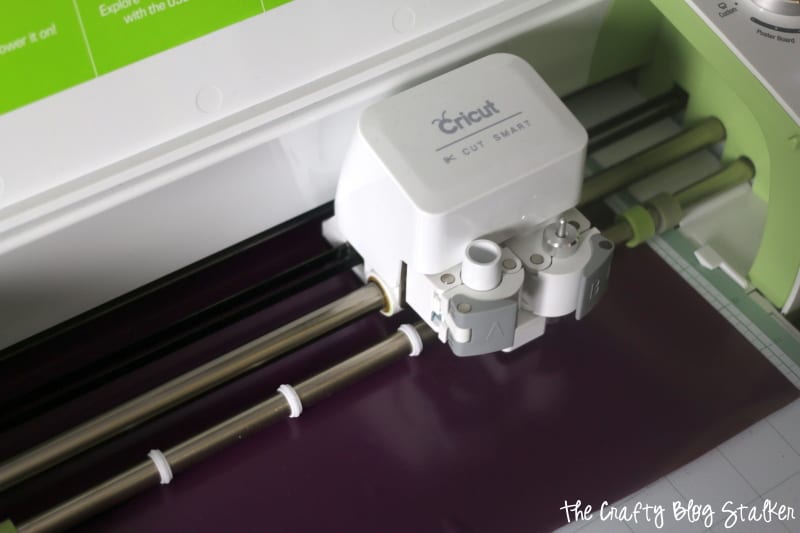
Place the iron-on shiny side down on a light-grip mat, and make sure you select Mirror Image before you begin the cut. Follow the prompts in Cricut Design Space to cut the image out.
Once the image is cut, weed the excess iron-on vinyl from the backing sheet.
The BrightPad is super helpful during this step because it shines light through the lines so you can easily see the areas you need to weed. Don't forget to remove the center of the letters!
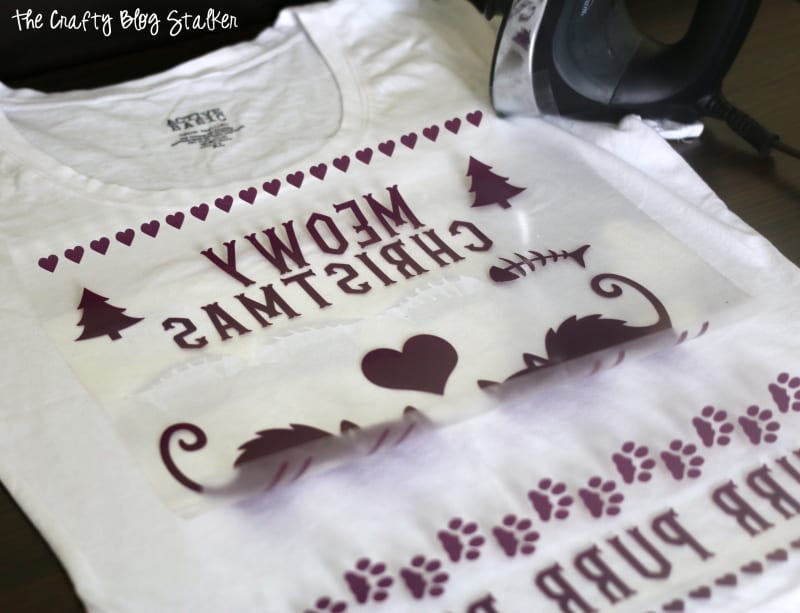
Center the cut-out on the front of your shirt. If you would like, you can use a ruler or t-square to get it perfectly centered. I go easy and just eyeball it.
If your shirt has a v-neck you can use the v as a center point and that helps center the design.
We are using an industrial heat press to apply the iron-on. We set the temperature to 315 and 30 seconds.
Shake the shirt lightly to cool the shirt so you can touch it. It gets really hot!!
Slowly peel back the iron-on backing. If the iron-on doesn't stick you can reapply the backing and apply the heat press again.
That's all there is to it. Easy Peasy! Now you have a super cute ugly Christmas sweater that is really a shirt!
This ugly sweater design is so much fun whether you love or dislike cats. Great for that Christmas Party or cute enough to wear just cuz it's cute!
Crafting Essentials
- The Cricut Cutting Machine is easily my favorite crafting tool. We use it in so many of our tutorials!
- These MakerX Crafting Tools are perfect for keeping in the craft room and are always ready when needed!
- This Fiskars Paper Trimmer is easy to use and cuts nicely without frayed edges.
- These Scotch Precision Scissors cut like a dream, and you get multiple pairs in a pack!
Shantel
That is the cutest idea ever! I love it!!!!
Kate
Thank you!! The weeding took time (as usual) and I had to be particularly careful around the paw prints with my weeder tool, but it turned out GREAT. I did have to purchase some of the images.
Katie
You are welcome Kate! I am so glad you liked the project!
Laura Rigsby
Can you change colors on certain items on the image?
Katie Adams
Yes, you can, although it will take extra steps. In Cricut Design Space, duplicate the design for the number of colors you want to use, and change one design to each of those colors. With a design highlighted, select Contour, and select the pieces you DON'T WANT to cut in that color. This will hide those shapes. Repeat for all layers.