Who doesn’t love a special decoration box made just for them? Homemade Santa boxes are easy to make with a Cricut. Learn how to make Santa boxes here.
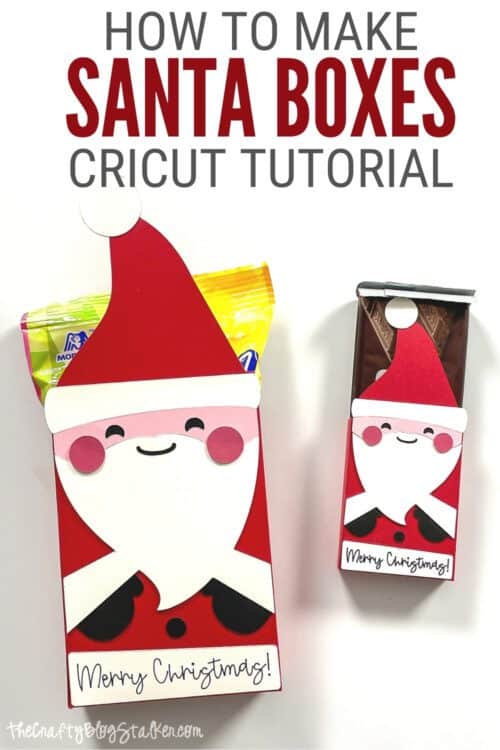
Do you like to give small gifts to friends, neighbors, and teachers during the holiday season?
These are some of my favorite gifts to make and give.
There is something so personal in a handmade gift.
Craft Tutorial Video:
Like videos? I have a video tutorial for you! Please subscribe to my YouTube Channel so you don't miss out on any future video tutorials!
Supplies You'll Need to Create this Project:
This post contains affiliate links.
- Cricut Maker or Explore
- Cricut Design Space Project Canvas
- StandardGrip Mat
- Cricut Pen
- Scoring Wheel or Scoring Stylus
- Cardstock in white, pink, and black
- Bone Folder
- Adhesive
Cut the File in Cricut Design Space:
The file to make this Santa box is completely ready to go on Cricut Design Space.
I have the file sized to fit a candy bar with a width of about 2 inches.
This is a perfect size, for Reece's, Twix, and Hershey bars.
If this size works for you, you can go ahead and Make It.
If you need to adjust the sizing, select Customize.
Make sure to highlight the entire design when resizing so all of the pieces will still fit together.
Watch the tutorial video near the bottom of this post for resizing tips.
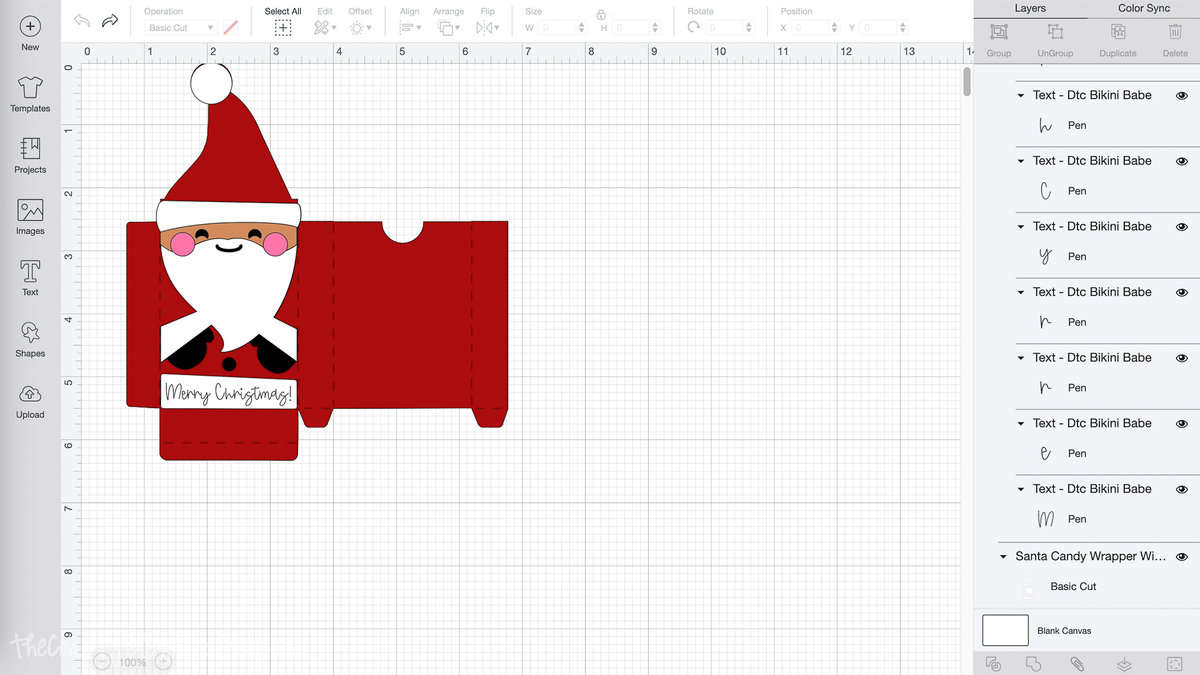
This design uses 5 different colors of cardstock. White, black, red, pink, and beige.
Each color layer will automatically be put on its own mat when you go to cut the design.
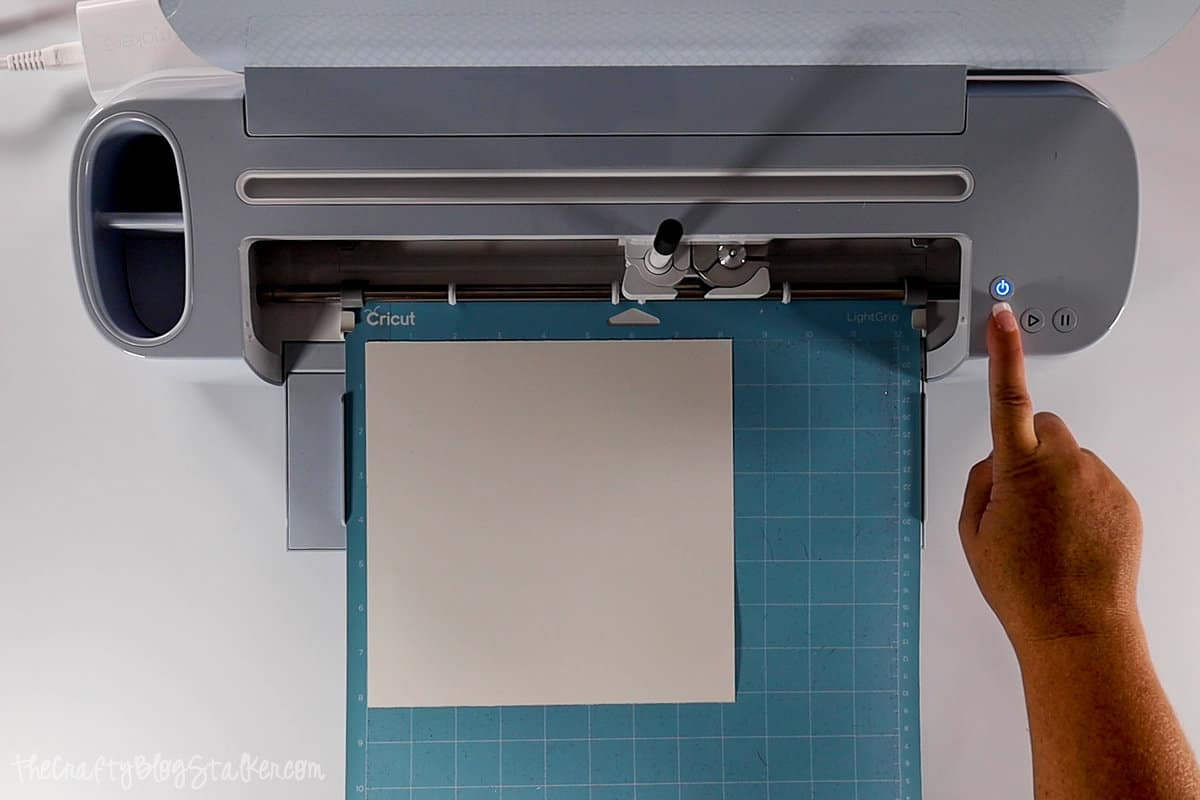
Assembling the Santa Box:
Lay all of the pieces in front of you.
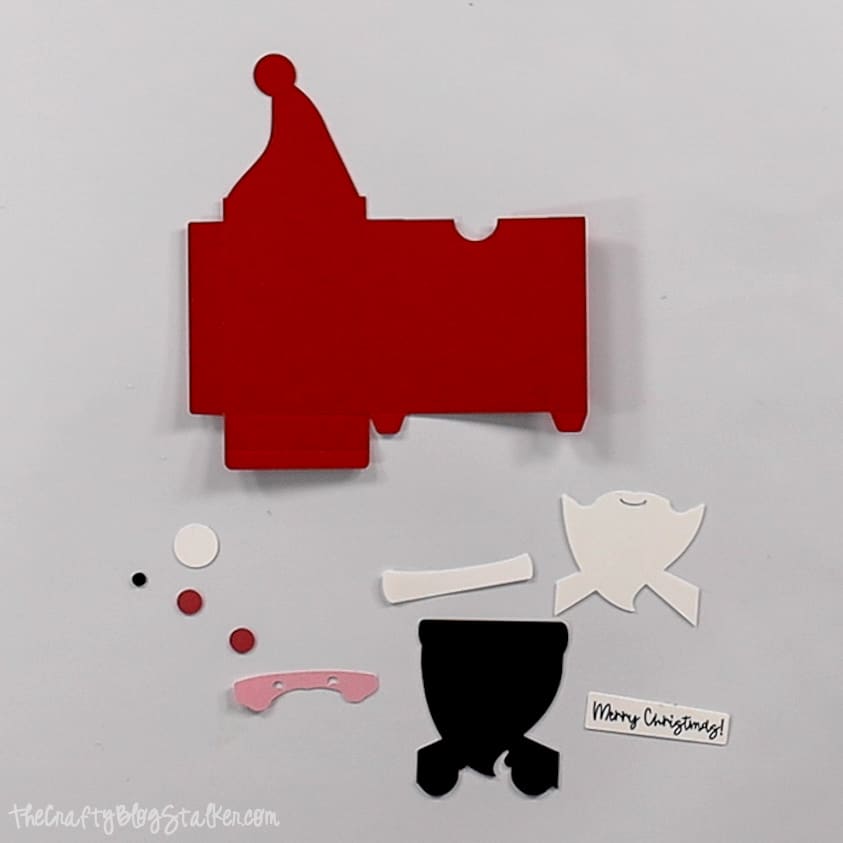
Begin by layering the Santa face, starting on the black base piece.
First lay the white piece with the beard on top of the black piece. You want to make sure everything facing the direction.
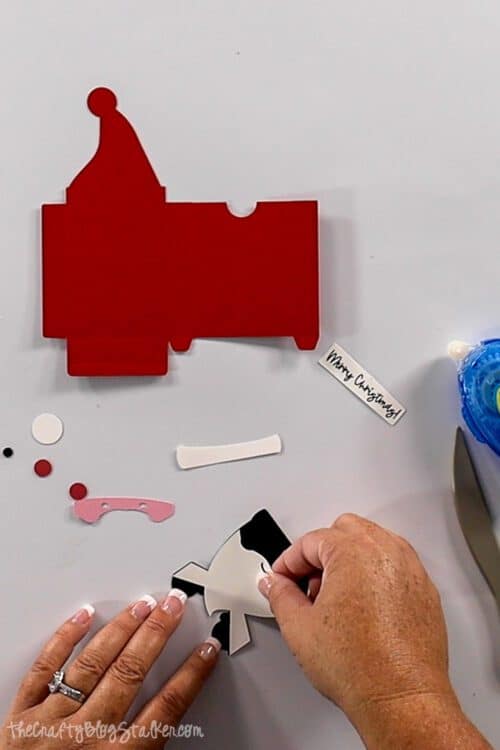
Apply glue to the back of the white beard piece and press it into place.
Next, add the pinkish-beige face, followed by the top rim of the hat.
Lastly, apply the round reddish cheeks.
You will still have a small black dot, a larger white dot, and a Merry Christmas Banner piece. These will be added in a bit.
Using a bone folder, fold the scorelines of the box.
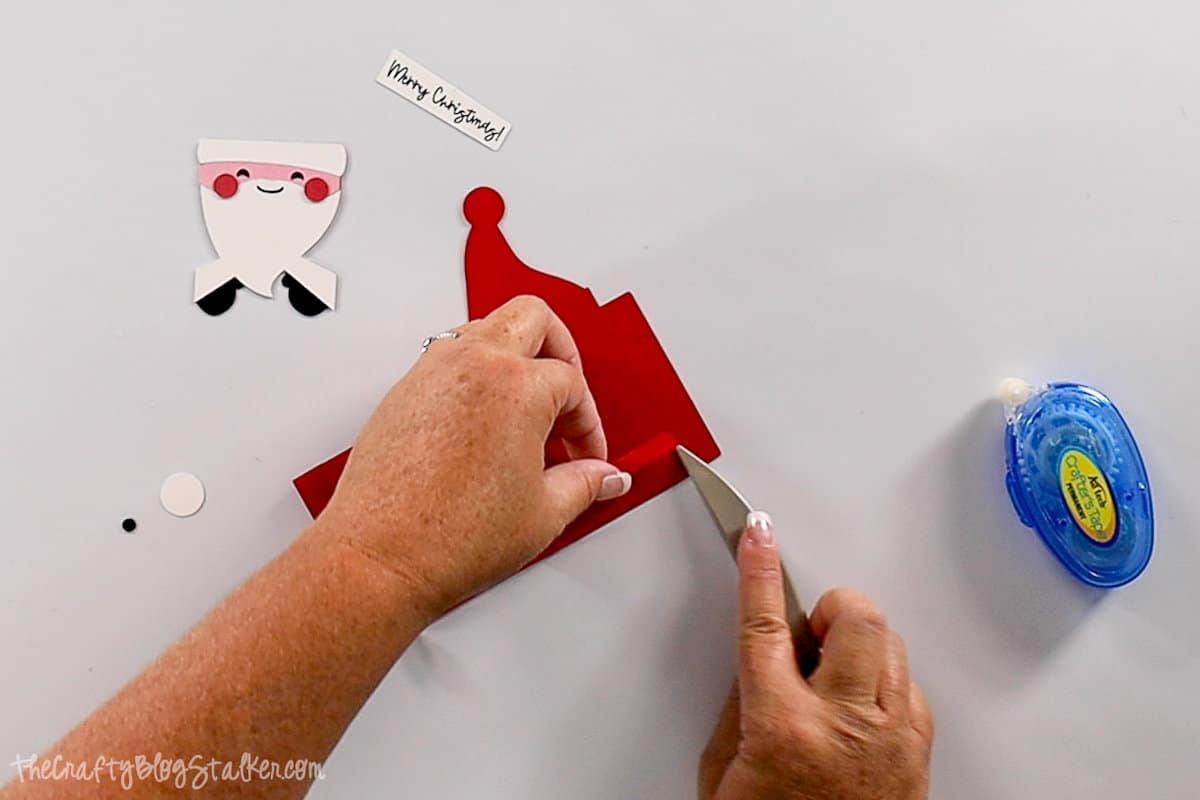
The bone folder helps you to get nice crisp folds for the box.
Apply adhesive to the back of Santa and apply it to the front of the box.
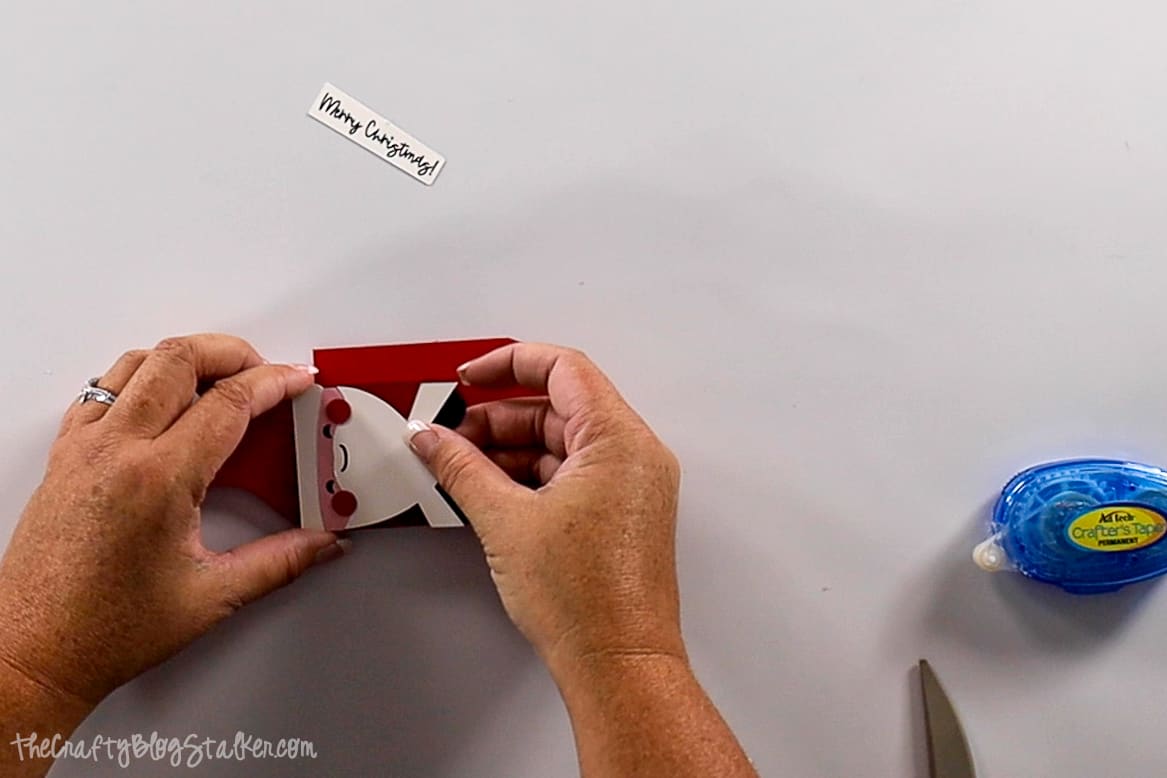
Now you can adhere the small black button, the white circle at the top of Santa's hat, and the Merry Christmas Banner to the bottom of the box.
Apply some adhesive to the bottom flap tab, fold it in, and secure it into place.
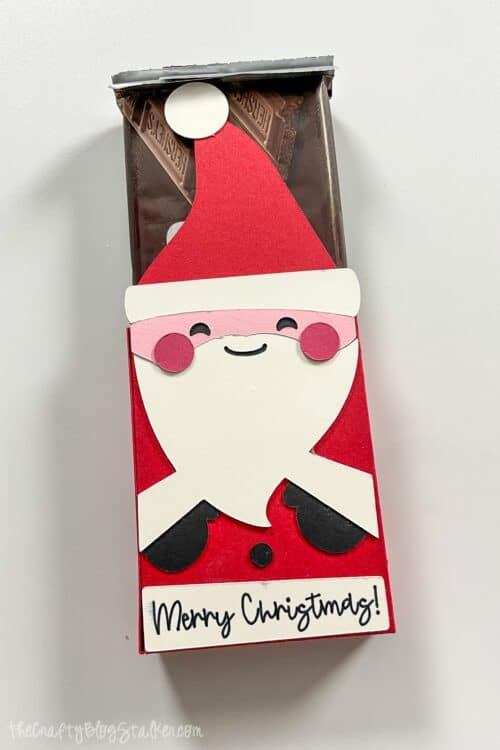
That's it! The Santa Box is done!
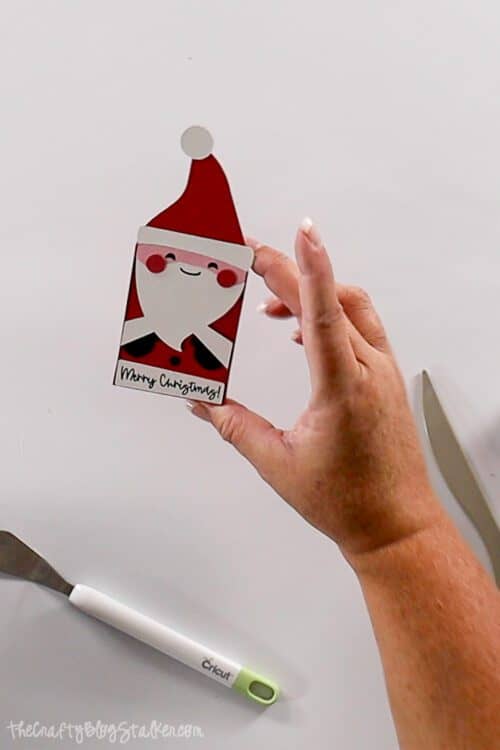
All that is left is to add the candy! There, now he is complete.
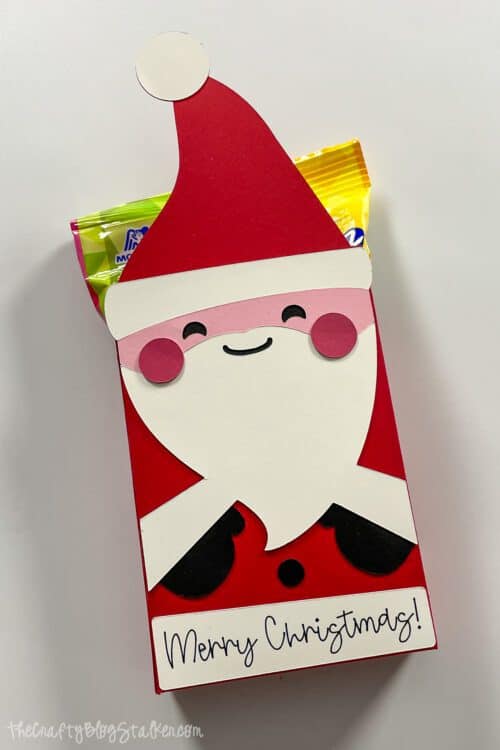
I also made a larger box that can hold a small bag of candy like Hi-Chew!
Our Crafting Essentials:
- The Cricut Cutting Machine is easily our favorite crafting tool. We use it in so many of our tutorials!
- These MakerX Crafting Tools are perfect for keeping in the craft room and are always ready when needed!
- This Fiskars Paper Trimmer is easy to use and cuts nicely without frayed edges.
- These Scotch Precision Scissors cut like a dream, and you get multiple pairs in a pack!





Theresa
These Santa boxes are so adorable! Visiting from DearCreatives.com
Cari @Reach For The Star Berries
These are too cute! I love that stamp about the naughty deserving something nice. I can think of a few people these boxes would be perfect for. I found your blog through the no rules blog hop.
Fashionable Human Hair Extensions
Wow! Looks pretty simple and effective. I really like the words stick in this Santa box.
Erin
Those are too cute! Paper punches are the best. I love your version with the googly eyes-they're so fun!
Brooke
My six-year-old twin say your Santa treat boxes and loved them! They are so cute! Thanks for sharing such a great idea. Merry Christmas!
Diana - FreeStyleMama
Very cute! I might have to make them for teachers!
Diana - FreeStyleMama
Thanks for linking up. I like how you labeled the different shapes on the tutorial!
Rose Craft
You just have the best punches! Love how these came out.
Vanessa
These are so cute!!! Love the stamp!
Jennifer Hicks
These are so cute. Great creativity using the different punches to build the Santa.
ngnrdgrl
They turned out really awesome! So creative with all those different punches. Pinning this. 🙂
Pinkoddy
That is brilliant. So cute. Thanks for sharing. off to pin.
Claire Justine
Thanks for sharing last week at Creative Mondays. Featuring this week,hope you can stop by and link up anything that has got you Creative this week... Merry Christmas 🙂
Amy R
Hi! Your project was one of the most viewed on Get Crafty Friday! Thanks for participating.
Heidi
Congratulations. This post was a fan favorite (and one of my favorites) at One Creative Weekend on OneCreativeMommy.com. Please stop by to grab a featured button and check out the other features. I hope you'll link up again this week!
Absolutely adorable! You are so creative! I can't wait to try these for next year.
Kelly LifemadeSweeter
Wow, these Santa boxes are so adorable and super creative! You did an incredible job - love them 🙂
Maria
Awww these are so adorable!!!! You did a great job with them, they look perfect!!! What a fun idea!
Shantalle LifestylesOfTheStayAtHomeMom
These are adorable!
Constance Gammeter
Hi Kati: I just added you as a g+ friend. These are so adorable. I'm pinning. Thanks for sharing.
Sumo @ Sumo's Sweet Stuff
How cute are these! Anyone would love to be on the receiving end!