

Follow this Fishtail Stretch Bracelet Tutorial for a fun, handmade bracelet! The new trend in friendship bracelets.
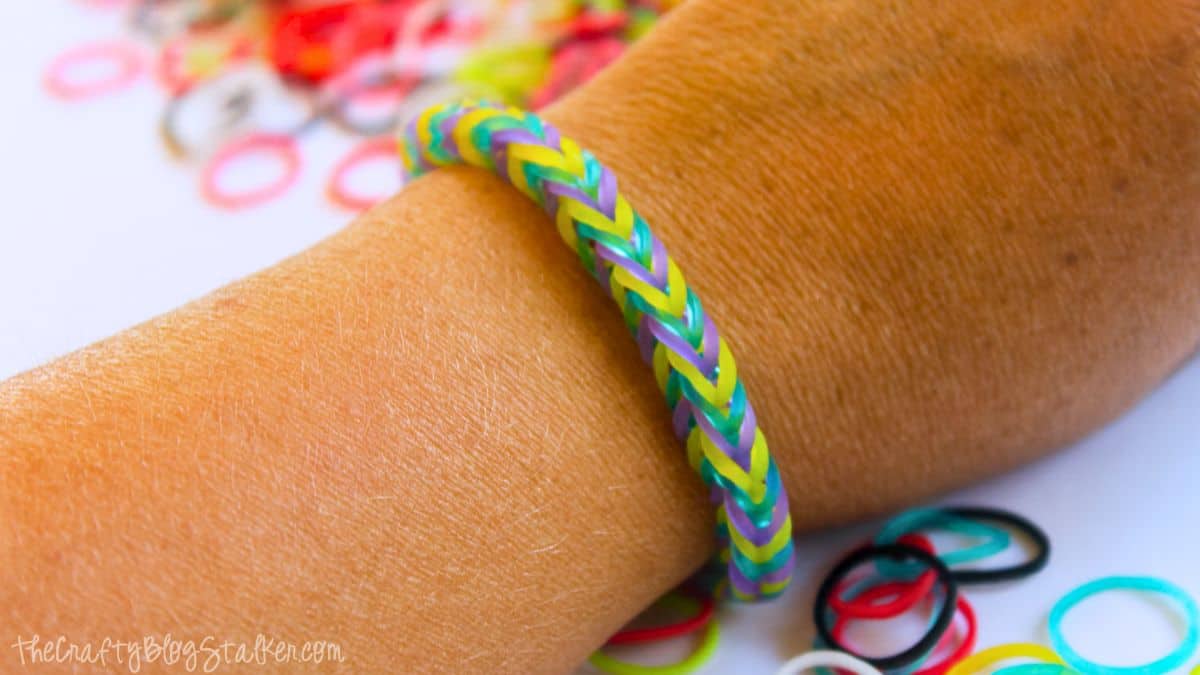
I love these new Stretch Bracelets! I think they are so much fun to make, and they are easy enough that I can make them with my daughters!
A couple of weeks ago I shared a tutorial for an Easy Stretch Bracelet. The bracelet in today's tutorial is similar but a new technique to give the bracelet a fishtail pattern.
Supplies Used
Items linked below may go to similar items when exact items couldn't be found online. Links are affiliate so I will get a small kickback to help fund the next tutorial!
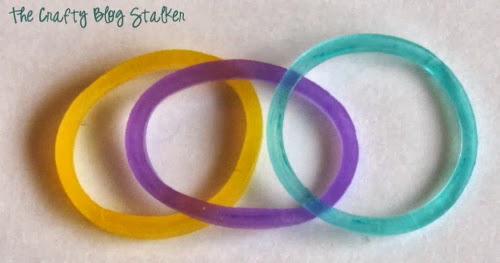
- Mini Bands
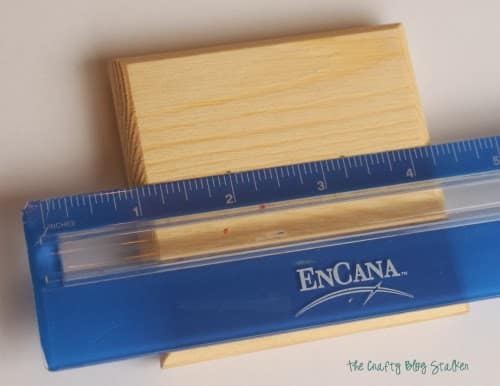
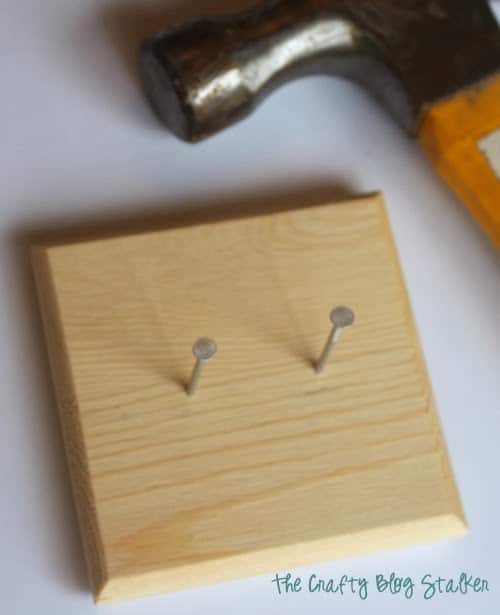
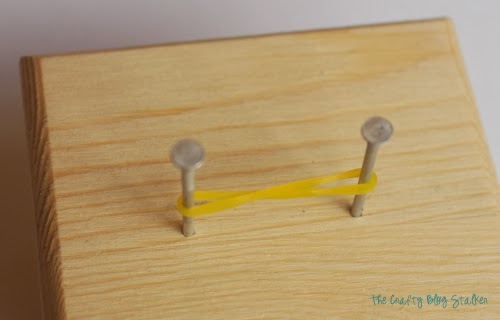
- Small Wood Board or Box w/ 2 nails
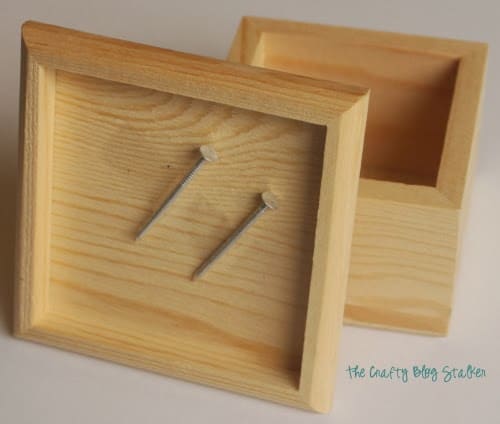
The nails need to be about 1 ¼ inches apart. Using a ruler, mark the spacing on the lid of a box or a piece of wood.
Using a hammer, nail them into place.
How to Make a Fishtail Stretch Bracelet
First I selected what colors I wanted to use, and the pattern they would go in. I kept my color pattern on the table so I could always remember what color came next.
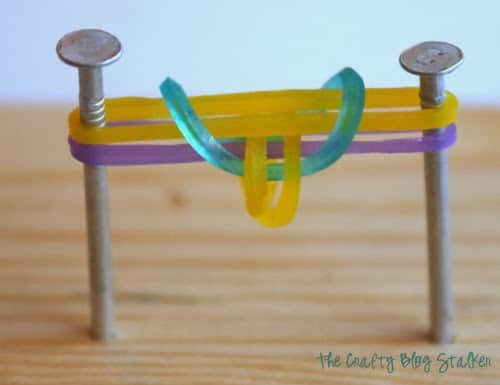
The first band needs to be twisted on the nails so it looks like a figure eight.
Add 2 more bands to the nails. The other bands are placed on normally, it is only the very first band that needs to be twisted. Make sure to keep your colors in order.
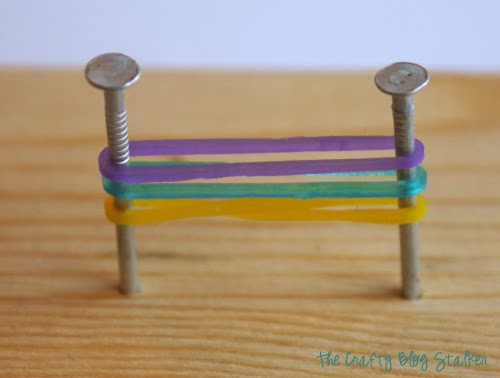
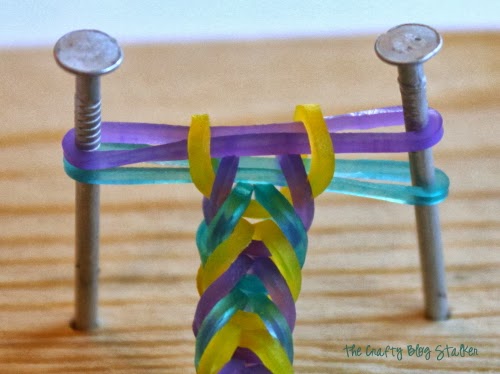
Take each side of the bottom band (here is yellow) and pull over the nails and the other bands so it looks like below.
Place the next color band over the nails, and repeat the last step. Take the bottom band that is still on the nails and pull over the nails and other bands.
Repeat. Place the next color band over the nails and repeat the last step. Take the bottom band that is still on the nails and pull over the nails and other bands.
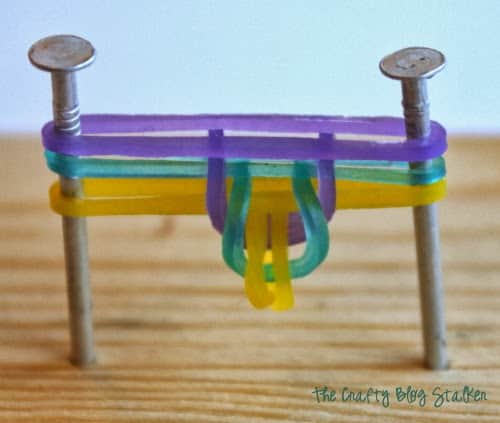
Keep repeating that same step. Place the next color band over the nails and repeat the last step. Take the bottom band that is still on the nails and pull over the nails and other bands.
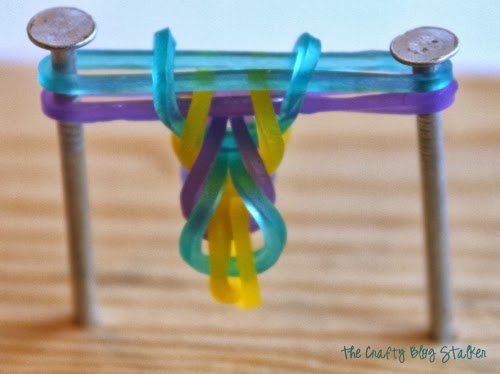
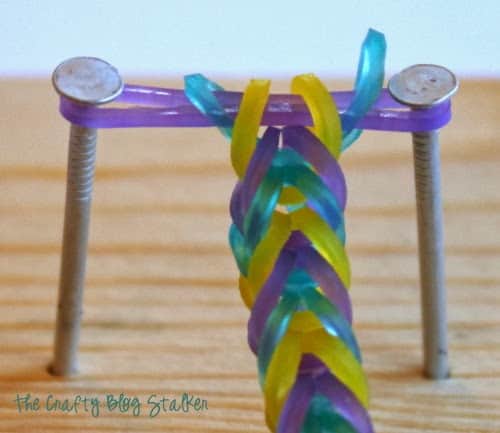
Repeat until you are at the desired length for your bracelet.
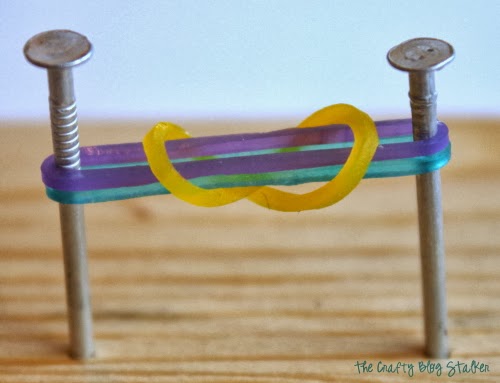
To finish the bracelet continue looping the last bands over the nails without adding the additional band on top, till you are left with a single band still on the nails.
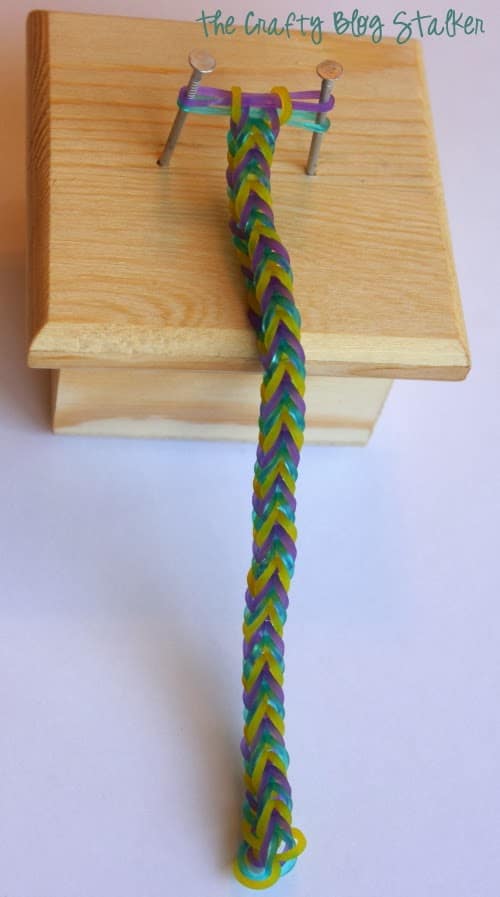
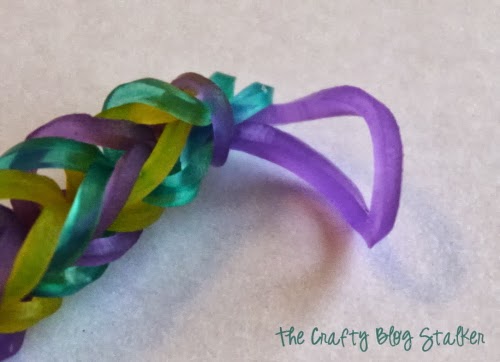
It was hard to get a good picture of this step so I am going to explain it the best I can.
Take one side of the last band and put it through the opening of the same band on the other side of the nail and pull tight. This basically knots the band through itself.
Now you can remove the bracelet from the nails, and it won't unravel.
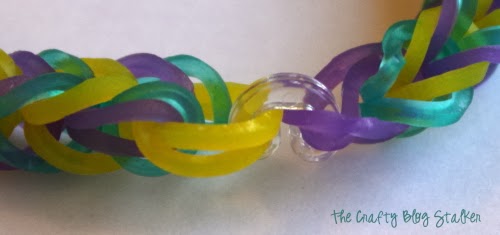
When you purchase the stretch bands there are clear clasps that are included. String both ends of the bracelet into a clasp.
That is all there is to it. Now you are ready to wear your bracelet out on the town!
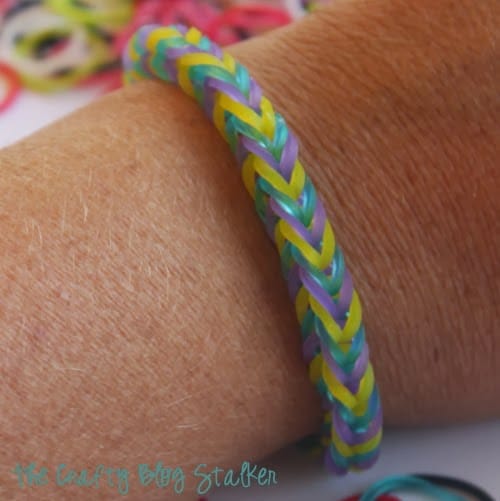
These bracelets are fun to make and cut for all ages to wear. My girls love them, but even I get compliments when I wear mine. So don't be afraid to rock these, no matter how young or (in my case) old you are!
Crafting Essentials
- The Cricut Cutting Machine is easily my favorite crafting tool. We use it in so many of our tutorials!
- These MakerX Crafting Tools are perfect for keeping in the craft room and are always ready when needed!
- This Fiskars Paper Trimmer is easy to use and cuts nicely without frayed edges.
- These Scotch Precision Scissors cut like a dream, and you get multiple pairs in a pack!
Becky
I just tried this. Great tutorial. Easy, Peasy!!
Bright and Beautiful Life
I LOVE this. All the little {and maybe big} girls would love to make these at our Thanksgiving family dinner/evening gathering. Thanks for the great tutorial and idea. Would you be willing to share this at our Making Monday link party? We would love it. Thanks. Have a fabulous day.
Sparkling
As a 4th and 5th grade teacher, these bracelets and necklaces are going to be the death of me! Everyone has them and they have to play with them all period long and then they break and they have repair them and on it goes. They are pretty and cool but I wish they were made of string so they would be less likely to break!!!
artclubblog.com
How cool! My daughter and her friends have really been enjoying these elastics, and making all kinds of bracelets. I'll have to show her this one.
Julia Toussaint
so creative! i love how this came out!
Summer Rumsey
Katie I love this idea - so fun! Thanks for linking up to my linky party!
umm faress
it's very easy thank you for sharing