This post may contain affiliate links. For more information, please see our disclosure policy.
Add sparkle to your jeans with rhinestones using Bling on a Roll! Follow this guide to transform ordinary denim into a dazzling fashion statement.
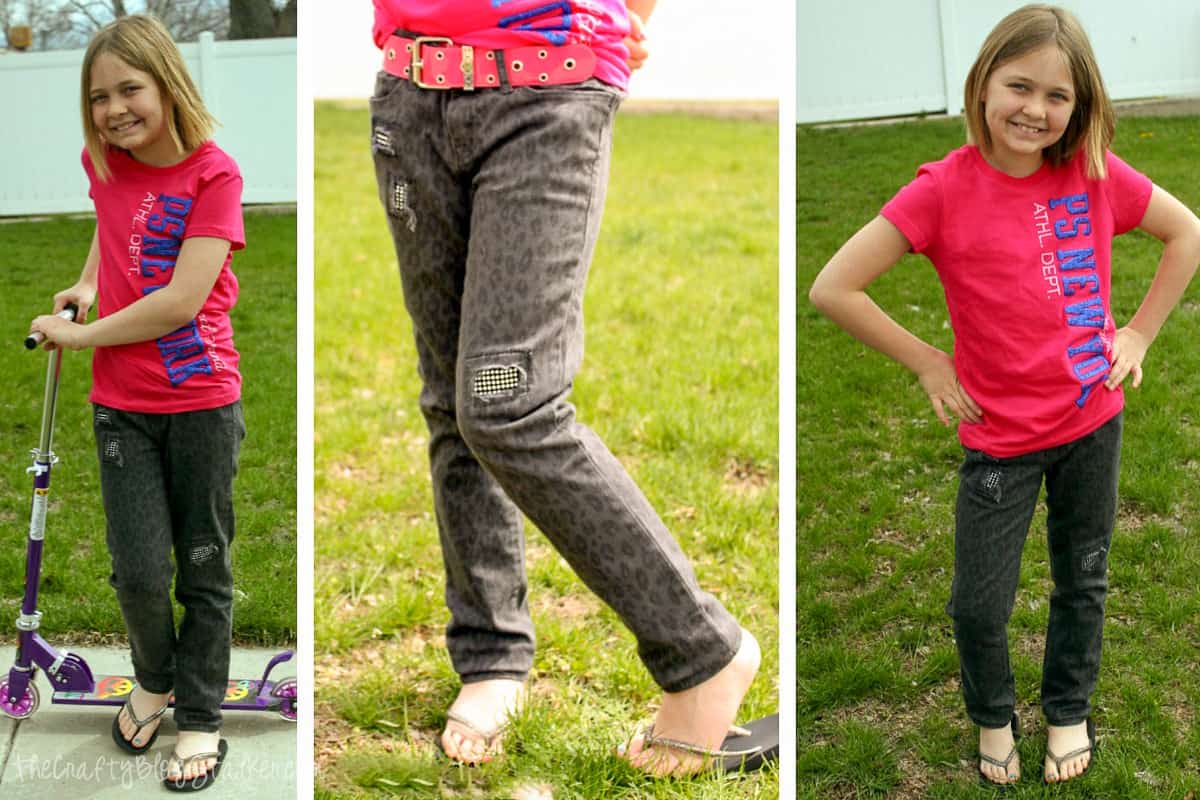
Last week my husband took our daughter Allie back to school shopping, just the two of them. Isn't that so cute?!
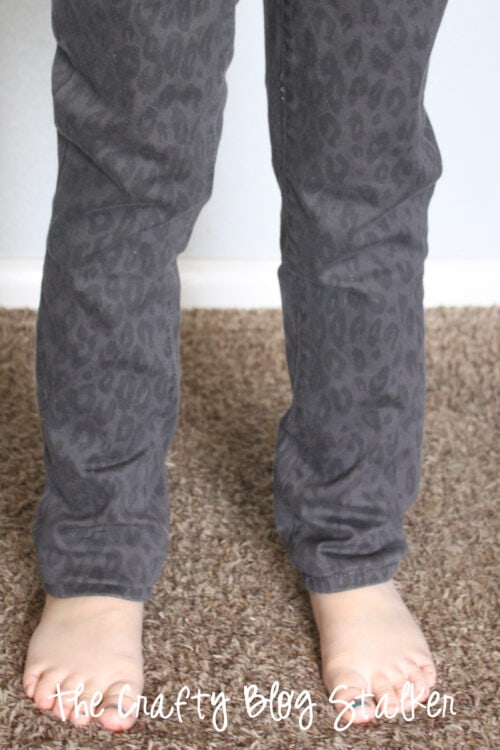
While they were out they found these super cute jeans that were on clearance. Originally $24 down to $4. SCORE!
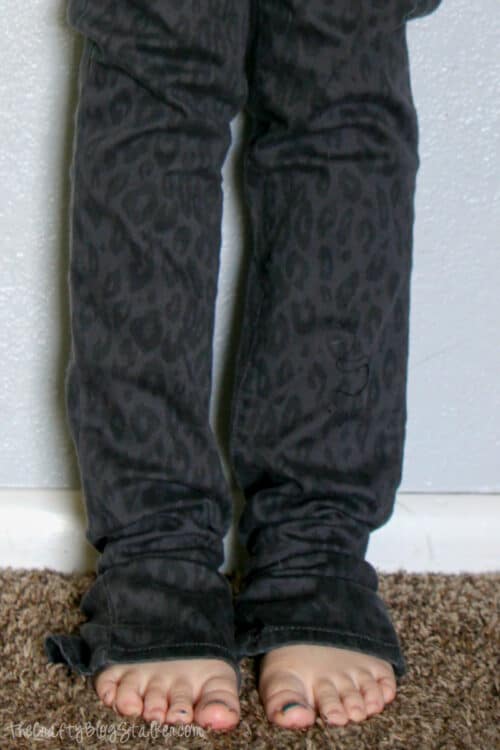
The jeans fit her really well everywhere except in the length, they were too long.
Since I already had to break out the sewing machine, we thought it would be best to add some bling to her new pants as well.
Supplies to Hem Jeans:
Some links may be to similar items when exact items couldn't be found online.
If you also need to hem like I did. Here is a tutorial on how to shorten pants while keeping the original bottom hem by Just Sweet & Simple.
It is a great tutorial. Very easy to follow with lots of pictures, and it helped me take the jeans from too long to just right!
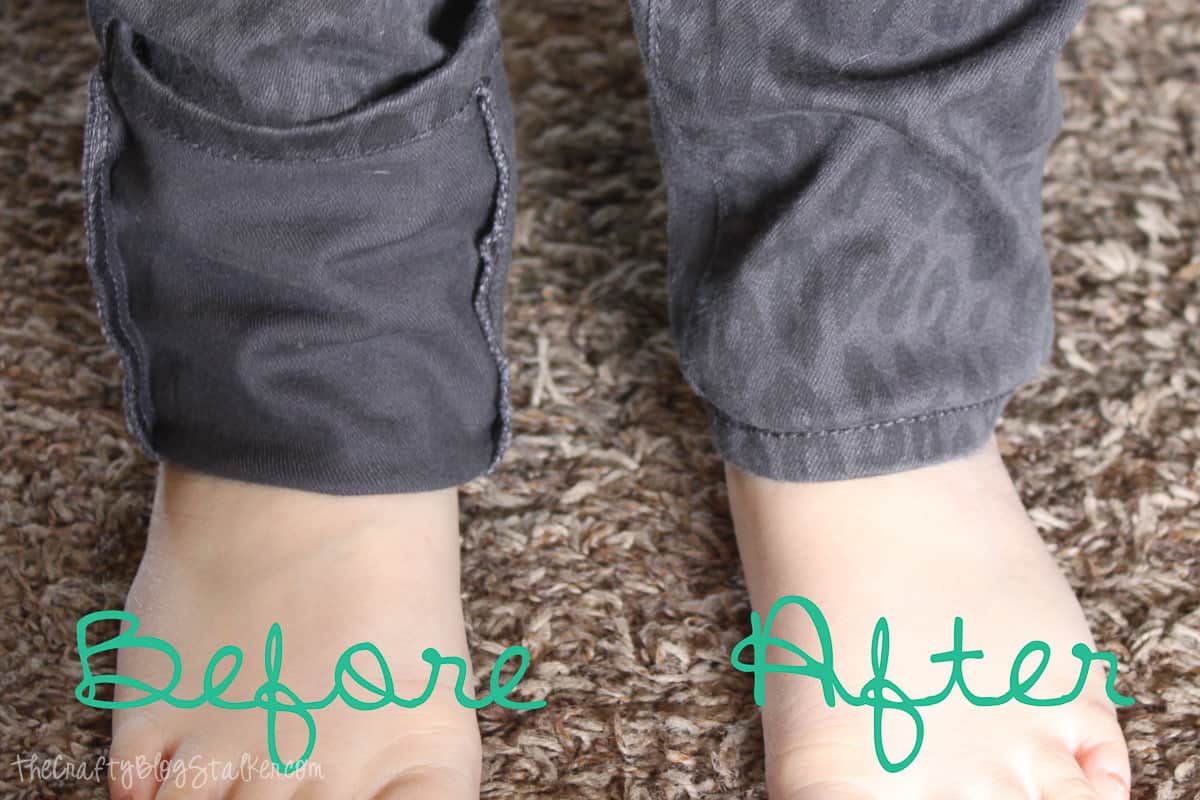
Isn't that much better?
But... There is even more that I want to do with this pair of jeans, they need some bling!
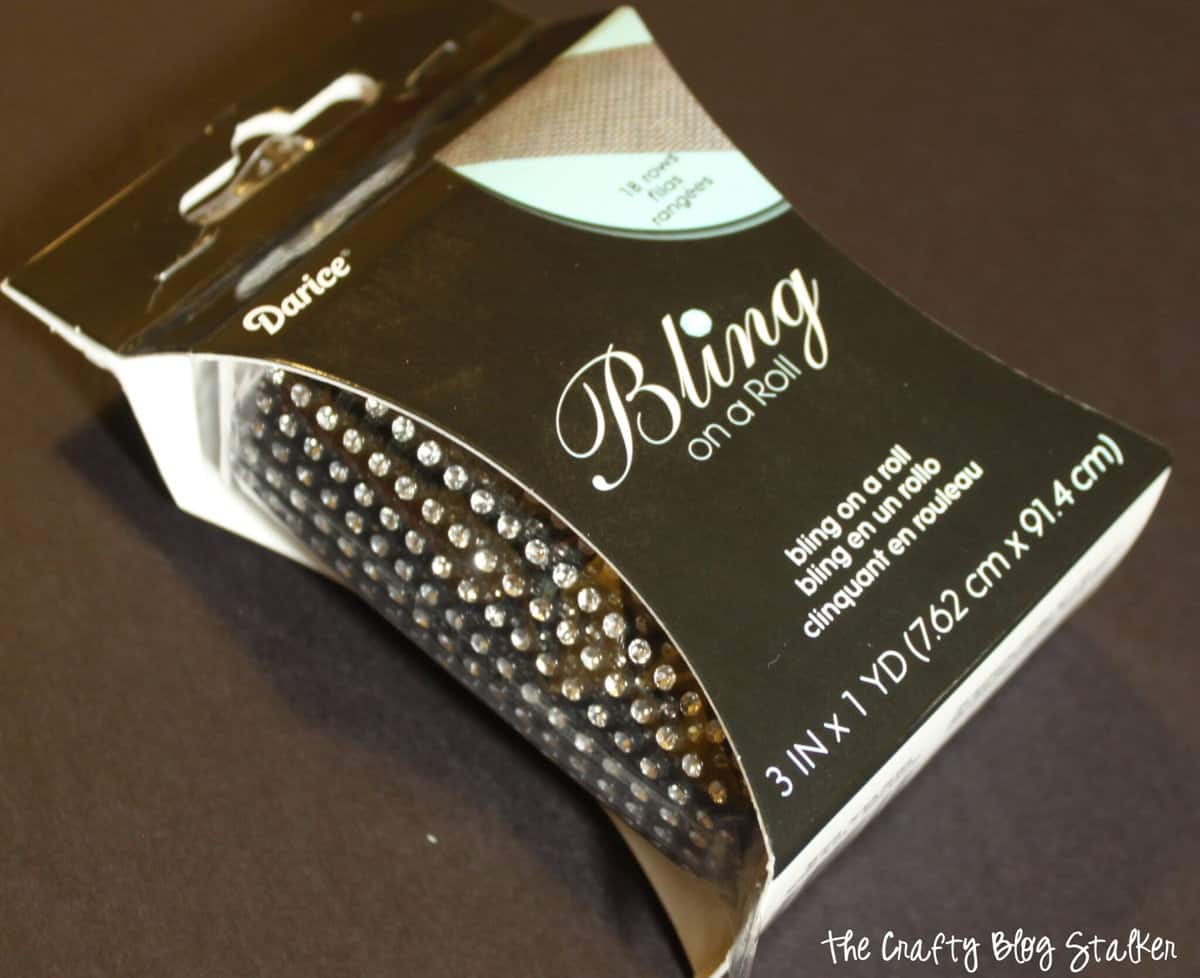
Supplies to Bling Jeans:
Instructions:
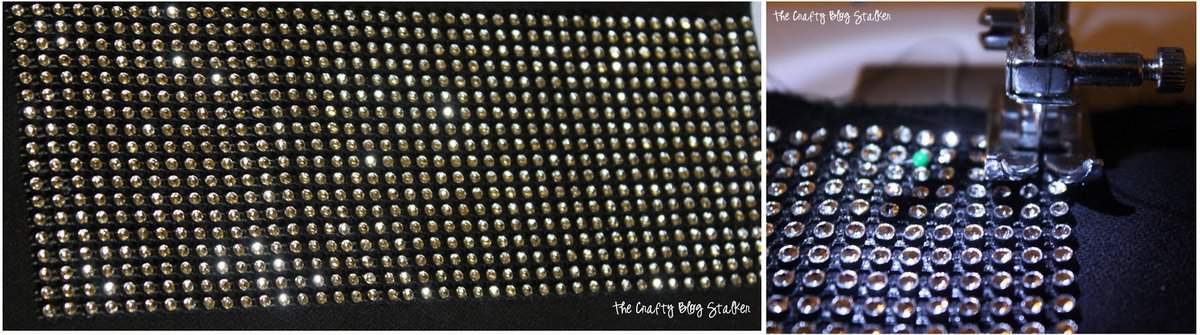
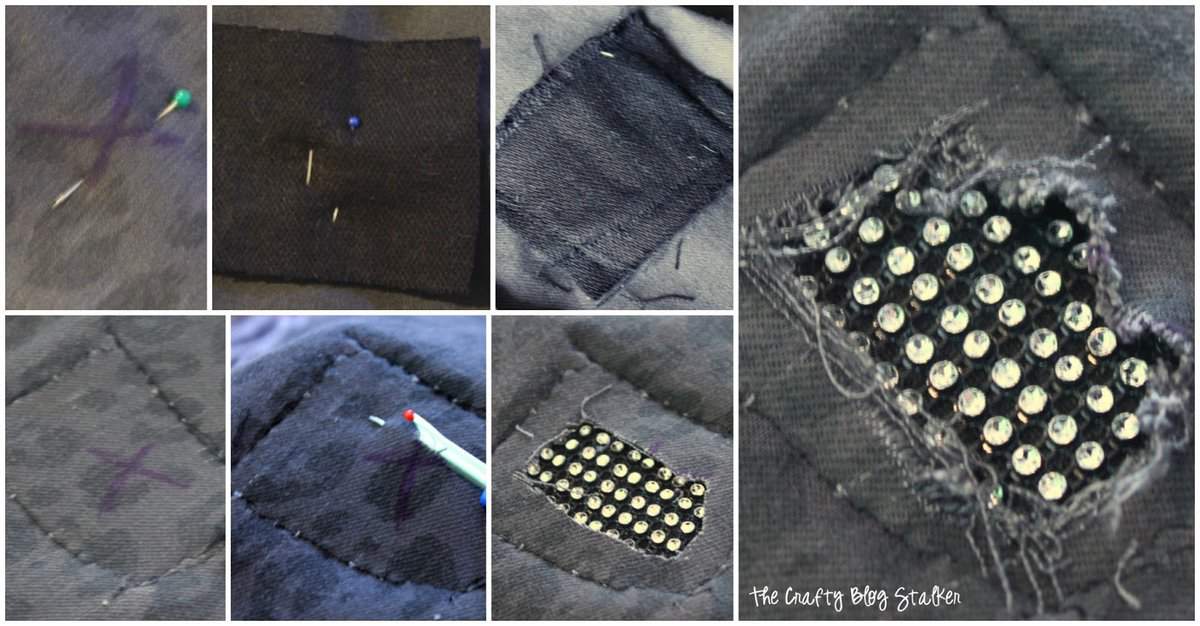
Begin by sewing the Bling on a Roll onto a strip of black fabric.
Set the sewing machine needle to go in between the rows of gems.
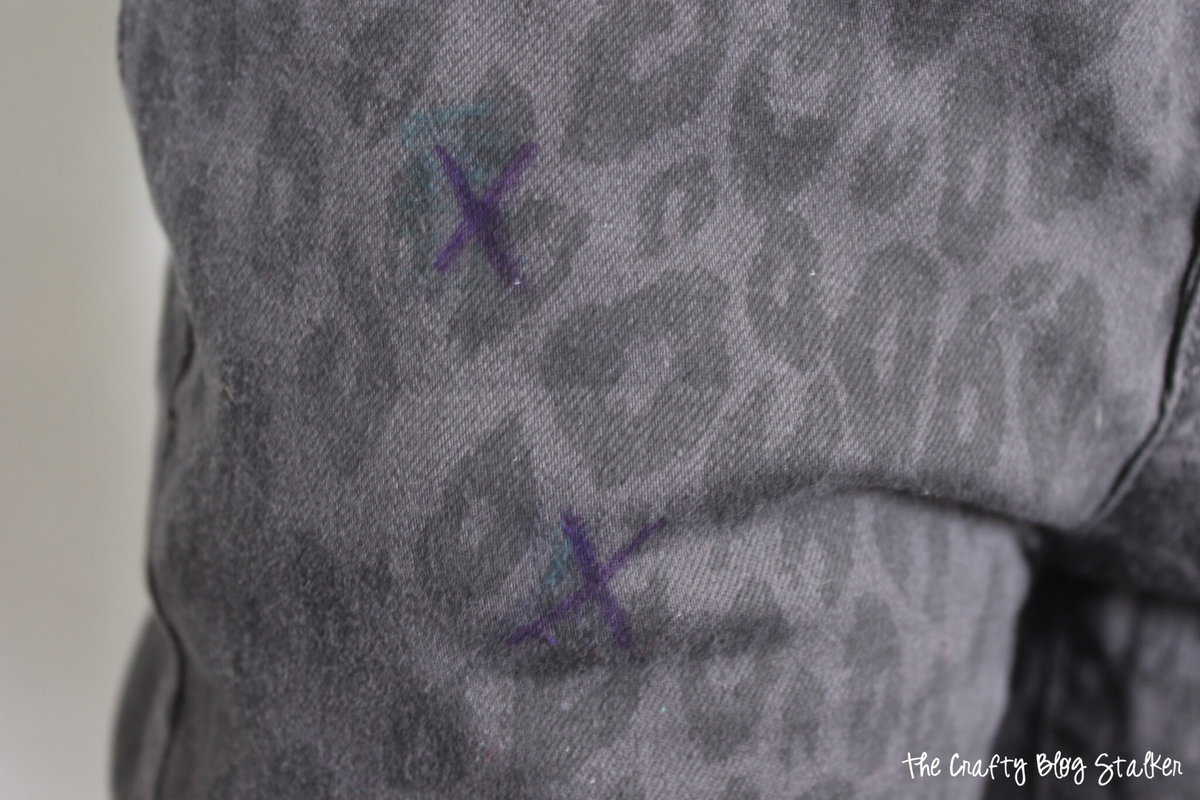
My daughter tried the jeans on, and then with a marker I marked where to place the gems.
Take the strip of fabric with the Bling on a Roll sewn on and cut off a small square.
Mine measured about 2 by 3 inches.

Pin the square of Bling to the inside of the pants with the bling side touching the wrong side of the jeans.
Turn the pants inside out and sew around the edges of the bling patch.
Turn the jeans right side out and with a seam ripper cut a hole within the square of where the bling patch is placed.
Distress the edges by pulling on the raw edges. The holes will distress more when the pants are washed.
These blinged Jeans are so cute and Allie loves them too!
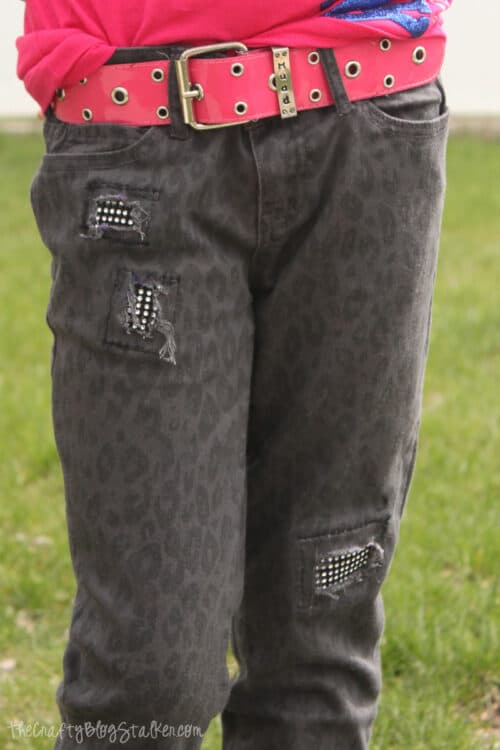
The best part is these rhinestone jeans is that they are machine wash! Just throw them in with another load of jeans, and you are good to go.
Have you ever altered your clothes to make them fit your style?
Our Sewing Essentials List
- The Sewing Machine we use is a Singer Fashion Mate and has been a great machine.
- The Cricut 18" x 24" Self Healing Cutting Mat is my favorite. Beautiful pattern on one side, and measurements on the other.
- This Rotary Cutter cuts easily and is very comfortable to hold.
- And one can never have enough Measuring Tapes! I'm always misplacing mine.
Recommended Posts

Mahboube G
i like
Anna-Marie Field
Hi There, I like very,very,VERY much!! The possibilities are endless really!!!
Love
AMarie
amy mayen
That's a really cool idea! I was just complaining today about how sewing for Tweens is tough. The want everything glittery and sequeny which doesn't tend to be real friendly with frequent washings. Then I find that most stuff is too babyish or too grown. So I love this idea so, so much!
Gina @ Kleinworth & Co.
Very cute- my girls would love those
Diana - FreeStyleMama
Cute!
Kassi Mortensen
These turned out so fun!!! This would be perfect for patching those older jeans with worn out spots too!!
Linda@With A Blast
My daughter would love this ! Thanks for sharing 🙂 {Pinned from the Pin Me Party}
Jennifer Lachman
I love it. I remember when I was young they had a thing called the bedazeler. Trims have come a long way since then.
Carolina Moore
I love these jeans! You're giving me ideas... the bling would also work great on jeans that already have holes in them!
Jeanette Ann O'Donnell
How nice. Amazing how simple but so effective,especially as they only cost $4.
I recently visited St Vinnies,and they had a whole rack of jeans for $2each. I got 3 pairs and they look new. :)Might try this with one of them.
espirational
Bling on a roll? How great is that?!
Jocelyn
Oh what a fun idea!! My daughter is 11 and all about neon and bling!!!
Jennifer Hughes
Visiting from the Pin It Party. My Family-Focused Monday hop is live now and I would love to see one of your awesome posts linked up @ http://www.mondaykidcorner.blogspot.com.
Have a wonderful week.
Marie bloominghomestead
This is adorable. Who wouldn't love these? I'll be featuring them this week. 🙂 Thanks for linking up to Crafty Tuesday.
Natalie Buehler
Those are awesome looking pants - the after is so much cooler than the before!!
Thank you so much for sharing this super tutorial over on Tutorial Thursdays.
I look forward to seeing what you have been up to this past week :).
x
Natalie
amy mayen
Katie, adorable!!