

Create fall vibes at home with this DIY Dollar Tree candle project. Enjoy a free SVG bundle to personalize your decor. A budget-friendly festive upgrade!
As autumn approaches, we all crave a bit of warmth and coziness in our homes.
There's no better way to bring a touch of fall into your space than with some decorative candle holders that won't break the bank.
Imagine creating your very own personalized candles with a unique touch, using the free SVG bundle provided.
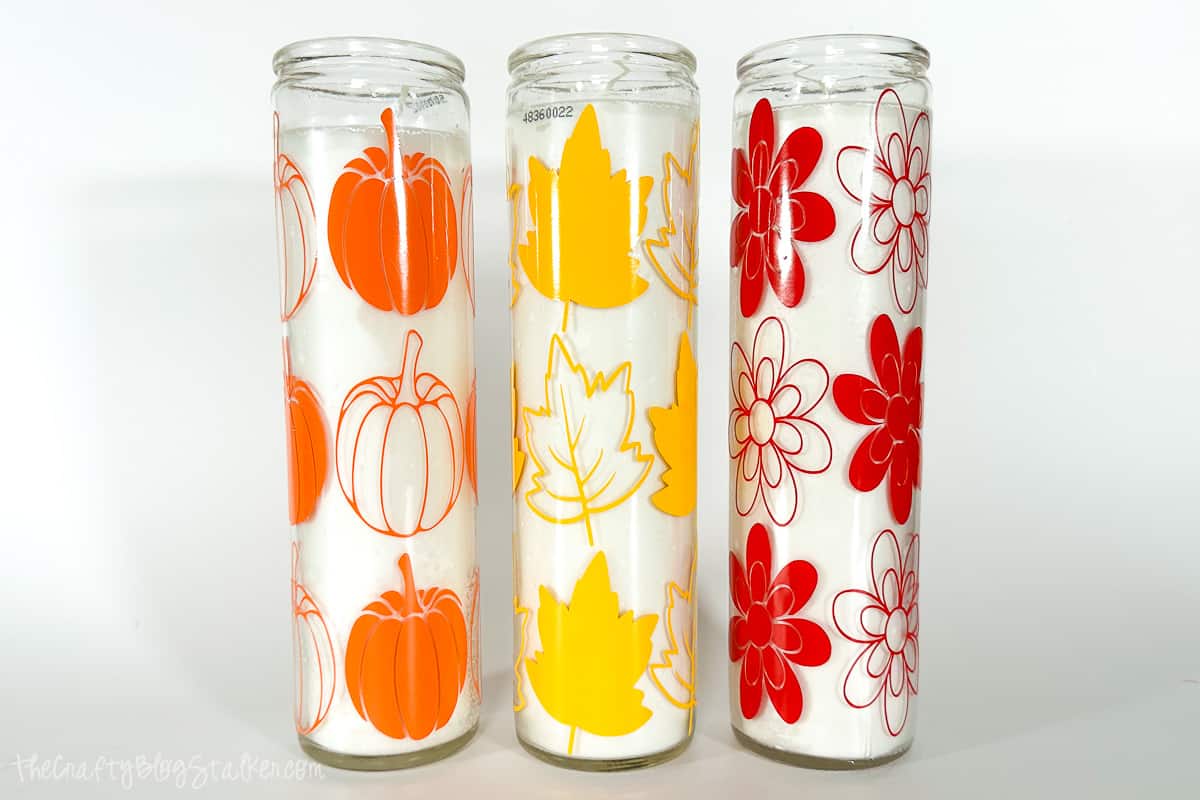
This DIY project tutorial will guide you step-by-step on how to transform Dollar Tree glass jar candles into gorgeous pieces of fall decor, adding a comforting glow to your home.
Craft Video Tutorial:
Like videos? I have a video tutorial for you! Subscribe to my YouTube Channel so you don't miss out on any future video tutorials.
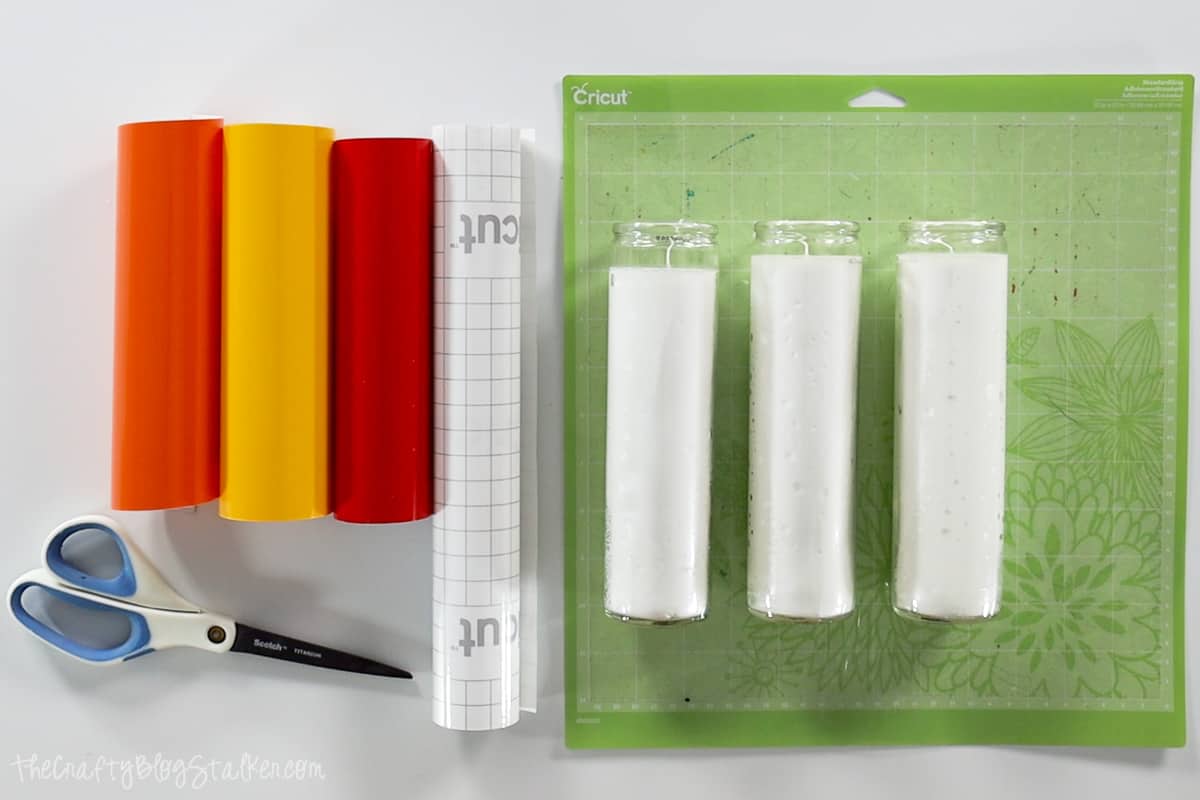
Supply List:
Some links may lead to similar items when the exact item is unavailable.
- Dollar Tree Prayer Candles
- Fall Candle SVG Bundle
- Cricut
- Permanent Vinyl
- Transfer Tape
- Weeding Tools
- Paper Trimmer
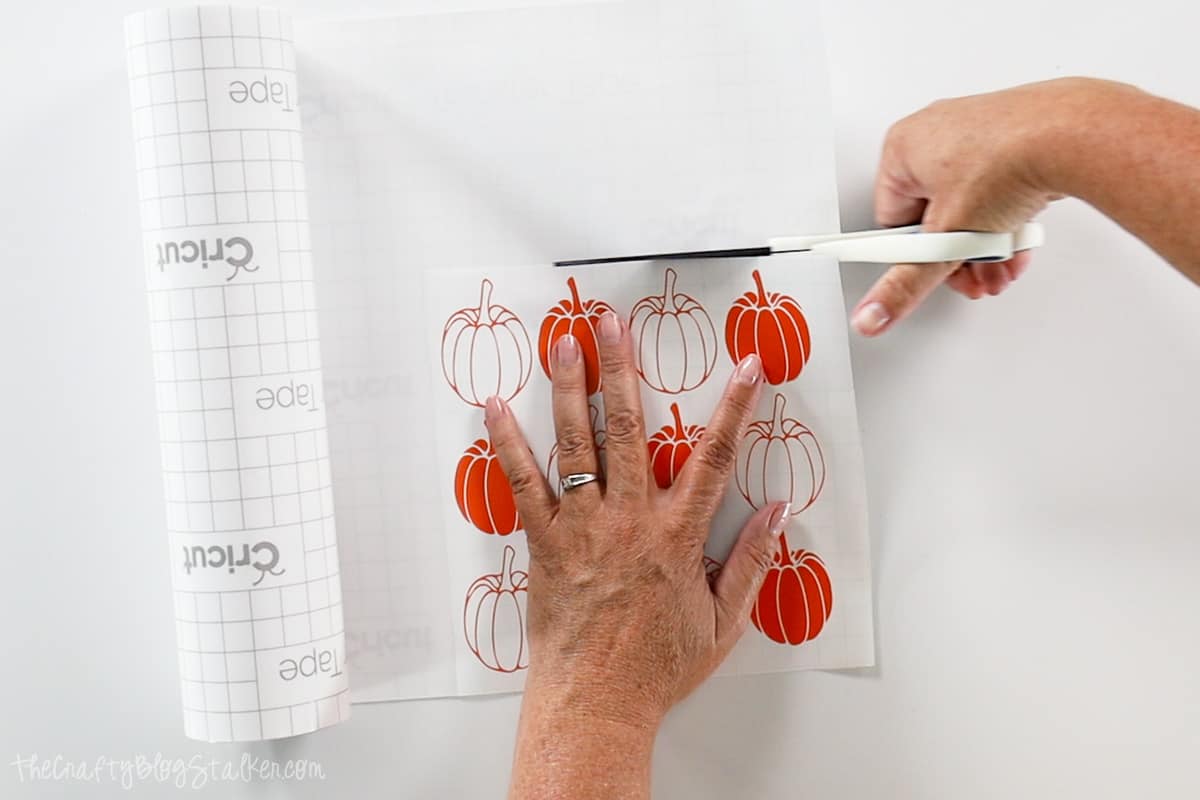
- Scissors
The candles I purchased had a plastic wrap with a religious design on them that was easily removed.
Fall Candle SVG Bundle:
This digital media is for Personal Use Only - You do not have permission to redistribute.
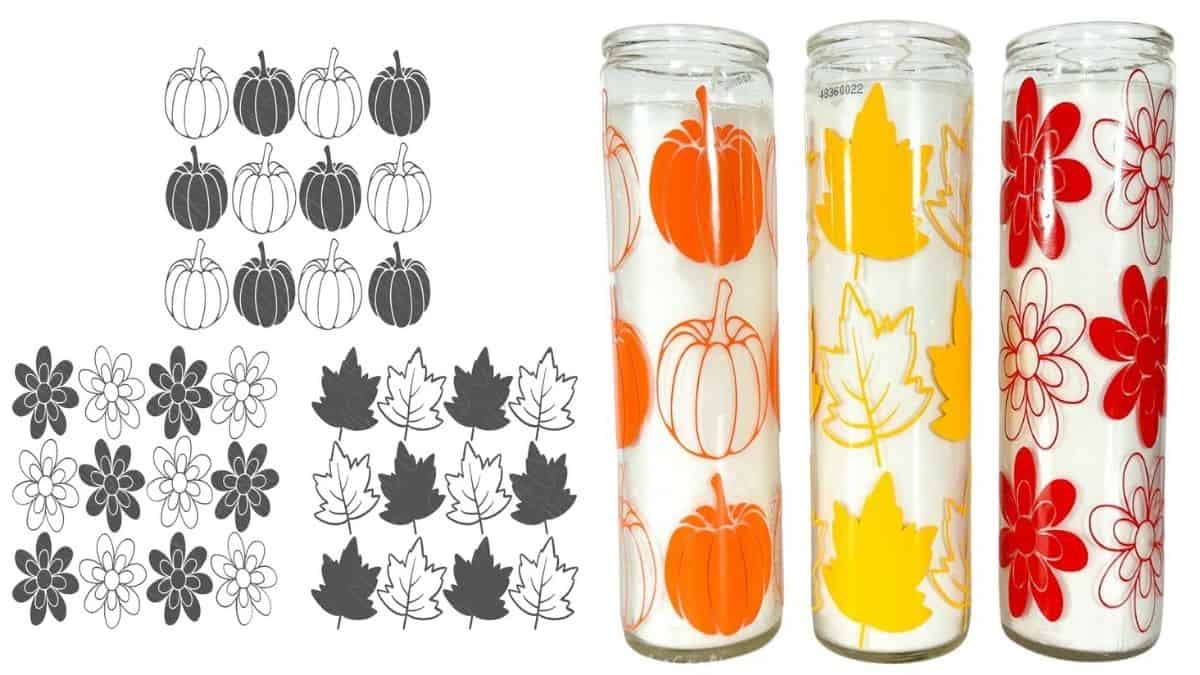
There will be no watermarks on the downloaded version.
Cricut Design Space:
I use Cricut Design Space and the next several steps will be based on that.
If you use Silhouette Studio or a different design software, your steps may be different.
The first thing to do is upload the file into your cutter software.
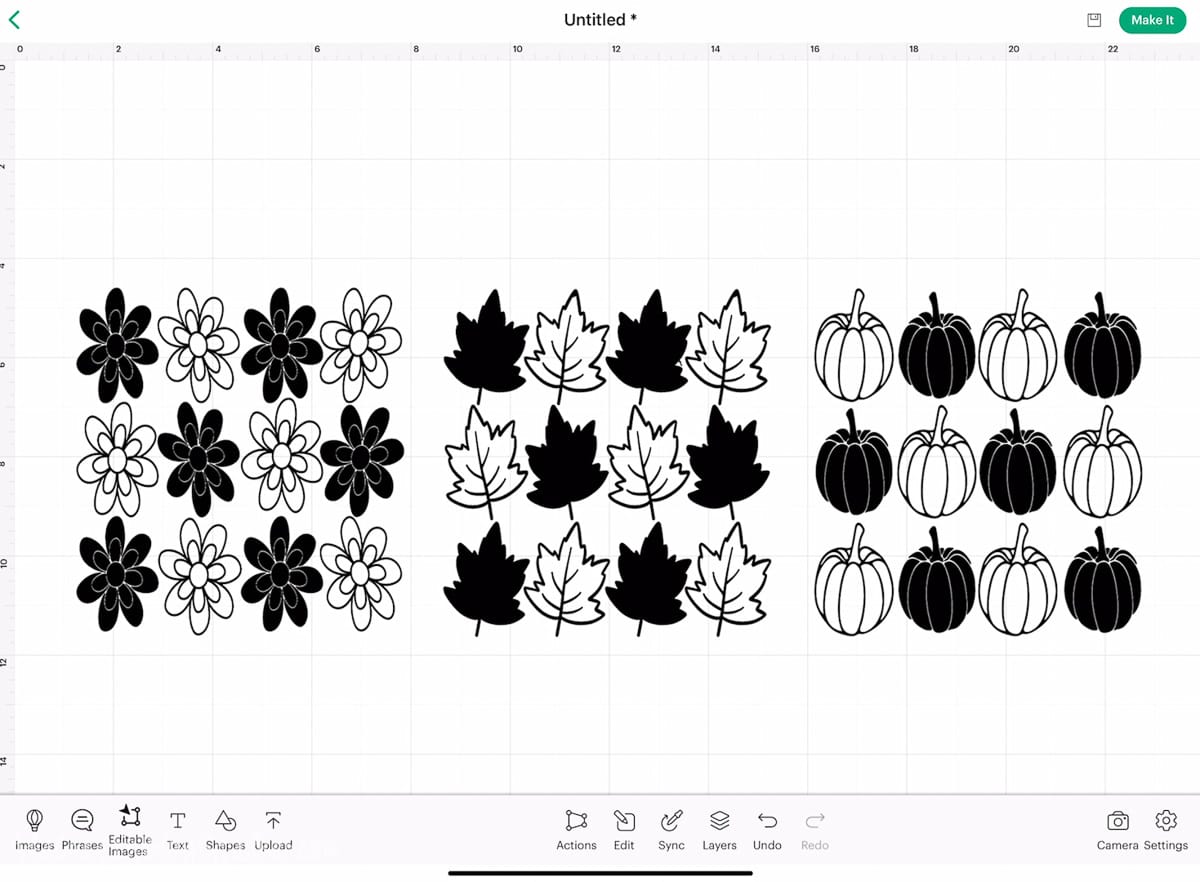
The design is already sized to fit on the dollar store 8-inch Prayer Candles.
I like to change the color of my design in Cricut Design Space because it makes it easier to keep the different mats straight when cutting multiple mats.
To change their color, highlight all three designs and 'Ungroup'. You can find this button in the Layers Panel.
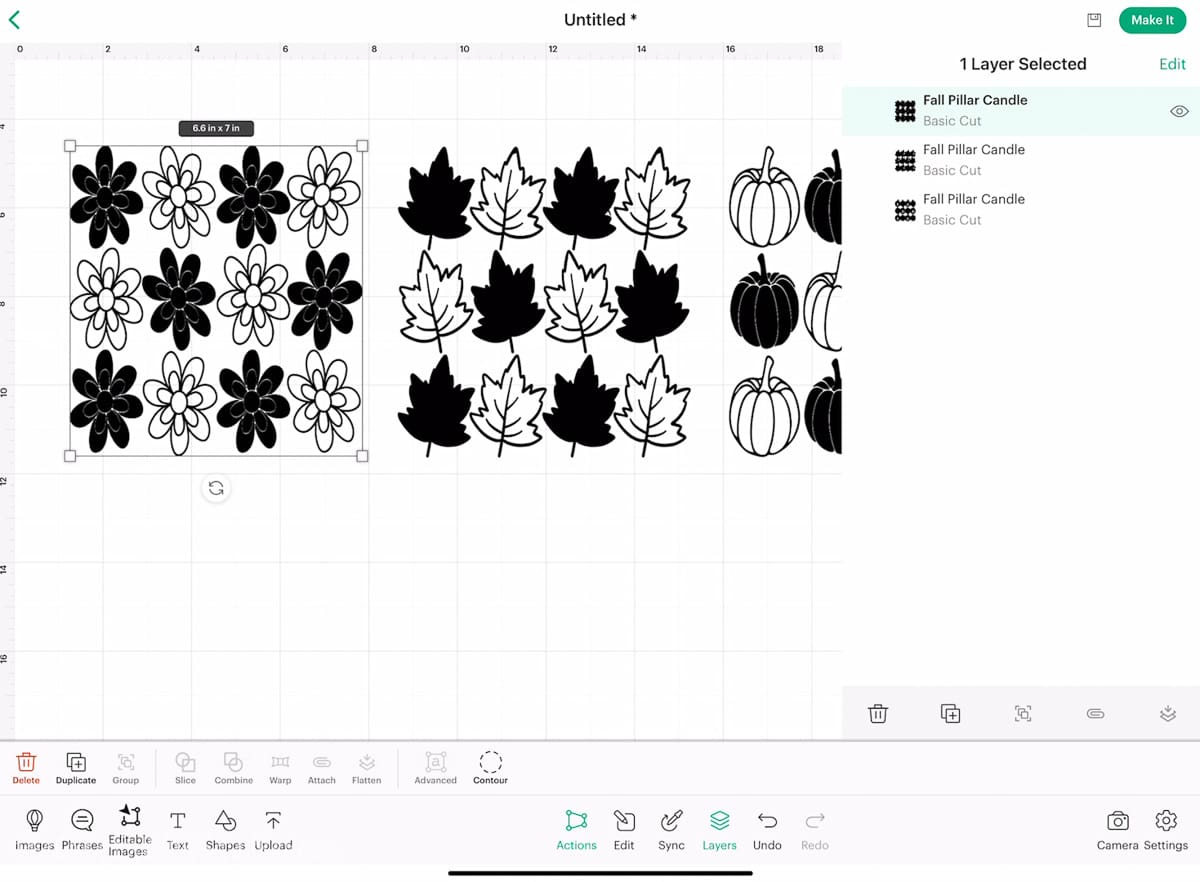
Then you can highlight each individual design or section.
To change the color of a section, highlight it, and select 'Operation'. You can then choose the 'Material Color'.
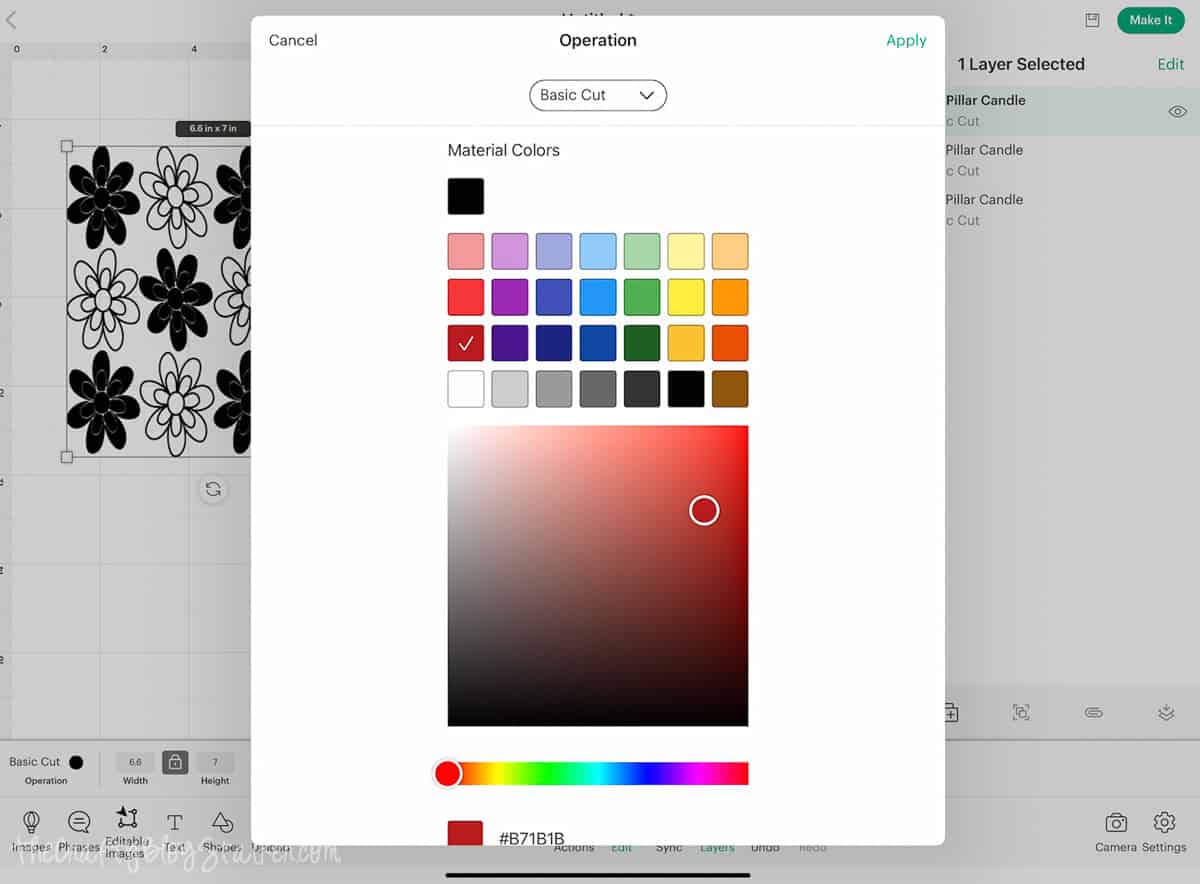
Repeat for all sections. This will ensure they will cut on different mats and make them easier to keep organized when cutting.
Select 'Make It' and your next screen is a mat preview.
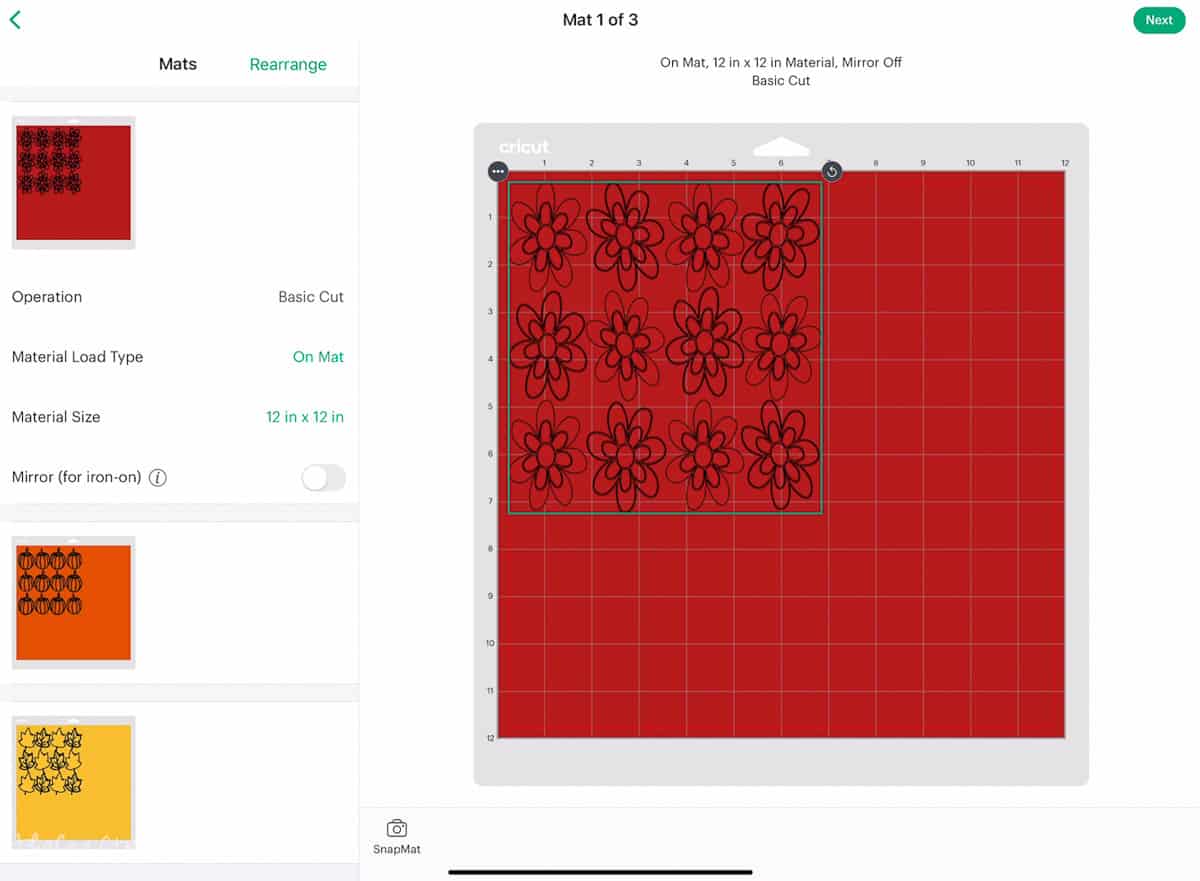
On this screen, I take note of the size of the design so I can cut my vinyl for the project.
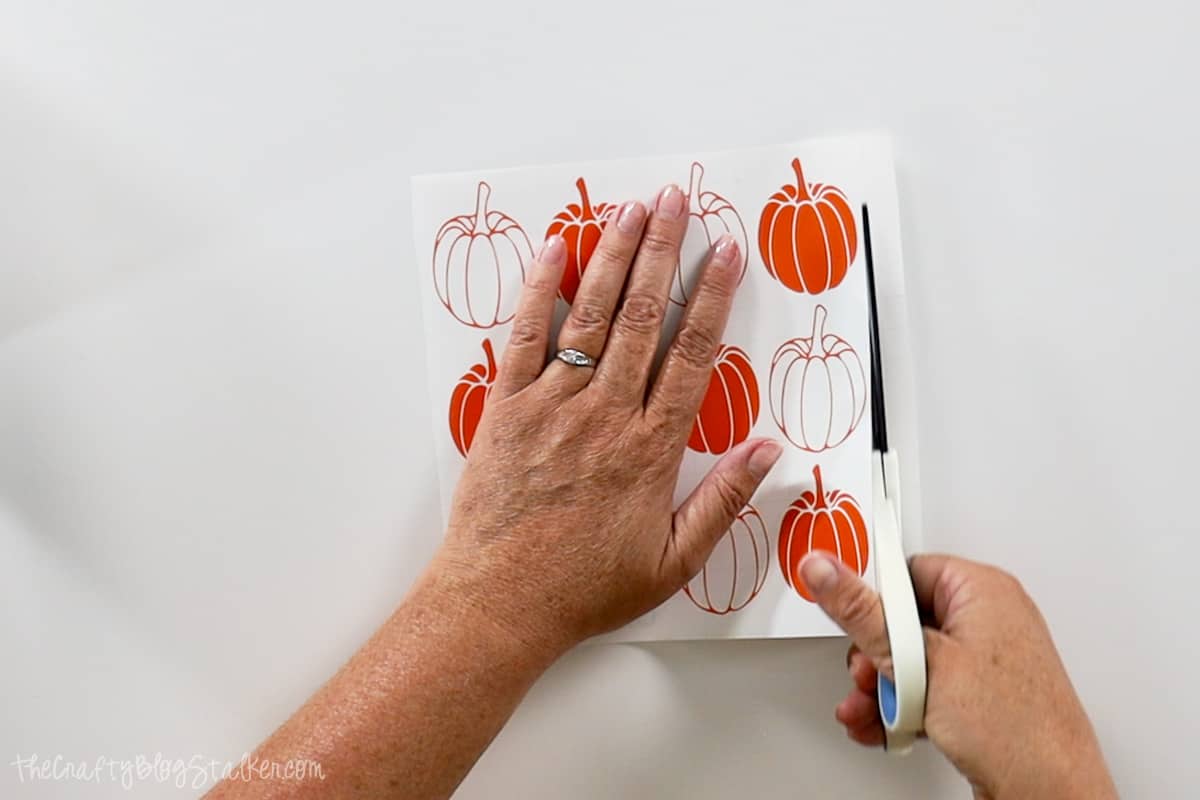
Cutting Vinyl:
You can see on the Mat Preview above that I need a piece of vinyl that measures 7.5 inches by 7 inches.
To keep it easy, I am going to cut a square 7.5 by 7.5 inches.
With the cover of the mat still on, unroll the vinyl and line it up with the mat.
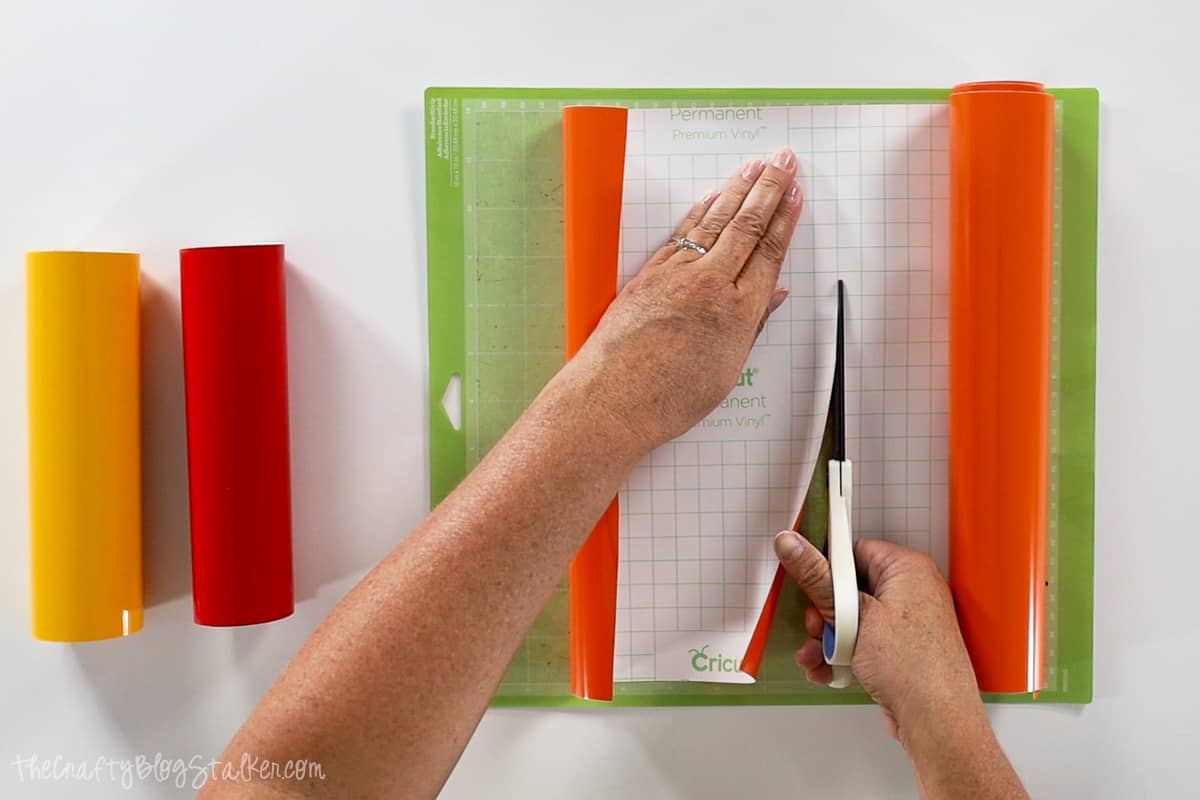
Using the mat underneath, lets me quickly find the grid line to cut without having to count squares.
Once the piece is cut to size, remove the protective sheet from the mat and apply the vinyl.
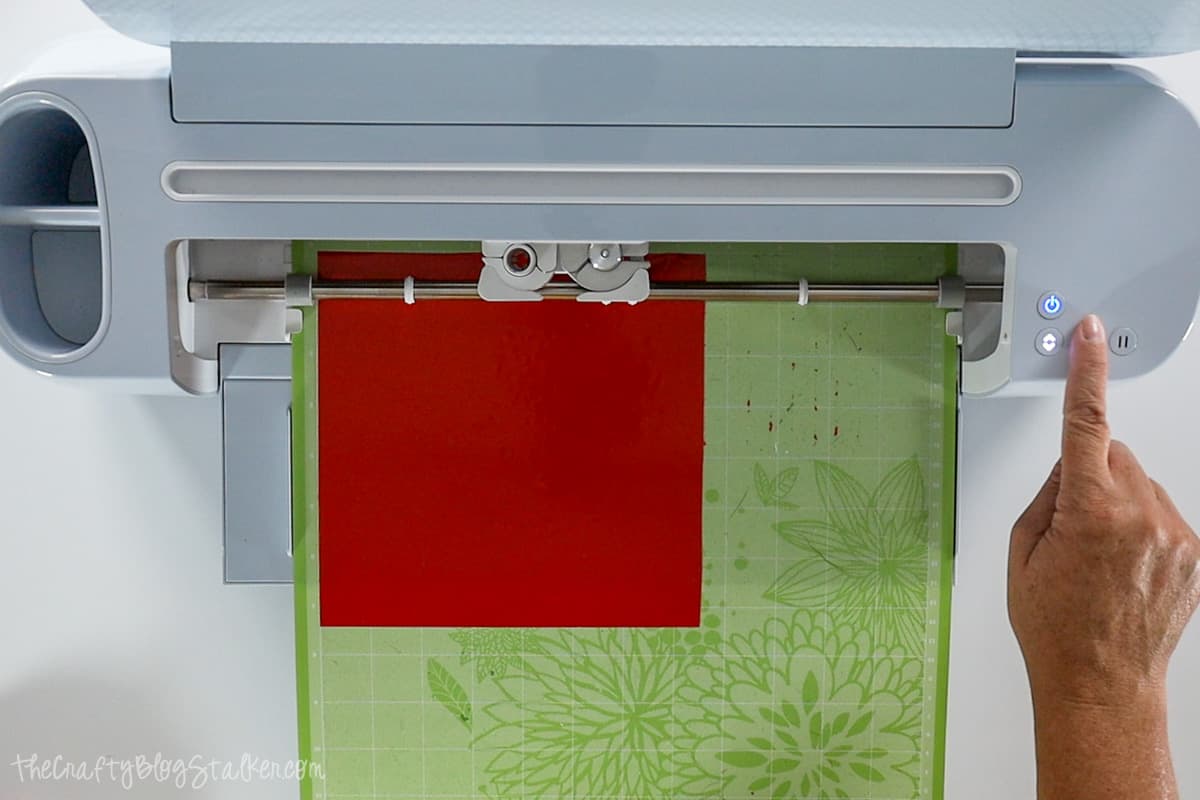
Follow the prompts in Cricut Design Space so you know what color of vinyl to load.
Weeding:
When removing vinyl from the mat, it is a good habit to always turn the mat face down, and remove the mat from the material.
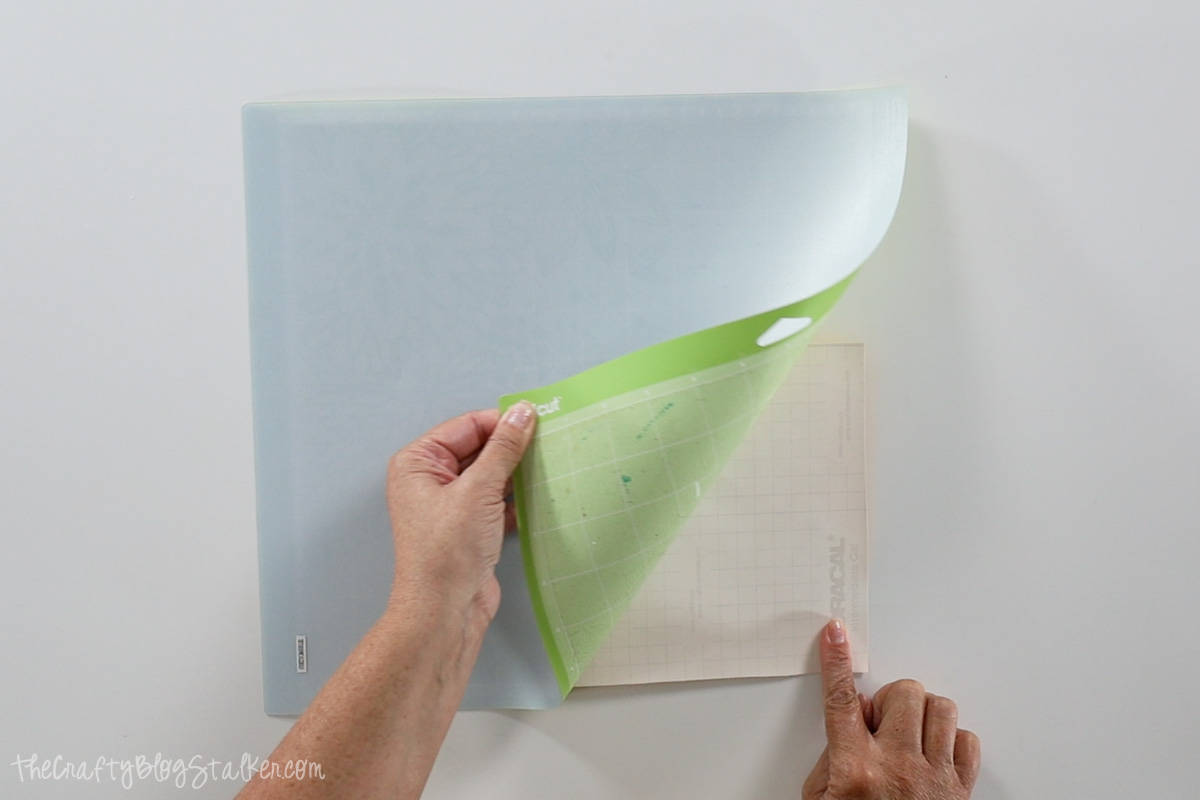
This is especially important when cutting paper. Using this technique will stop the paper from curling when removing it from the mat.
So it is just a good habit to have.
Use a weeding tool and slowly weed the design.
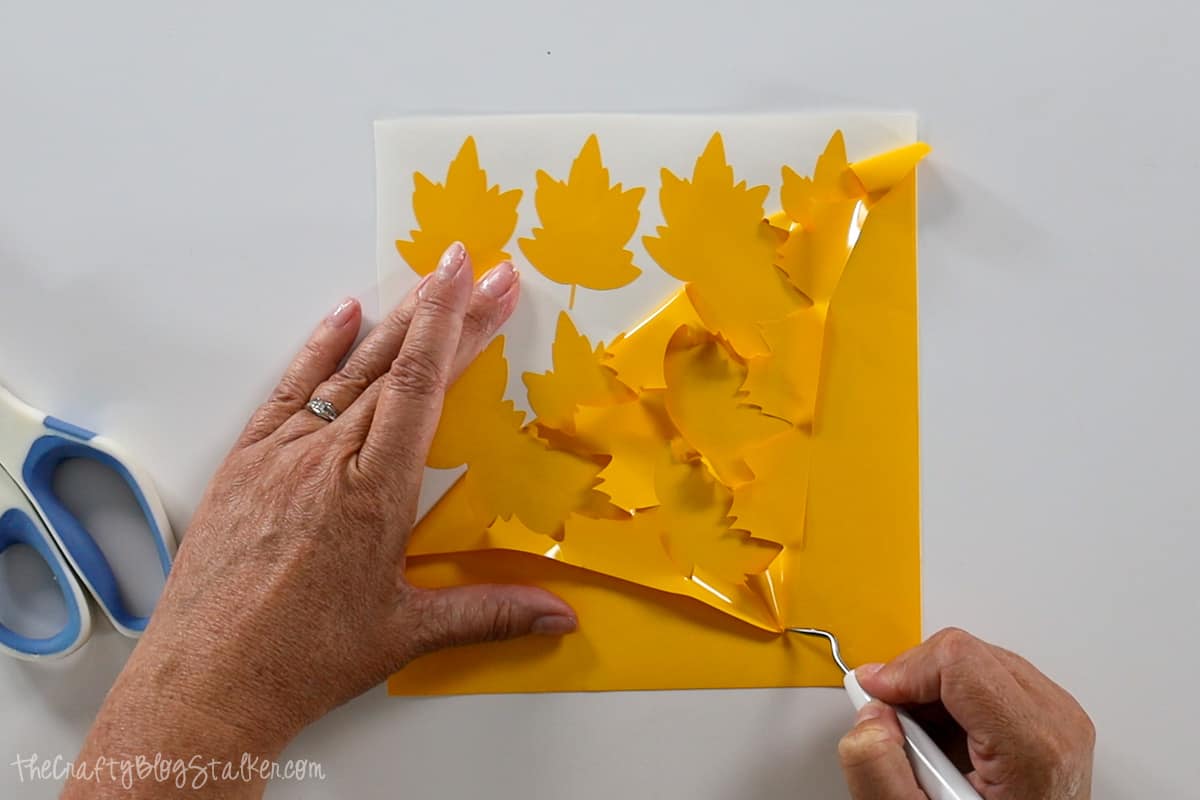
The pumpkin and flower designs are a bit more difficult to weed than the leaves.
Go slow and keep a pair of scissors handy to cut off pieces already removed while you're working through it.
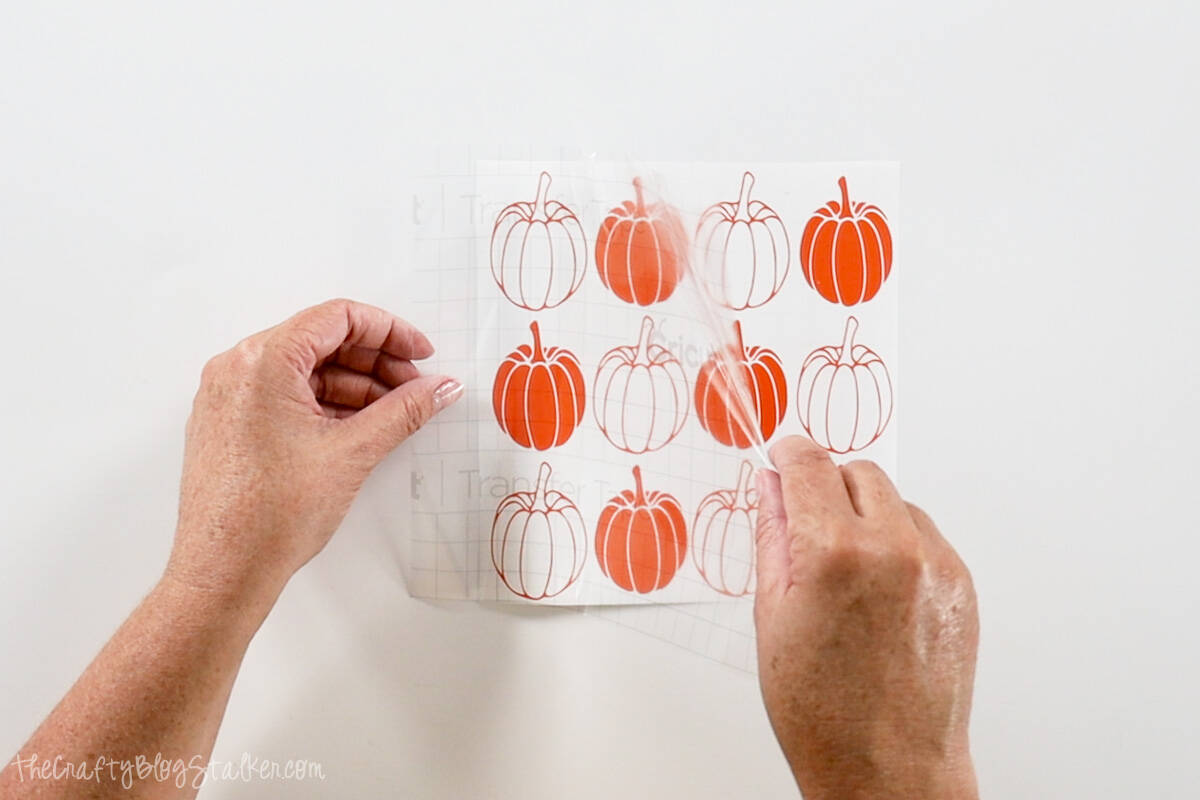
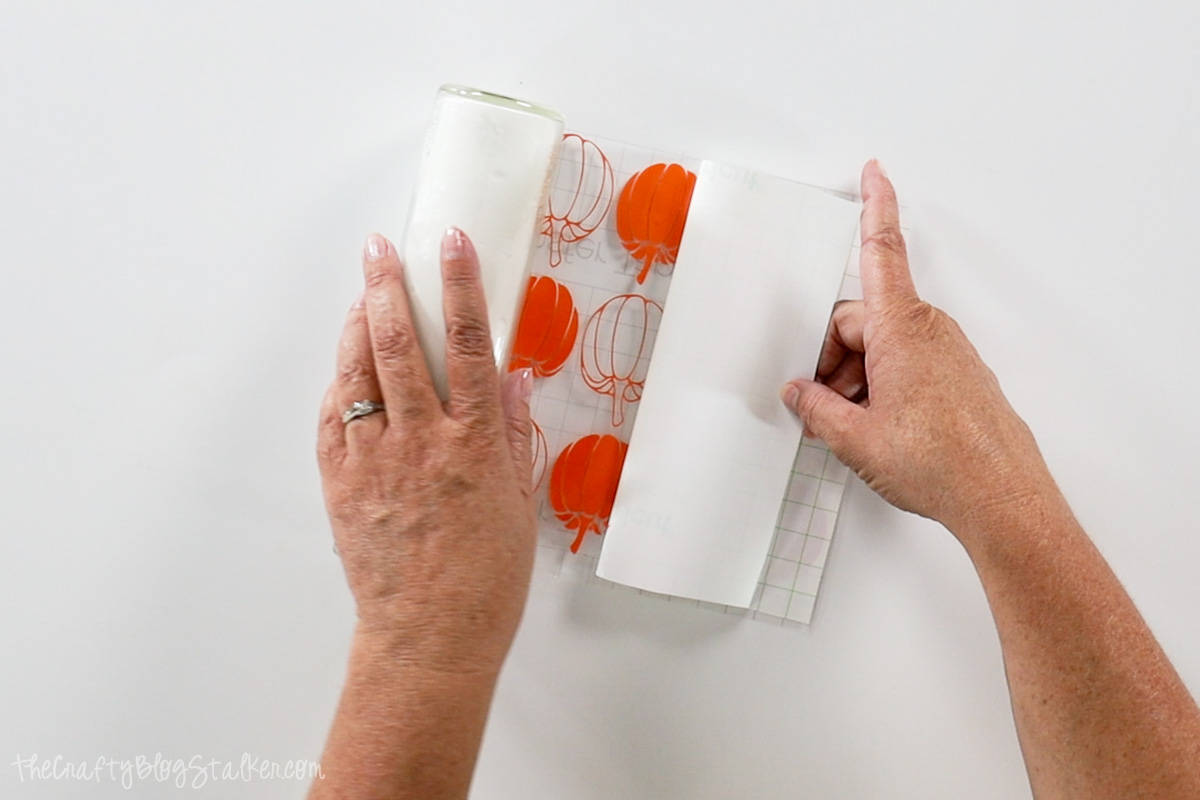
Appling Transfer Tape:
Cut a square of Transfer Tape the same size as the design.
Trim the backing paper to the design.
Remove the backing paper to the transfer tape, and then roll the transfer tape over the design, leaving an exposed edge of the transfer tape.
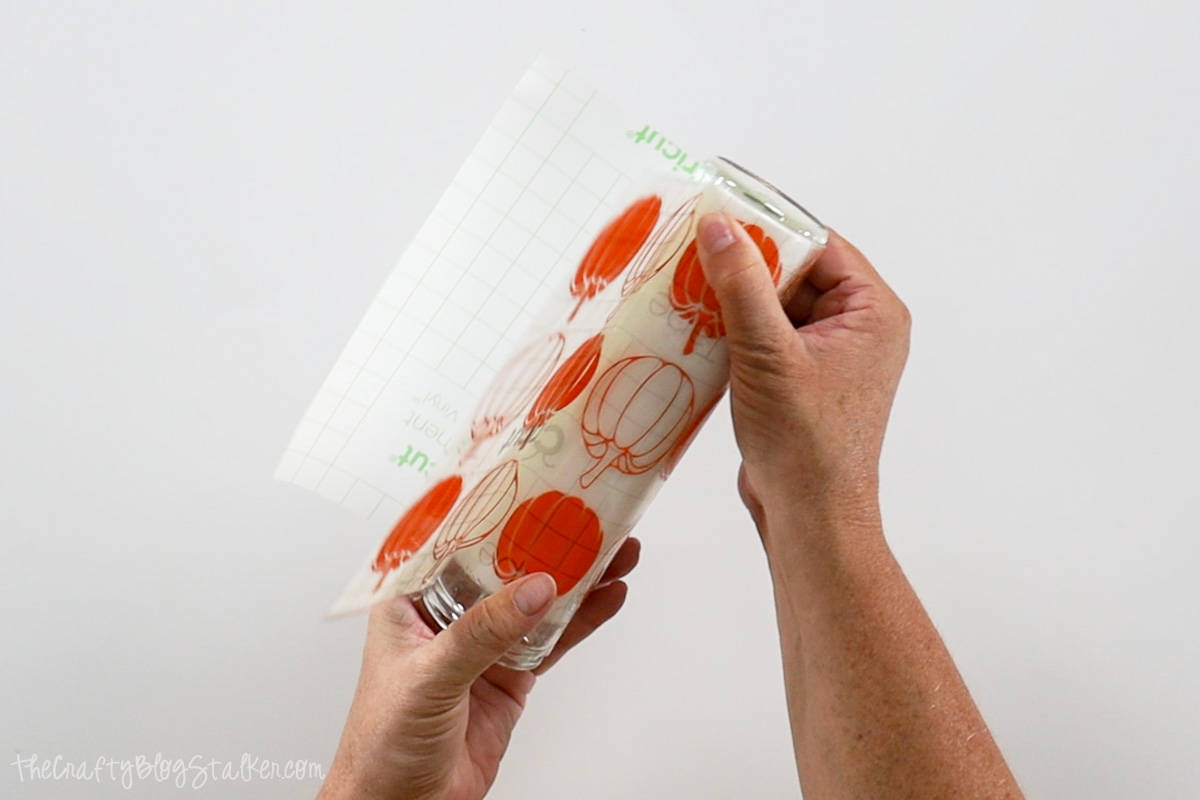
Applying Vinyl to Candle:
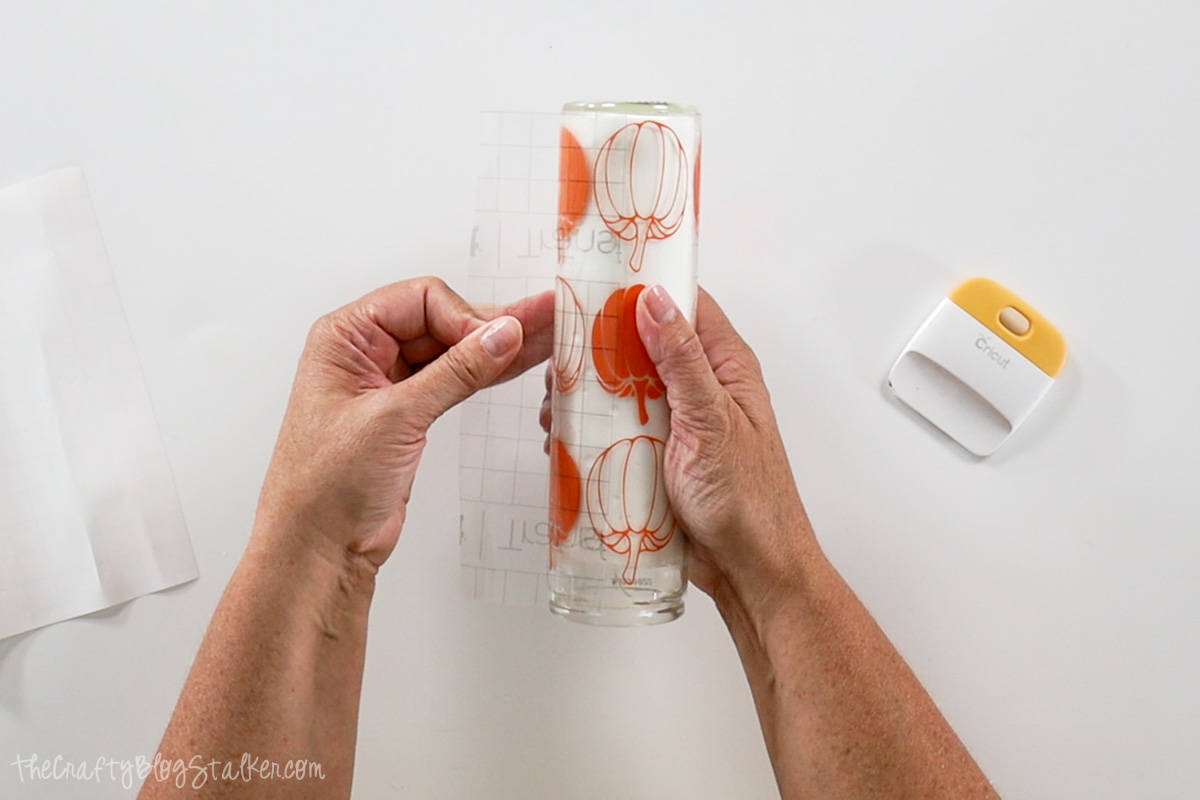
With the backing paper still attached to the design, wrap the design around the glass pillar candle to find the right placement.
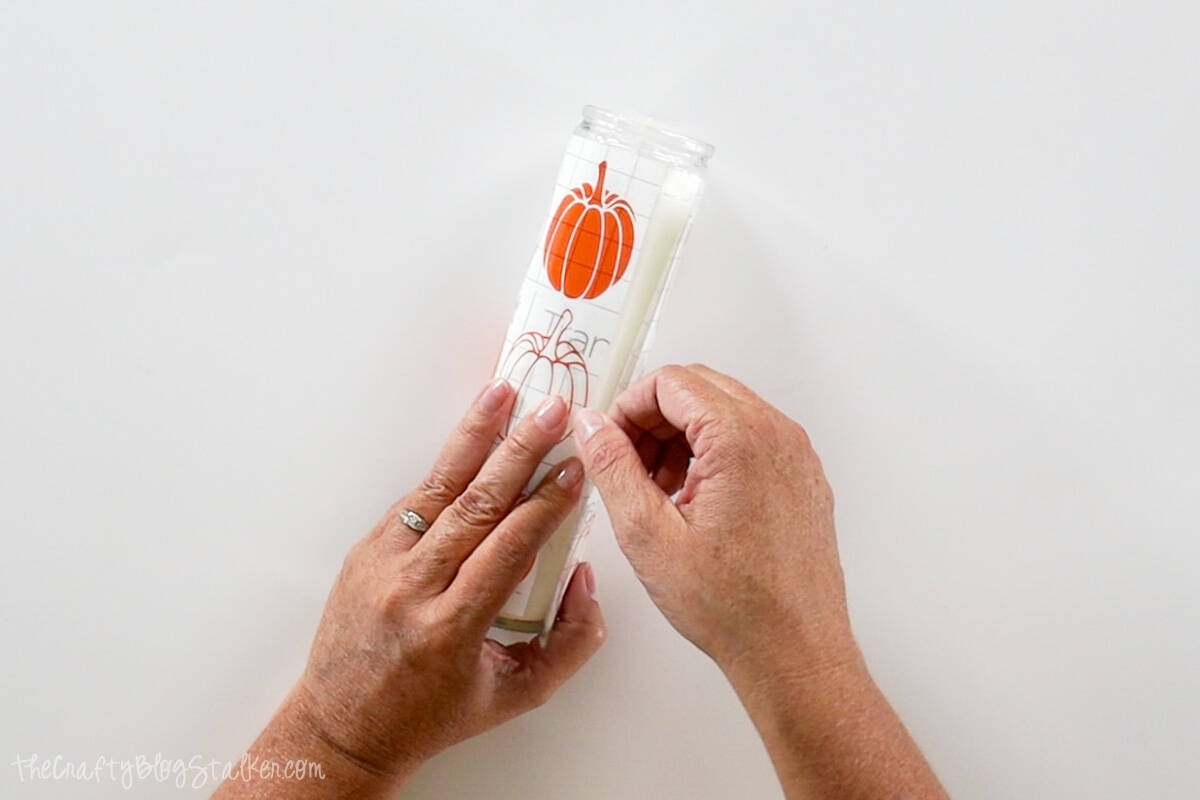
Press the exposed edge of the transfer tape to the glass candle holder.
Begin to peel the backing paper away from the design, making sure all pieces stick to the transfer tape.
Go around the glass holder pressing the design into place with a thumb or finger.
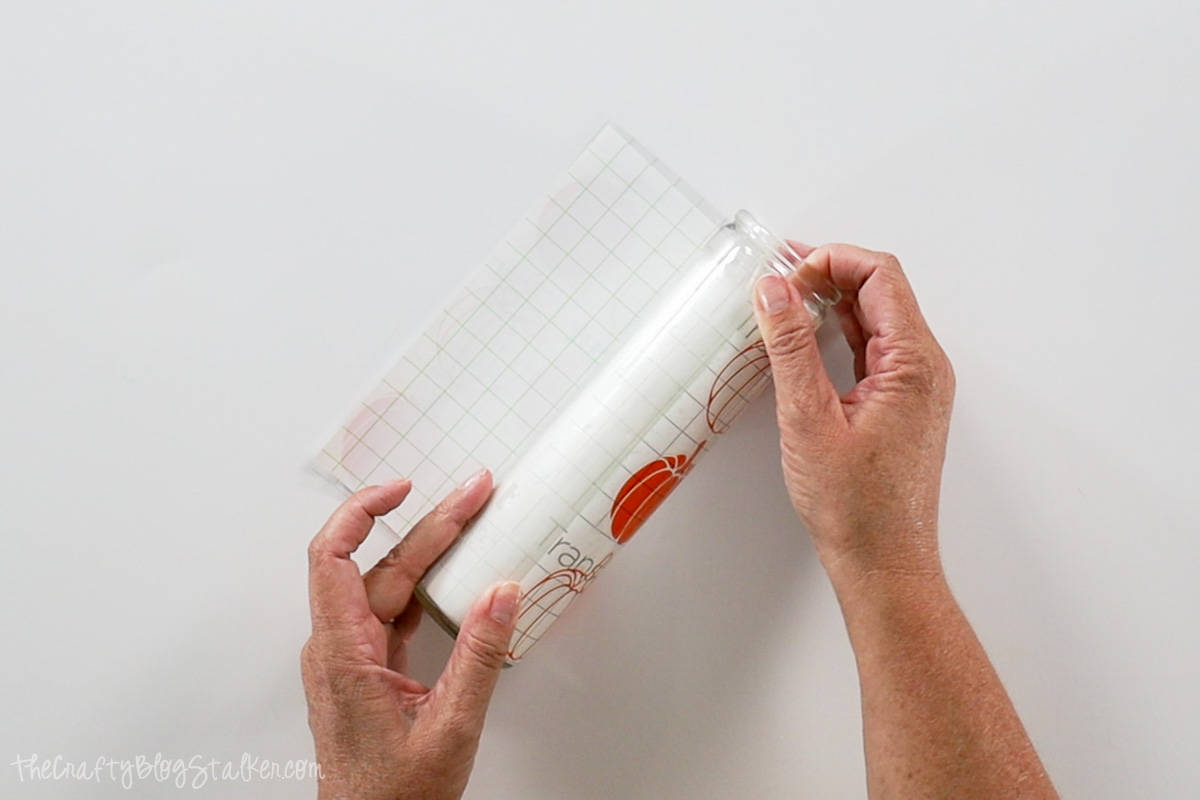
When the design is about half applied, go to the beginning of the transfer tape and begin peeling up. You don't want to apply the end of the design over the top of it.
I just kind of looped it over on itself so it couldn't lay back down.
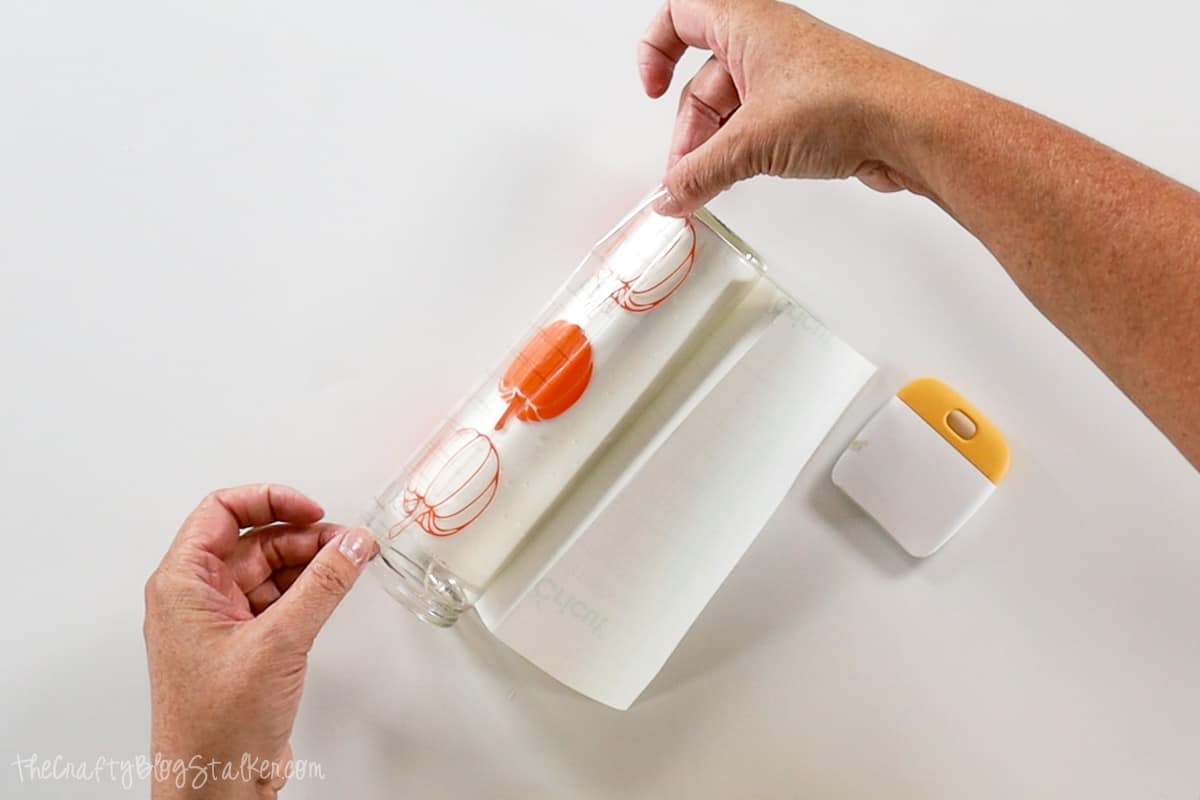
Resume pressing the rest of the design onto the glass.
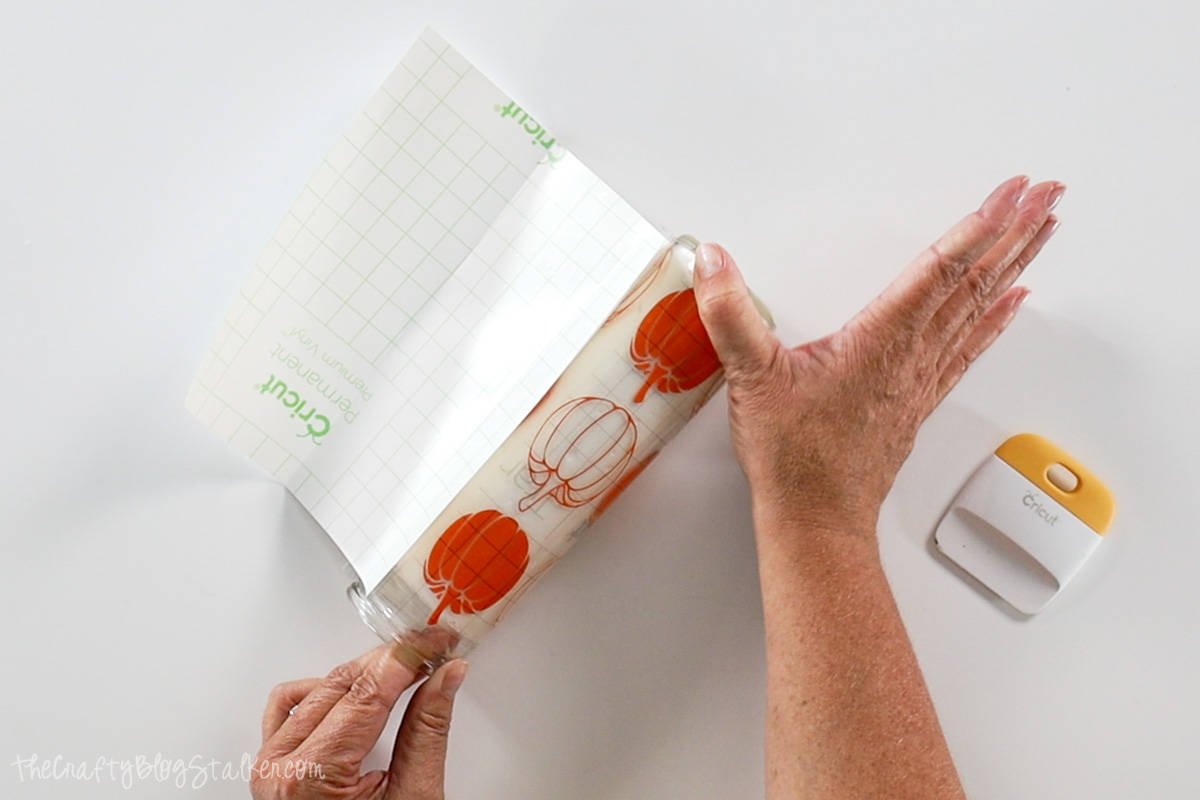
Once the design is in place, peel back the transfer tape, making sure the design sticks to the glass.
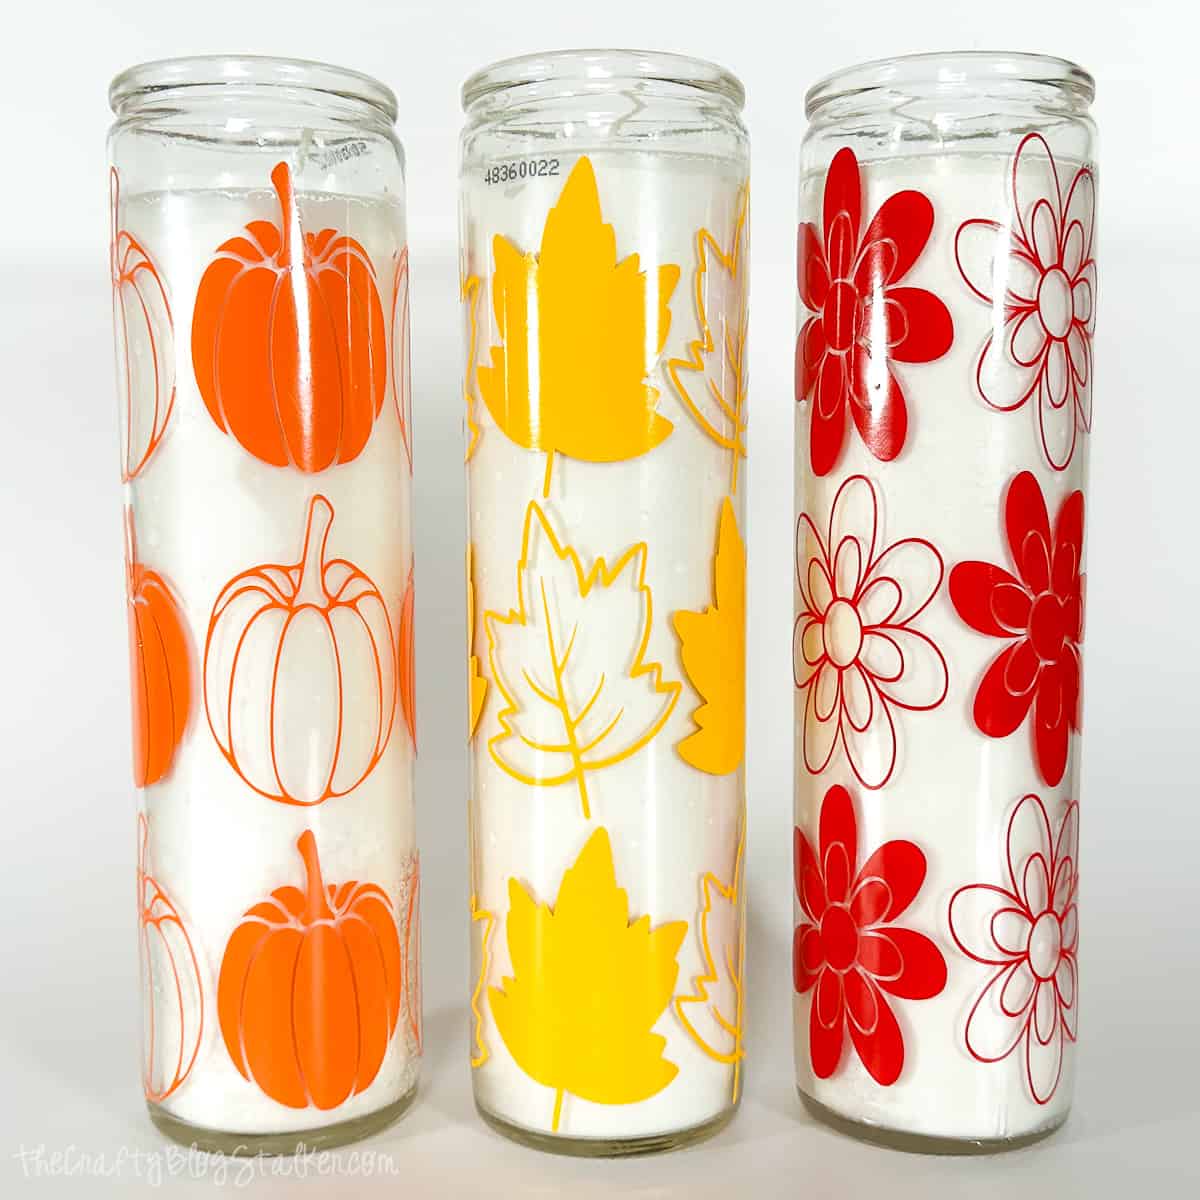
Repeat application for remaining candles.
You now have a set of fun fall candleholders to put on display and enjoy!
How will you use these candles in your home's decor? In a centerpiece, on a mantel above the fireplace, or bookshelf? Or has this project given you inspiration for a completely different project? Leave a comment below and let me know!
Crafting Essentials
- The Cricut Cutting Machine is easily my favorite crafting tool. We use it in so many of our tutorials!
- These MakerX Crafting Tools are perfect for keeping in the craft room and are always ready when needed!
- This Fiskars Paper Trimmer is easy to use and cuts nicely without frayed edges.
- These Scotch Precision Scissors cut like a dream, and you get multiple pairs in a pack!
Karen F
Thank you for making the download process easy. I appreciate that he svg opens easily and it can be uploaded in two steps.
Katie Adams
You are so welcome!! Thank you for the feedback. ❤️