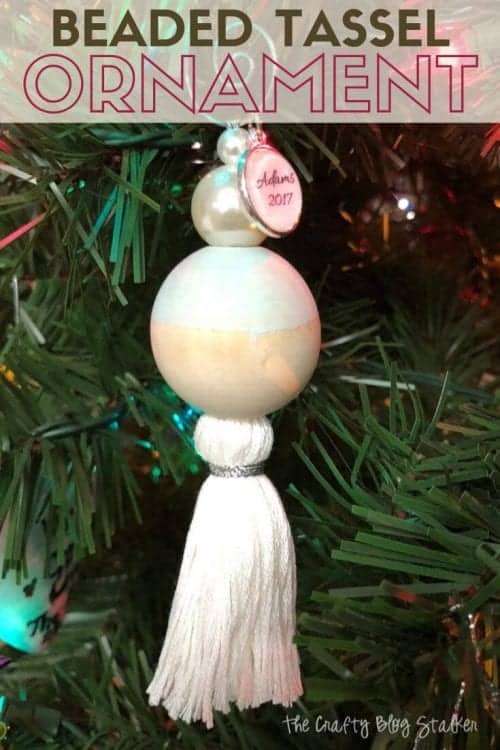
Learn How to Make a Beaded Tassel Ornament to Hang on your Christmas Tree. An Easy DIY Craft Tutorial Idea Perfect for the holidays!
Do you like to make handmade Christmas Ornaments? They really make the best gifts! Every year my family does an ornament exchange. Since there are about 8 of us that participate, we each make 8 ornaments and then we get together to swap, and we each come home with 8 different handmade ornaments. I love it! We have been doing this for close to 20 years and these ornaments are my favorite Christmas keepsakes!
Today, I am going to show you how to make Beaded Tassel Ornaments. This was the ornament I made last year but never got around to creating the tutorial.
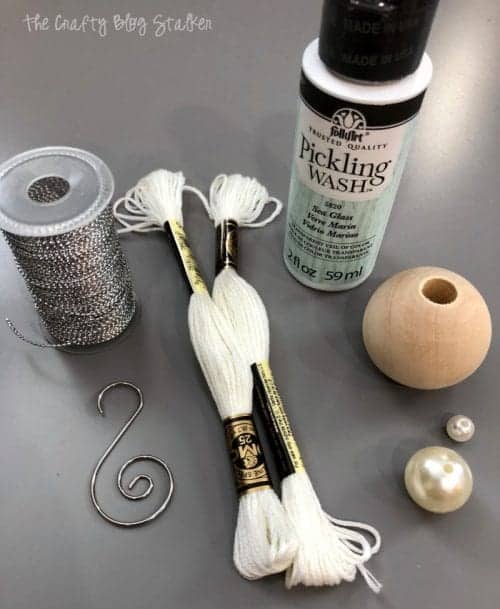
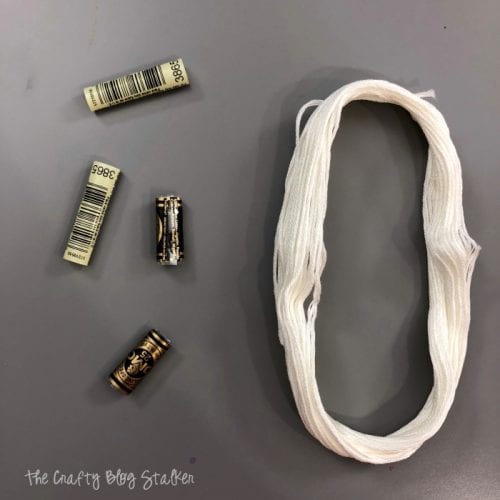
Supplies Used to Make a Beaded Tassel Ornament
Some links may be too similar items when exact items couldn't be found online.
- 1 ½ Inch Wood Bead
- Craft Paint
- 2 Skeins matching DMC Floss
- 2 Different Sized Beads
- 3-feet Silver Non-stretchy Craft Cord
- Ornament Hanger
- Tape
- Paint Brush
- Scissors
- Supplies for a Pendant Charm (optional)
Painting
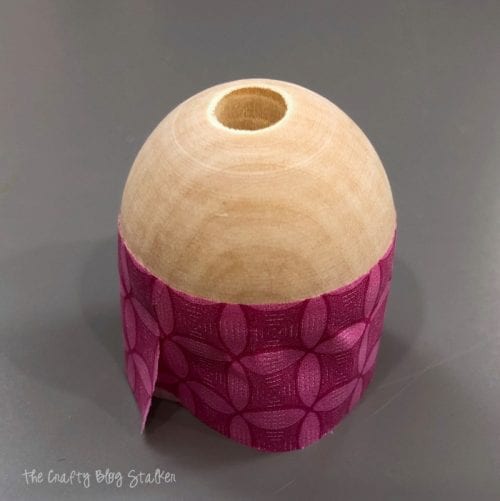
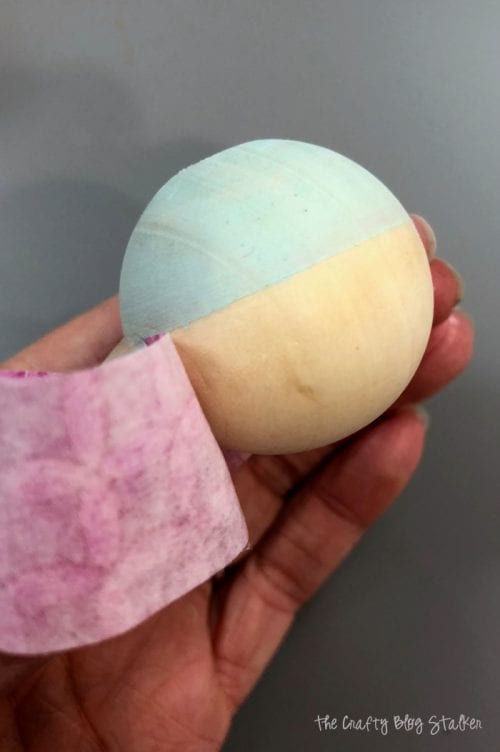
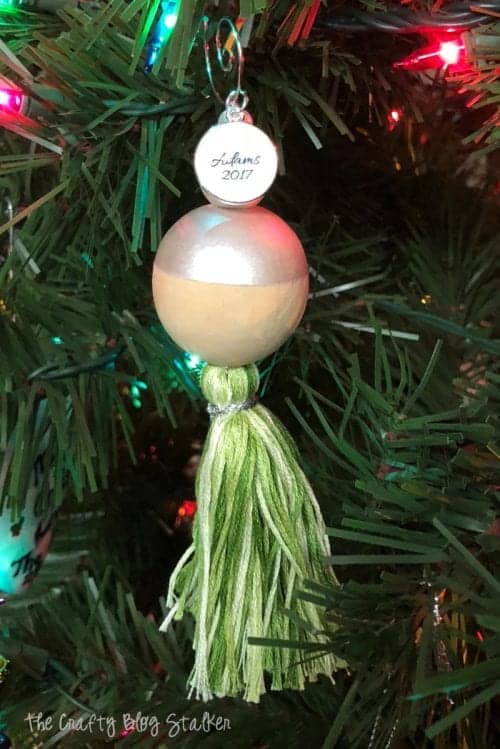
To begin, we want to paint the wood bead. I like the look of only having half of the wood bead painted so you can see the wood grain on the other side.
Using washi tape or painters tape, wrap a piece of tape around the center of the wood bead. Push down the edges so no paint will sneak underneath.
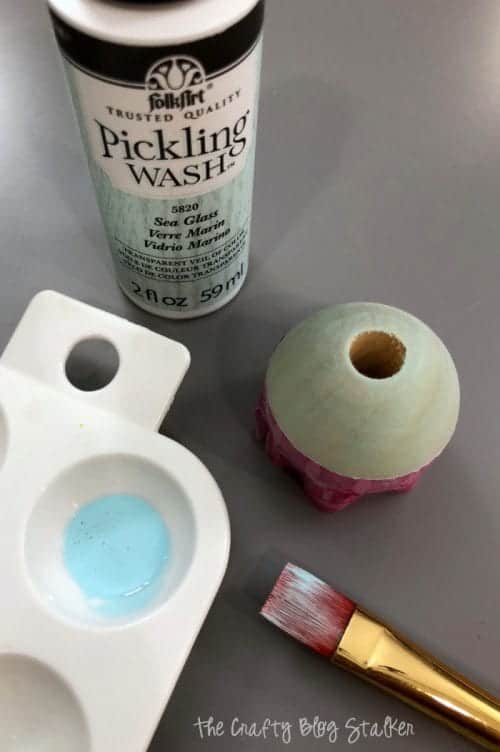
Then paint your wood bead! I used FolkArt Pickling Wash Sea Glass for this one, but I actually made several and used a different craft paint color for each bead.
Let dry.
Doesn't it look cool when you remove the tape?
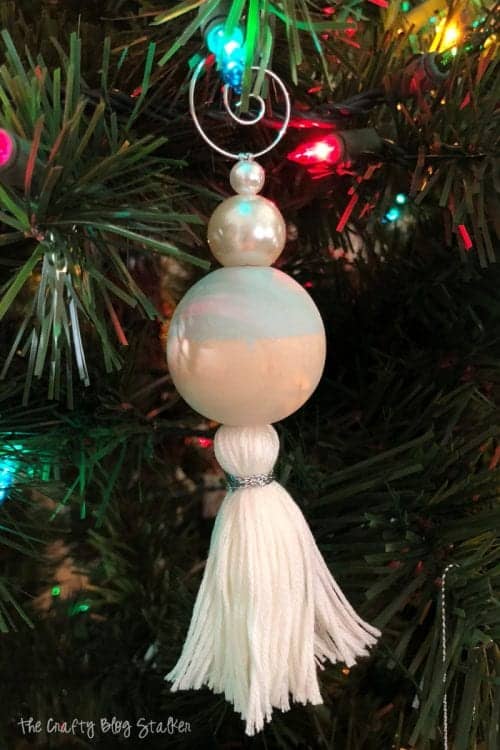
Assembly
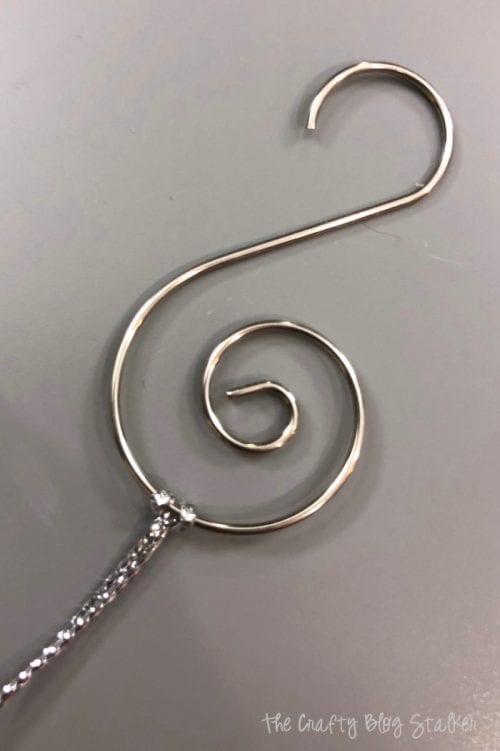
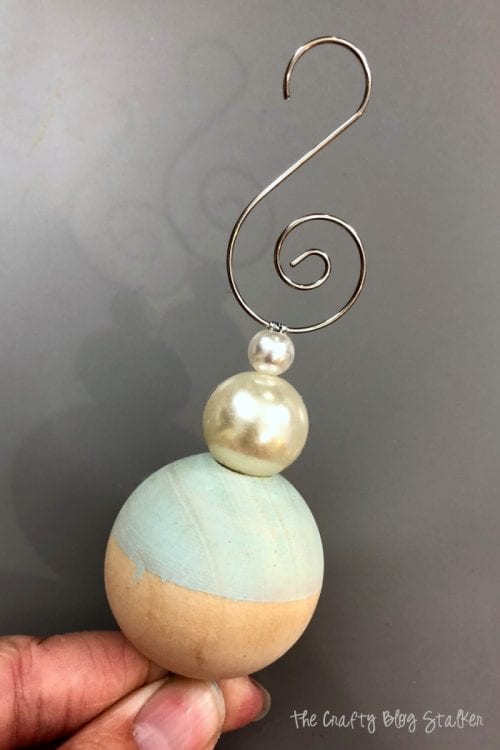
To begin the assembly of the ornament, start with the ornament hanger and about 18 inches of the thin silver cord.
Fold the cord in half and do a loop knot over the bottom of the hanger. To do this lay the cord down with the fold at the top. Place the hanger on top of the cord near the top fold, and the take the end of the cord and pull through the folded loop of the cord. You can see the finished knot below.
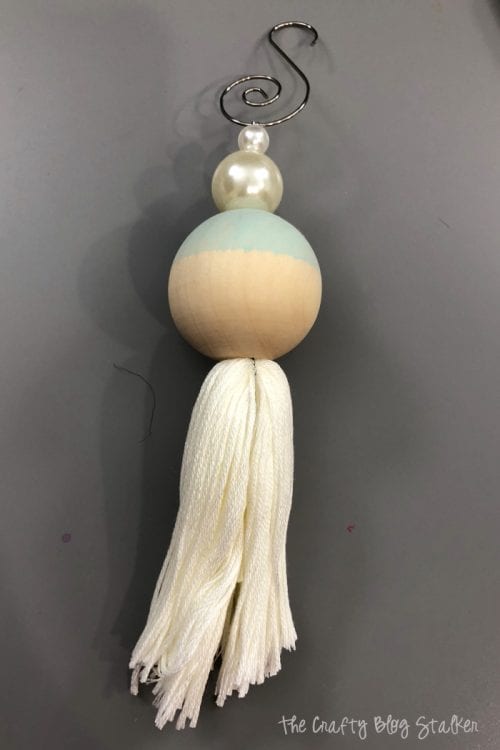
Start with the smallest bead and string the cord through the beads leading up to the largest wood bead.
Now, we are going to make the tassel.
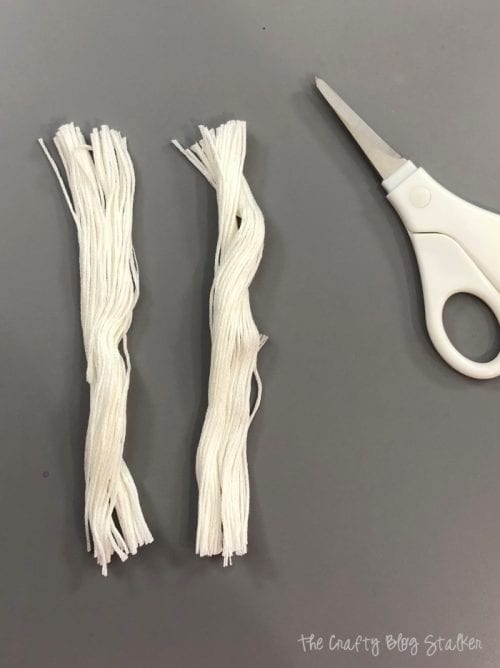
Open the two skeins of DMC Floss and open the circle.
With a Pair of scissors, cut twice on opposite sides. This will leave you with two chunks about the same length. Combine, making one strand chunk.
Using the silver twine coming out of the bottom of the ornament, find the center of the strand chunk and tie a knot as tight as you can to secure the DMC floss in place.
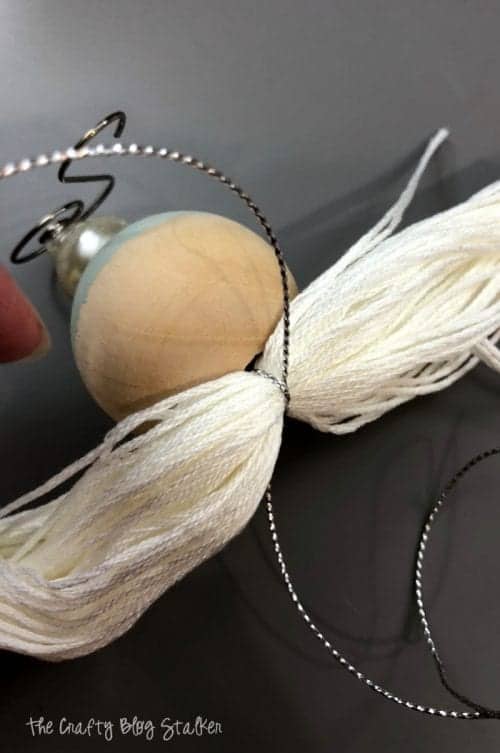
Trim the silver cord, and fold the strands down.
Next, take the remaining silver cord and create a "belt" around the top of the tassel. Wrap the cord several times around and secure with a knot.
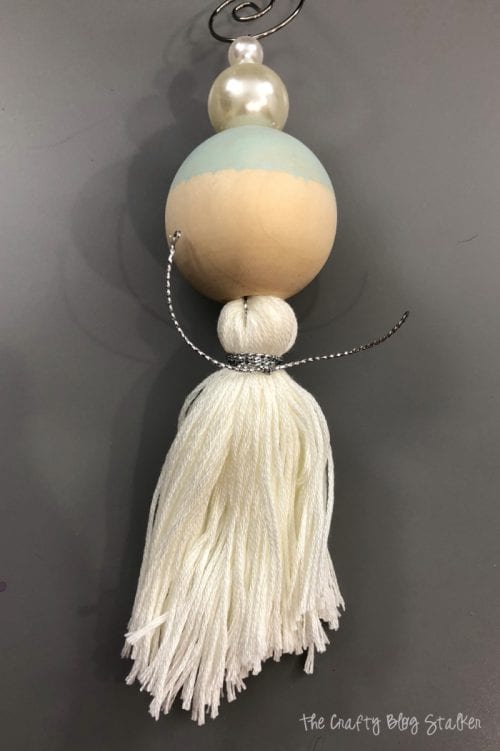
Trim the silver cord as close to the knot as you can making sure not to cut the knot.
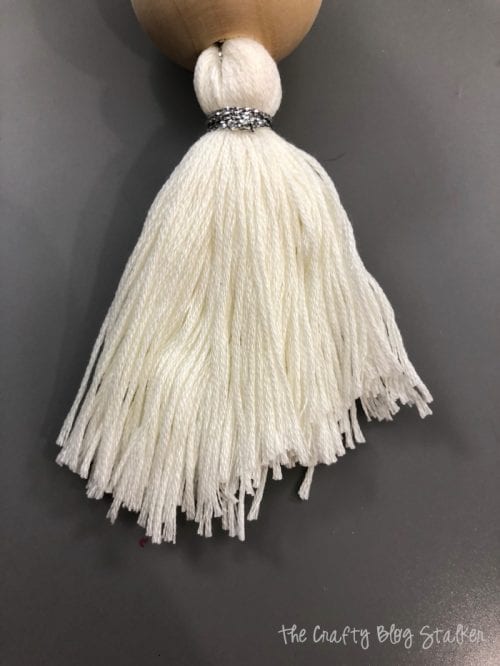
Lastly, trim the edges of the tassel to give it a nice even edge.
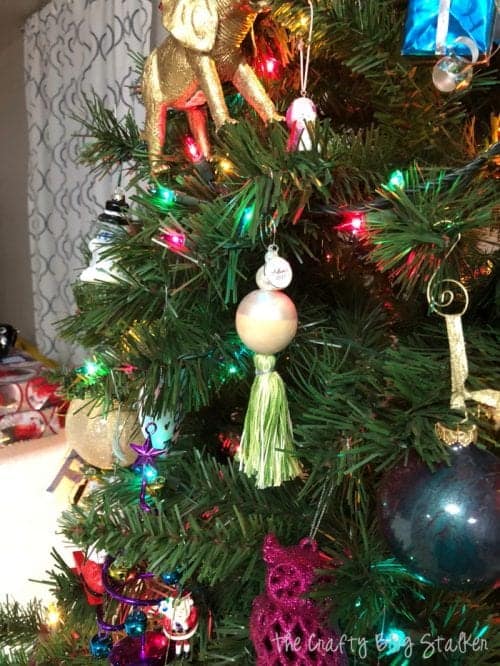
That is all there is to it! Your Bead Tassel Ornament is complete!
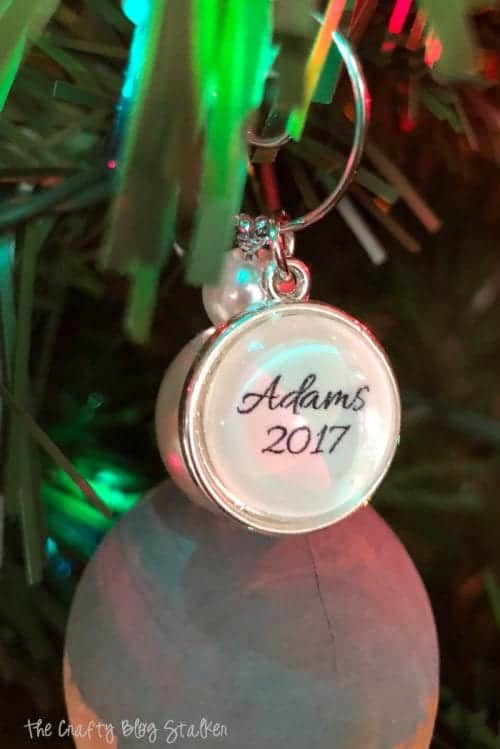
For our ornament exchange, we have to label them so we can remember who made what year after year. To label mine, I used a Pendant Charm Kit to create a charm with my last name and year. This is completely optional, but I do like the finished look with the charm.

The Beaded Tassel Ornament is the perfect addition to my Christmas Tree! I love that about 90% of the ornaments on this tree are handmade!
Recommended Posts


Leave a Reply